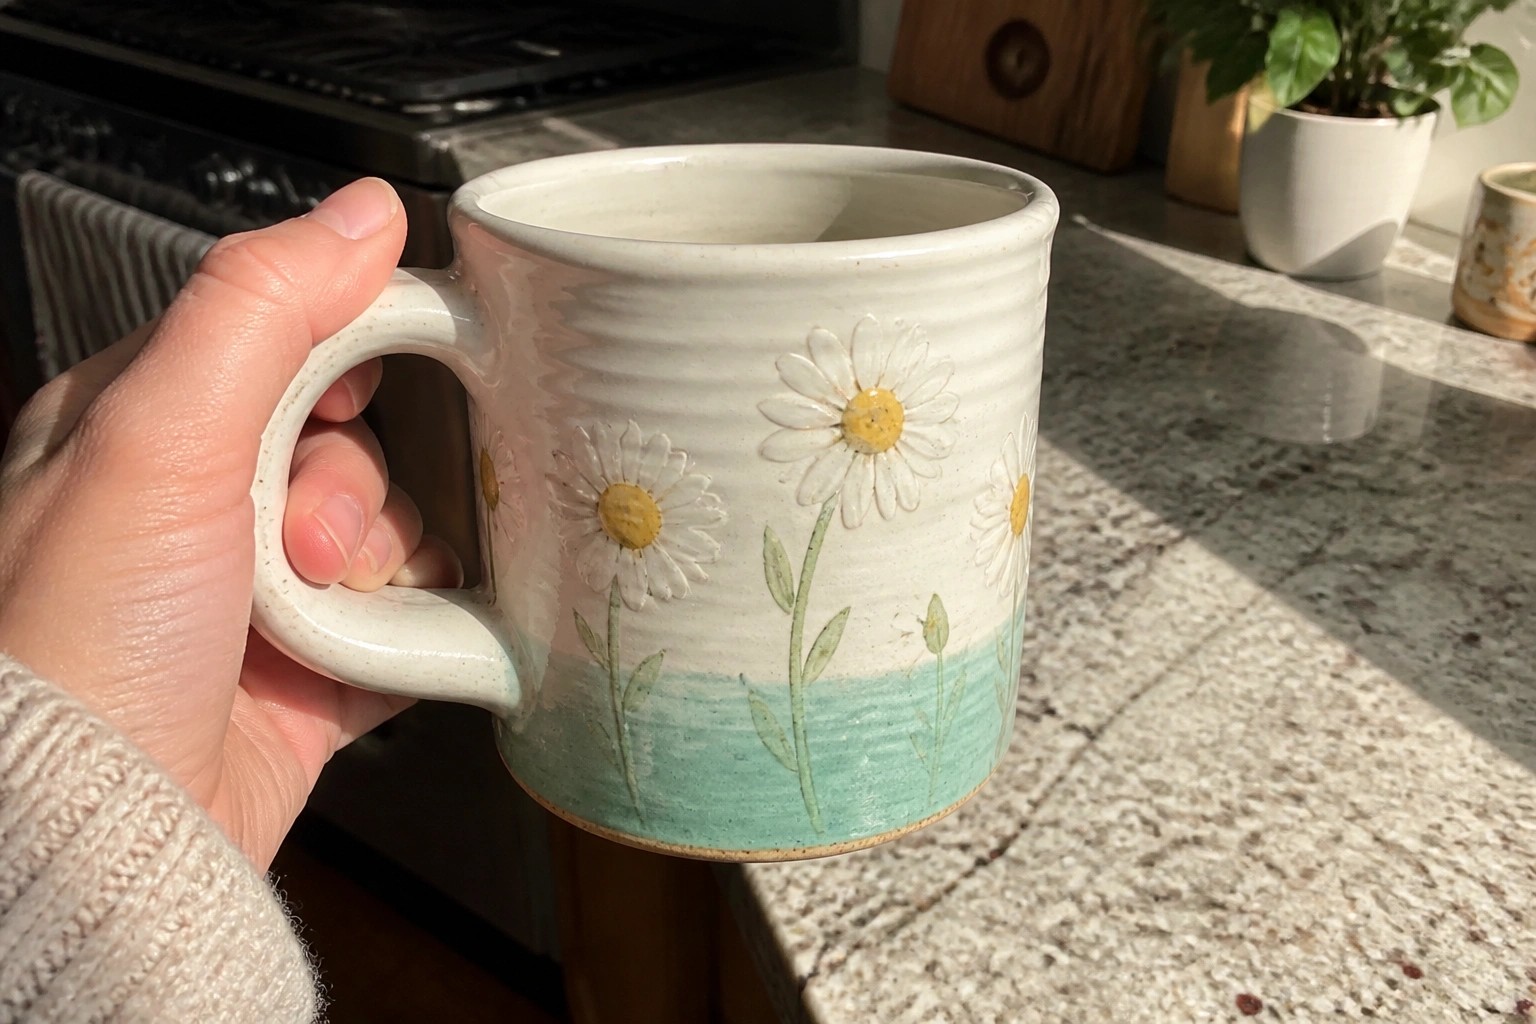
I’ve been making hand built ceramic cups for a few years now.
Some shapes worked better than others once they came out of the kiln.
I collected eighteen ideas that stay simple and focus on being usable every day.
Each one can be formed with basic clay and minimal tools.
They are the kind of cups I actually reach for in my own kitchen.
Mug with Hand Painted Daisies and Dipped Glaze Base
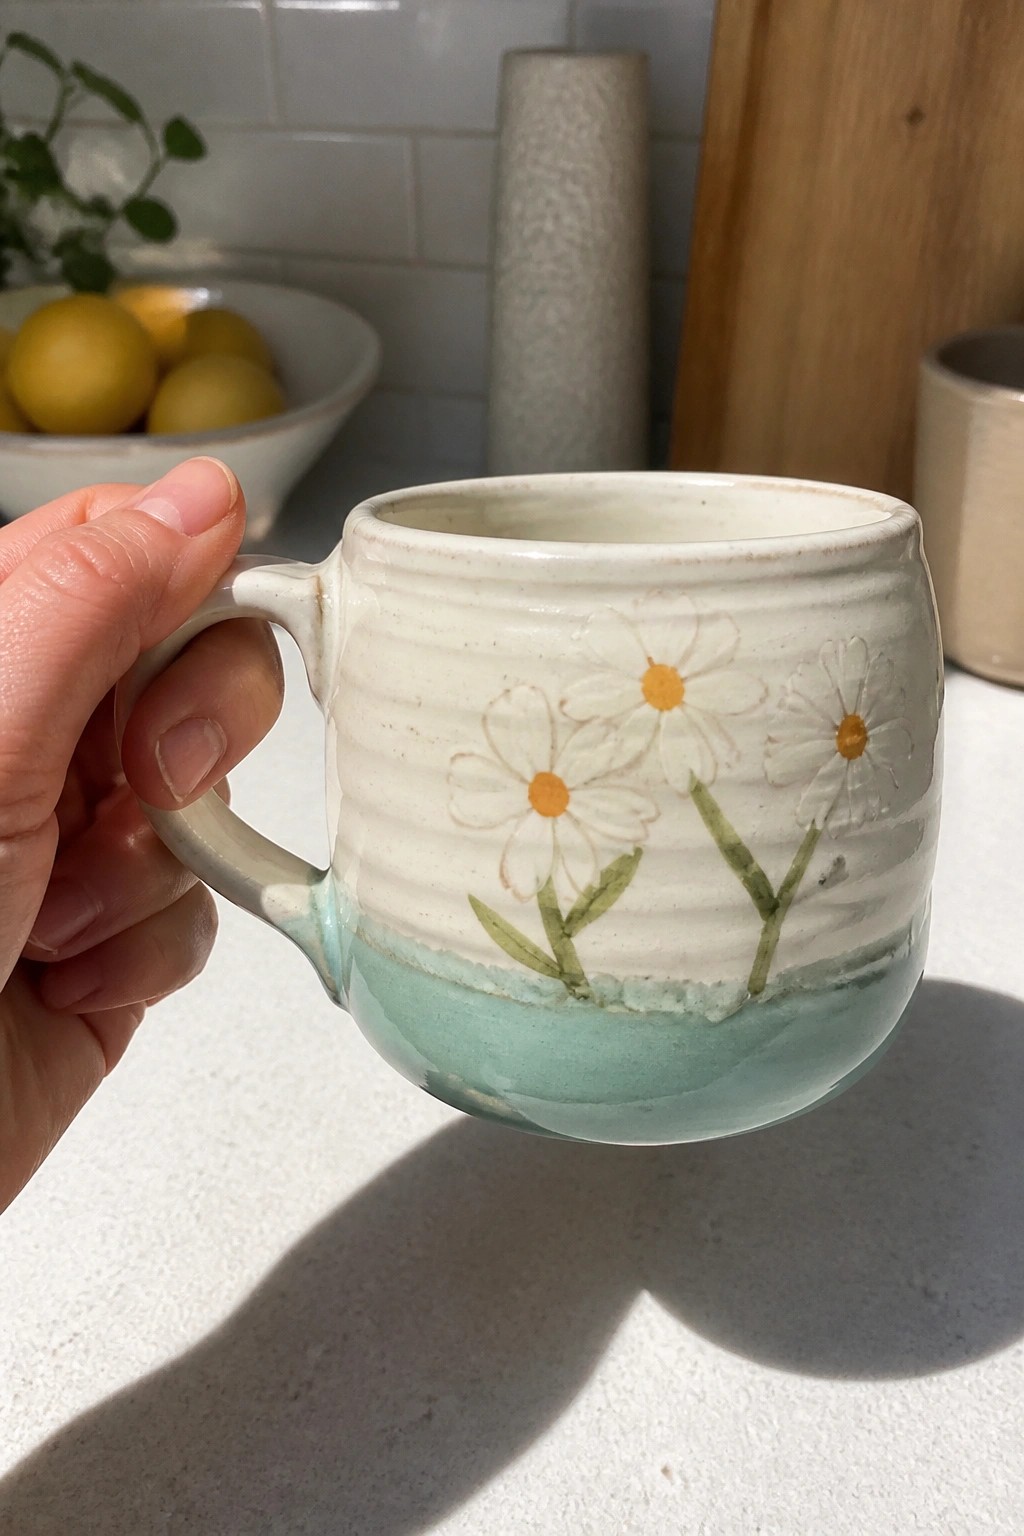
A basic mug shape gets lifted by adding three simple daisies painted across the ridged white surface. The flowers use white petals, orange centers, and green stems that sit right above the point where a turquoise glaze covers the lower half. Horizontal ridges on the upper section give the paint a slight texture to hold onto while keeping the overall form easy to throw or handbuild.
What makes this idea useful is how the painted motif can be swapped for different flowers or colors without changing the mug shape itself. The dipped glaze creates a clean color break that hides minor inconsistencies at the waterline, which helps when you are still learning even glaze application. You could repeat the same daisy layout on a taller tumbler or shorten the stems to fit a smaller cup. The design stays simple enough to finish in one session yet looks finished enough to give away.
Soft Green Ceramic Cup with Simple Tapered Form
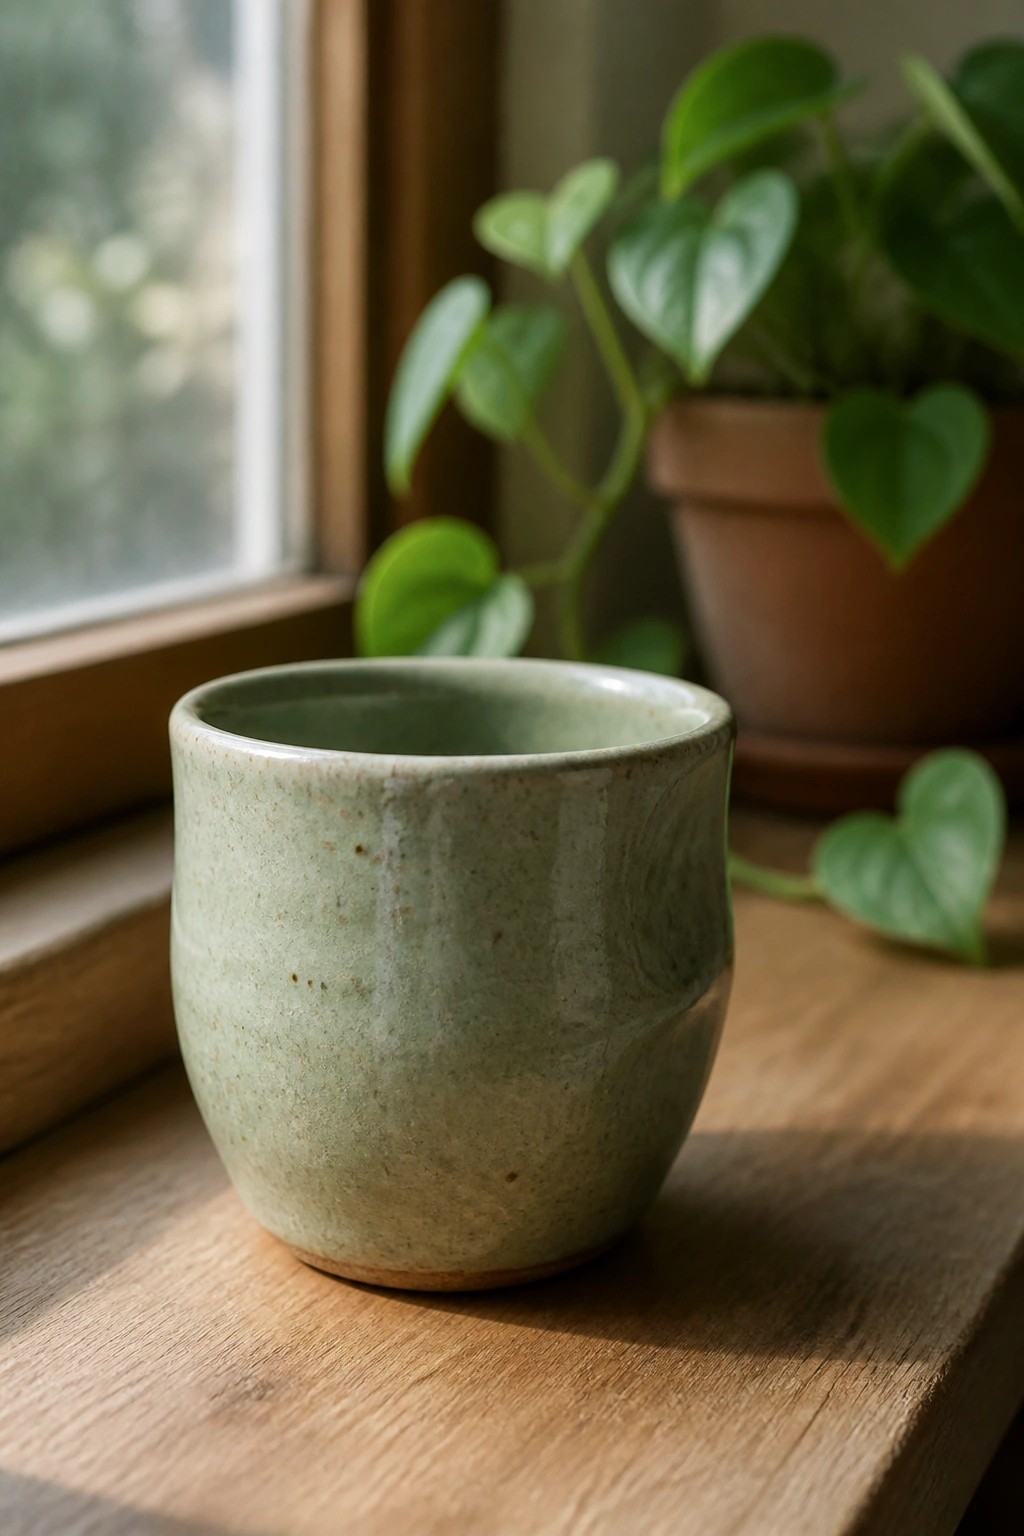
A small ceramic cup like this serves as a basic drinking vessel or small holder that beginners can form by pinching or using a simple mold. The rounded body with a slight inward curve at the base gives it balance and an easy grip without added handles. A matte light green glaze with faint speckling covers the surface evenly and lets the clay texture show through in places.
What makes this idea useful is how the compact size and neutral glaze work across multiple uses without needing extra details. You can adapt the same shape into a set of matching cups, shorten it into a small spoon rest, or widen the rim slightly for a desk organizer. The plain finish keeps the focus on the form so variations in height or clay color stand out when you make multiples.
Dark Clay Cup with White Glaze Drip
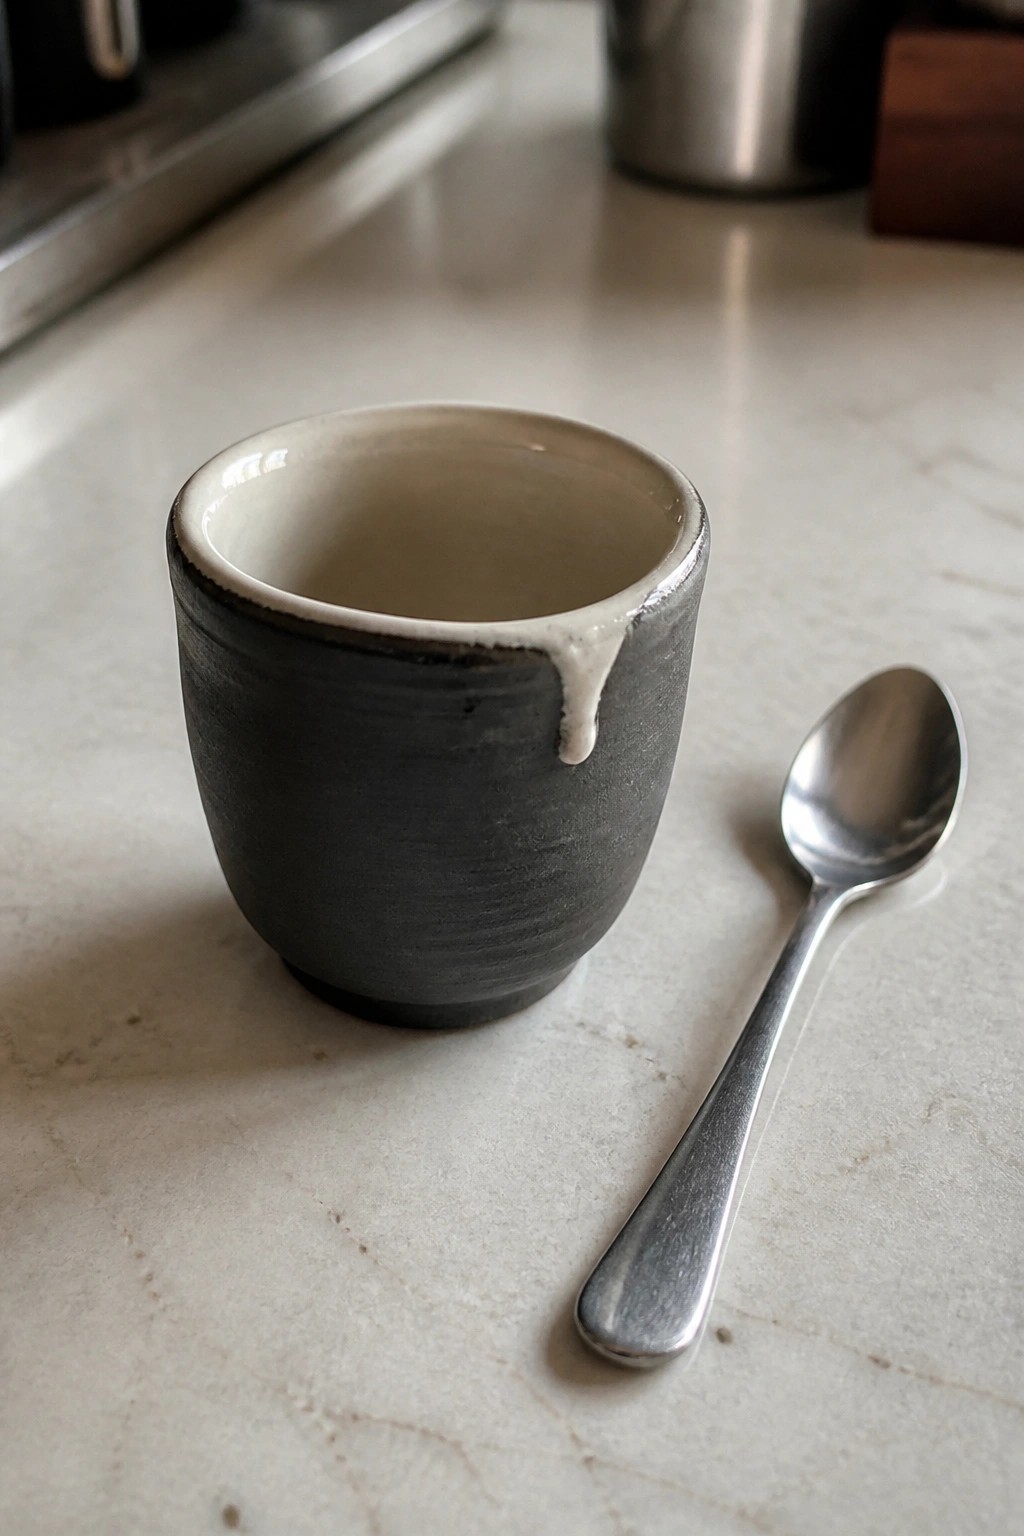
A small cup formed from dark clay features a white glaze on the interior and rim that runs down one side in a single drip. The rough exterior texture contrasts with the smooth white areas to create a simple visual break without extra decoration. This approach fits the category of basic drinking cups that still show clear handmade details through the glaze movement.
What makes this idea useful is how the drip effect turns a basic form into something more noticeable with minimal extra work. The small scale works well for espresso shots or small portions of sauce at the table. You could repeat the same rim treatment on a taller mug or change the drip color to match other kitchenware. For a gift, the cup pairs easily with a spoon as a ready-to-use set.
Gradient Glazed Nesting Cups
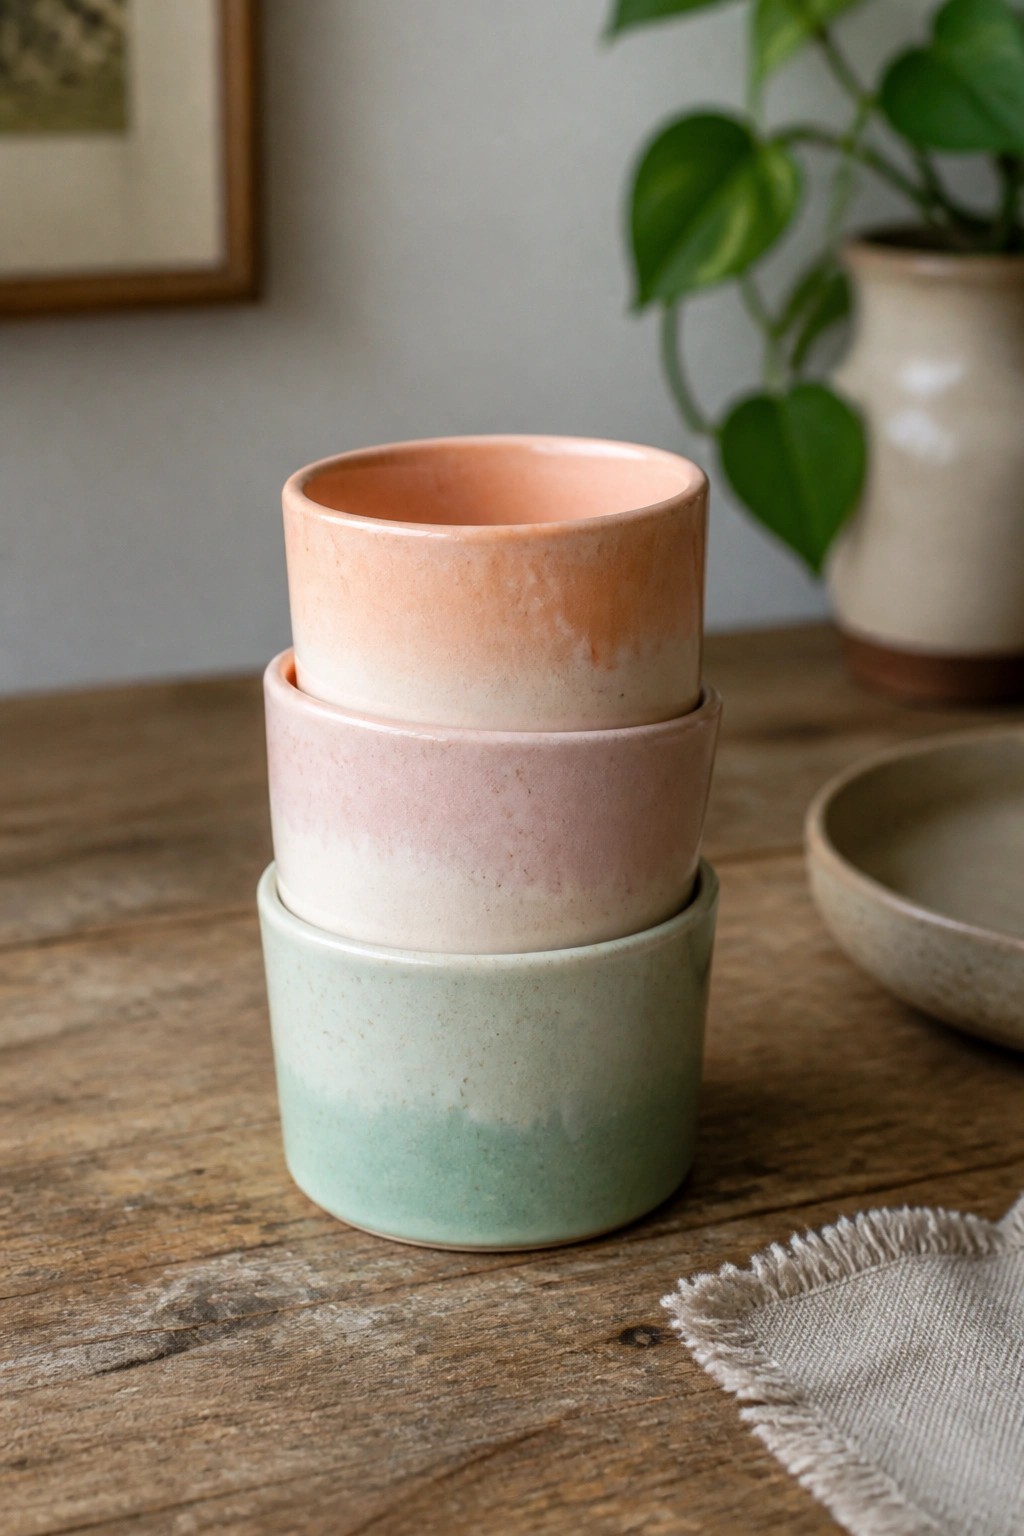
Three small ceramic cups with soft gradient glazes sit stacked in peach, pink, and mint tones. Each cup has a simple tapered form that lets them nest together neatly. The color transitions run from deeper at the rim to lighter at the base, giving the set a clean, coordinated look without added patterns. This idea fits the category of everyday tableware like small drinking cups or ramekin-style bowls.
The nesting shape makes the set easy to store in tight cabinet space. You can swap the pastel gradients for bolder color pairs or stretch the same technique across different sizes for sauce cups and small prep bowls. In a kitchen, these work well for holding dips, espresso shots, or loose tea. The project also scales down to a single cup if you want to test the glaze effect first.
Polka Dot Ceramic Teacup and Saucer

A simple teacup and saucer set gains visual interest from a scattered polka dot pattern applied in a darker shade over a light purple glaze. The dots vary slightly in size and spacing, which keeps the surface lively without requiring precise placement. This style works as a straightforward way to add pattern to a basic wheel-thrown or hand-built cup while leaving the handle and rim clean.
What makes this idea useful is how the dot motif can be repeated on other small kitchen pieces like a sugar bowl or creamer. The small scale of the cup makes it easy to try different dot colors or densities until the pattern feels balanced. In a kitchen or breakfast nook, the design shows up well against lighter backgrounds or wood tones. You could also adapt the same spotting technique to a taller mug or shorten the saucer into a small tray for rings or spoons.
Chick Face Ceramic Cup
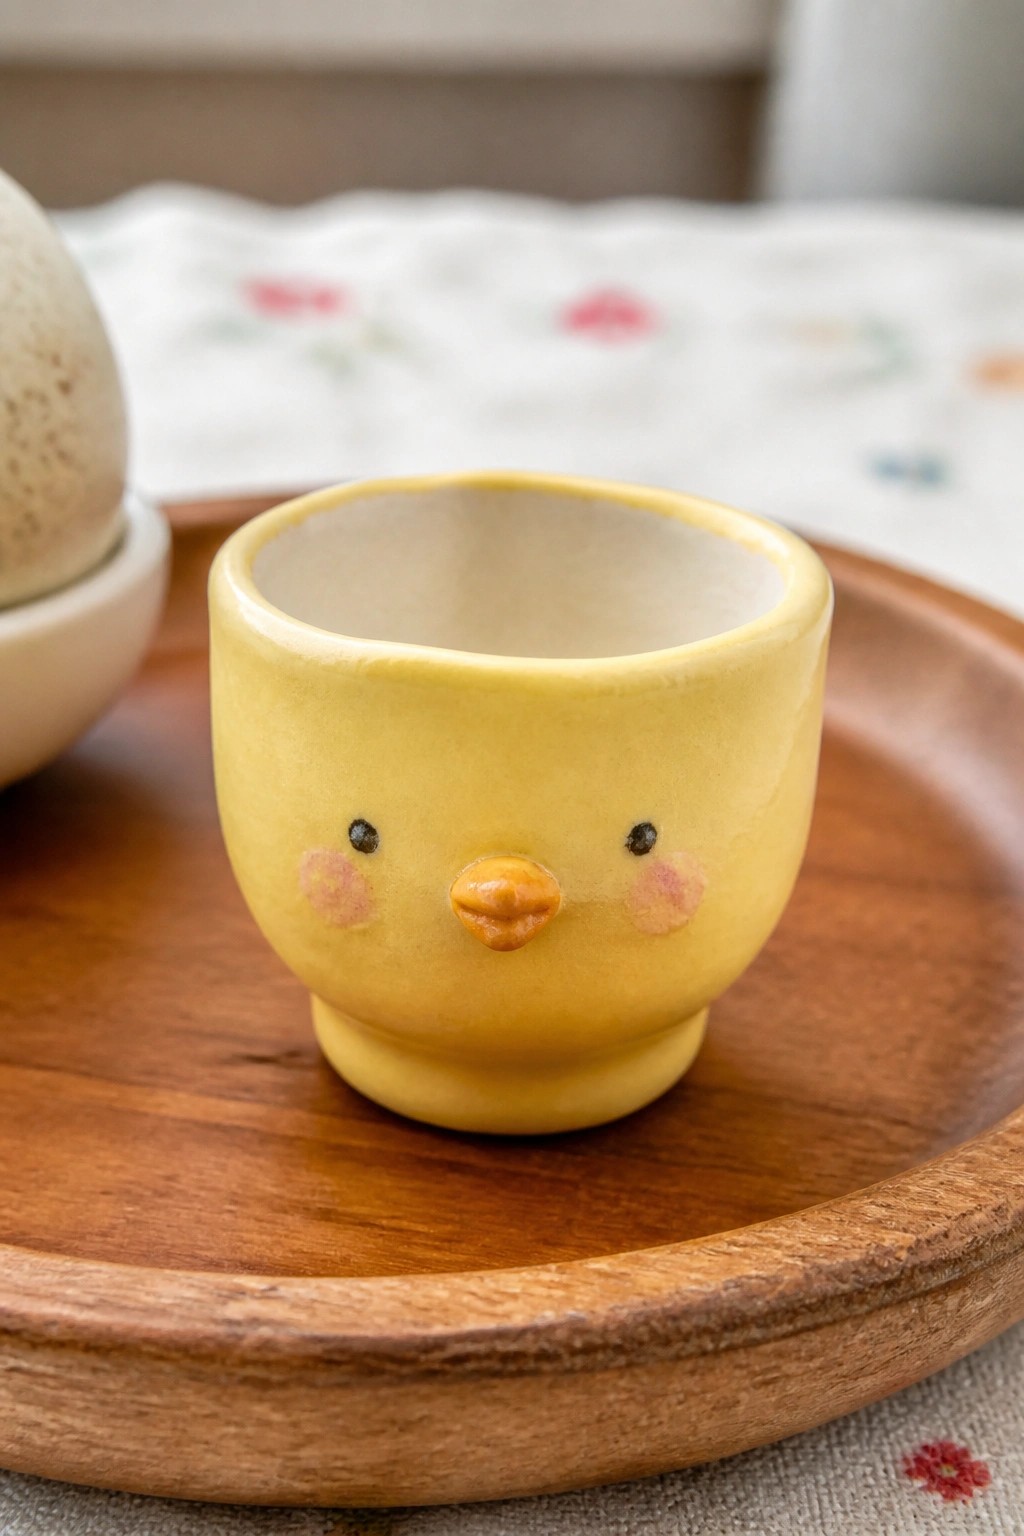
A small ceramic cup works well when formed into a rounded chick shape using basic pinching and added clay pieces for the beak. The yellow glaze covers the exterior while black dots and pink blush create the face details. This approach keeps the cup functional for eggs, dips, or small snacks while adding a clear animal motif. The design fits into simple handbuilt cup ideas that rely on shape and minimal surface decoration.
The small scale makes this easy to adapt by swapping the chick features for other animals or using different glaze colors. It serves well on a breakfast table or as a quick gift for children without needing complex forms. You can simplify the sculpted beak to just painted lines if you want faster results. The idea stands out for its straightforward way to turn a plain cup into something themed.
Textured Blue Ceramic Tumbler

A tall cylindrical cup made from stoneware clay features a blue glaze that shifts from lighter tones at the rim to deeper blue near the base. Horizontal throwing lines and a light speckled surface add subtle texture without any added decoration. The simple tapered shape fits the category of a drinking tumbler and works as a practical everyday vessel.
What makes this idea useful is the basic form that can be thrown on the wheel or handbuilt with coils. The ombre glaze effect is easy to recreate by layering two blue glazes or using a wash at the bottom before firing. This shape stores well in a cabinet and can be adapted into a smaller juice cup or a wider version for soup by changing the rim diameter slightly.
Sculpted Cat Face Mug
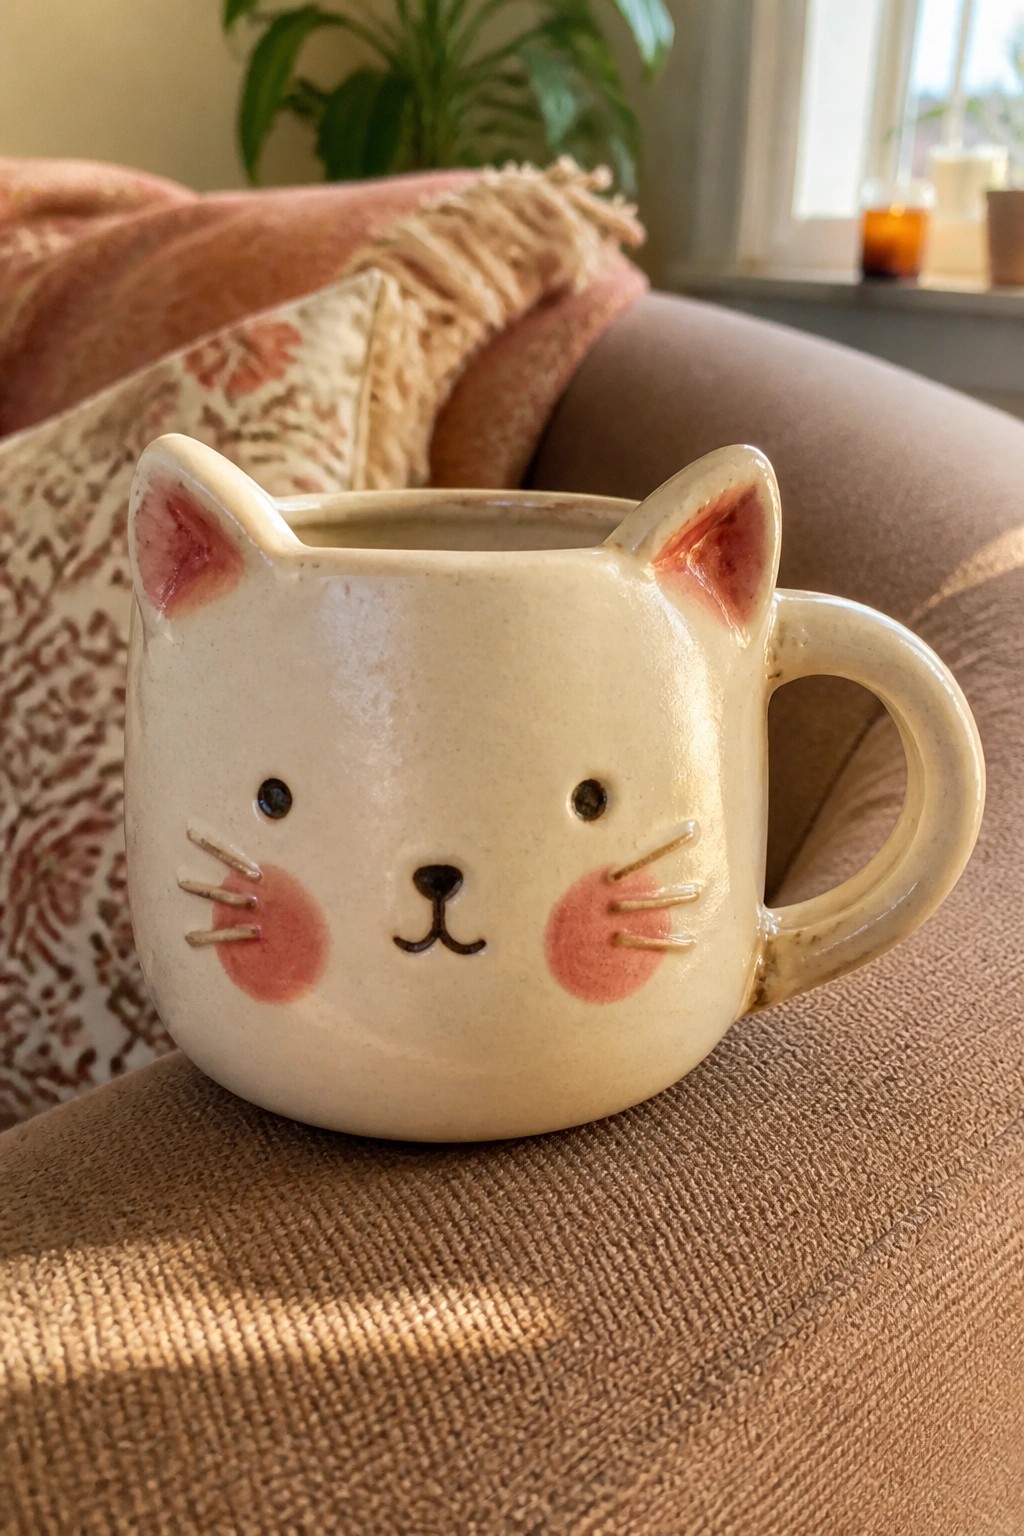
A basic ceramic mug can be turned into a cat face design by pinching two small ears from clay and attaching them at the rim before firing. The face details are added with underglaze or paint, including round cheeks, short whiskers, simple dot eyes, and a nose, then sealed with a clear glaze over an off-white base. This keeps the cup fully functional while using the sculpted ears and painted accents to give it a clear animal shape.
The shape does a lot of the work here because the ears and face fit naturally on a standard small mug size without needing extra tools. You can adapt the same ear attachment and face layout to other animals or swap the pink accents for different colors to match a kitchen or desk setup. For a gift, something like this works well for anyone who likes cats since it stays practical for drinks or small storage. Beginners can practice the ears separately first, then add the painted details once the form is secure.
Mini Spouted Ceramic Pouring Cup
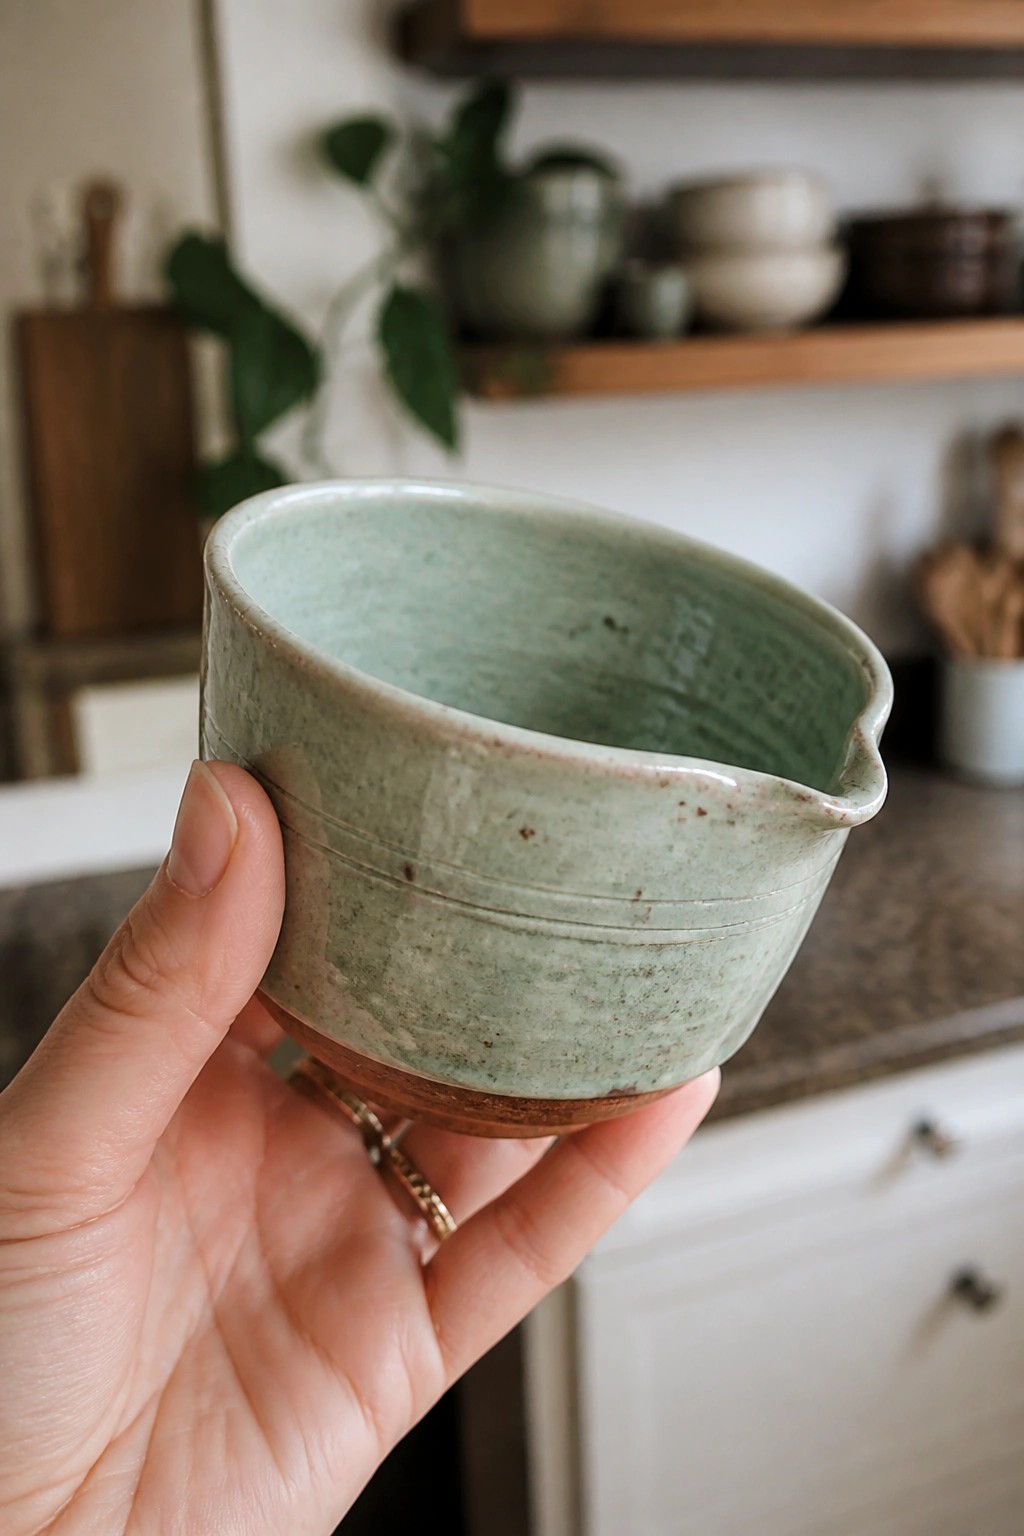
A small wheel-thrown cup with a pinched spout makes a practical pouring vessel for cream, sauces, or oils. The form stays compact with a rounded body, subtle throwing lines, and a narrow base that shows the raw clay. A light green speckled glaze covers the interior and most of the exterior, leaving the foot unglazed for contrast and stability.
What makes this idea useful is the built-in spout and modest size, which lets it sit on a countertop or table without taking much space. You can adapt the shape by adding a small handle or switching to a matte white glaze if you want it to match other dishes. In a kitchen this kind of piece works well for daily use and stores easily on open shelves. The same profile could be scaled up slightly to make a small milk jug or kept as is for individual portions.
Mug with Integrated Spoon Notch
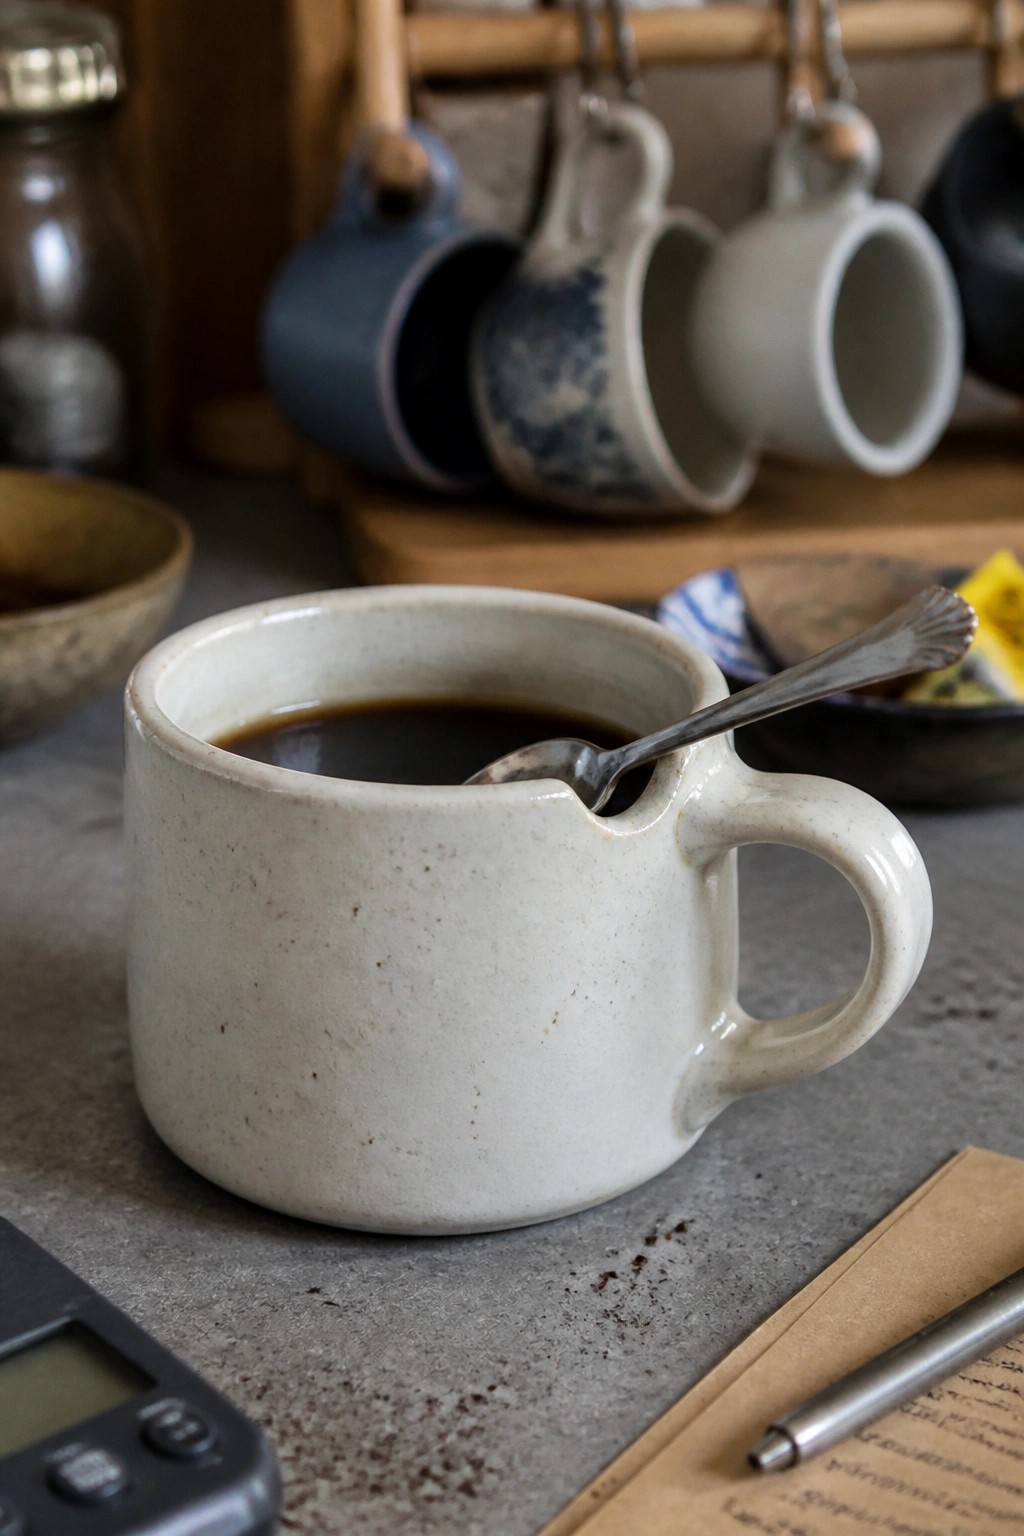
A basic wheel-thrown or handbuilt mug gains extra function from a simple rim notch that holds a spoon in place. The notch is formed by pinching or cutting the clay edge before firing, creating a stable resting spot without adding separate parts. The speckled matte glaze keeps the surface practical for daily use while highlighting the handmade texture. This idea fits the mug category and turns an ordinary cup into something more convenient for coffee or tea routines.
What makes this idea useful is how the notch solves a common kitchen problem without extra pieces. The shape works especially well on a desk or breakfast table where you want the spoon to stay clean between sips. You could adapt it by varying the notch width for different spoon sizes or by using a contrasting glaze inside the dip. For beginners, the project stays straightforward since it builds on a standard mug form with one small adjustment that still photographs clearly for sharing.
Stamped Floral Band Cup
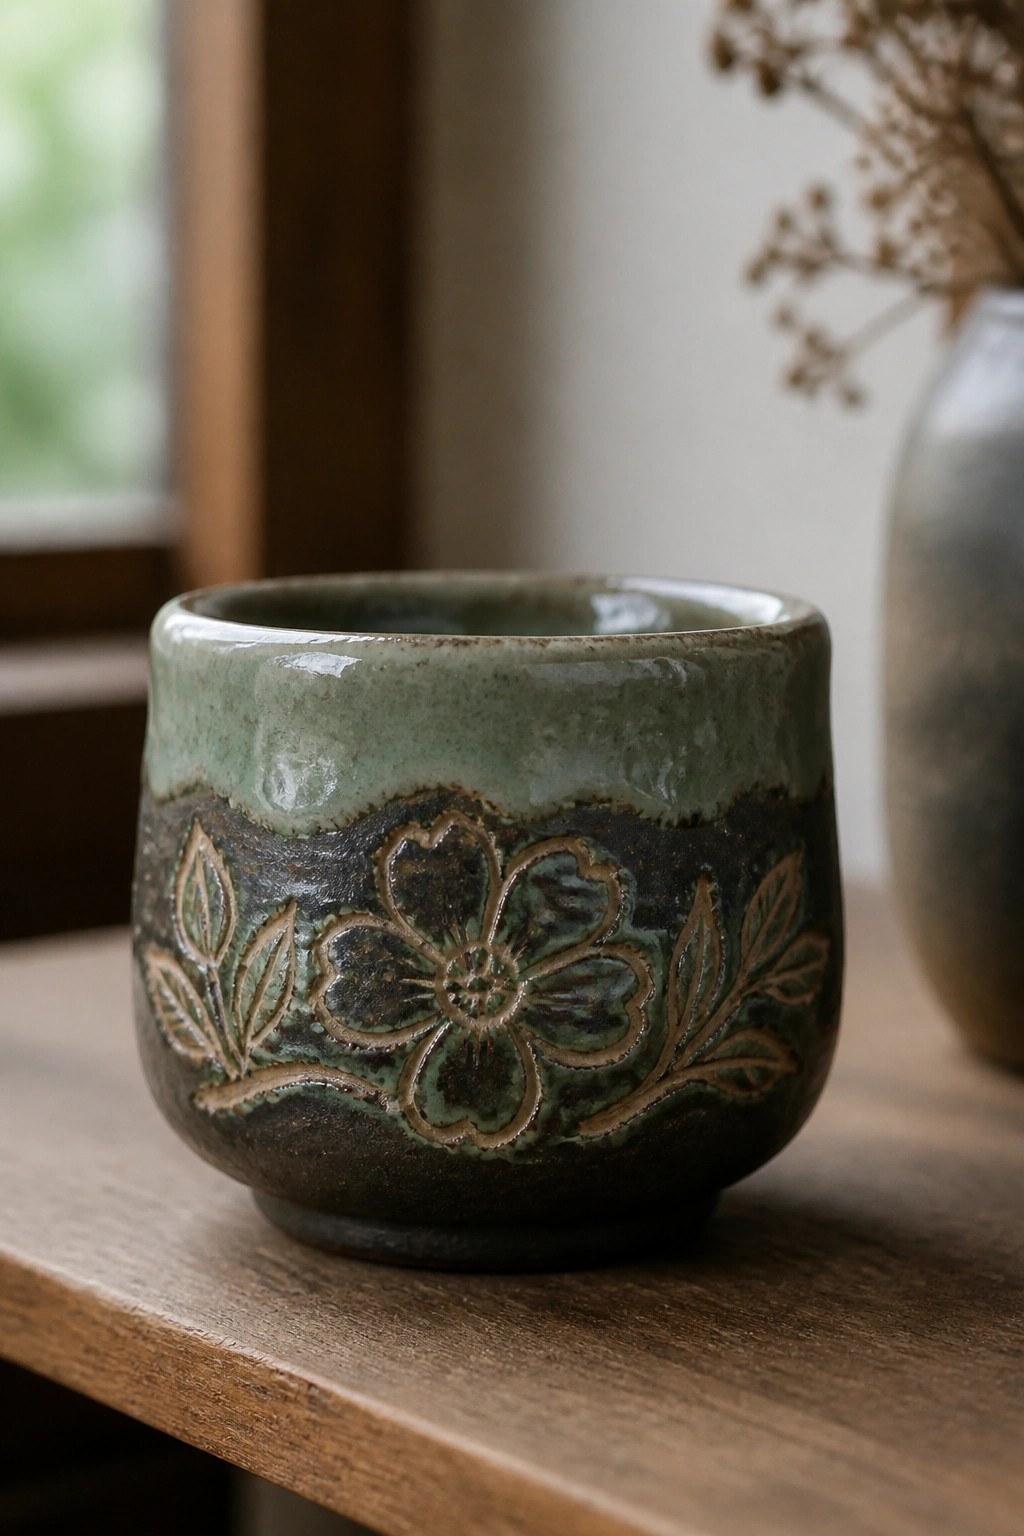
A small ceramic cup works well here because the form stays simple while a single decorative band carries the main visual interest. The idea centers on pressing or carving a flower and leaf motif into a middle section of the cup, then layering two glazes so the darker band highlights the raised design against a lighter upper rim. This approach keeps the cup functional for tea or small servings while giving the surface a clear focal point without covering the entire piece.
What makes this idea useful is that the band format lets you swap in different stamps or simple carvings without changing the cup shape. The small size makes it quick to throw or hand-build in batches, and the same motif could transfer easily to a matching saucer or small bowl set. For gifts, this kind of cup stands out on a shelf because the contrast between the plain rim and the patterned band draws the eye without extra color work.
Dimpled Ceramic Cup
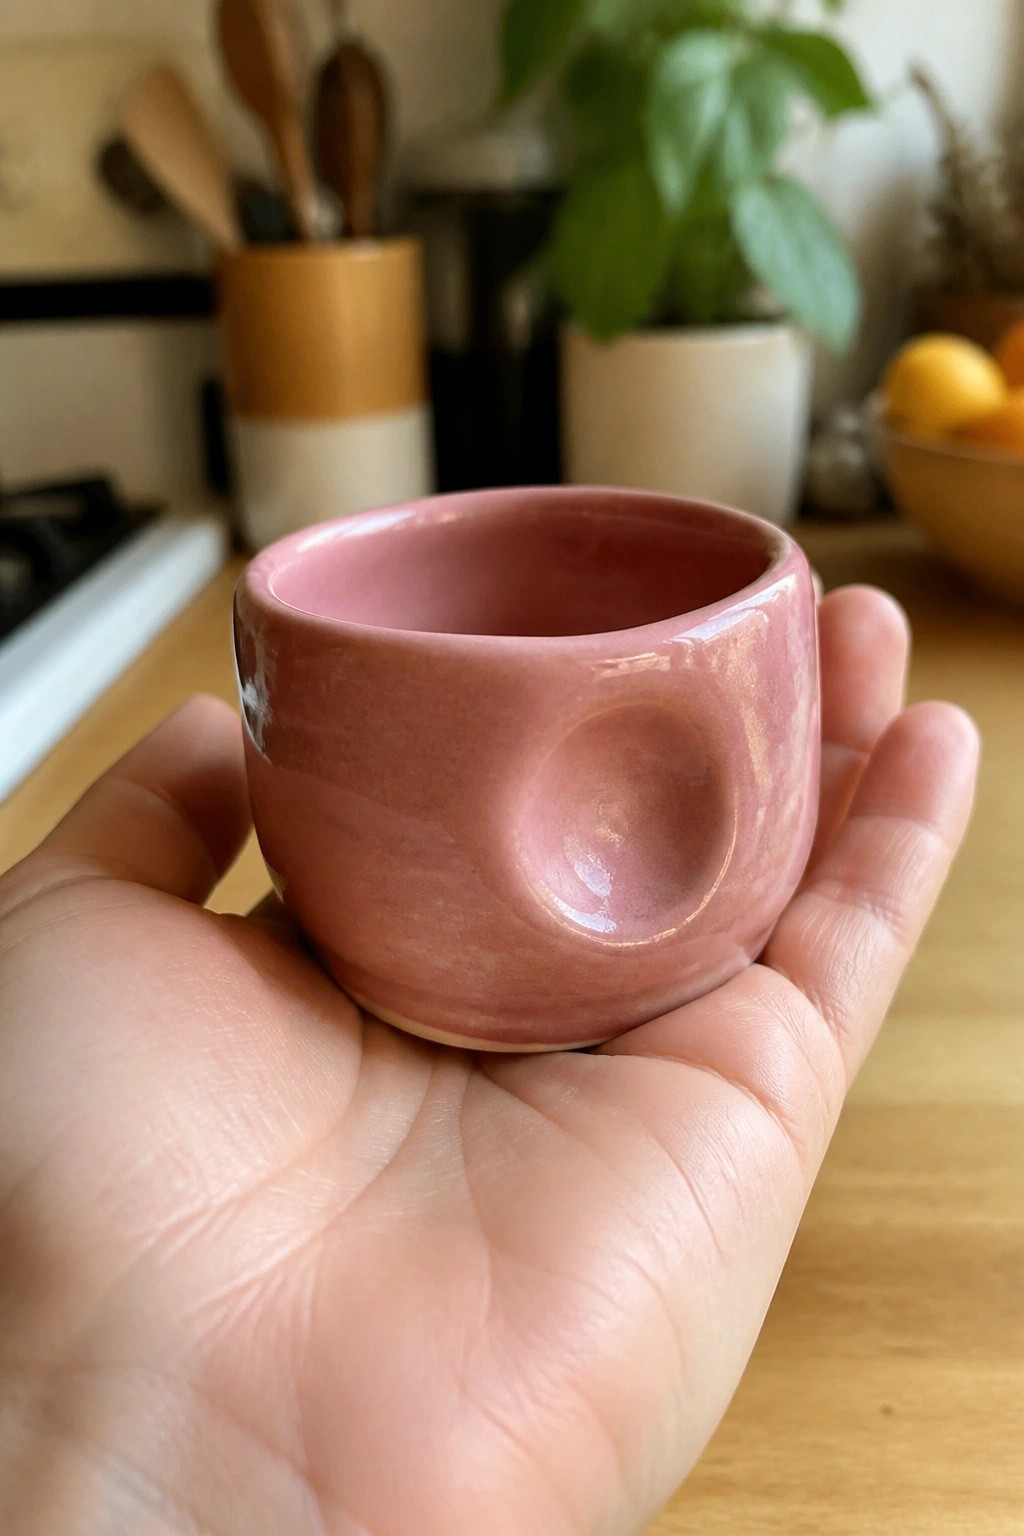
A small ceramic cup formed by pinching clay and then pressing a rounded indentation into one side gives the piece both a comfortable grip and a simple sculptural detail. The even pink glaze highlights the smooth curves while keeping the focus on the handmade shape. This approach works as a basic mug or drinking cup idea that stays functional without needing a handle.
The small scale makes this easy to adapt for a desk, nightstand, or kitchen counter where a compact vessel is useful. You could vary the dimple depth, add a second one opposite the first, or change the glaze color to match other tableware. For a gift this shape stands out on Pinterest because the detail is quick to add yet changes the whole look from a plain cylinder.
Citrus Slice Painted Planter Bowl
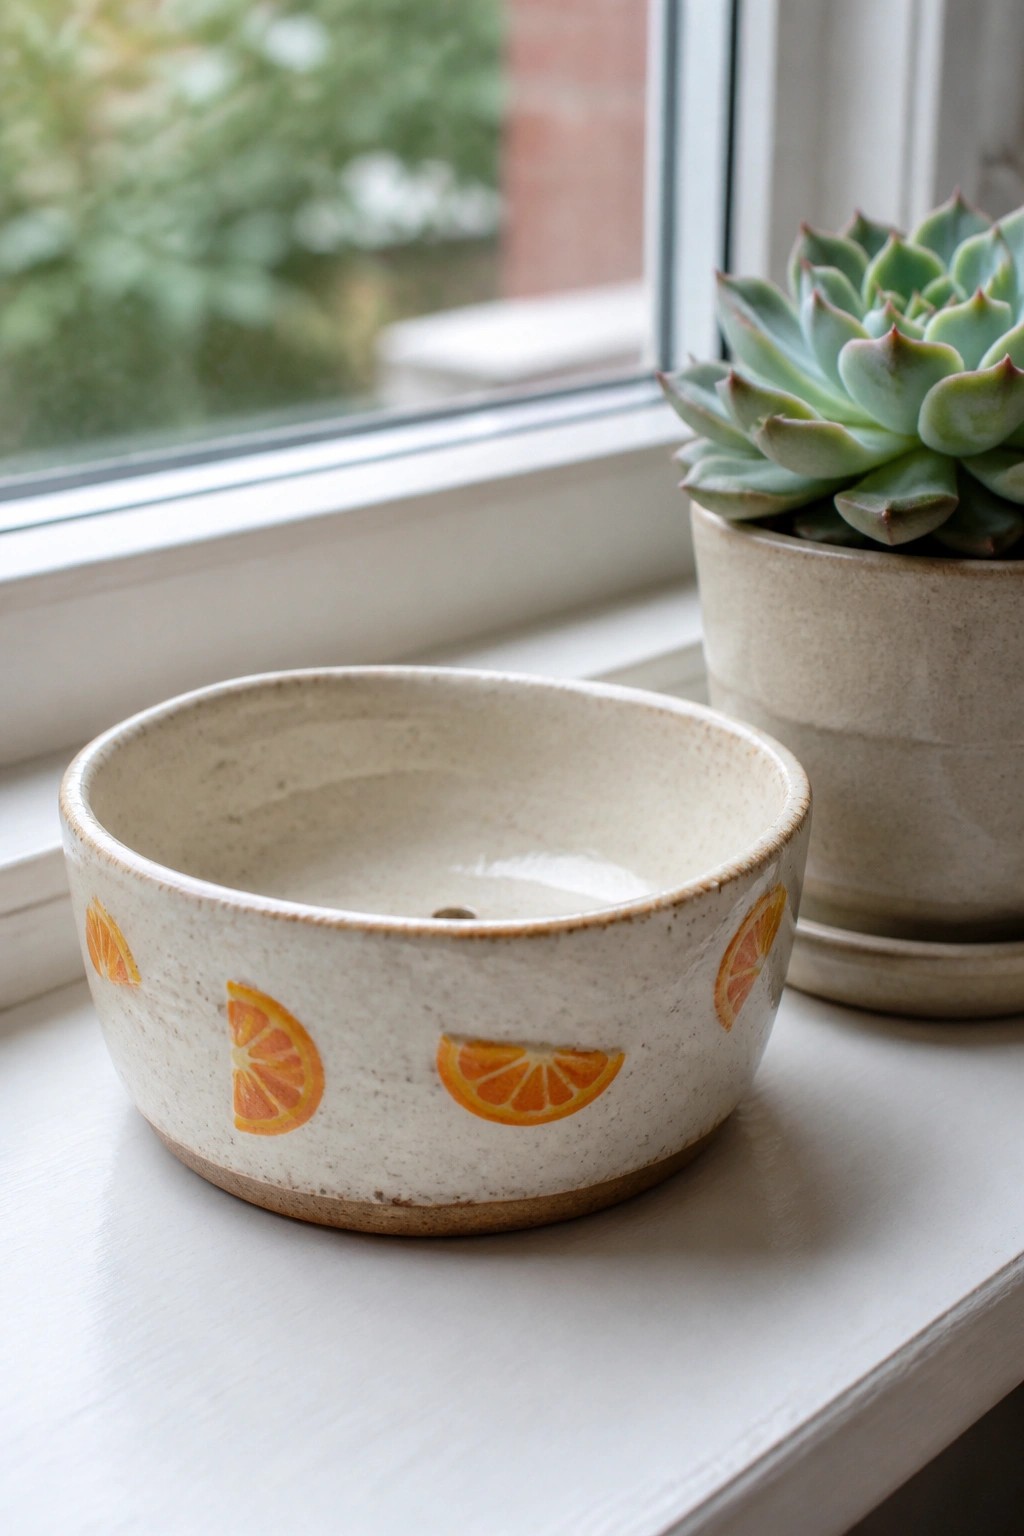
A small, low ceramic bowl with a drainage hole makes a simple planter when you paint citrus slices around the outside in underglaze. The neutral speckled surface keeps the orange fruit shapes visible and spaced evenly without crowding the form. This approach works for any beginner who wants to add a single motif rather than a full pattern.
What makes this idea useful is how the same painted slices can move to a taller cup shape or a shallow tray with almost no change in technique. The compact size fits on a narrow windowsill or shelf without taking much clay. You can swap the citrus for other fruit outlines or repeat just one slice if you want a faster version for gifts or kitchen use.
Leaf Stamped Ceramic Mug

A simple cylindrical mug with rows of repeated leaf stamps pressed into the clay before glazing. The blue-gray glaze settles into the recessed leaf shapes to create contrast against the lighter raised areas. This produces a textured surface that stays functional as a drinking vessel while showing clear handmade marks.
What makes this idea useful is how the stamp pattern can be applied with basic tools on a wheel-thrown or hand-built mug. The small scale of the leaves works well on cylindrical shapes and could be adapted to bowls or small vases by changing the motif spacing. In a kitchen setting this style of mug stands out because the glaze contrast draws attention to the handmade marks without requiring complex painting skills.
Mug with Raised Blue Dots
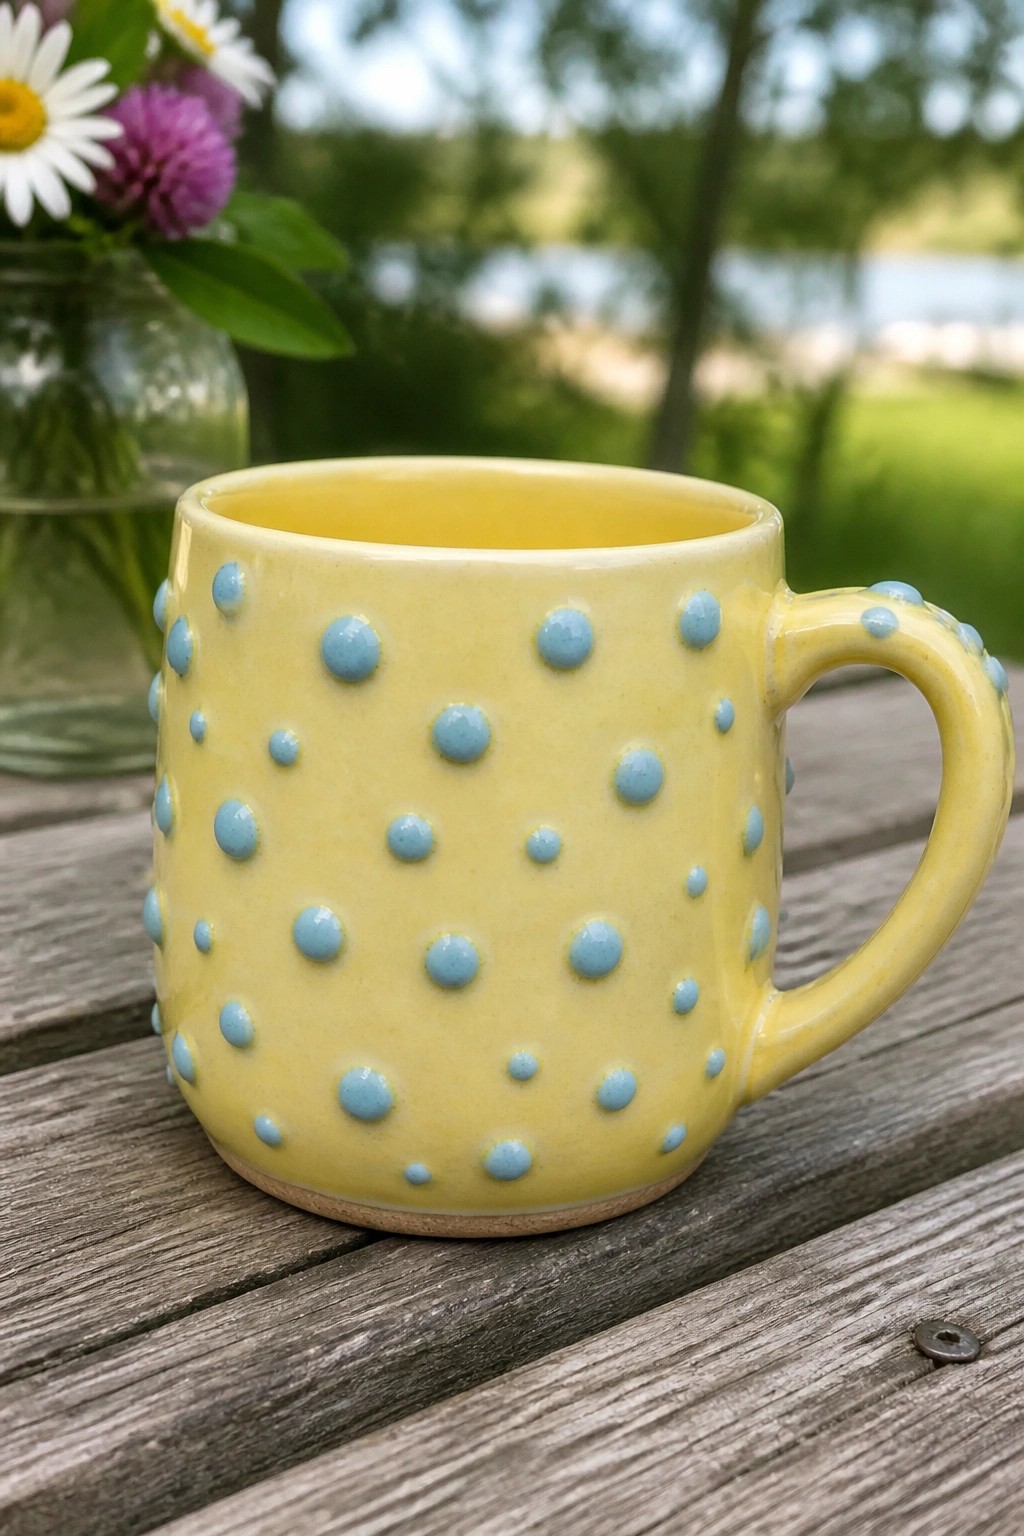
A standard ceramic mug gets its main interest from rows of small raised blue dots pressed onto the yellow glazed surface and along the handle. The dots sit evenly spaced to create a simple repeating pattern that adds texture without covering the whole form. This idea falls into the category of surface decoration on functional cups where clay additions create both visual contrast and a light grip.
The shape does a lot of the work here because the dots stay small enough to keep the mug easy to hold and stack. You can adapt the same method by changing dot size or spacing to fit smaller cups or by switching the base glaze color for different kitchen styles. For a gift this kind of piece works well since it stays practical while looking more finished than a plain mug. The dot technique also translates easily to other items like small bowls or utensil holders if you want to make a matching set.
Footed Cup with Speckled Exterior and Colored Interior
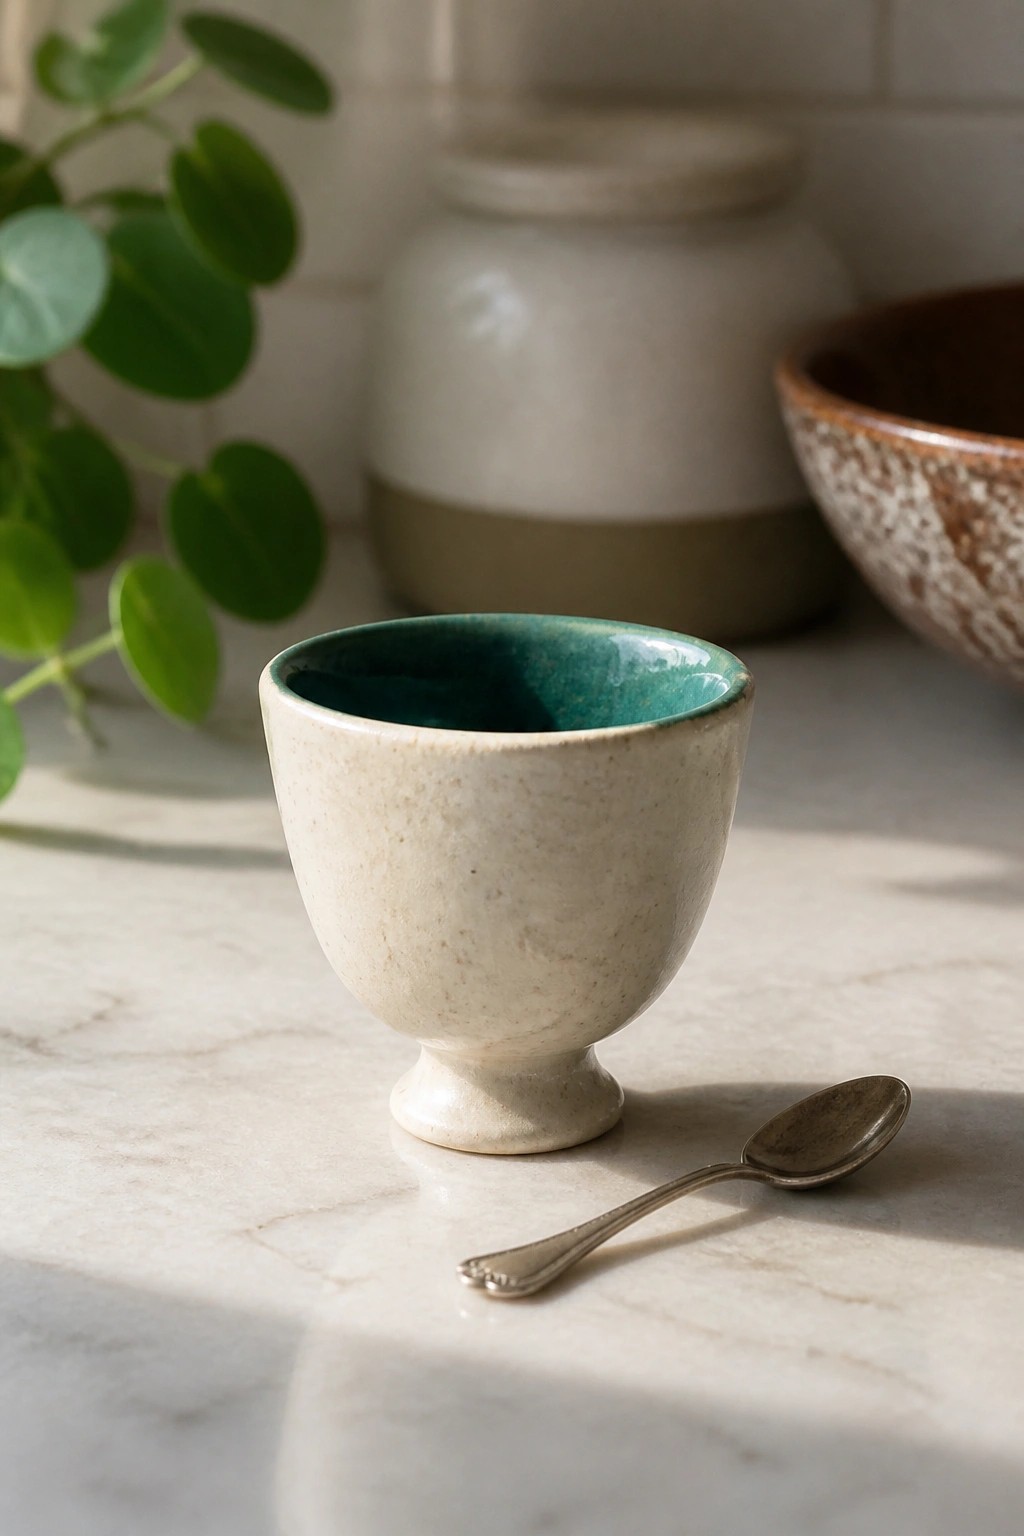
A small footed cup gives beginners a simple shape that still looks finished once fired. The form uses a basic bowl profile lifted on a short pedestal base, which helps it sit steady on a table. Keeping the exterior in the natural speckled clay and applying glaze only on the inside creates a clear color contrast without extra decoration steps. This keeps the project quick while producing a usable kitchen piece.
The compact size works well for holding a single egg, spices, or small snacks during meals. You can adapt the same shape by widening the opening slightly for a sauce bowl or shortening the base to make a low dish. Switching the interior glaze color lets you match it to other dishes you already own. The foot adds just enough lift to make the cup stand out in photos for Pinterest boards focused on simple tableware.
Two-Tone Drip Glaze Mug

A handmade ceramic mug uses a light blue glaze applied so it runs down over the lower section, leaving the base in its natural brown clay tone. The rounded shape and simple pulled handle keep the form basic while the glaze creates the main visual detail through its uneven drip line. This approach belongs to the mug category and lets the material and firing process supply the surface pattern.
What makes this idea useful is how the drip effect adds interest to a standard mug without requiring extra carving or painting. The blue-over-brown combination works well for daily kitchen use or as a gift because the colors stay versatile. You could adapt the same shape by changing the glaze color or adjusting how far the drip travels down the sides. The small size also makes it straightforward to repeat in a set with slight variations in the glaze flow.
Cloud Painted Ceramic Cup
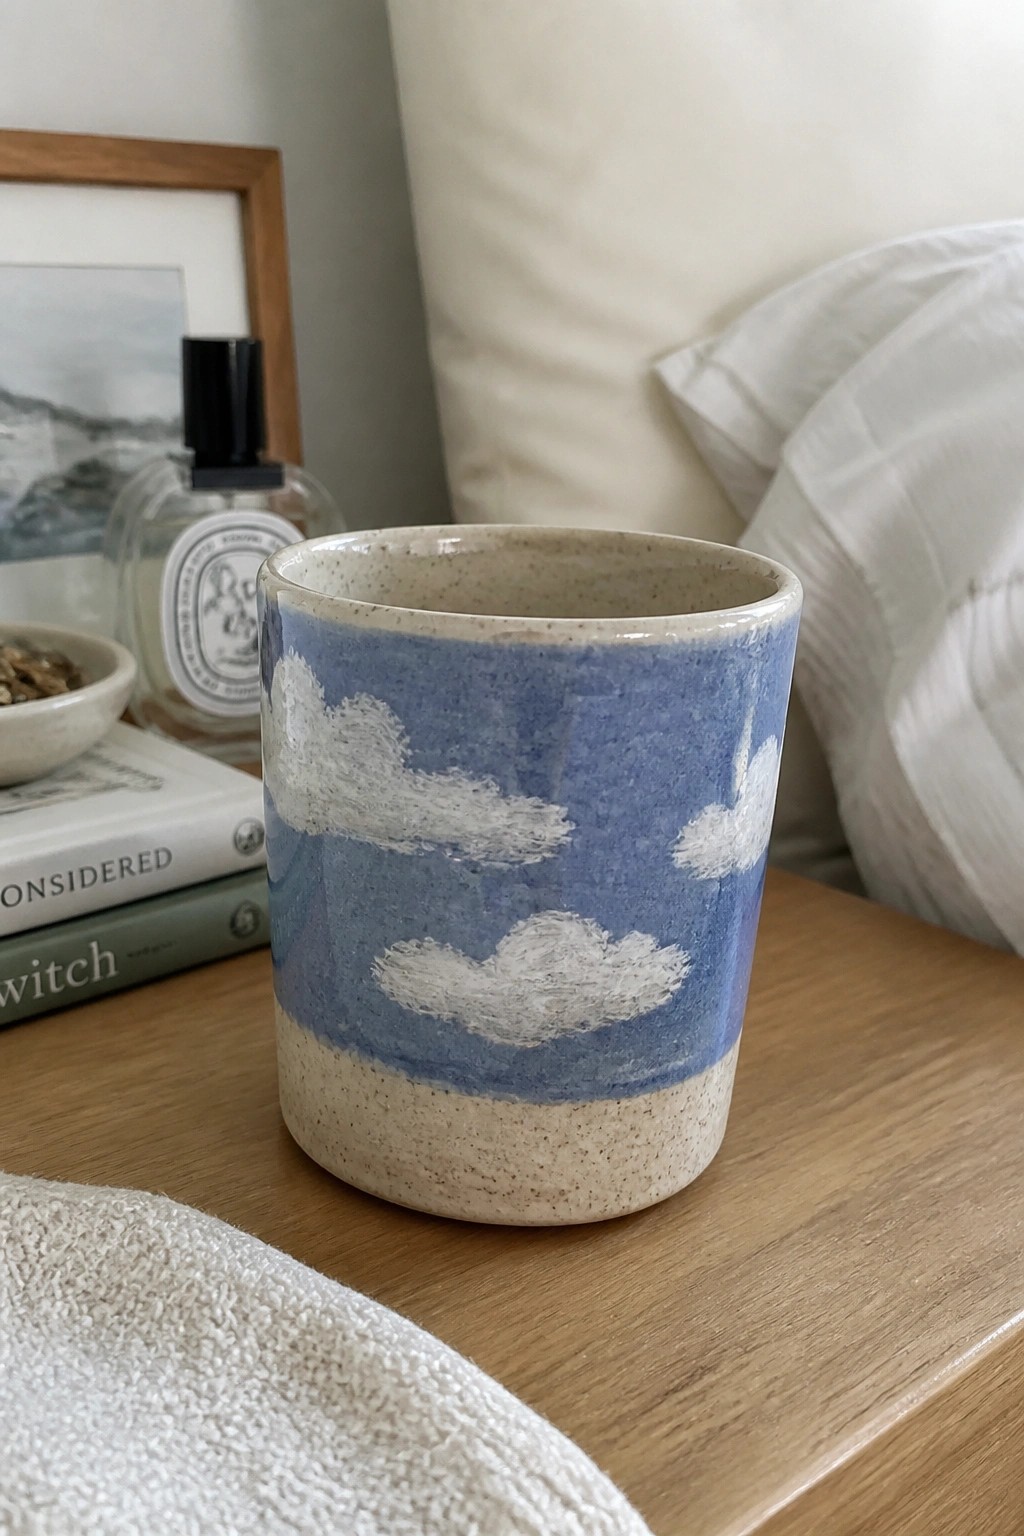
A basic cylinder cup becomes more interesting when covered in a soft blue glaze and finished with loose white cloud shapes painted around the middle. The lower section keeps a natural speckled clay surface to create a clean break between the painted area and the base. This keeps the form simple while adding a recognizable sky motif that works on a drinking vessel without needing extra sculpting or carving.
The shape does a lot of the work here because the straight sides give plenty of room for the painted clouds to show up clearly. You could repeat the same idea on a taller mug or shrink it down for espresso cups by adjusting how many clouds fit around the form. For a gift set, make two or three cups with slight variations in cloud placement so they match without looking identical. The painted detail also photographs well for sharing, which helps the project stand out when saved for later reference.
Frequently Asked Questions
1. What type of clay works best for beginners making hand-built ceramic cups? Start with a stoneware or earthenware clay that has some grog mixed in for strength and to reduce cracking. These clays are forgiving for pinching, coiling, or slab methods and fire at lower temperatures that many community studios offer. Avoid porcelain at first since it is harder to work with and more prone to warping.
2. How can I keep my handmade cups from cracking while they dry? Dry pieces slowly and evenly by covering them loosely with plastic for the first day or two then gradually exposing them to air. Place them on a dry wooden board or shelf and rotate them occasionally so all sides dry at the same rate. If cracks appear, score the area lightly and add a small amount of slip to repair before the clay reaches leather hard stage.
3. Do I need a kiln or can these cups be fired another way? Most durable ceramic cups require kiln firing to become waterproof and strong. Check local pottery studios, community centers, or schools that offer firing services for a small fee. Air-dry clay projects will not hold liquids safely and are only suitable for decorative use, so plan to use a proper kiln for functional cups.
4. How do I make sure my cups are safe for food and hot drinks? Use food-safe glazes that are labeled as dinnerware safe and follow the firing instructions exactly, usually cone 6 or higher for stoneware. Apply glaze evenly and avoid areas that will touch food if the glaze is not certified safe. Test one cup first by running it through a dishwasher cycle to confirm it holds up.
5. What simple tools help create the 18 cup ideas without buying expensive equipment? Basic items like a rolling pin, wooden ribs, a needle tool, sponge, and wire cutter are enough for most hand-building projects. Repurpose household objects such as plastic containers for templates, old credit cards for smoothing, and chopsticks for adding texture. These tools let you try slab cups, coiled mugs, and pinched bowls using the ideas in the article.

Pottery Path is my cozy corner of the internet where I share clay ideas, pottery inspiration, and simple projects you can recreate at home. I love exploring everything from air dry clay to handbuilt pottery to cute minis that brighten your day. My goal is to make clay crafting feel easy, fun, and welcoming for anyone who wants to try it.
You will find beginner friendly tutorials, creative pottery painting ideas, and lots of warm inspiration for slow and happy crafting. If you enjoy hands on creativity, this space will feel like home.