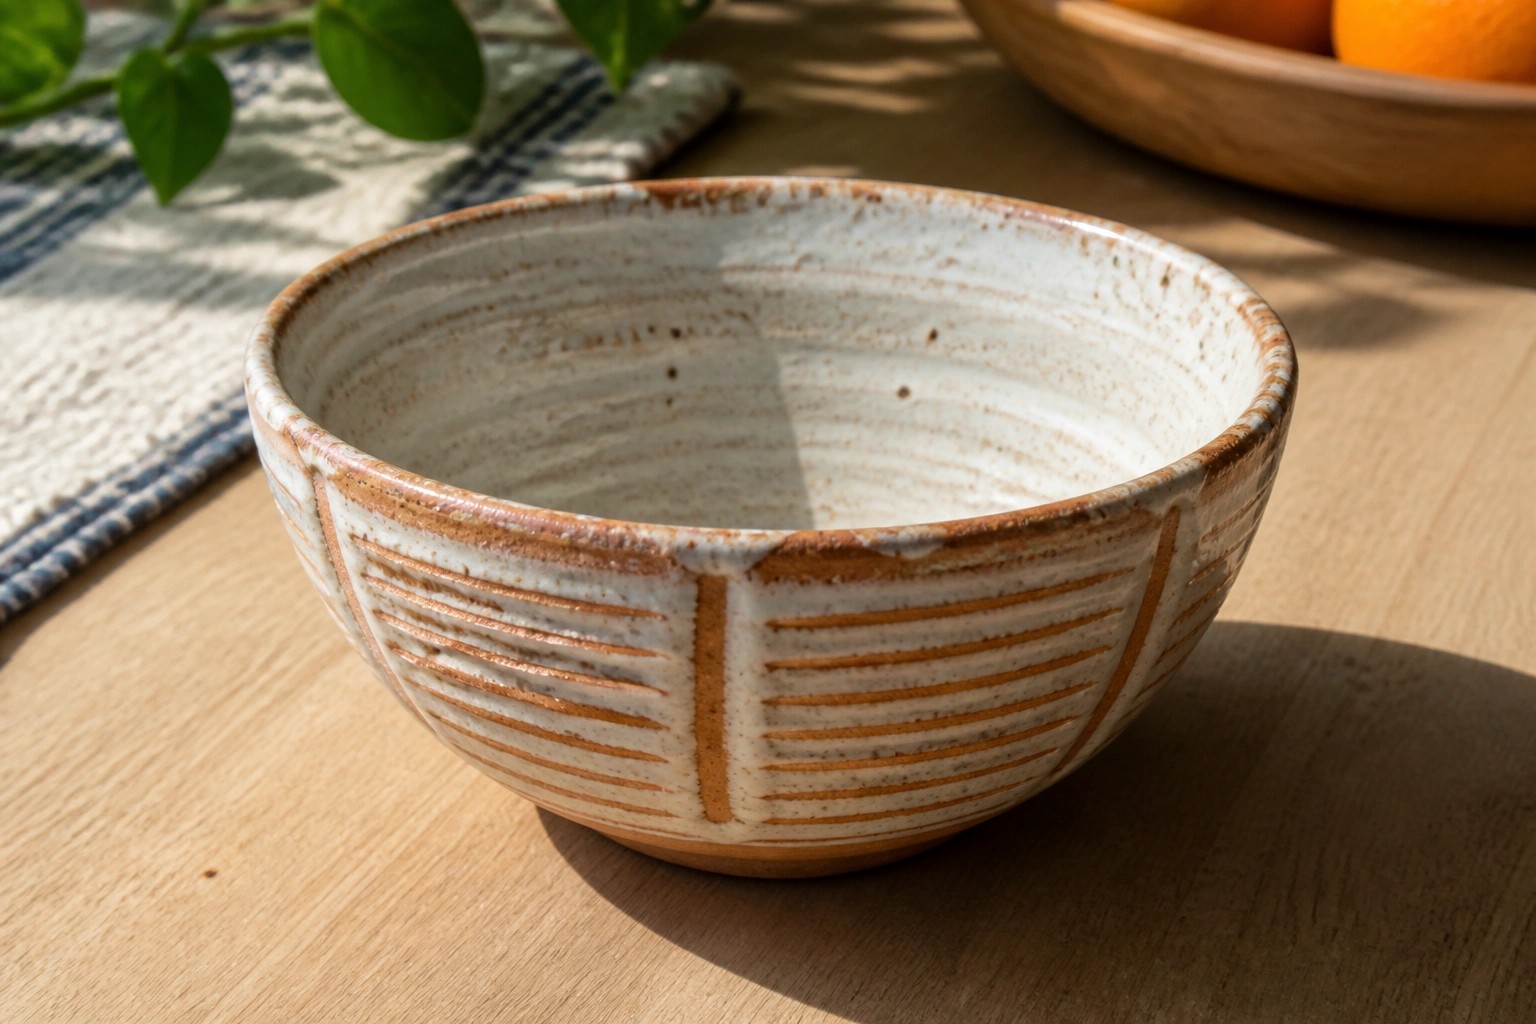
I’ve been trying out different ways to decorate my pottery bowls lately and texture has become one of my favorite parts to play with.
It adds something you can actually feel and notice up close without needing a lot of extra steps.
Over the past few months I collected some ideas that focus on simple details like carving or stamping rather than bright colors or big designs.
These are things I’ve tested on my own pieces and they seem to hold up well after firing.
I thought it might be helpful to put them together in one place for anyone else who likes working with clay at home.
Horizontal Ridges Layered with Earthy Glazes
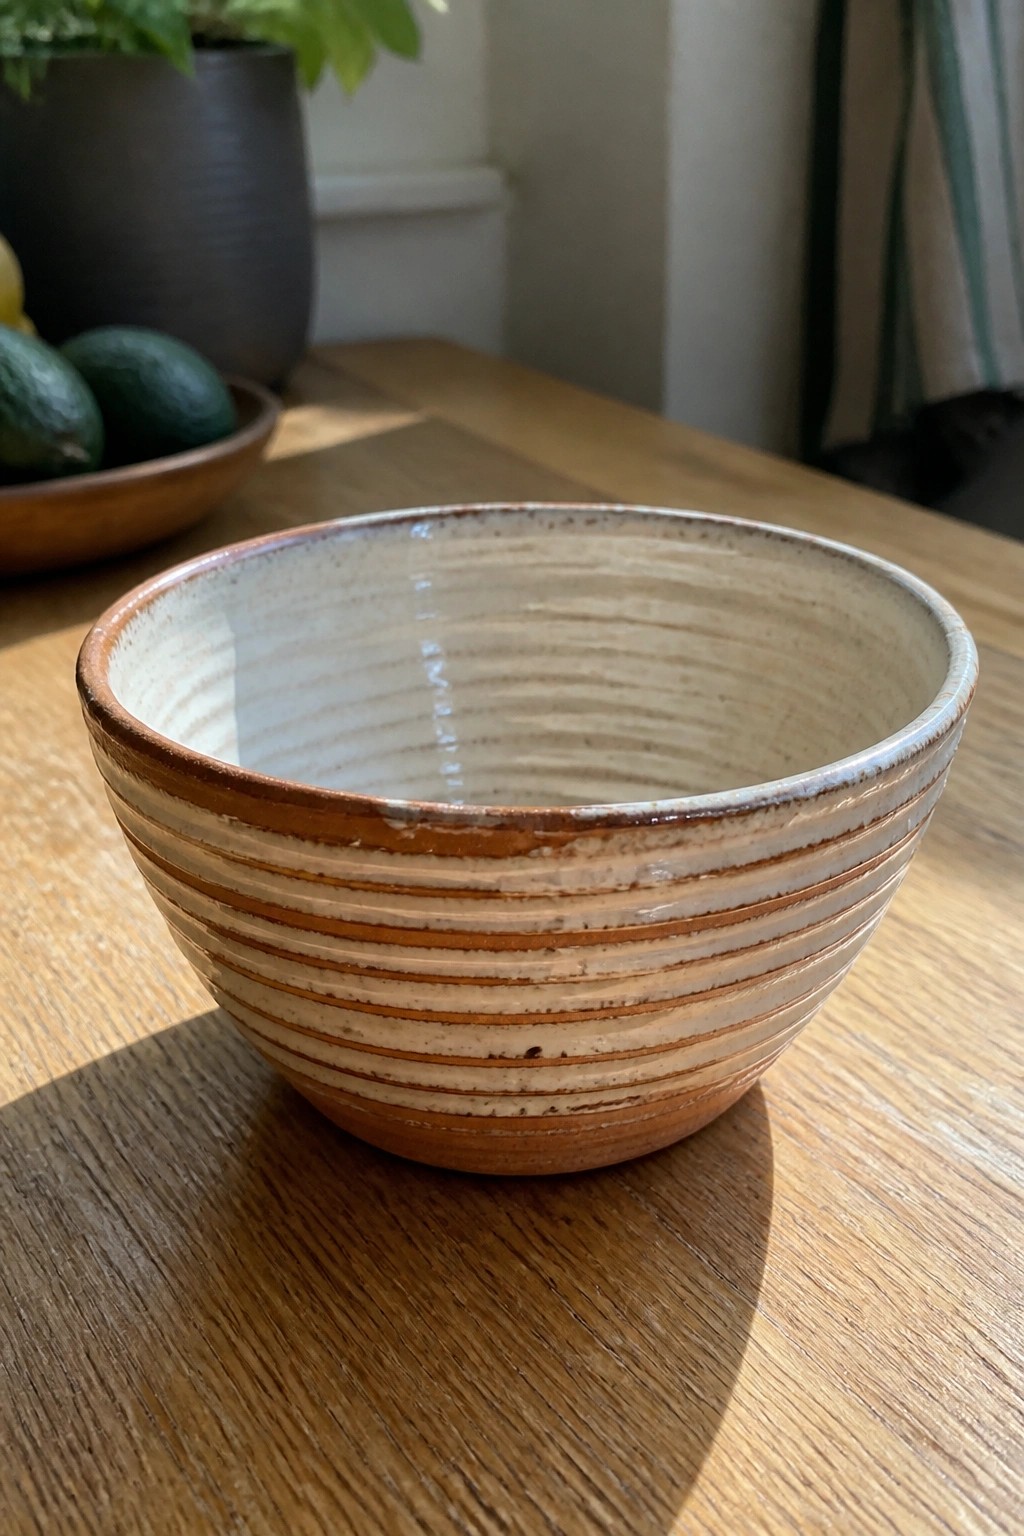
A wheel-thrown bowl can be finished with evenly spaced horizontal ridges that run around the exterior and interior. These ridges are created during throwing or carved afterward, then glazed in overlapping bands of brown and cream that settle differently in the grooves. The result is a simple bowl form that gains depth and pattern purely from the surface texture and glaze behavior.
What makes this idea useful is how the ridges do the decorating work once the shape is formed. You can repeat the same ridging on smaller bowls for serving dips or on larger ones for salad. The earthy stripe pattern fits kitchen or table use and can be scaled down for a set of four without much extra effort.
Incised Botanical Ring Dish
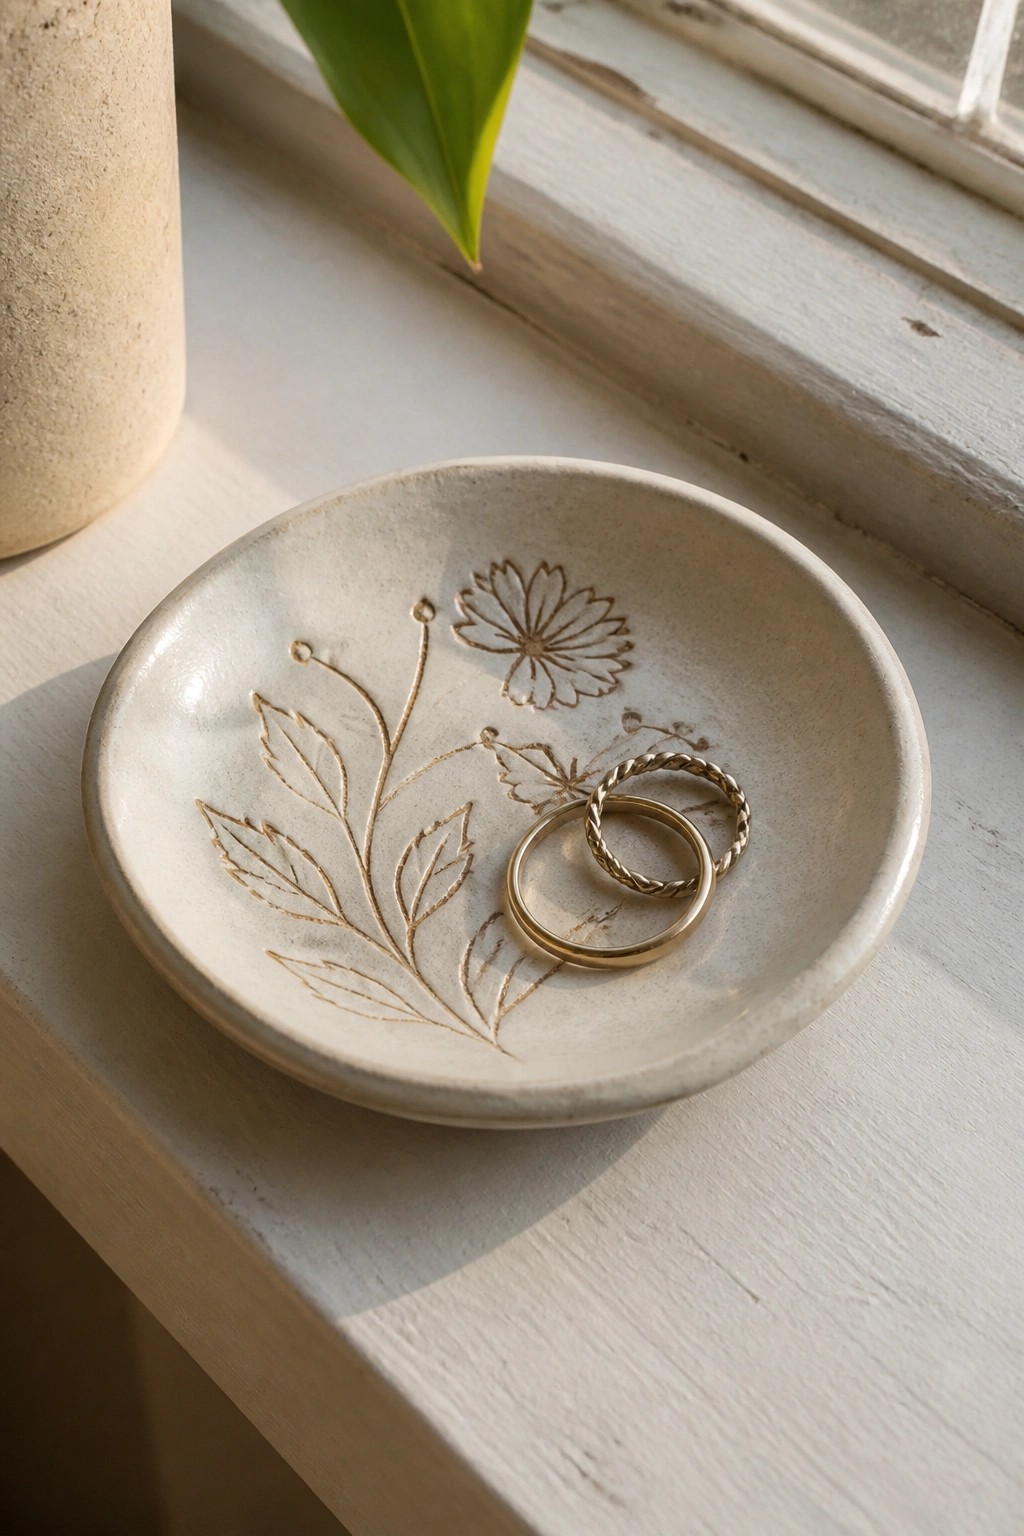
A small shallow clay dish works well for this idea, with a smooth light glaze and a single cluster of incised leaves, stems, and flowers pressed or carved into the surface. The design stays low and flat so the texture comes from the lines themselves rather than raised clay or heavy color. This approach keeps the piece simple while giving it enough detail to stand out as a ring dish or small jewelry holder.
What makes this idea useful is the small scale, which lets you try the carving on a test piece without committing to a full set of bowls. The same incised plant motif can be repeated on a larger tray or adapted to the inside bottom of a soap dish. For a gift, something like this takes little clay and still feels finished once the rings sit inside. The light background also makes the carved lines read clearly in photos, which helps if you want to share the finished piece online.
Vertical Ridges on a Blue Ceramic Bowl
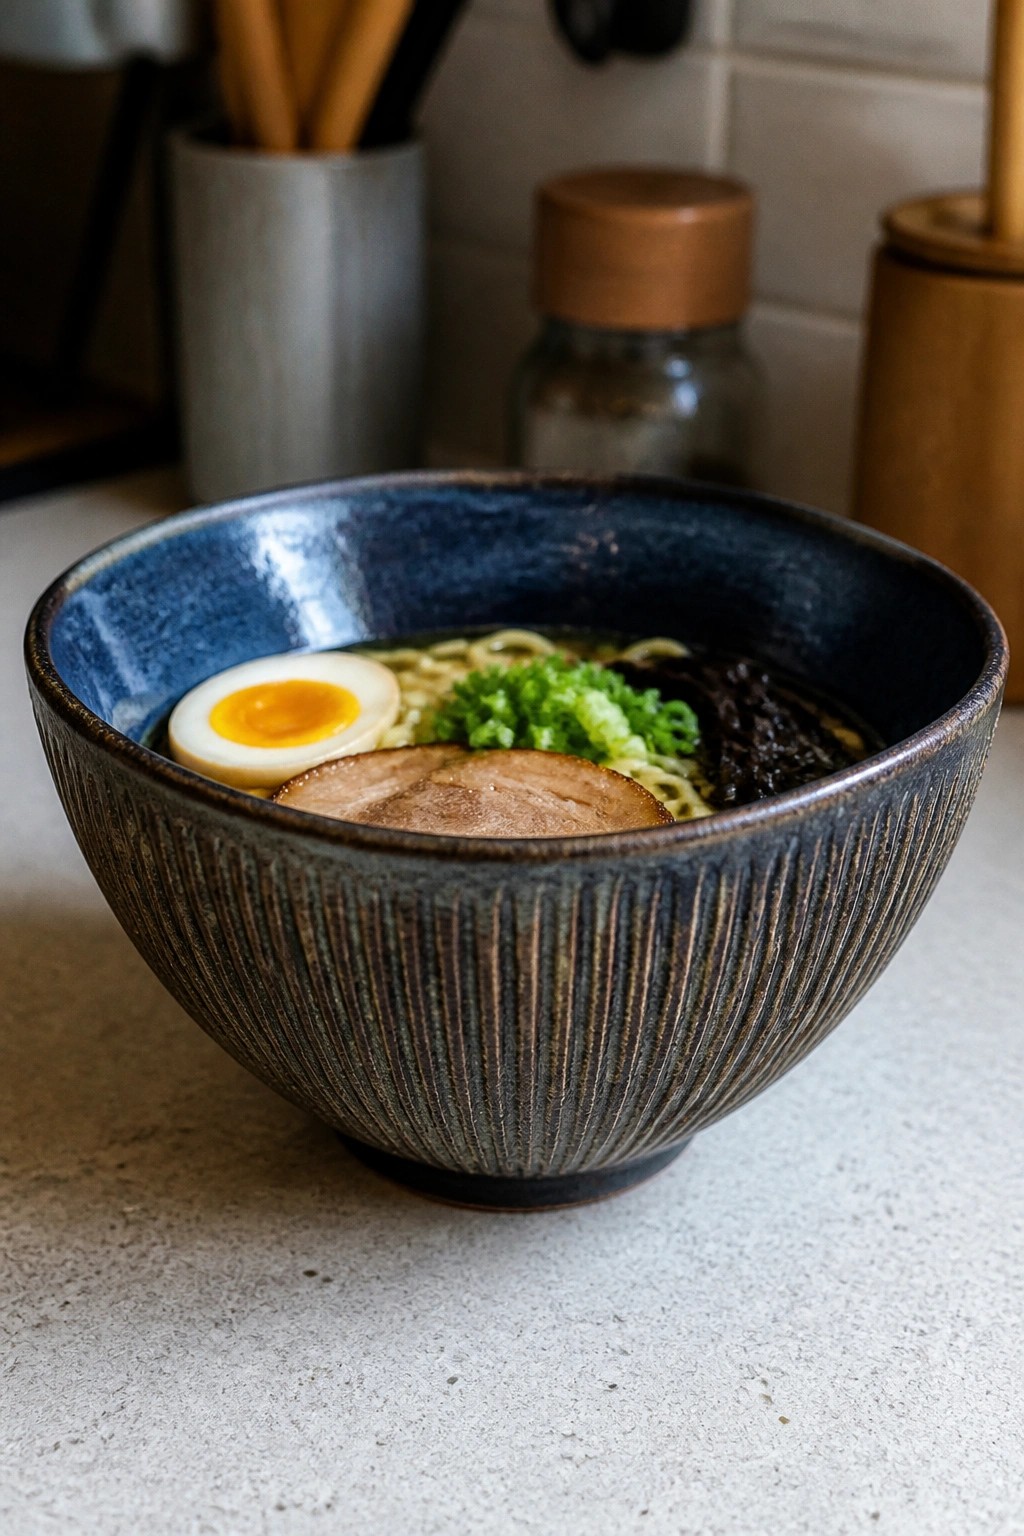
A deep ceramic bowl finished with vertical ridges on the exterior adds strong linear texture while the interior stays smooth under a dark blue glaze. The ridges run from the rim down to the foot, creating contrast against the glossy inside that holds soup or broth. This style works as a kitchen bowl meant for serving noodle dishes where the outside detail shows even when the bowl is in use.
The ridged surface would suit a kitchen or dining table where the bowl gets handled often. You could scale the same groove pattern down for smaller side bowls or widen the spacing for a larger serving piece. The texture also photographs clearly, which helps the design stand out if you share finished work online.
Segmented Citrus Glaze on a Small Catch-All Bowl
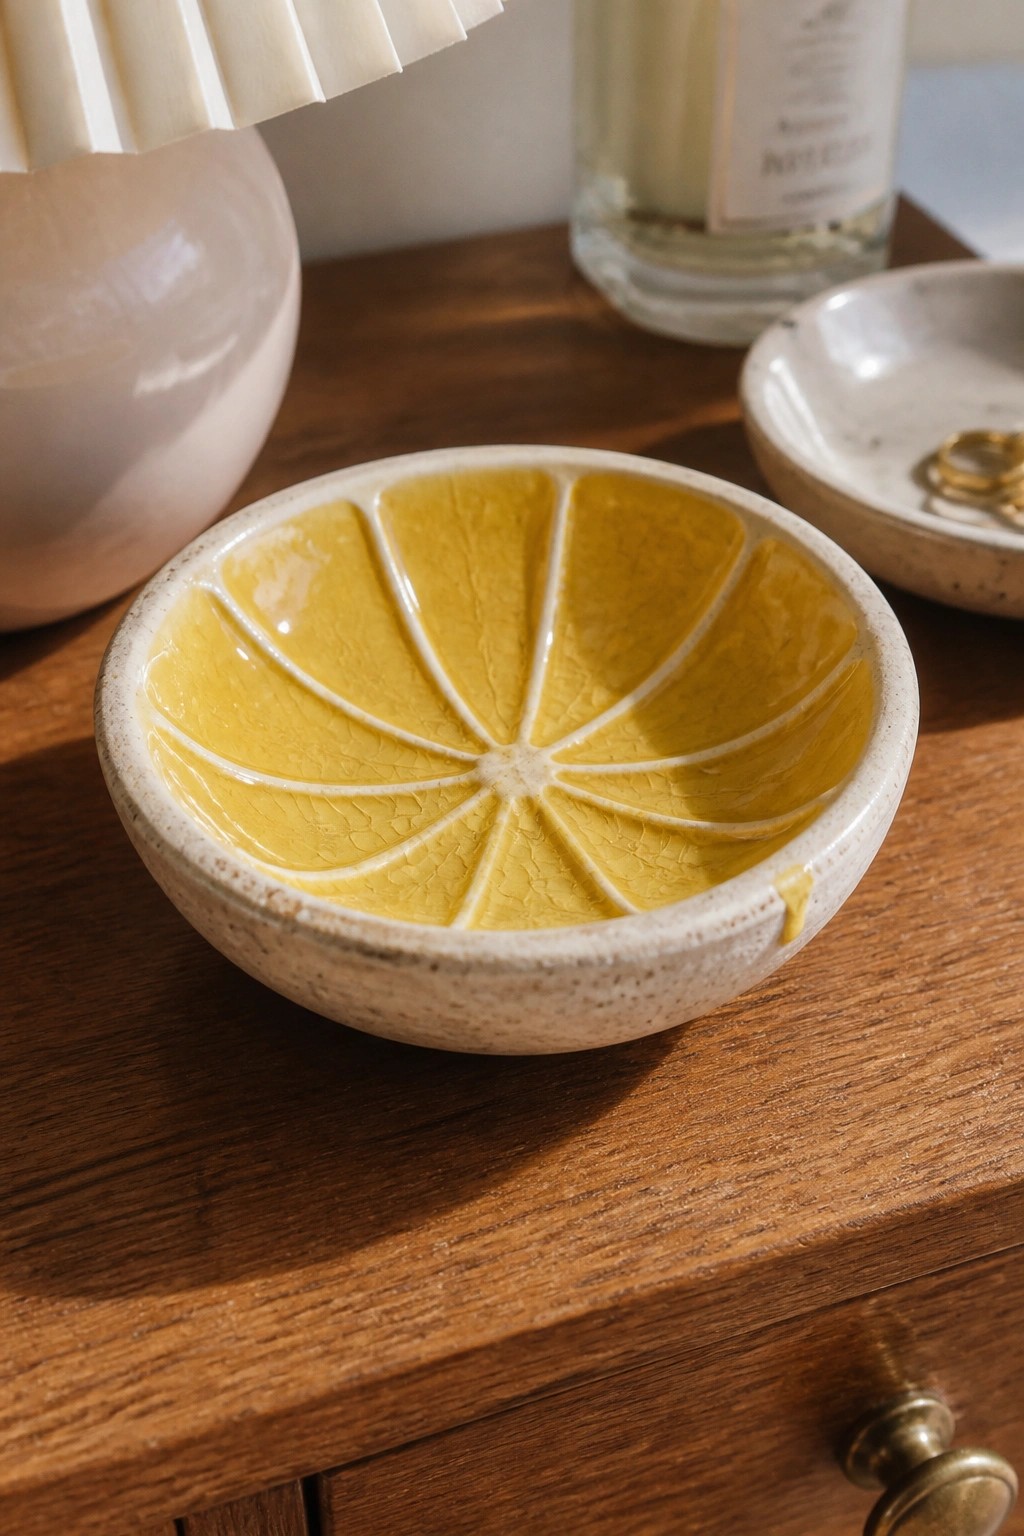
A small ceramic bowl uses a citrus slice pattern made by dividing the interior into wedge shapes with yellow glaze. The radiating lines create the look of fruit segments while the speckled white rim frames the design. This works as a ring dish or tiny trinket bowl where the motif gives the piece a clear focal point without extra sculpting.
What makes this idea useful is how the divided glaze layout adds detail to a simple round shape that stays easy to make. The compact size works well on a nightstand or bathroom counter for holding jewelry or small items. You could adapt the wedge pattern to other colors or fruits and apply it to a tray or shallow plate instead.
Notched Yarn Bowl with Rough Exterior Texture
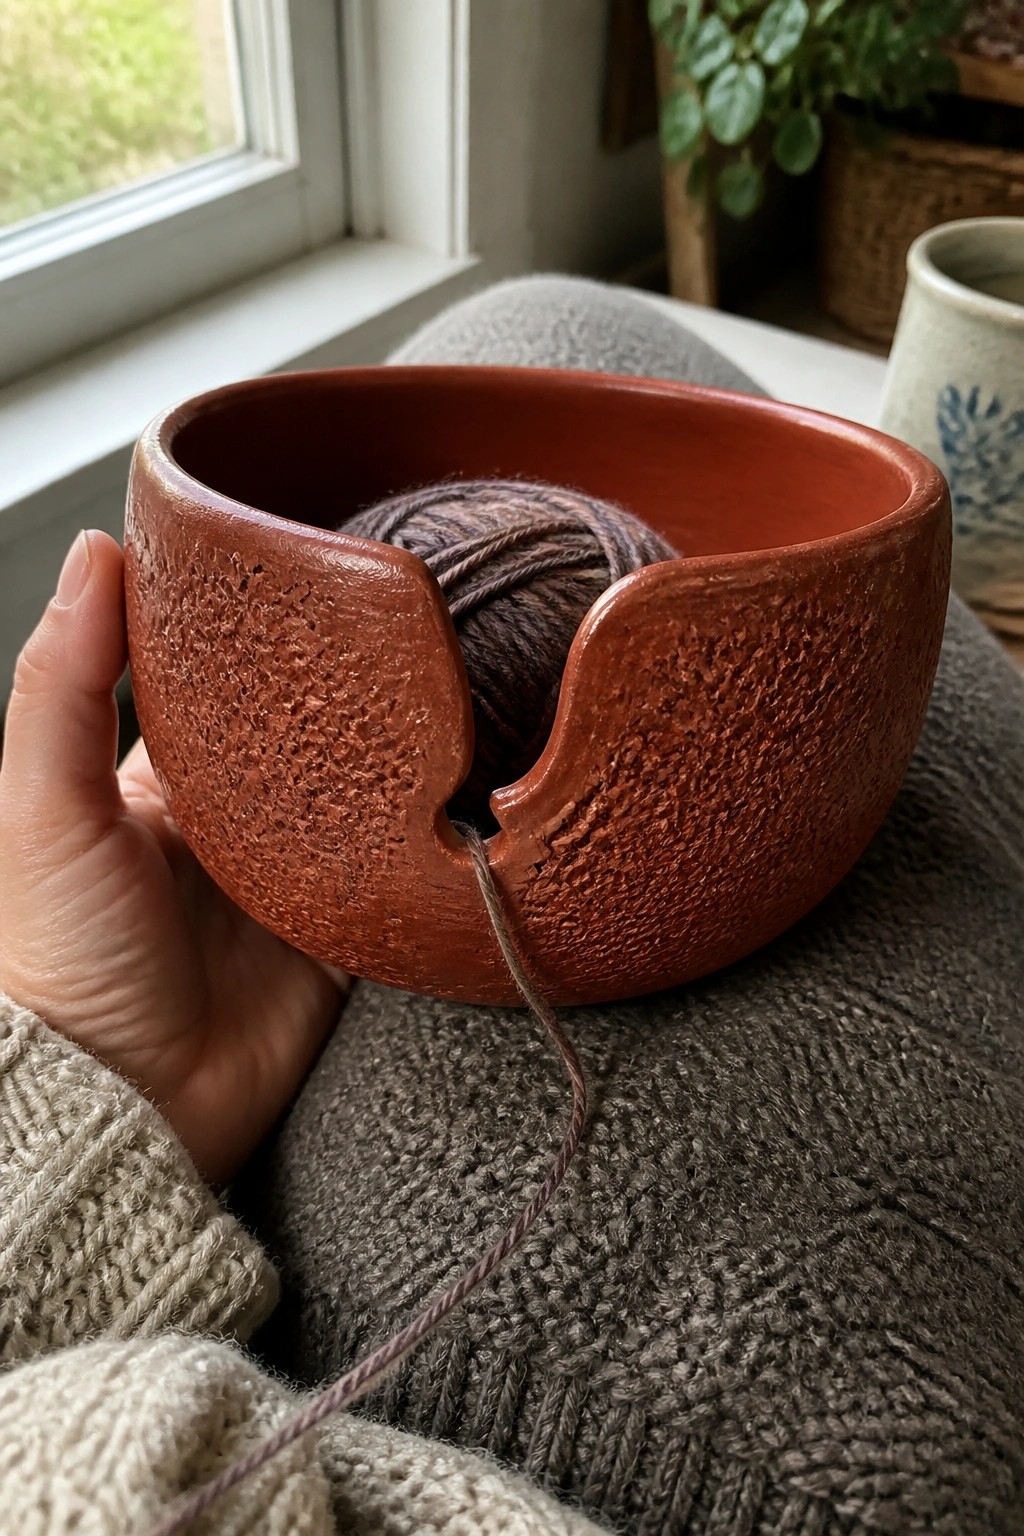
A yarn bowl is a simple clay project that combines a wide, rounded form with a single deep notch cut into the rim. The notch acts as a built-in guide so yarn feeds out steadily without tangling. The bowl shown uses a heavily textured surface on the outside while keeping the inside smoother, all covered in a single earthy red finish that highlights the handmade shape.
What makes this idea useful is how the notch turns an ordinary bowl into a practical tool for knitting or crocheting. The textured exterior adds detail with minimal extra steps, since it can be created with basic stamping or carving before firing. You could adapt the same notch into a smaller version for embroidery floss or make a taller shape for larger skeins. In a craft space this piece keeps yarn contained and visible at the same time.
Wavy Line Detail on Speckled Bowls
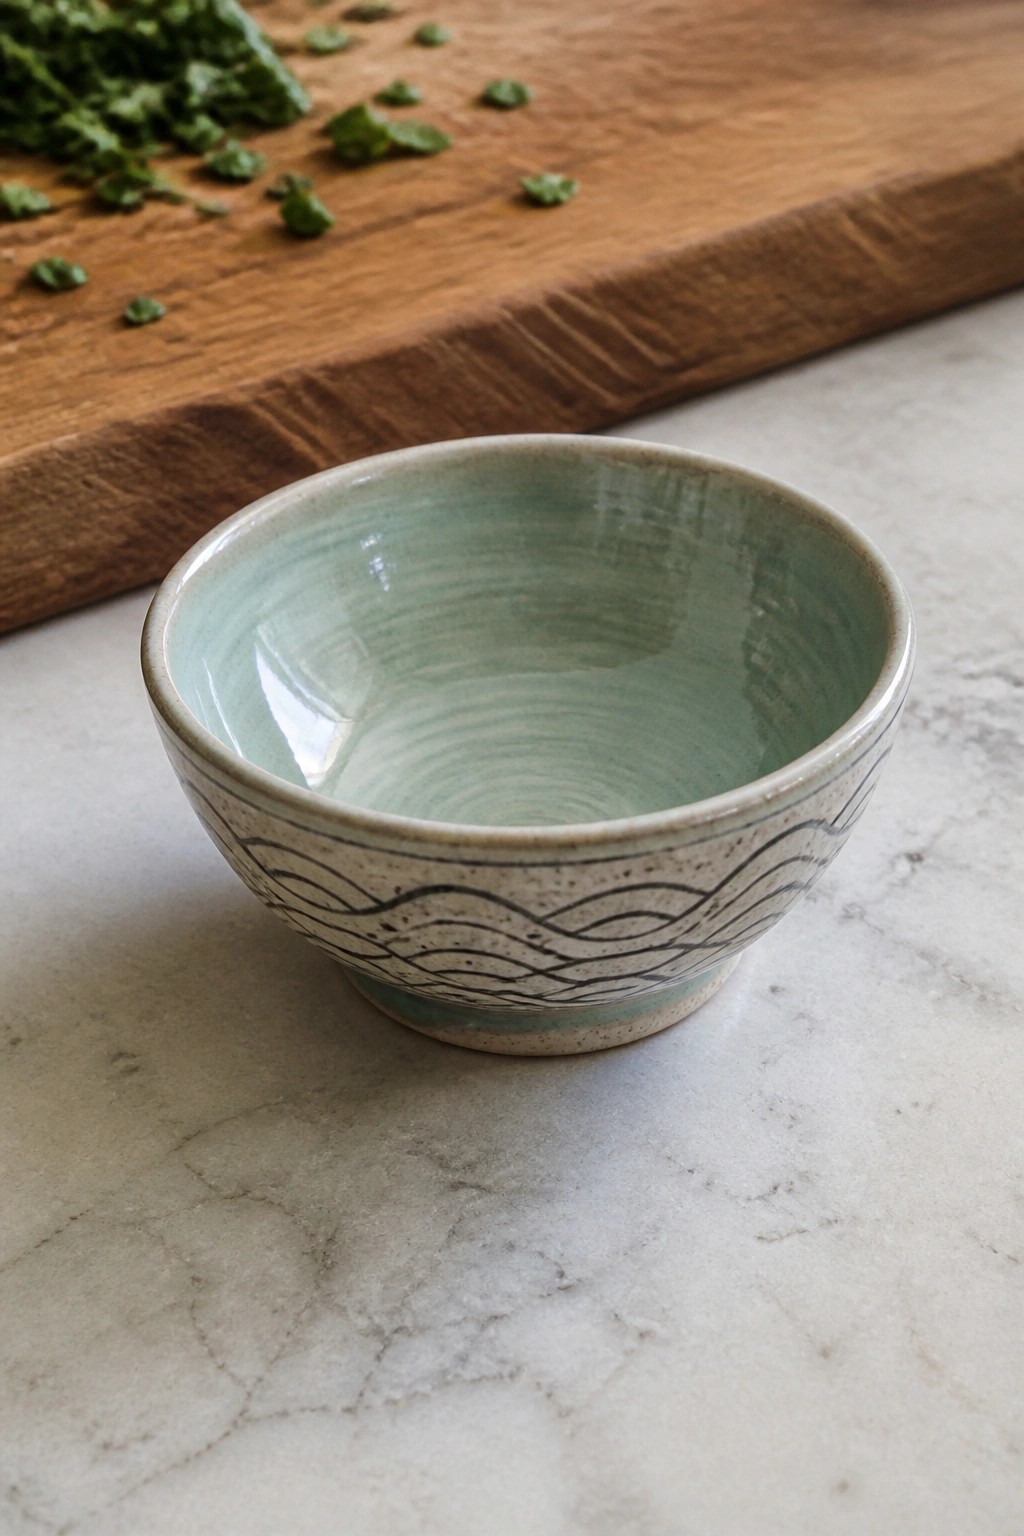
A small bowl made from speckled clay uses a series of black wavy lines painted or incised around the exterior to create the main surface detail. The interior carries a light green glaze that shows the throwing rings clearly. This combination keeps the decoration focused on contrast between the dark lines and the light clay while the glaze adds a simple color accent inside. The result works as a basic kitchen or table bowl where the pattern stays visible from the side.
The shape does a lot of the work here because the compact size lets the wave pattern wrap fully without crowding. You could scale the same lines onto a taller mug or a wider plate by adjusting the spacing between rows. In a kitchen this kind of bowl handles prep tasks or small servings while the speckled clay hides minor marks over time. The painted waves would translate easily to underglaze on bisque if you want to test the motif before committing to a full glaze firing.
Raised Dot Texture on a Pedestal Bowl
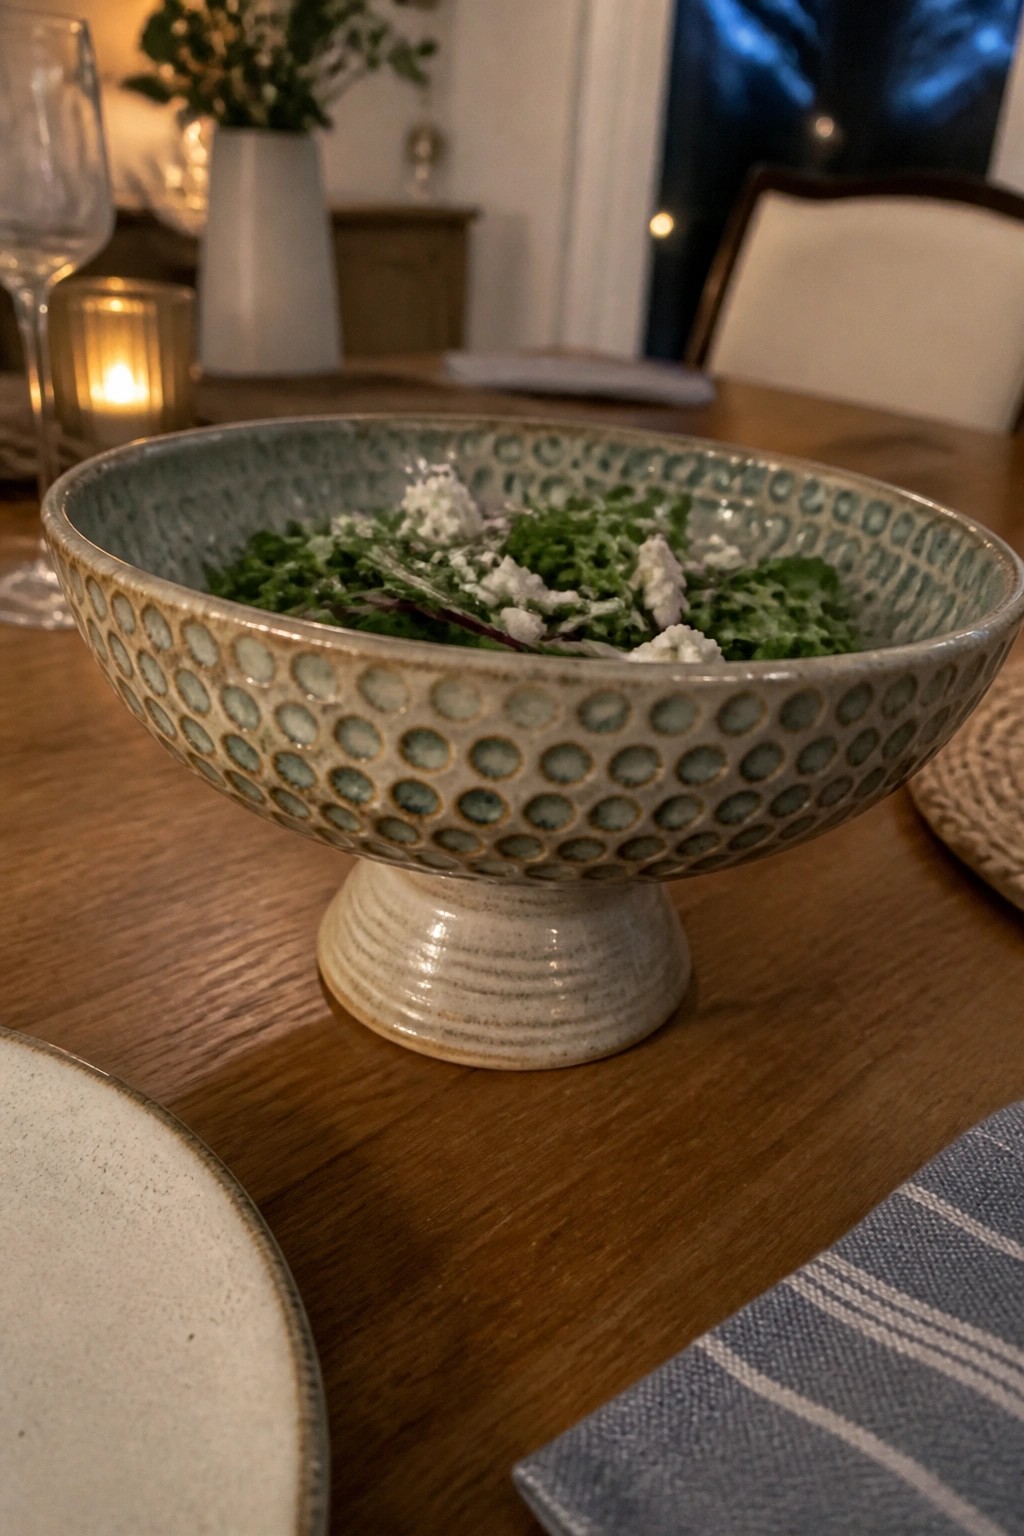
A footed ceramic bowl uses a grid of raised circular dots across the exterior to add dimension. The dots are built into the clay surface before glazing so the mottled blue-green and beige glaze pools slightly around each one and makes the pattern stand out. The interior stays smoother for easy serving while the textured outside creates contrast. This style fits a medium serving bowl where the detail remains visible on a table.
What makes this idea useful is that the dot pattern scales easily to smaller or larger bowls by changing the size and spacing of the circles. The pedestal base lifts the texture so it reads clearly from the side rather than getting hidden against a table. You can recreate the effect with a simple stamp or by pressing in small balls of clay instead of carving. The same texture works on straight-sided bowls or trays if you want to repeat the idea in other forms.
Marbled Glaze Nesting Bowls
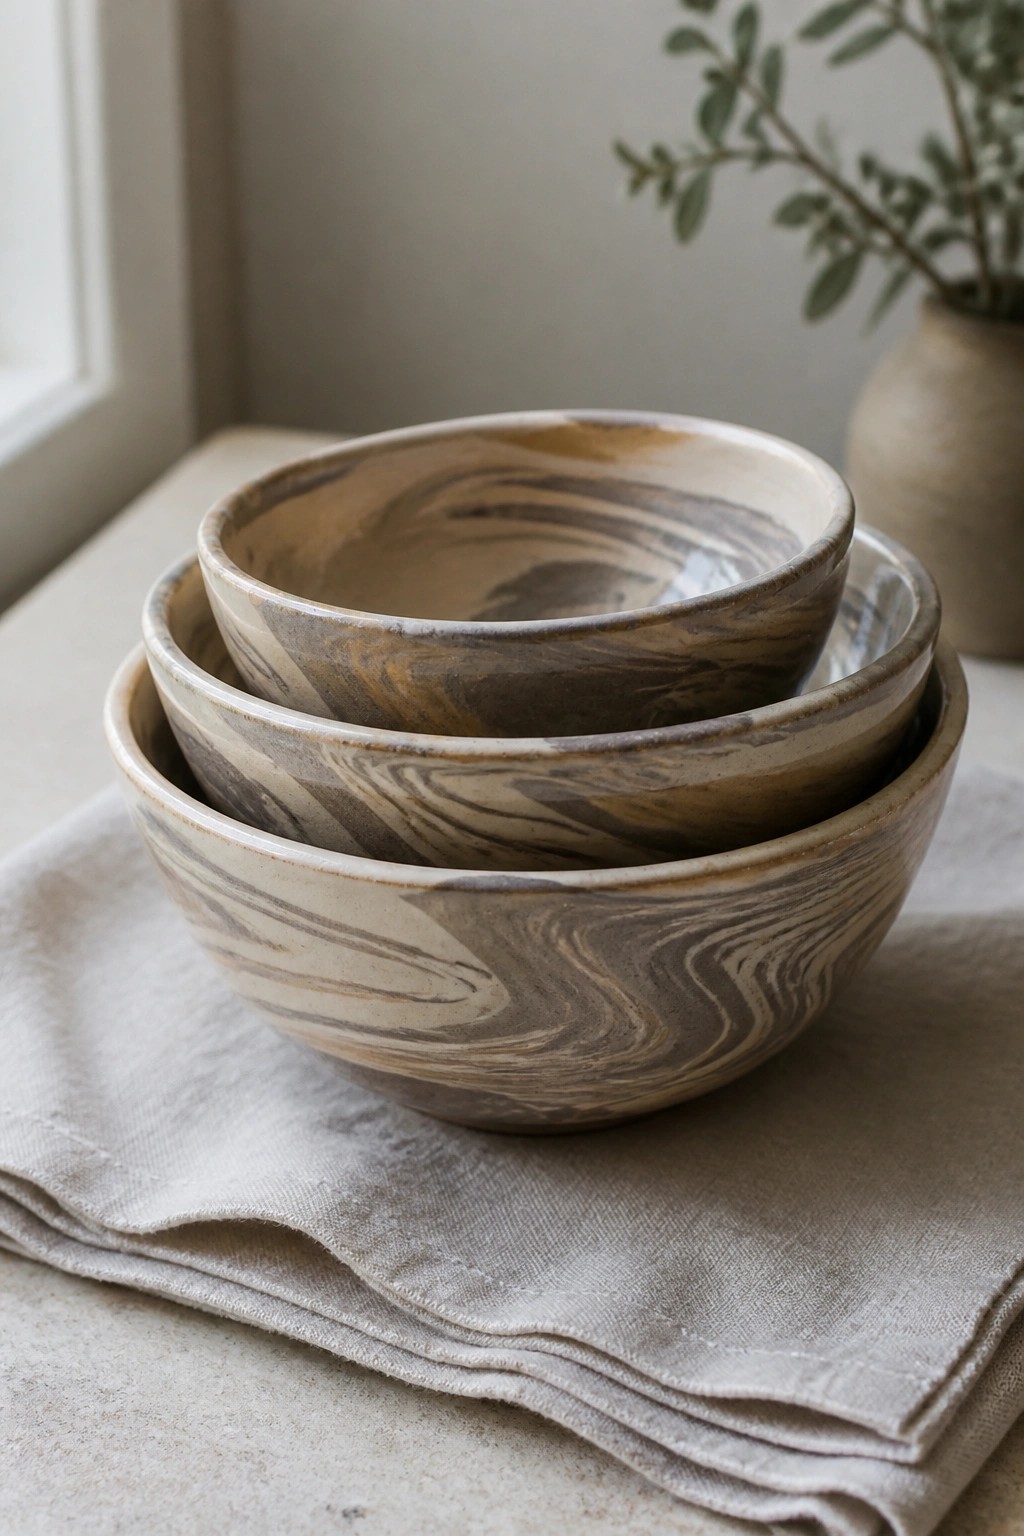
A set of ceramic nesting bowls finished with a flowing marbled glaze creates depth through blended earth tones. The pattern comes from the way the glaze moves during firing, giving each bowl a slightly different swirl across the curved surface. This approach fits the texture category because the detail lives entirely in the glaze layers rather than added carving or slip. The neutral tones keep the focus on the movement of the pattern instead of bright color contrasts.
What makes this idea useful is how the same glaze batch produces variation across three sizes without extra work. These bowls work especially well stacked on open shelves or used for everyday serving where the pattern shows from different angles. You could adapt the marbling to a single large mixing bowl or a set of smaller prep bowls for a coordinated kitchen group. The simple shape leaves room to experiment with glaze thickness while still producing a finished piece that photographs cleanly for reference.
Paw Print Impressions on a Ceramic Pet Bowl
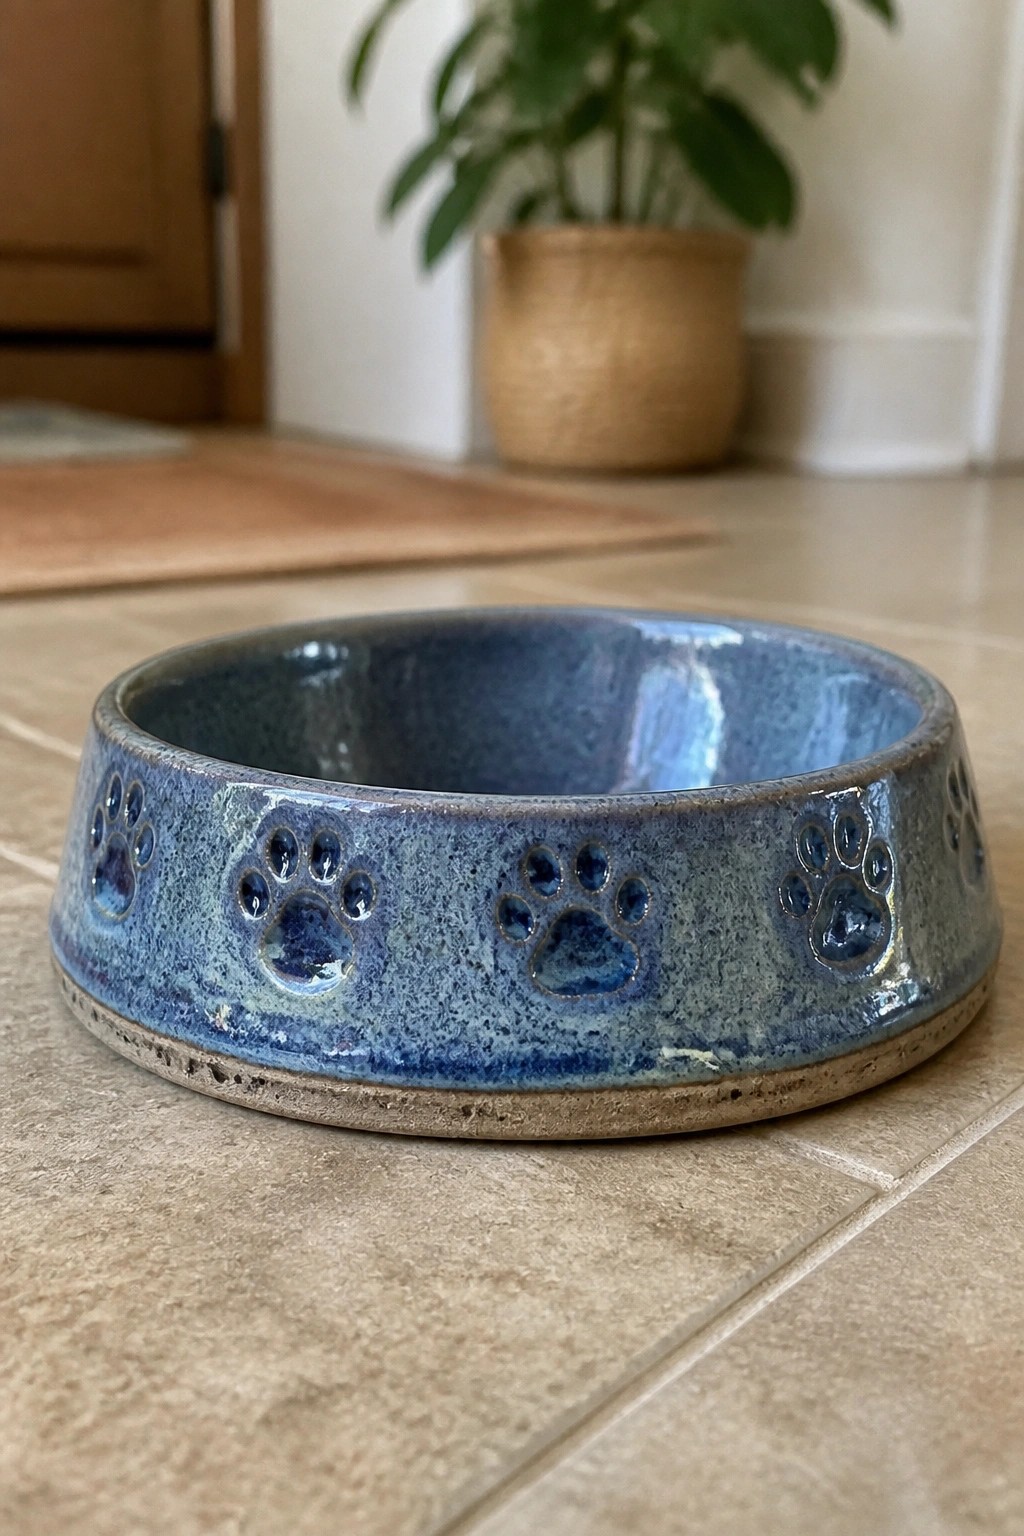
A low ceramic feeding bowl gains clear visual interest when paw prints are pressed into the clay around the outer rim before glazing. The blue glaze settles into the recessed shapes and creates contrast against the lighter clay body without extra painting. This method keeps the bowl fully functional while adding a repeatable texture that reads clearly from a distance.
What makes this idea useful is how the same stamp can be used on different bowl sizes or adapted for a matching water dish. The wide, shallow form works well on the floor in a kitchen or entryway and photographs cleanly for sharing. You could simplify it by using fewer prints or switch to a single contrasting glaze color to make the impressions stand out more.
Leaf Impressions on a Wide Green Bowl
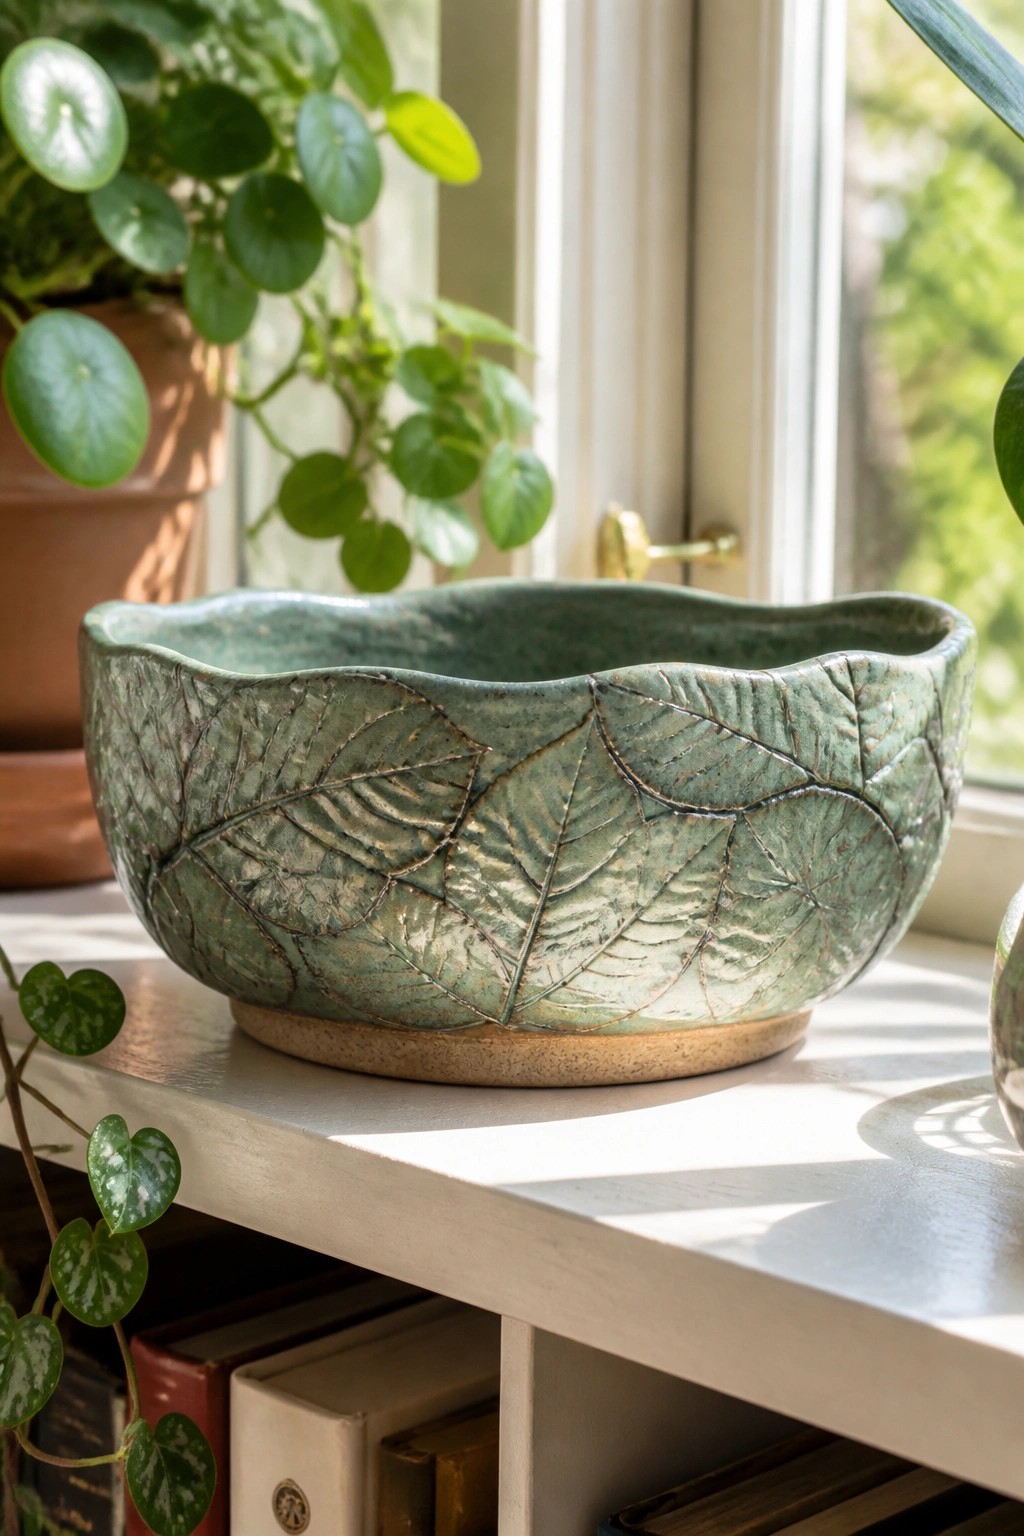
A wide ceramic bowl can be decorated by pressing real leaves into the clay to create raised vein patterns across the exterior. The overlapping leaves form a continuous textured surface that is then covered with a green glaze to emphasize the details and give the piece an aged, organic look. This method suits decorative bowls or small planters where the outside surface is meant to be seen from multiple angles.
What makes this idea useful is how the leaf pressing technique adds strong texture with minimal tools. You could try the same process on a narrower bowl or a low tray using smaller leaves for tighter patterns. The green glaze choice keeps the focus on the texture rather than bright color, which helps the piece photograph clearly for inspiration boards. For a gift, the same leaf method works on a set of matching dishes to create a coordinated look.
Wheel Ridges With Rim Drips
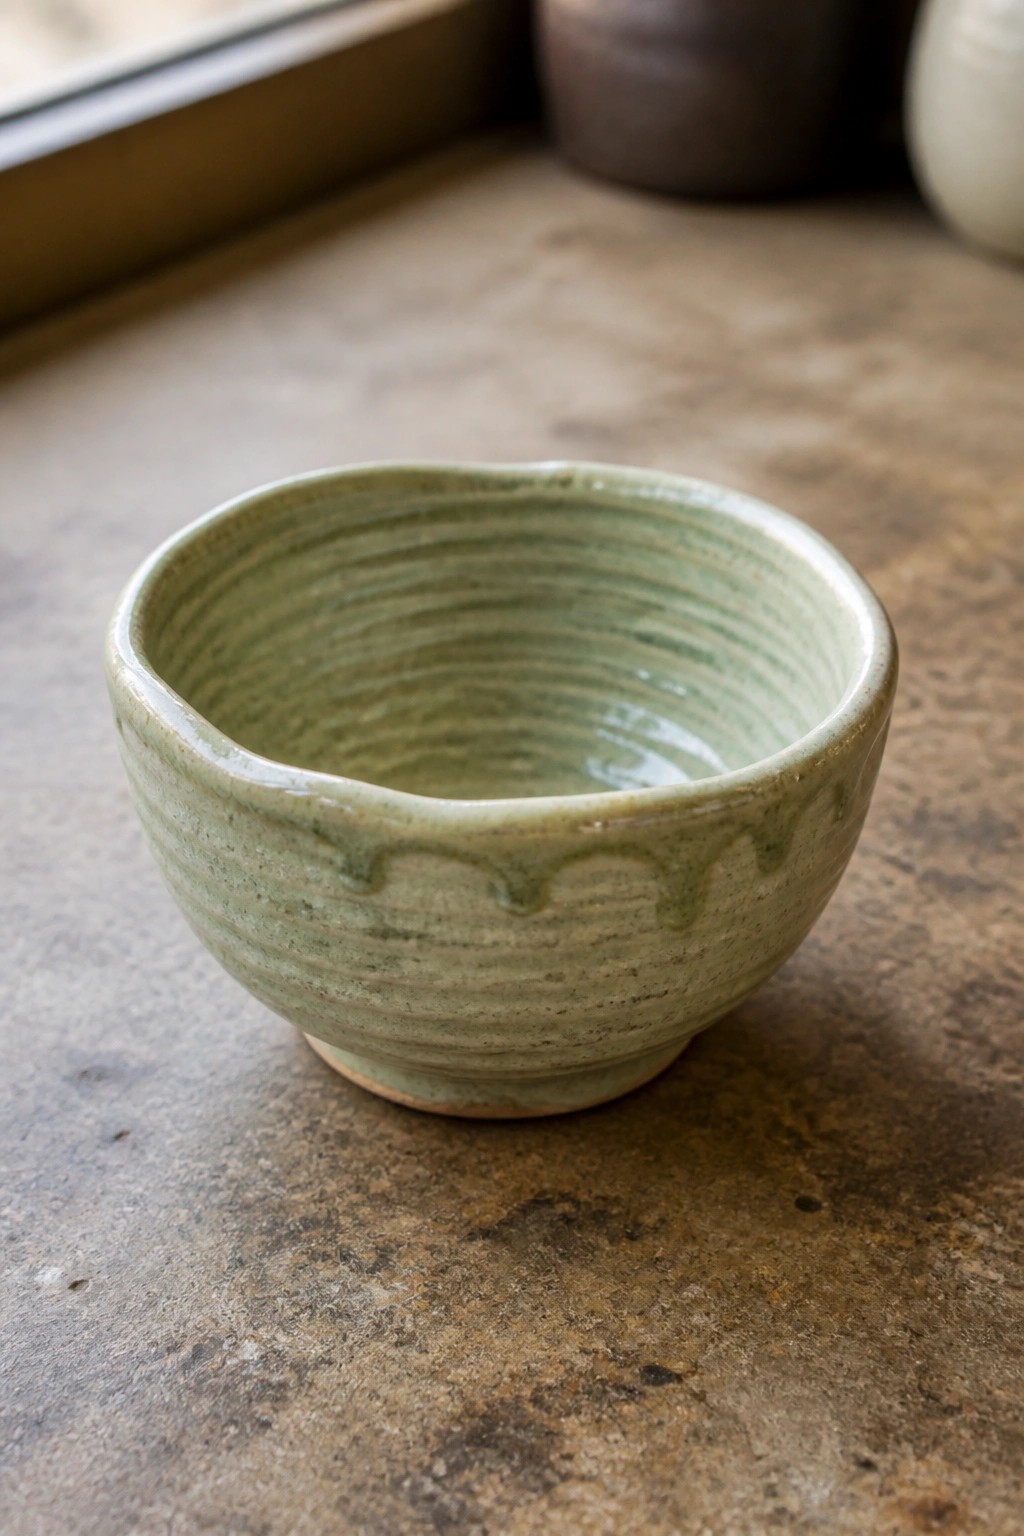
A small thrown bowl that leaves the horizontal wheel ridges exposed under a light green glaze creates built-in texture across the entire surface. The glaze is applied so it breaks over the ridges and runs into a series of controlled drips along the outer rim, giving the edge an irregular, organic line. This combination works because the ridges provide consistent linear detail while the drips add variation in thickness and color without requiring extra carving or stamping.
What makes this idea useful is that the texture comes directly from the throwing process, so you can focus on timing the glaze application to control how far the drips travel. The shape works especially well as a small prep or sauce bowl that sits nicely on a counter or table without taking much space. You could repeat the same ridged surface and drip rim on a set of stacking bowls or adapt the drip detail alone onto the foot of a taller vessel for a subtler version.
Crackled Glaze on a Spouted Bowl
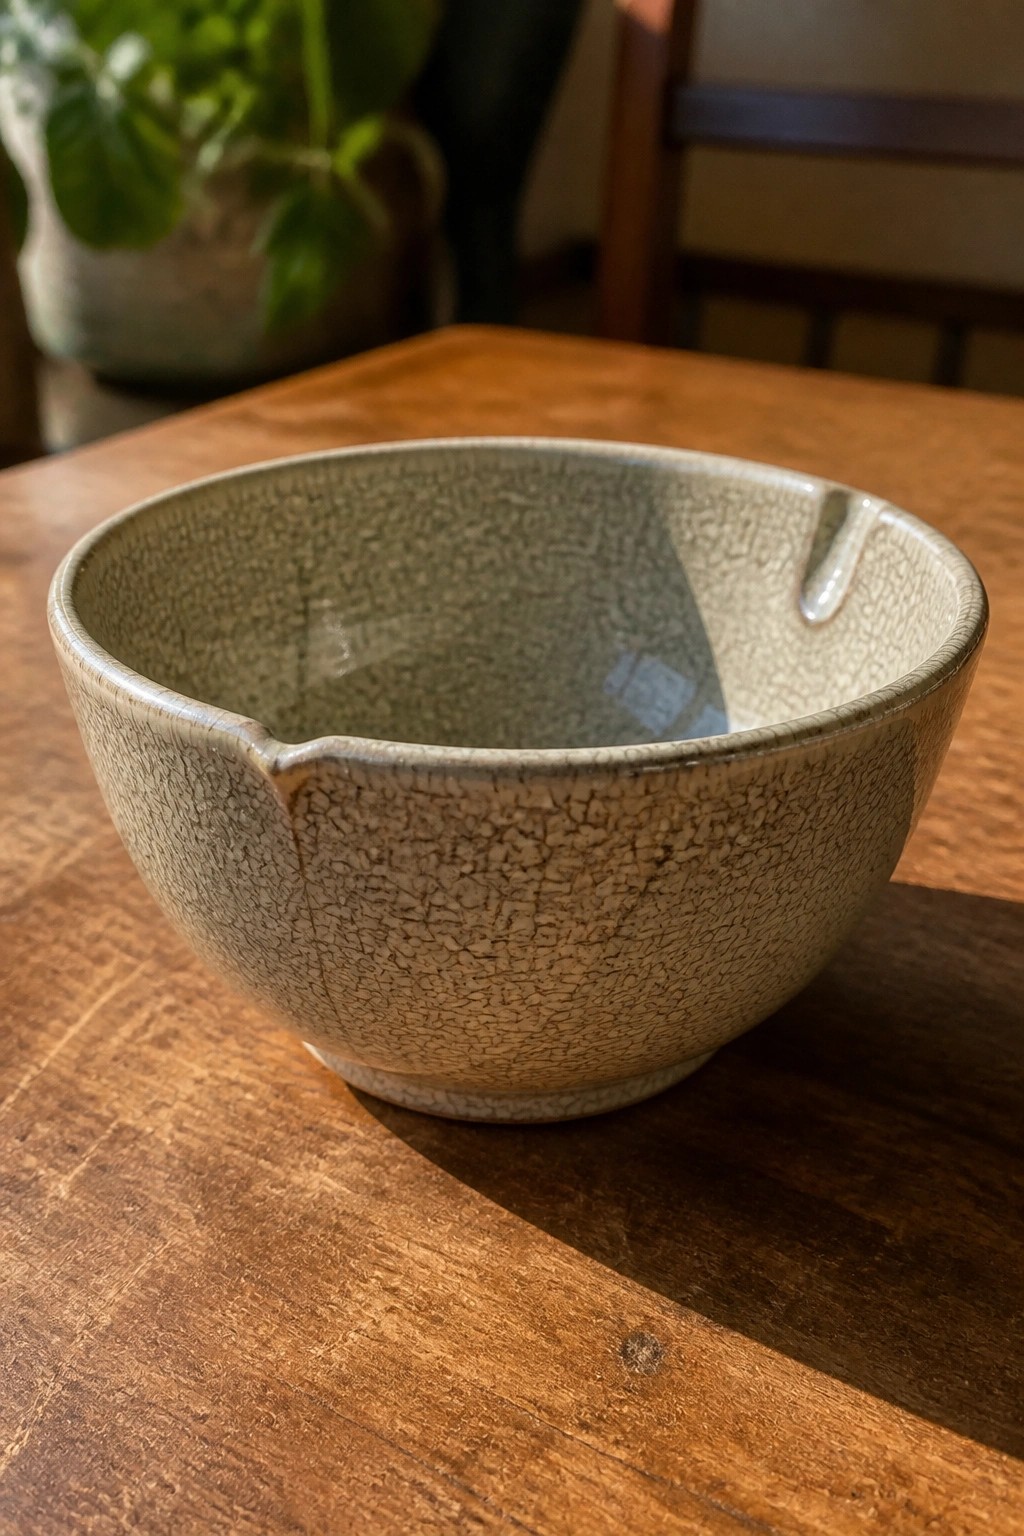
A ceramic bowl finished with a crackled glaze produces a fine network of lines that add texture across the entire surface. The shape includes a small pouring lip cut into the rim, which turns the bowl into a functional piece for dressings or sauces. This combination pairs a simple surface treatment with one practical detail that keeps the form clean.
What makes this idea useful is how the crackle texture works on a standard bowl size without extra carving or color layers. You could repeat the same glaze on a set of smaller prep bowls or add the lip detail to a larger serving bowl for variety. In a kitchen, the piece fits well for both daily use and open-shelf display, and the same crackle approach can be scaled down for ring dishes or small condiment holders.
Coiled Rib Texture on a Large Bowl
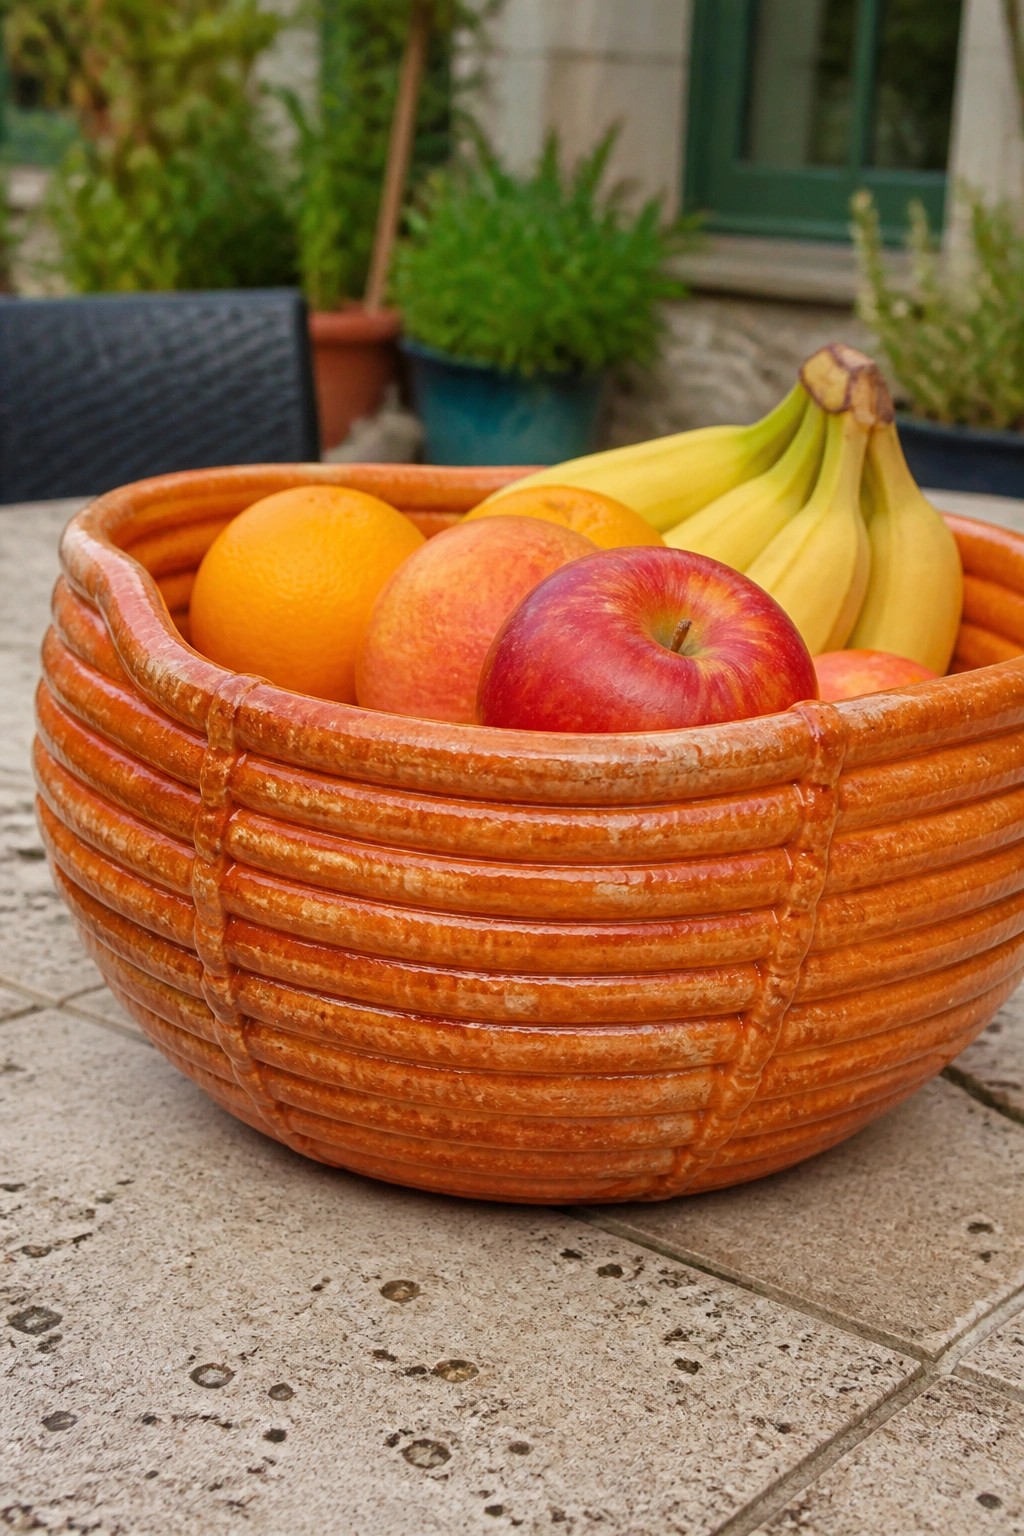
A ceramic bowl formed with stacked horizontal coils produces a ribbed exterior that gives the surface clear texture and shadow lines. The glossy orange glaze sits over the ridges without filling them in, so each layer stays visible while the inside remains smooth for holding fruit or other items. This method works well for a sturdy, medium-to-large bowl that doubles as both a kitchen piece and a decorative object.
The wide shape supports heavier contents like fruit without tipping, and the single glaze color lets the coil texture stand out on its own. You could adapt the same rib pattern to a smaller bowl by using thinner coils or pressing shallow grooves into a thrown form before glazing. In a kitchen setting this size handles everyday use while still looking intentional on a counter or table.
Impressed Spiral Motifs on Small Pink Bowls
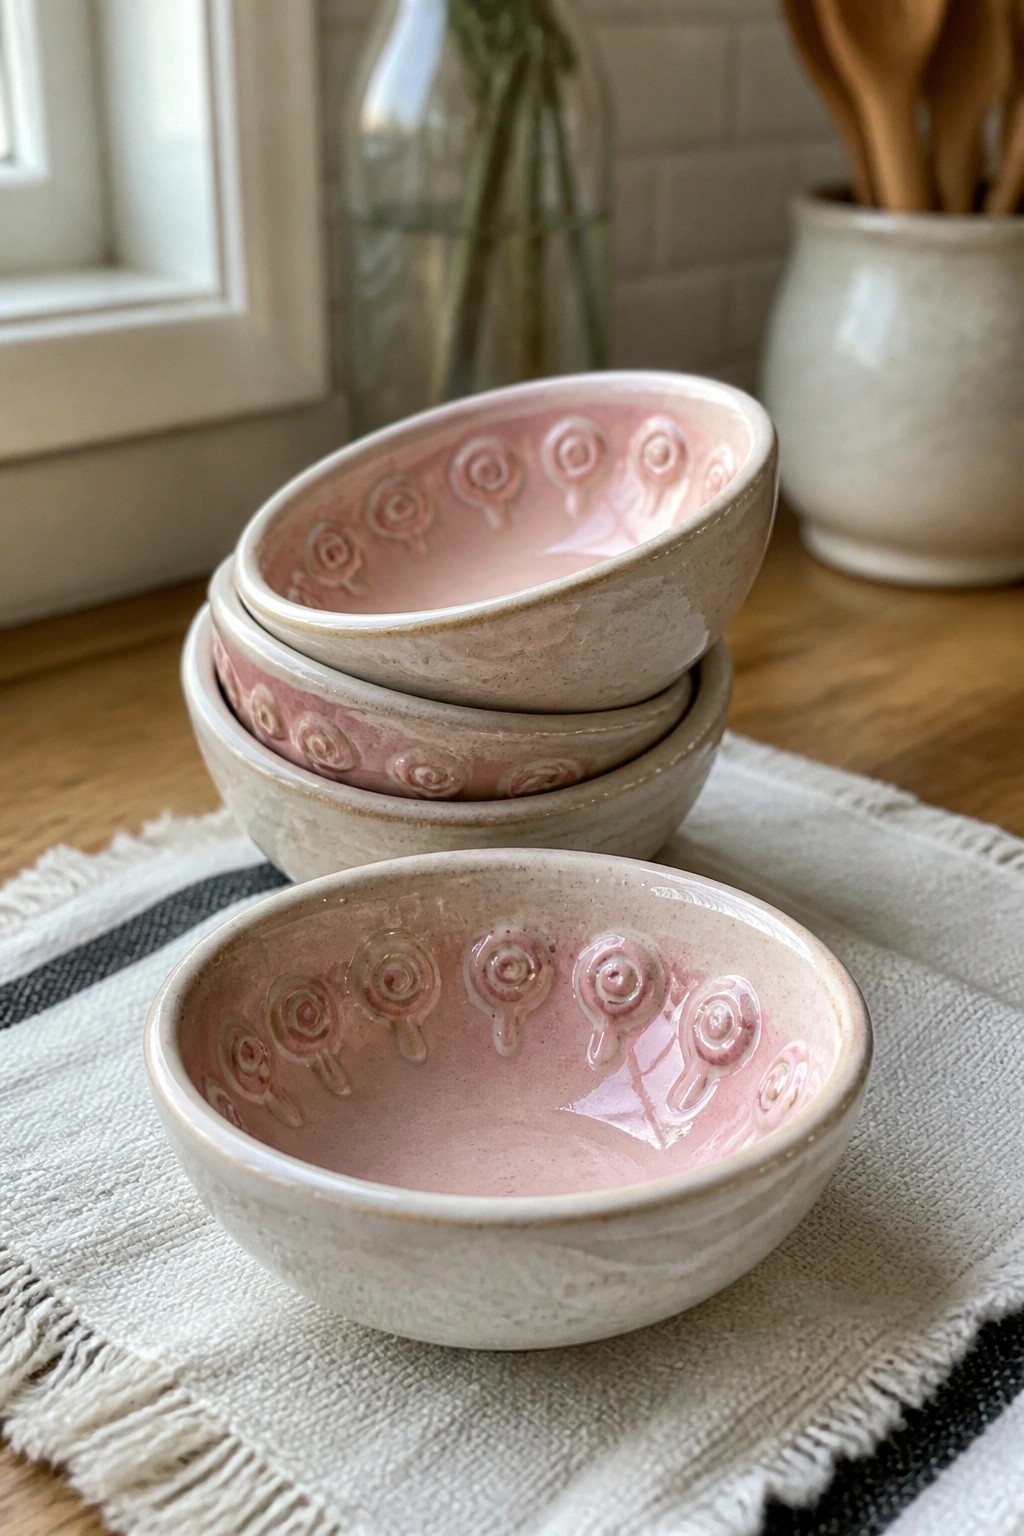
Small bowls gain a clear focal point when circular spiral shapes are impressed into the clay around the inner rim. The pink glaze pools slightly in the recessed areas and makes the raised details stand out against the smoother center. This keeps the surface textured yet practical for holding food or small items.
What makes this idea useful is how the motif stays limited to the rim so the bowl center remains easy to clean and use. The same impressed spirals can be repeated on different sizes for nesting sets or adapted to other simple stamps like lines or dots. In a kitchen these bowls suit dips, snacks, or prep work where the pattern is visible when the bowl sits empty on a counter.
Openwork Scalloped Rim on a Mottled Bowl
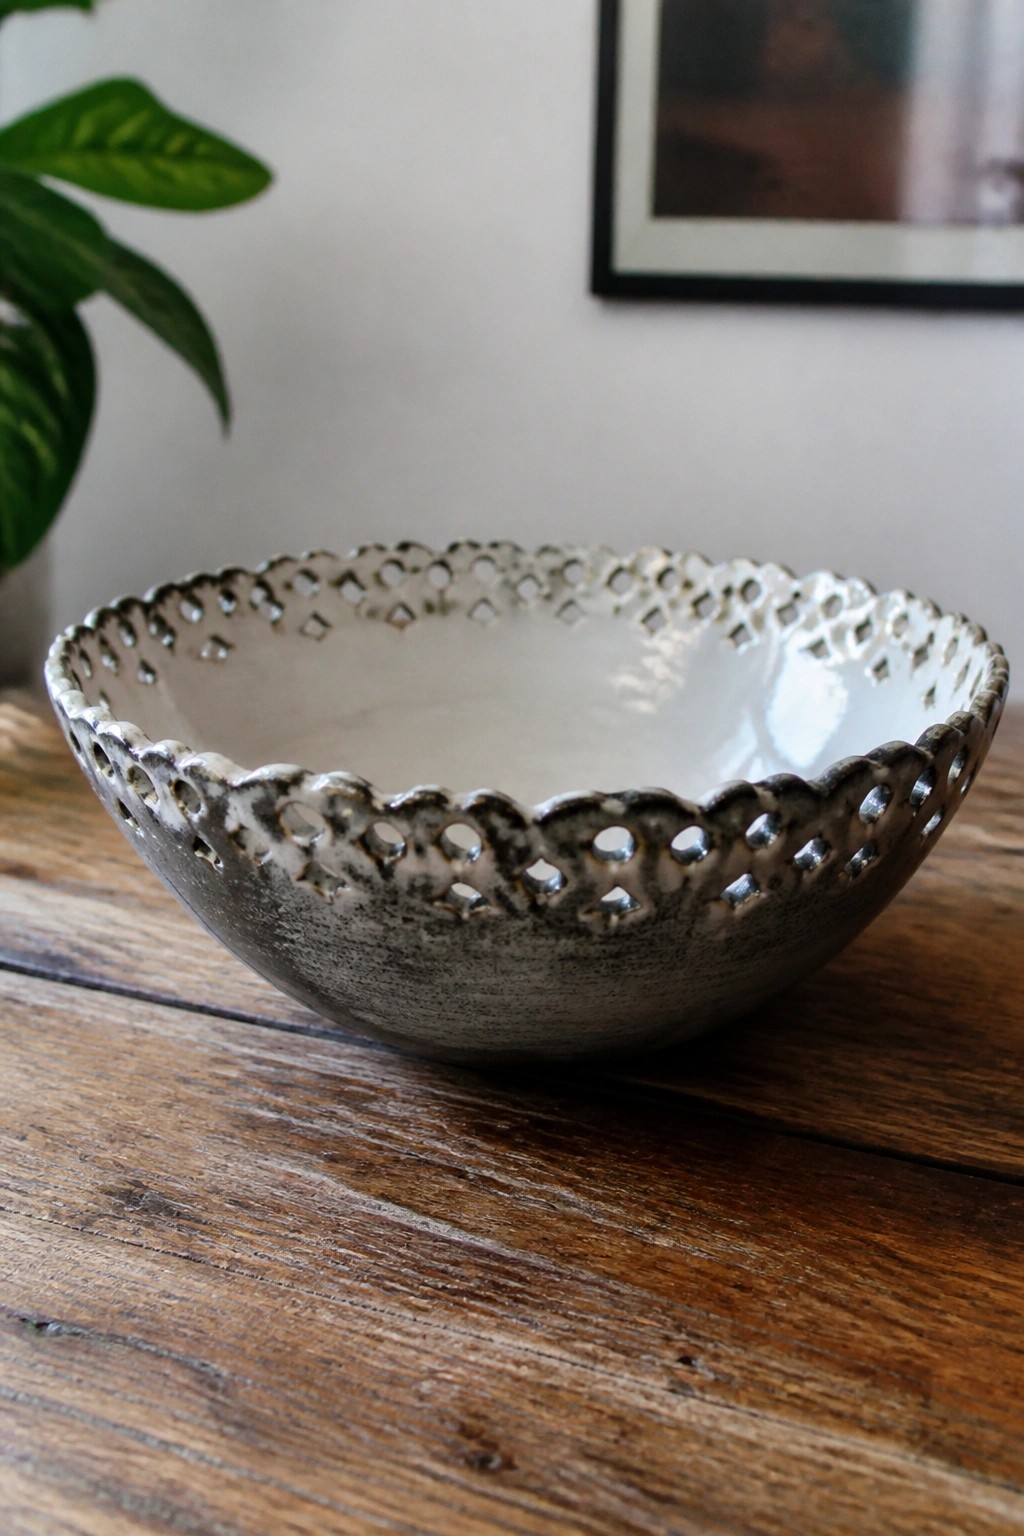
A wide ceramic bowl uses a repeating series of small geometric cutouts along the rim to create an openwork edge. The rim itself is scalloped, and the glaze shifts between gray and off-white tones that settle into the carved areas to highlight the contrast between solid clay and the pierced sections. This approach keeps the main body simple while turning the rim into the main decorative feature.
The shape works especially well as a fruit bowl or decorative catch-all on a table because the cutouts let light through and add interest from any angle. You could scale the same rim pattern down for smaller serving dishes or adapt the spacing of the holes for a planter where drainage and airflow matter. The glaze variation already emphasizes the texture, so the idea stays effective even if you keep the rest of the form plain.
Dimpled Texture on a Compact Bowl
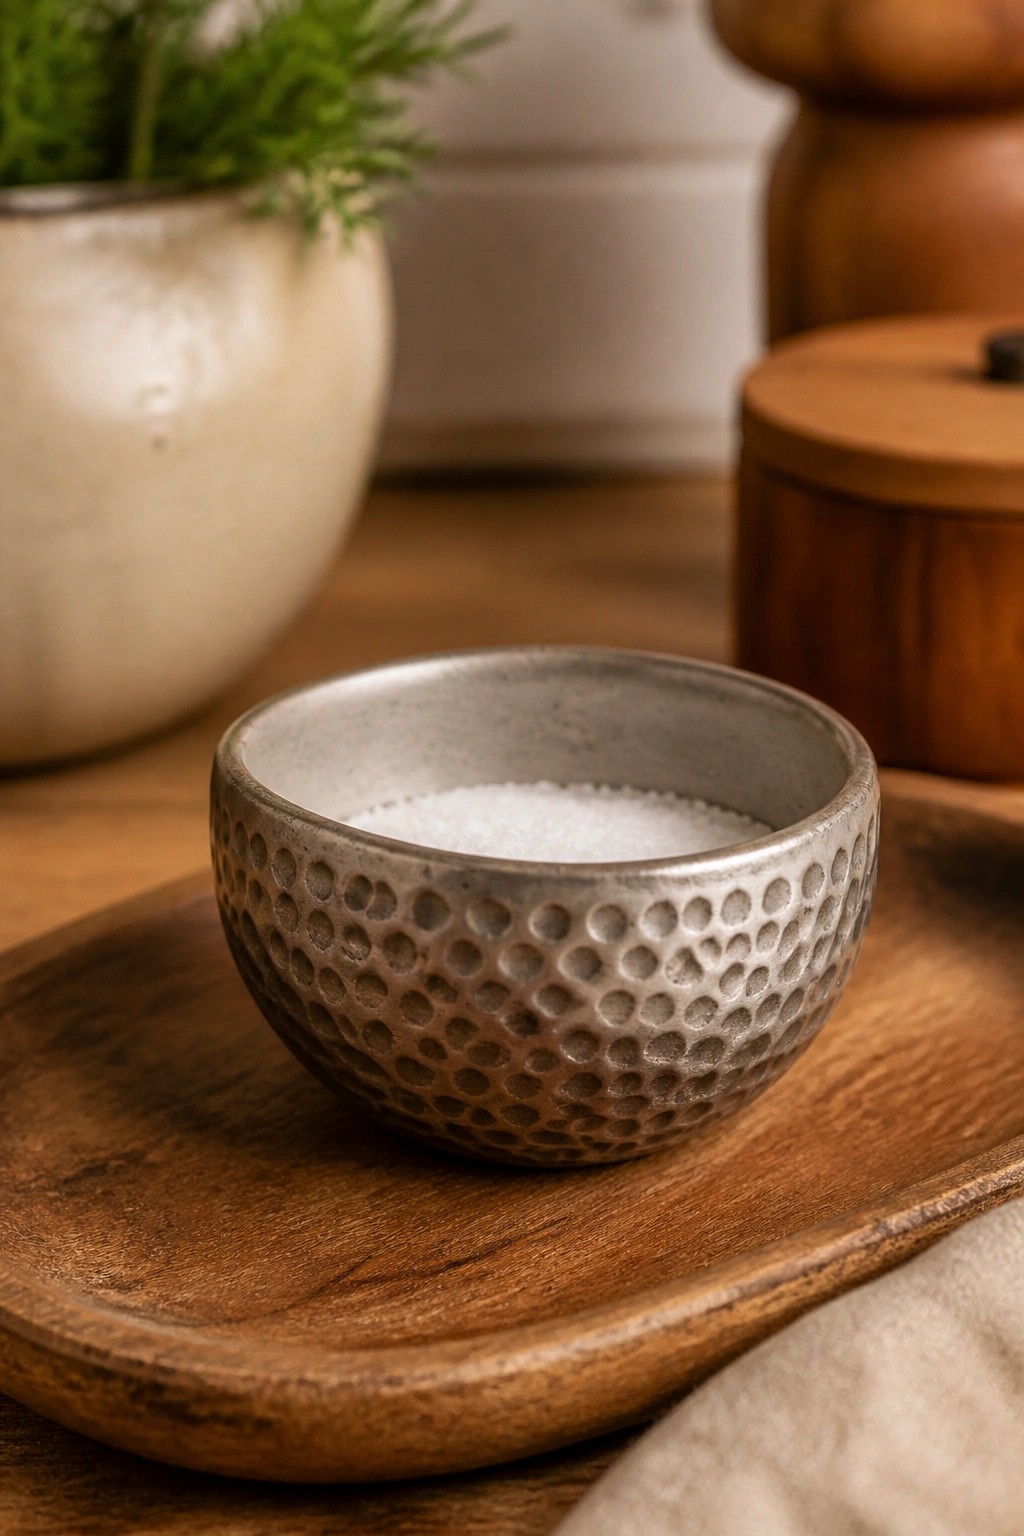
A small ceramic bowl becomes more engaging when the surface is covered with a repeated dimple pattern created by pressing rounded shapes into the clay. The metallic gray glaze sits in the recesses and highlights the edges, so the texture shows up clearly without extra color or carving. This approach works well for a kitchen piece meant to hold salt, sugar, or small snacks. The idea belongs in the texture category because the surface pattern itself carries the design.
What makes this idea useful is how the dimple pattern can be applied with basic household items like a rounded tool or stamp before the piece is glazed. In a kitchen setting the small scale keeps it practical for daily use while the texture helps it stand apart from plain bowls. You could rework the same surface treatment on a larger dip bowl or a set of ramekins using a different glaze color. The compact size also makes it a fast way to experiment with texture before committing to bigger forms.
Speckled Texture on a Shallow Ceramic Bowl
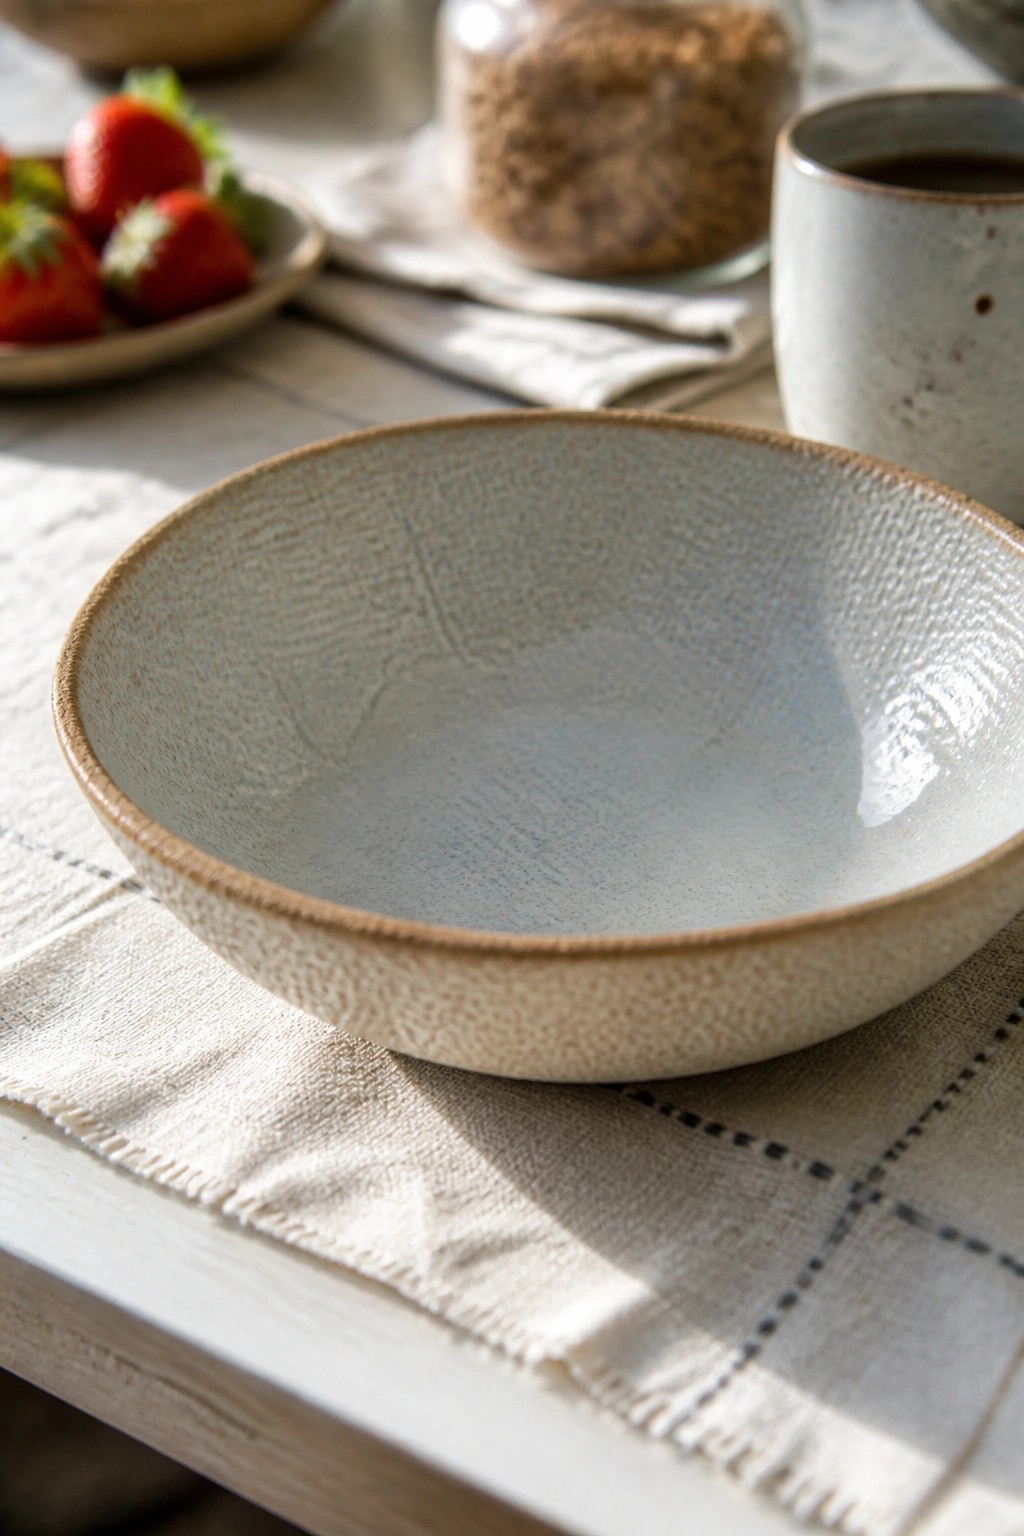
A shallow bowl made from stoneware or similar clay features a heavily stippled exterior surface that creates a rough, light-catching texture across the entire form. The interior carries a soft blue-gray glaze that remains mostly smooth while the rim is wiped back to the natural clay color for a simple edge detail. This approach keeps the focus on surface variation rather than added decoration or color patterns.
The shape does a lot of the work here because the wide, low profile lets the texture show clearly without competing elements. You could adapt the same stippled exterior by pressing a textured cloth or stamp into the clay before the first firing and then choose any neutral glaze inside. This kind of bowl works well as a fruit or snack server on a table since the matte outside resists fingerprints better than a fully glossy piece. For a different version, try the same texture treatment on a deeper mixing bowl or a set of smaller side dishes to keep the surface idea consistent across the collection.
Streaky Gradient Glaze Bowl
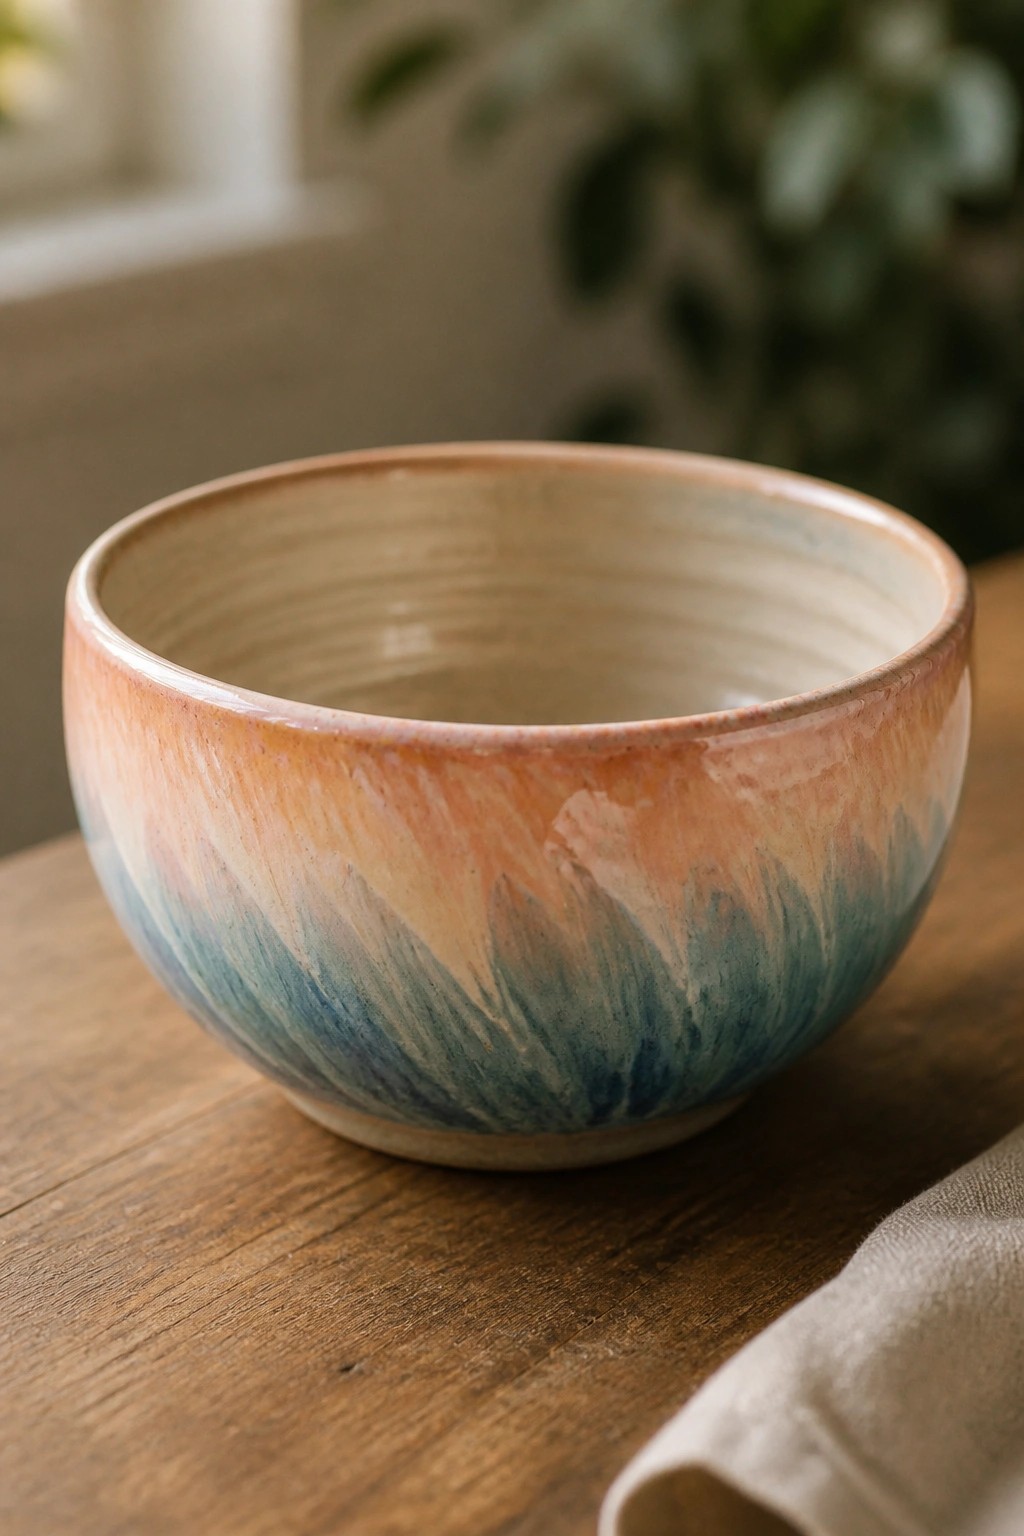
A ceramic bowl finished with a blended glaze that shifts from peach and orange near the rim into teal and blue toward the base. The glaze was applied to create soft, streaky lines that run vertically and give the surface movement through color variation alone. This fits the category of everyday bowls where the glaze pattern supplies the main detail instead of added carving or texture.
What makes this idea useful is how the smooth, rounded shape lets the glaze colors stand out without competing details. You could scale the same blending method down for smaller prep bowls or try different warm-to-cool color pairs to suit your dishes or table linens. The approach works well as a starter project because it relies mainly on glaze behavior rather than advanced forming skills.
Nesting Bowls with Stamped Triangle Texture
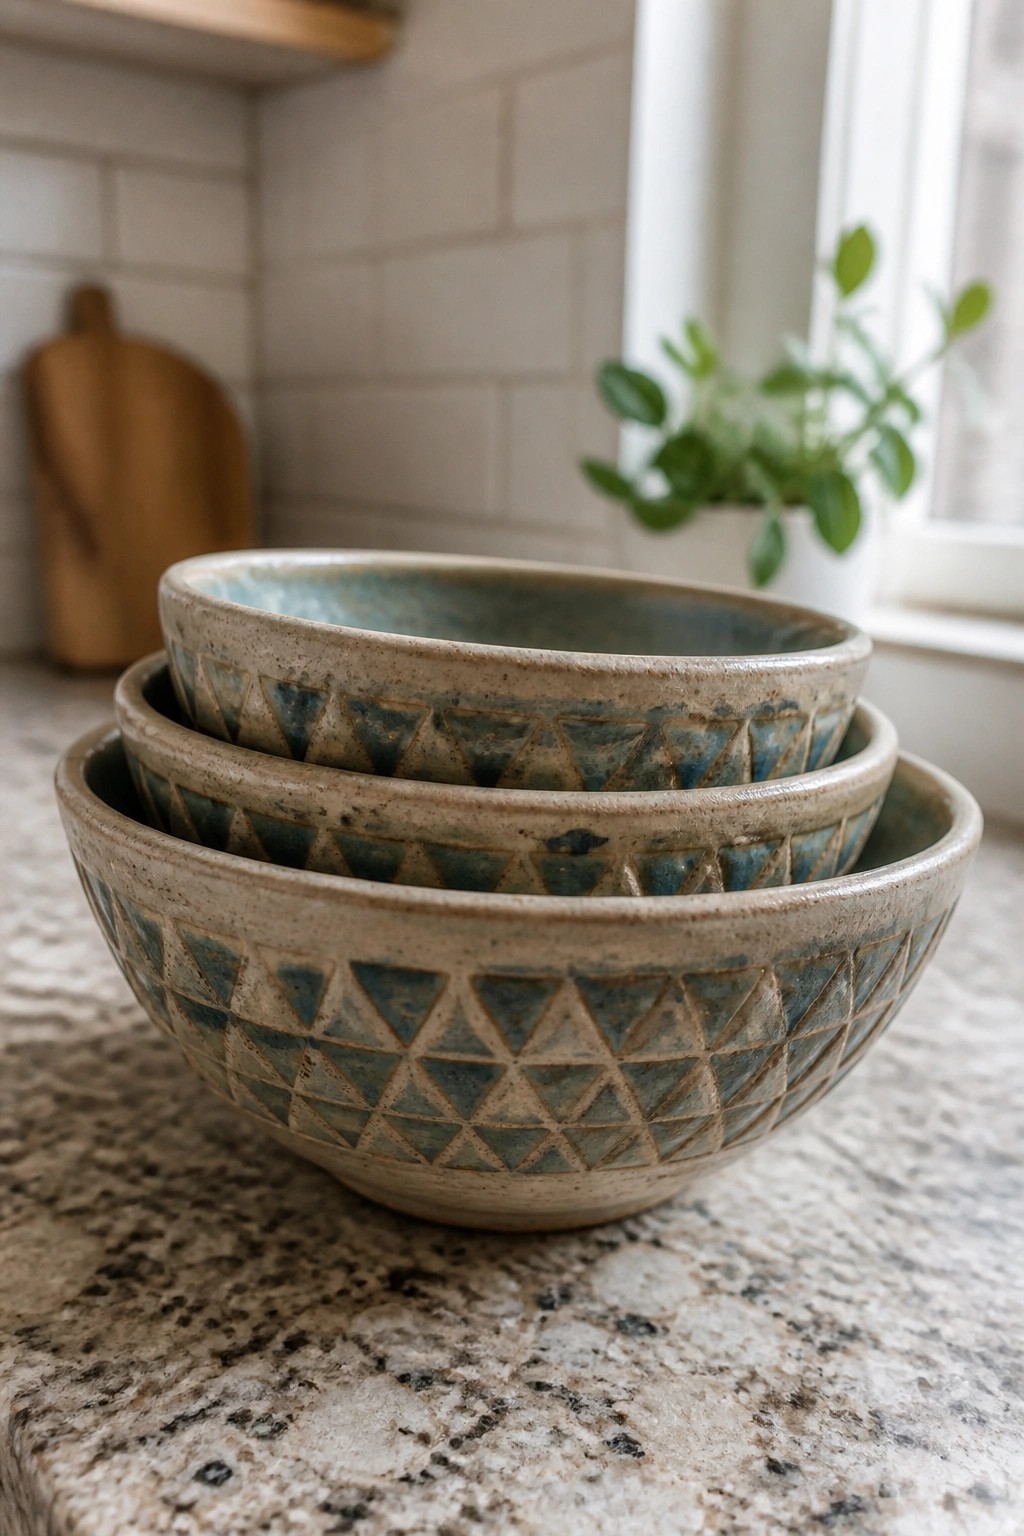
These ceramic bowls use a repeated triangle stamp pressed into the leather-hard clay before glazing. The triangles are arranged in offset rows that cover most of the exterior, and a blue-green glaze pools in the recessed areas while the raised clay stays a lighter speckled tone. The result is a clear geometric pattern that reads well from a distance yet still shows the handmade surface when viewed up close. Nesting sets like this keep the same motif across different sizes so the collection looks intentional rather than random.
What makes this idea useful is that the stamp can be made from a simple piece of clay or wood and reused on any round form. You could apply the same triangle layout to a set of plates or a single serving bowl without changing tools. In a kitchen the textured exterior gives a bit more grip when the bowls are wet, and the pattern helps minor scratches blend in. The approach also works for gifts because one stamp creates a coordinated look across multiple pieces without extra painting time.
Leaf Vein Impressed Bowl
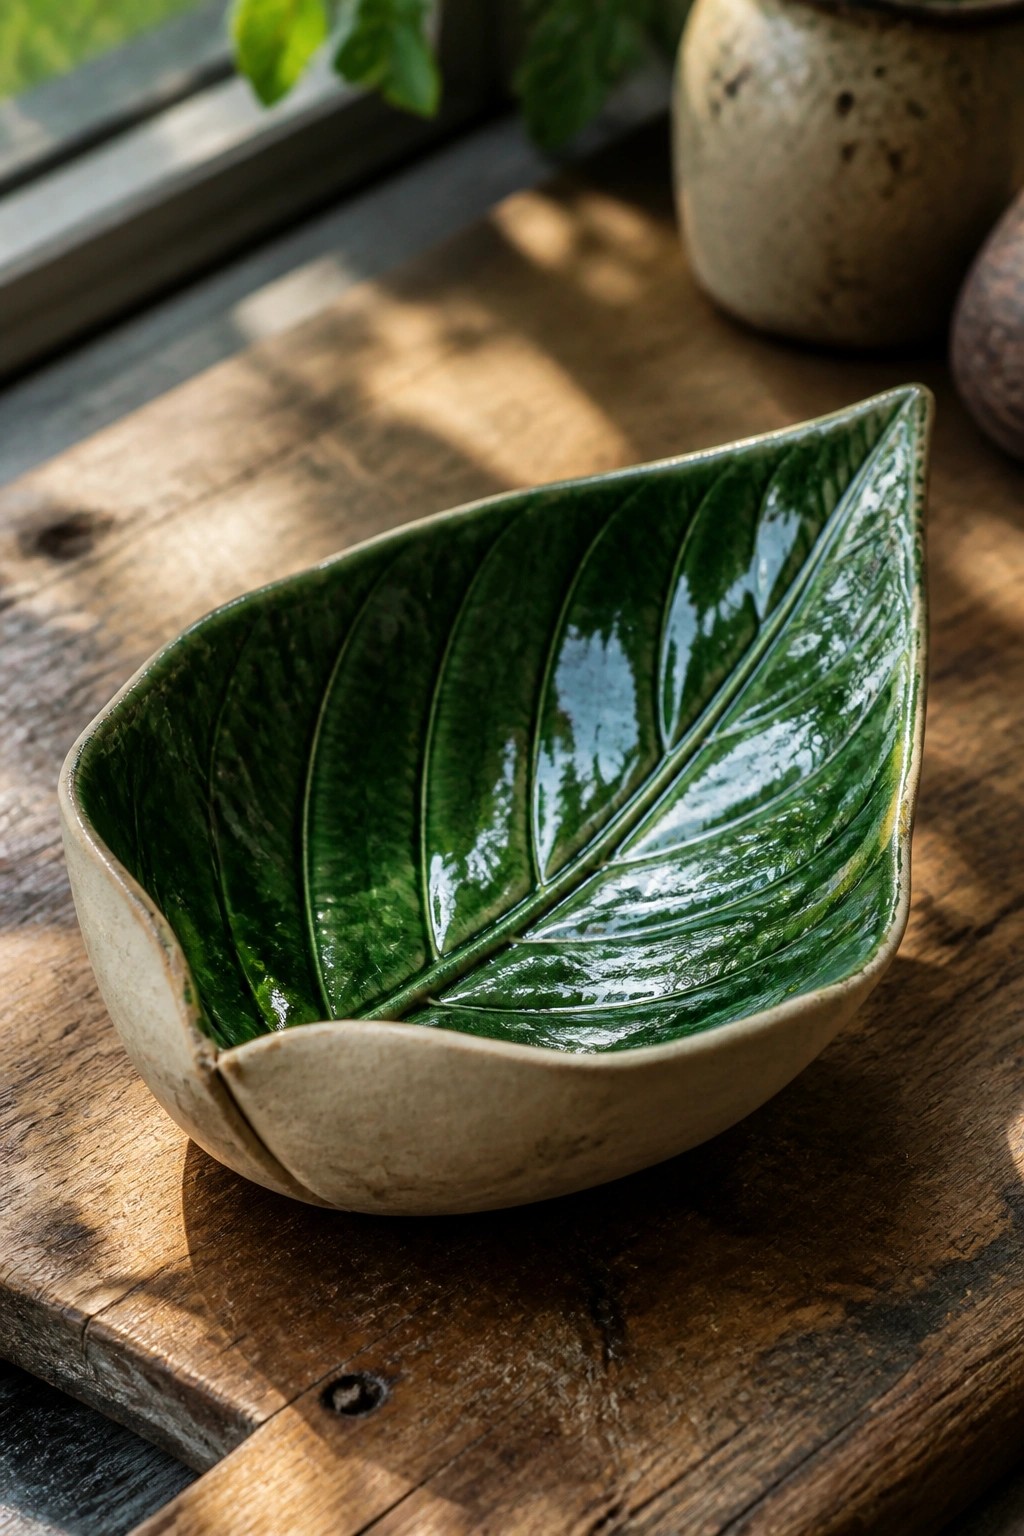
A shallow bowl formed in the shape of a leaf gains its main detail from pressing a real leaf into the clay to capture the vein pattern. The interior is then coated with a glossy green glaze that settles into the recessed lines while the rim stays unglazed and matte. This keeps the piece simple yet clearly handmade and gives it a functional shape that still reads as decor.
The shape does a lot of the work here because the outline and texture already supply the interest without added painting. You could use the same impression method on a round bowl or a small tray for keys or jewelry. The two-tone glaze treatment also adapts easily if you want to try different leaf sizes or switch the interior color to match a specific room.
Speckled Dotted Texture on a Small Kitchen Dish
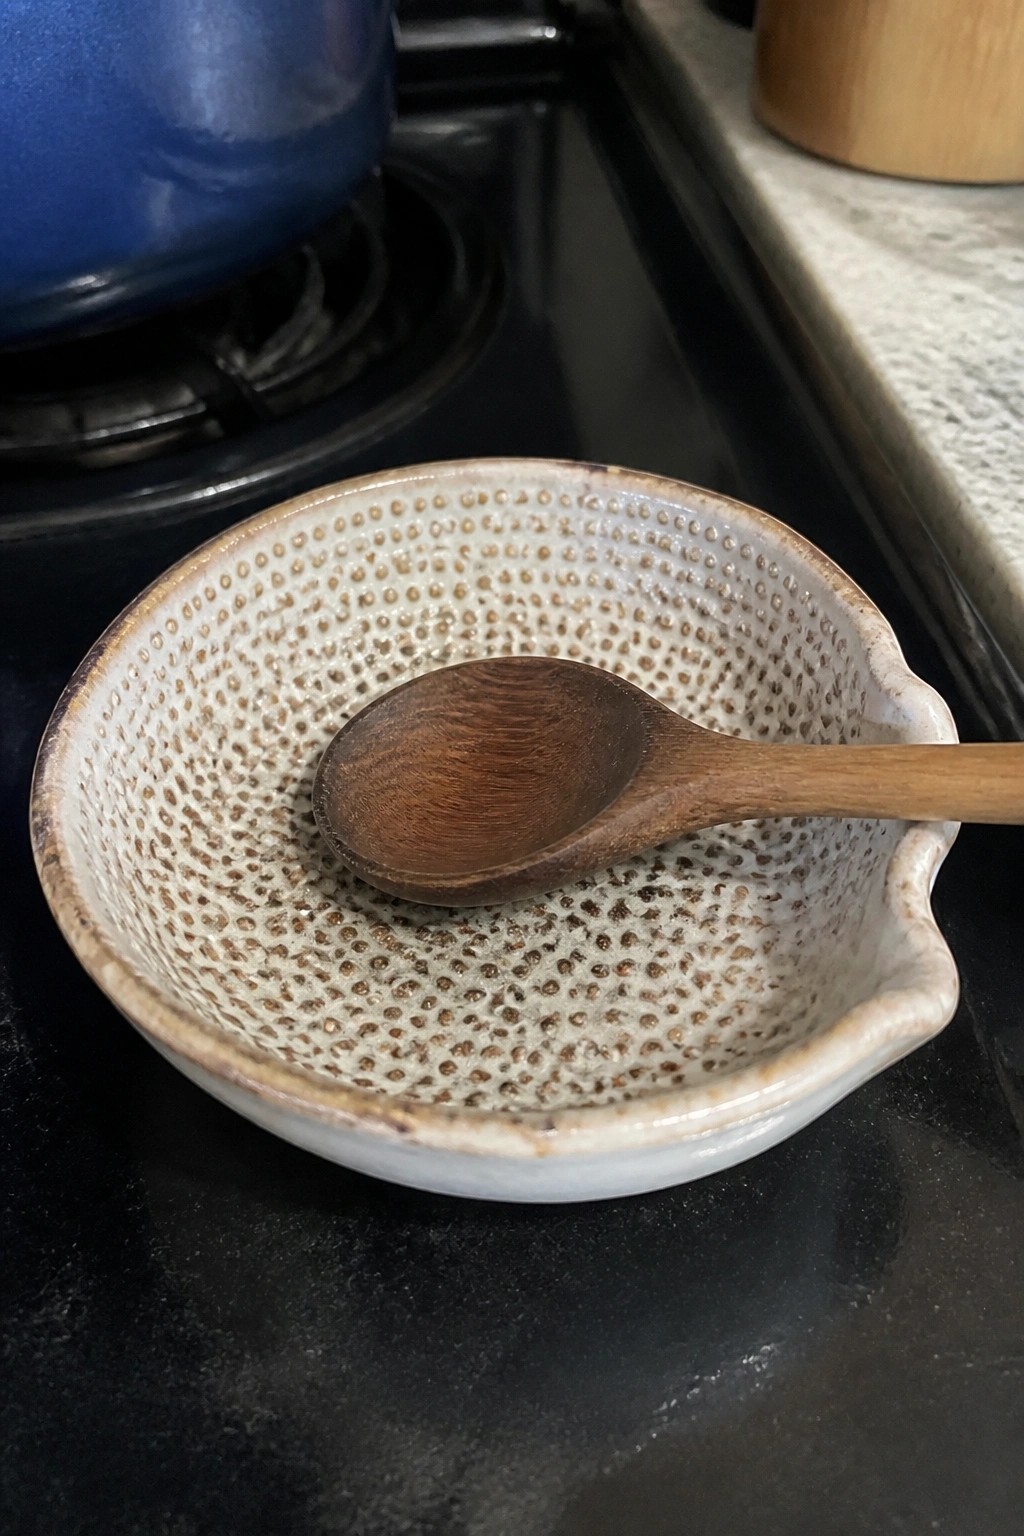
A compact ceramic bowl finished with an all-over pattern of small brown dots creates a functional kitchen piece that doubles as a spoon rest or condiment holder. The dense speckling covers the interior surface evenly and gives the form a consistent texture that reads clearly even on a small scale. This approach keeps the design simple while making the bowl distinct from plain glazed pieces through the repeated surface detail alone.
What makes this idea useful is that the pattern works on any size bowl without needing extra shaping or carving. You could repeat the same dot spacing on a set of ramekins or stretch it across a larger mixing bowl for a matching look. The shape also lends itself to quick adaptations like adding a small notch in the rim for spoon storage. In a kitchen this kind of textured dish holds up well to daily use because the dots hide minor wear better than solid glazes.
Sculpted Frogs on a Bowl Rim
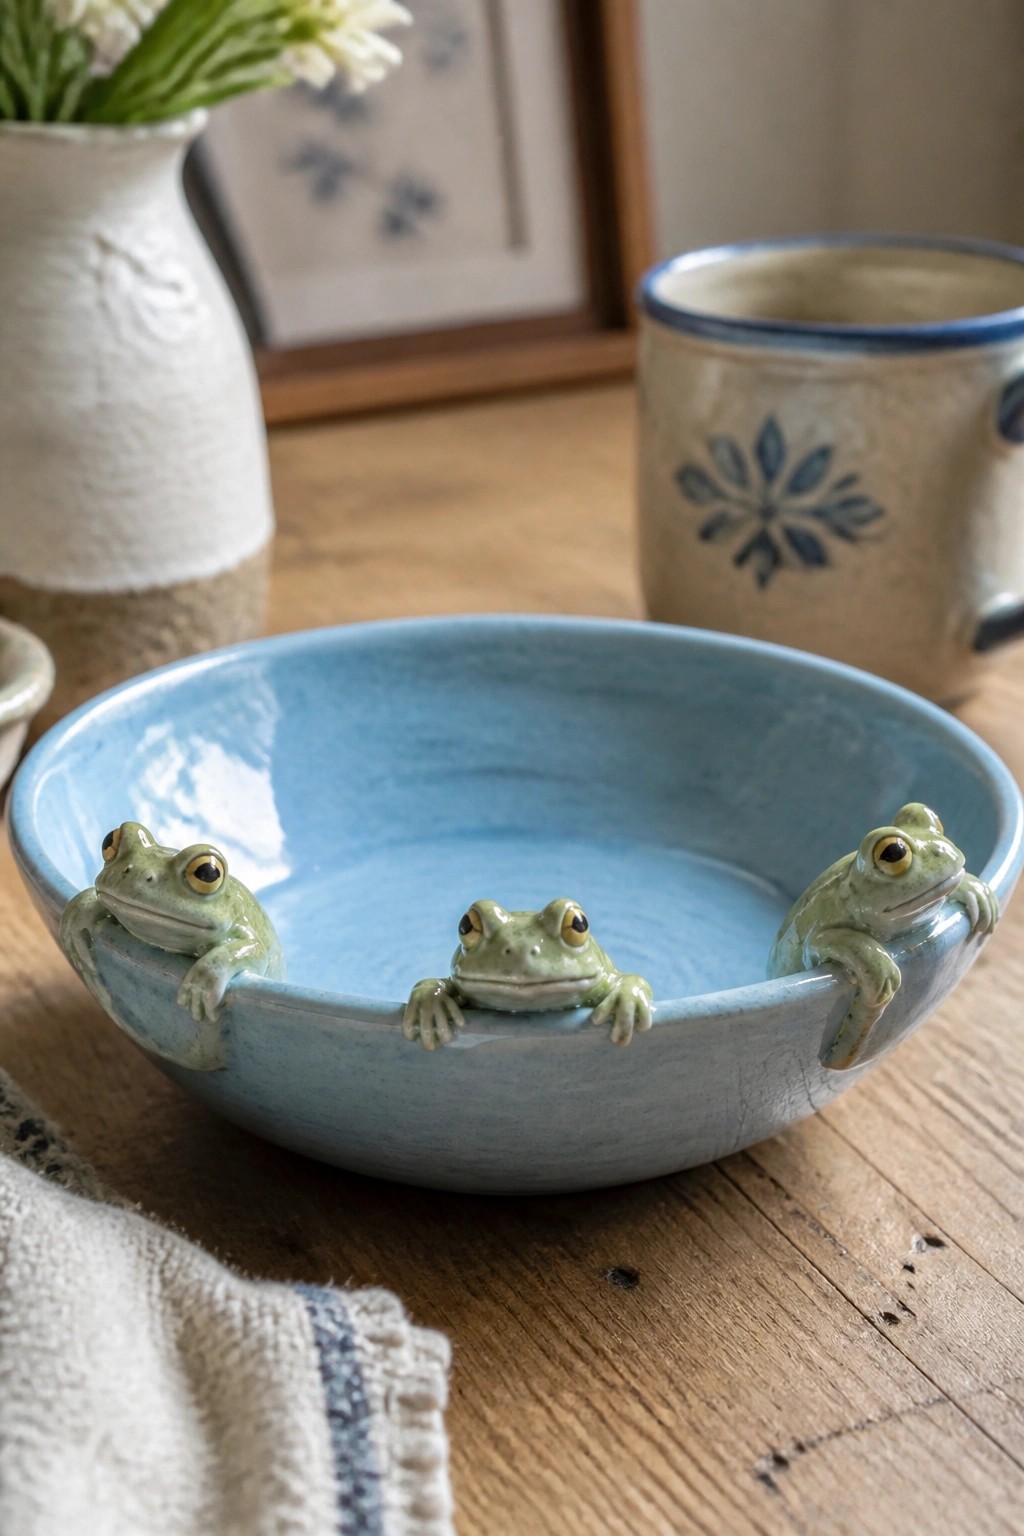
A medium bowl gets its main detail from three small frogs sculpted right onto the rim so they appear to be climbing over the edge. Each frog is formed as a separate piece then attached before glazing, with the green matte finish on the figures set against the blue glaze on the rest of the bowl. This keeps the interior surface smooth and usable while turning the rim into the focal point. The approach fits the category of a decorative serving bowl where the sculpted detail stays limited to one area.
What makes this idea useful is that the frogs take up very little space yet change how the bowl reads on a table or shelf. You can adapt the same rim technique with different animals or reduce it to one or two figures if three feels busy. In a kitchen this bowl works for snacks or fruit while still looking distinct from plain glazed ware. The same rim sculpture method could move to a planter or a larger serving dish if you want the detail to stand out more on open storage.
Mosaic Tile Band on a Speckled Bowl
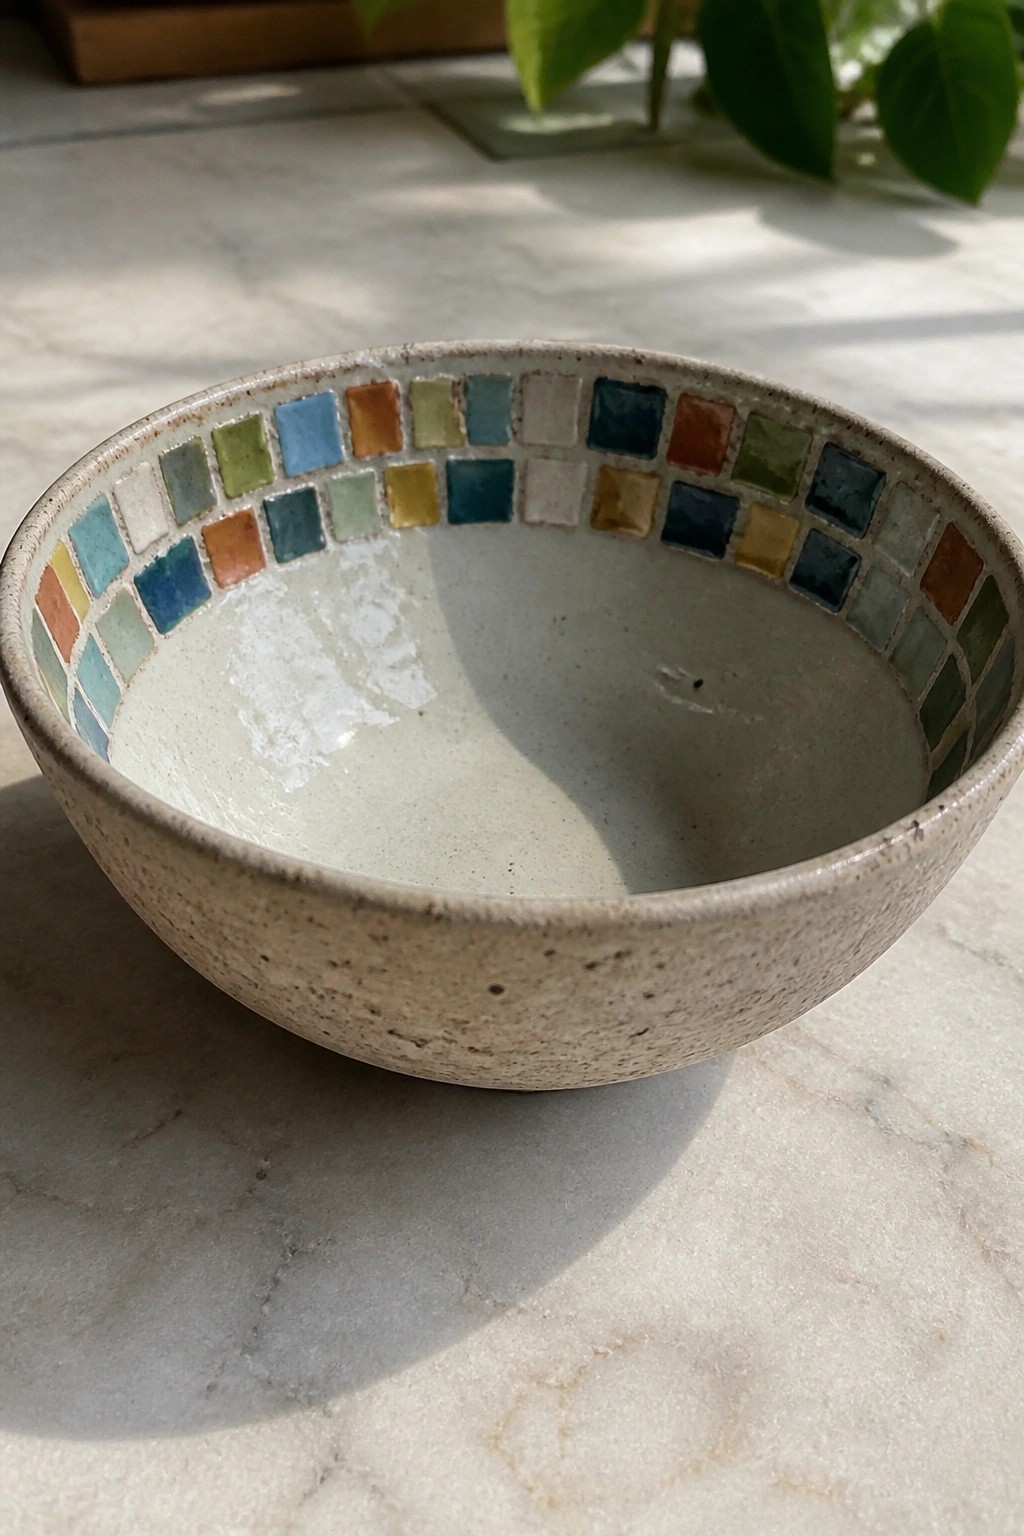
A ceramic bowl uses a narrow row of small square tiles in mixed colors to create a decorative border right below the rim. The tiles sit against the natural speckled clay while the inside stays smooth and white. This keeps the focus on the rim detail without covering the whole surface.
What makes this idea useful is how the narrow band lets you add color without complicating the form. The same approach works on serving bowls or small planters by swapping in different tile shades to match a room. You could simplify it further by using only two or three colors or extend the idea to a tray by running the mosaic along the edge instead.
Speckled Glaze Bowl with Notched Rim
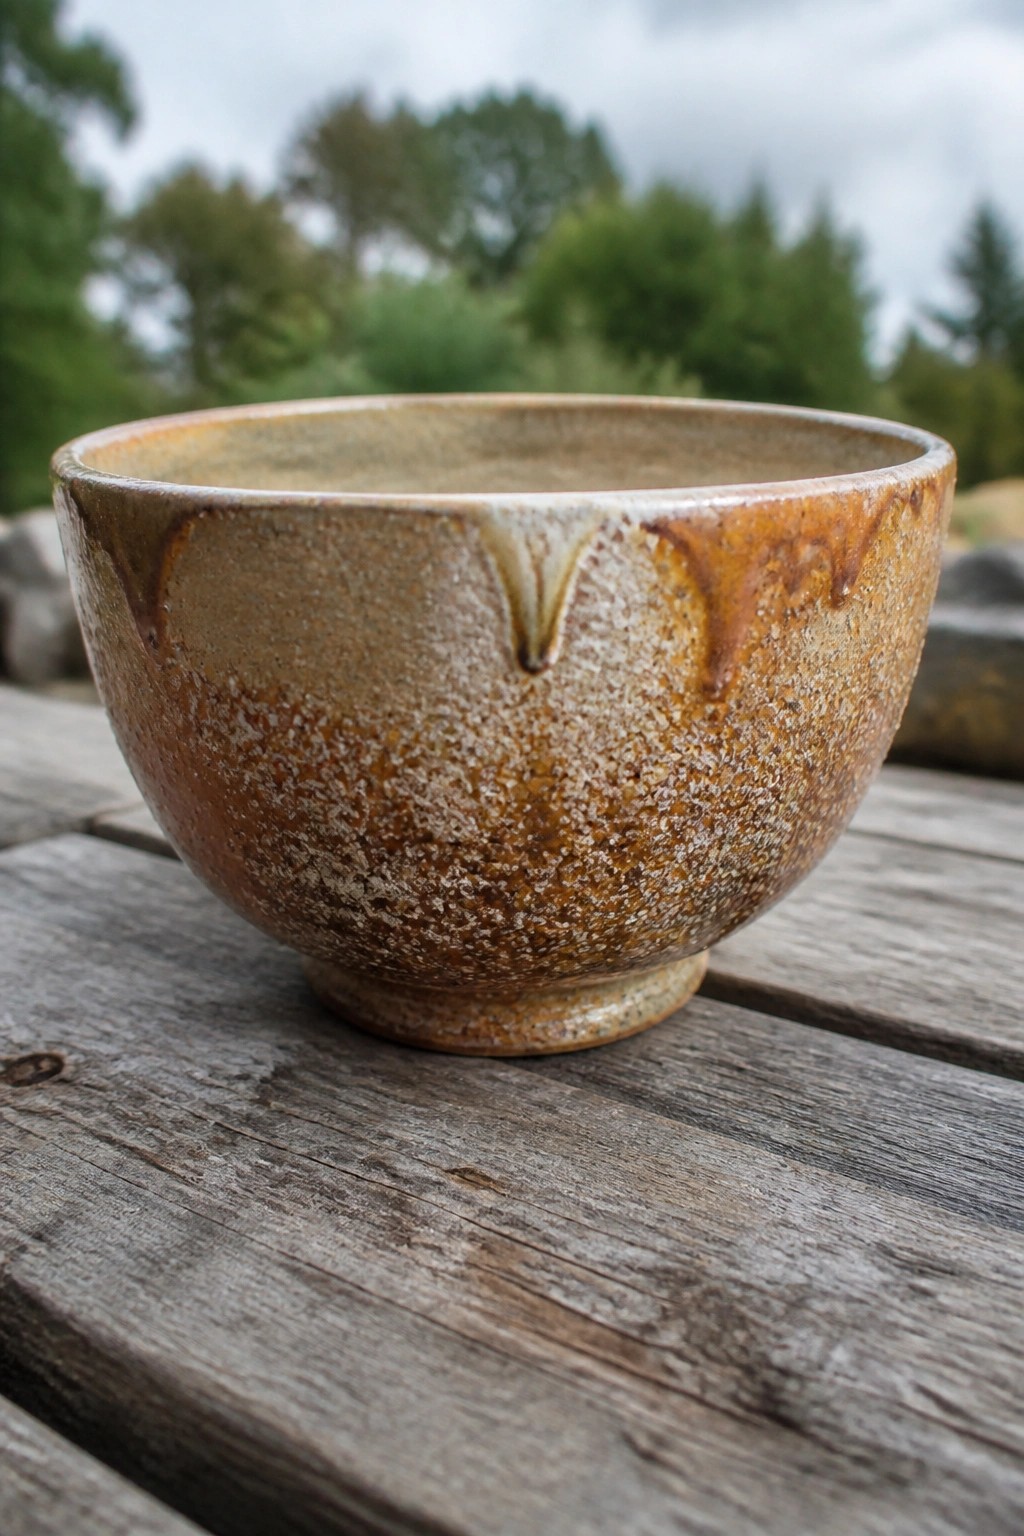
A wheel-thrown ceramic bowl can gain strong visual interest from a single variegated glaze that fires to a mottled mix of brown, tan, and orange with a gritty, speckled surface. The small V-shaped notch cut into the rim breaks the smooth circle and creates a focal point without adding separate pieces or handles. This combination keeps the form simple while the surface and rim detail do the work of making the bowl look finished and intentional.
What makes this idea useful is how the glaze texture and rim notch turn a basic bowl shape into something that stands out on a table or shelf. The same approach works for a small serving bowl in the kitchen or a larger one for fruit or snacks. You could repeat the notch on opposite sides for balance or skip it on a second bowl to create a matching set with subtle variation. The earthy color range also mixes easily with other wood or stone pieces already in a space.
Frequently Asked Questions
What tools work best for adding texture and fine details to pottery bowls? Common household items like forks, sponges, lace fabrics, and even leaves can press interesting patterns into wet clay. For more precision, try carving tools or rubber stamps designed for ceramics. Experiment on test tiles first to see how each tool interacts with your clay body before committing to a full bowl.
How do I keep intricate textures from smoothing out or cracking during the drying and firing stages? Allow the bowl to dry slowly under plastic wrap to control moisture loss evenly. Once leather hard, reinforce deep textures with a thin slip layer if needed. Fire at the clay’s recommended temperature and avoid rapid temperature changes in the kiln to preserve sharp details without distortion.
Which glazes or finishes best highlight texture rather than hide it? Matte or satin glazes tend to settle into crevices and emphasize raised areas, while avoiding thick, glossy coats that can fill in details. Apply glazes thinly with a brush in multiple light layers, and consider wax resist on textured spots to keep them unglazed for contrast.
Are these decorating ideas suitable for beginners or do they require advanced skills? Many texture techniques start simple, such as pressing objects into soft clay or basic carving, making them accessible right away. Beginners should practice on small bowls or scraps to build control before attempting complex layered designs that combine multiple textures.
How do I clean and maintain textured pottery bowls for long term use? Hand wash with mild soap and a soft brush to reach into grooves without scratching. Avoid dishwashers if the piece has delicate carved details, and store away from direct sunlight to prevent glaze fading over time.

Pottery Path is my cozy corner of the internet where I share clay ideas, pottery inspiration, and simple projects you can recreate at home. I love exploring everything from air dry clay to handbuilt pottery to cute minis that brighten your day. My goal is to make clay crafting feel easy, fun, and welcoming for anyone who wants to try it.
You will find beginner friendly tutorials, creative pottery painting ideas, and lots of warm inspiration for slow and happy crafting. If you enjoy hands on creativity, this space will feel like home.