Have you ever wondered why your garden isn’t thriving like you hoped? You’re not alone. Many gardeners face the challenge of poor soil quality, which can lead to disappointing results. Understanding what’s happening beneath the surface is key to nurturing healthy plants.
Key Takeaways
- Understand Soil Health: Soil test kits provide critical insights into nutrient levels and pH, helping gardeners determine the right amendments for healthier plants.
- Proper Sample Collection: Collect soil samples from multiple locations and at the appropriate depth (4-6 inches) to ensure accurate and representative results.
- Follow Instructions: Adhere to the step-by-step guidance that comes with the soil test kit to avoid mistakes and ensure reliable outcomes.
- Interpret Results Accurately: Carefully compare your test results to optimal ranges to make informed decisions for soil amendments and fertilization.
- Regular Testing: Test your soil every 1-3 years, or when changing crops, to monitor shifts in soil health and adjust gardening practices accordingly.
- Avoid Common Pitfalls: Steer clear of prevalent mistakes such as insufficient sampling, ignoring depth, and failing to clean equipment to enhance test reliability.
Overview of Soil Test Kits
Soil test kits assess the nutrient levels and overall health of your soil. These kits provide essential data that help you determine how to improve soil conditions for optimal plant growth.
Recommended Products
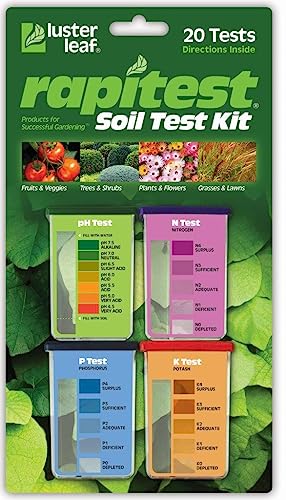
Quick, at home results for Soil pH, Nitrogen, Phosphorous and Potash Innovative and inexpensive soil test kit features an easy-to-use capsule system and patented color comparators

KNOW BEFORE YOU GROW | Grow the healthiest, sustainable lawn and garden with the most accurate and easy to use professional soil test kit on the market

Comprehensive Soil Analysis: Liquid soil test kits offer a comprehensive analysis of essential soil parameters, including pH, ammonia, nitrogen, phosphorus, and potassium. Having all these measurements in one kit provides a holistic understanding of the soil's fertility and health.
Components of Soil Test Kits
- Testing Strips: Color-coded strips indicate nutrient levels such as nitrogen, phosphorus, and potassium.
- pH Testers: Measure soil acidity or alkalinity. Optimal pH for most plants ranges between 6.0 and 7.5.
- Sample Containers: Small containers for collecting soil samples, ensuring accurate testing.
- Instructions: Step-by-step guidance for proper sample collection and testing procedures.
Benefits of Using Soil Test Kits
- Improved Plant Health: Understanding nutrient deficiencies helps promote healthier plants.
- Cost-Effective Solutions: Addressing deficiencies prevents unnecessary spending on fertilizers.
- Customized Fertilization: Tailor your fertilization strategy based on specific crop needs.
How to Use a Soil Test Kit
- Gather Supplies: Collect your kit and necessary gardening tools, such as a trowel and clean container.
- Collect Soil Samples: Remove debris, dig a few inches deep, and collect soil from several spots in your garden to ensure a representative sample.
- Mix Soil Samples: Combine collected samples in a clean container to create a uniform mixture.
- Follow Kit Instructions: Use the provided instructions to perform tests accurately. Typically, mix soil with water and compare results with the testing strips against the color chart.
- Analyze Results: Record nutrient levels and pH. Compare results to optimal ranges for your plants.
- Adjust Soil Conditions: Based on test results, consider adding specific fertilizers or amendments to improve soil health.
- How often should you test your soil? Test soil every 1-3 years, or when switching crop types.
- Where can you buy soil test kits? Purchase kits at garden centers, home improvement stores, or online retailers.
- What if my soil test results are poor? Amend soil with compost, organic matter, or targeted fertilizers to address deficiencies.
Using soil test kits empowers you to make informed decisions about your gardening practices, ensuring your plants thrive. These tools play a critical role in improving both soil quality and plant performance.
Benefits of Using Environmental Concepts Soil Test Kit
Using an Environmental Concepts Soil Test Kit provides multiple advantages for gardeners. These kits allow you to gain essential insights into your soil’s health, enabling better gardening practices.
Accurate Soil Analysis
Accurate soil analysis starts with testing. These kits contain specific tools that offer reliable results regarding soil pH, nutrient levels, and organic matter content. You can easily collect samples and test them right in your backyard. Results typically arrive in minutes, guiding you in making necessary amendments to improve soil conditions. For instance, if the test indicates low nitrogen levels, you can add organic fertilizers to support plant growth.
Improved Plant Health
Improved plant health occurs through informed decision-making. By understanding soil conditions, you can select suitable plants that thrive in your environment. The kit’s results help tailor your gardening approach, addressing issues like nutrient deficiencies and pH imbalances. Healthier soil leads to stronger plants, which produce more vibrant flowers and higher yields in vegetables. For example, adjusting soil pH for tomatoes can enhance fruit flavor and size, making your garden more rewarding.
Step-by-Step Guide on How to Use Environmental Concepts Soil Test Kit
Using the Environmental Concepts Soil Test Kit is straightforward and helpful for assessing soil health. Follow these steps for accurate results.
Preparing for the Test
Gather all necessary supplies before starting. You’ll need:
- Environmental Concepts Soil Test Kit
- Clean container for mixing soil
- Trowel or spade
- Clean water (distilled is best)
- Mixing stick
Ensure you read the instructions included in the kit. Understanding the details helps set realistic expectations for the test.
Collecting Soil Samples
Collecting samples properly is vital for accurate results. Here’s how to do it:
- Choose multiple spots in the area to sample. Aim for at least 5-10 spots for a comprehensive assessment.
- Remove surface debris like leaves and grass.
- Use a trowel or spade to dig down about 4-6 inches.
- Place the collected soil from each spot into a clean container. Mix these samples thoroughly for a consistent sample.
This method represents the overall soil quality and ensures reliable results.
Performing the Test
Now you’re ready to conduct the test. Follow these steps:
- Take a representative soil sample from your mixed container.
- Add the soil sample to the test kit’s testing chamber as directed in the instructions.
- Add the test solution as per the kit’s requirements.
- Wait the specified amount of time for the reaction to occur. Keep an eye on your watch.
Make sure you handle all chemicals safely and dispose of them per local regulations.
Interpreting the Results
Once the test completes, interpreting the results is crucial:
- Compare the color change of the soil sample to the provided chart. Different colors indicate varying pH and nutrient levels.
- Note any deficiencies or excesses in your soil and compare them with ideal ranges for the plants you want to grow.
- Consider taking corrective actions. Depending on results, you may need to add amendments such as lime, sulfur, or fertilizer.
Understanding the results informs better soil management practices for healthier plants.
Common Mistakes to Avoid
Using a soil test kit can improve your gardening experience, but certain mistakes can undermine your results. Avoid the following common pitfalls to ensure accurate assessments of your soil quality.
Not Sampling from Multiple Locations
Sampling soil from only one spot leads to misleading results. Different areas can display varying nutrient levels and pH values, so collect samples from multiple locations in your garden. Aim for at least five to ten spots, mixing them together to create a composite sample.
Ignoring Depth of Sample Collection
Collecting soil samples at the wrong depth affects the accuracy of the test. Typically, samples should be taken from a depth of 6 to 8 inches for most plants. Adjust the depth according to plant types—root vegetables may require deeper samples than surface plants.
Overlooking Seasonal Timing
Testing soil at the wrong time can skew your results. Late winter or early spring is ideal, as the soil’s nutrient levels stabilize. Avoid testing right after fertilization, heavy rainfall, or drought, as these conditions can impact pH and nutrient availability.
Failing to Read Instructions Carefully
Each soil test kit comes with specific instructions. Skimming or misinterpreting these guidelines can result in improper usage. Pay close attention to each step outlined in the manual, including preparation, testing, and interpreting the results.
Neglecting to Clean Equipment
Using unclean tools leads to contamination and inaccurate readings. Rinse all sampling and testing equipment thoroughly before use. This practice prevents residual chemicals from affecting your soil analysis.
Misunderstanding Test Results
Interpreting test results incorrectly can lead to poor soil management decisions. Familiarize yourself with the scale used in your kit, and consult any accompanying charts or guides for context. Understanding levels of acidity, nitrogen, phosphorus, and potassium plays a crucial role in proper soil amendments.
Avoiding Follow-up Tests
Soil quality changes over time, requiring periodic retests. Don’t rely solely on initial test results. Schedule follow-up tests annually or biannually to track soil health and adjust your gardening practices accordingly.
By avoiding these common mistakes when using an Environmental Concepts Soil Test Kit, you’ll gain clearer insights into your soil’s health. This knowledge helps in making the right decisions for nurturing your plants effectively.
Conclusion
Using the Environmental Concepts Soil Test Kit can be a game changer for your gardening or farming efforts. By taking the time to test your soil properly you’ll gain valuable insights that can lead to healthier plants and better yields. Remember to avoid common pitfalls to ensure you’re getting the most accurate results.
With the right information in hand you can make informed decisions that truly benefit your soil. So roll up your sleeves and dive into the world of soil testing. Your plants will thank you for it!
Frequently Asked Questions
What is the importance of soil quality for plant growth?
Soil quality directly impacts plant growth as it influences water retention, nutrient availability, and root development. Healthy soil fosters thriving plants by providing essential minerals and organic matter, promoting a balanced ecosystem for growth.
What does the Environmental Concepts Soil Test Kit measure?
The Environmental Concepts Soil Test Kit measures soil pH, nutrient levels (like nitrogen, phosphorus, and potassium), and organic matter content. These factors are crucial for understanding soil health and making informed decisions for gardening or farming.
How do I use the Environmental Concepts Soil Test Kit?
To use the kit, first gather supplies and collect soil samples from multiple locations in your garden. Follow the provided instructions for testing, ensuring to mix the samples well. After testing, interpret the results according to the guidelines to assess soil quality.
What common mistakes should I avoid when using the soil test kit?
Avoid mistakes like not sampling from various locations, ignoring sample depth, testing at the wrong time, skipping instructions, neglecting equipment cleaning, misunderstanding results, and overlooking follow-up tests. These errors can lead to inaccurate soil assessments.
How can I accurately interpret soil test results?
To interpret soil test results accurately, compare your findings with the recommended levels for your plants. Use the provided reference guides that often accompany the kit, and consider consulting local agricultural extension services for tailored advice on improving soil quality.
I’ve always been drawn to trees.As a kid, I spent most of my free time outside, climbing, exploring, and trying to figure out the names of the trees around me.That early curiosity eventually led me to study arboriculture and horticulture at Michigan State.Later, I completed a degree in forestry at the University of Michigan.
I’ve been working in tree care and education ever since.These days, I enjoy helping people learn more about the trees in their own backyards.How they grow, how to care for them, and why they matter.You don’t need to be an expert to appreciate trees.A little curiosity goes a long way.