Do you struggle with dull hedge trimmer blades that make yard work feel like a chore? You’re not alone. Many homeowners face this issue, and it can lead to uneven cuts and a less-than-perfect garden.
Key Takeaways
- Understand Blade Types: Familiarize yourself with the different hedge trimmer blade types (double-sided, single-sided, laser-cut, serrated) for efficient trimming tailored to your needs.
- Maintain Sharpness for Healthier Plants: Sharp blades produce clean cuts that promote plant health, reduce healing time, and minimize disease susceptibility.
- Safety First: Always follow safety precautions, such as wearing gloves and goggles, and ensuring the trimmer is powered off during maintenance.
- Follow a Step-by-Step Sharpening Process: Use a systematic approach when sharpening blades—remove, clean, file, check for uniformity, and lubricate for best results.
- Utilize Online Resources: Explore YouTube for various tutorials and channels that provide visual guidance on sharpening techniques and maintenance tips.
- Perform Regular Maintenance: Clean and lubricate blades after each use, and keep an eye out for signs of wear to prolong the lifespan of your hedge trimmer.
Understanding Hedge Trimmer Blades
Hedge trimmer blades play a crucial role in achieving a neat and manicured look for your garden. Knowing about the different types of blades and the significance of keeping them sharp will enhance your trimming efficiency.
Types of Hedge Trimmer Blades
- Double-Sided Blades
Double-sided blades feature teeth on both sides, allowing you to cut in either direction. This design boosts efficiency and reduces the time spent trimming. - Single-Sided Blades
Single-sided blades have teeth on one side, ideal for precise cuts and shaping hedges. They typically produce cleaner cuts but require more effort to reposition. - Laser-Cut Blades
Laser-cut blades offer a finely honed edge, enhancing cutting precision. These blades typically cut cleaner and require less maintenance than standard blades. - Serrated Blades
Serrated blades include a wavy edge for cutting through thicker branches. These are effective for dense foliage but may not deliver as smooth a finish as other blade types.
Importance of Sharp Blades
Sharp blades ensure clean cuts that promote healthy plant growth. Dull blades can damage plants by tearing rather than slicing through stems, leading to increased susceptibility to disease.
- Improved Efficiency
Sharp blades require less force, making trimming easier. You’ll save time and effort while achieving better results. - Healthier Plants
Clean cuts reduce healing time and minimize stress on the plants. Sharp blades help ensure your hedges thrive, maintaining their shape and longevity. - Prevention of Injuries
Dull blades can slip, causing injuries to you or causing unnecessary strain on your trimmer. Keeping blades sharp enhances safety during operation. - Longer Lifespan of Equipment
Regular sharpening reduces wear and tear on your trimmer, extending its lifespan. This approach saves you money on repairs or replacements in the long run.
Preparing to Sharpen Hedge Trimmer Blades
Before sharpening hedge trimmer blades, take a few key steps to ensure safety and effectiveness. Proper preparation sets the stage for a successful sharpening process.
Recommended Products

Simplified to support your backyard and garden projects and giving your go-to tools a new lease on life. The A679 Sharpening Kit includes everything you need to keep your favorite gardening tools looking sharp.

FROM HOURS TO MINUTES: Don't let blade maintenance steal your weekend. While traditional filing takes over an hour of tedious, imprecise labor, the Sharp Pebble Cordless Hedge Sharpener restores a razor-sharp edge to your hedge trimmer & shears in under 5 minutes. Save 50+ minutes per session with zero arm fatigue.
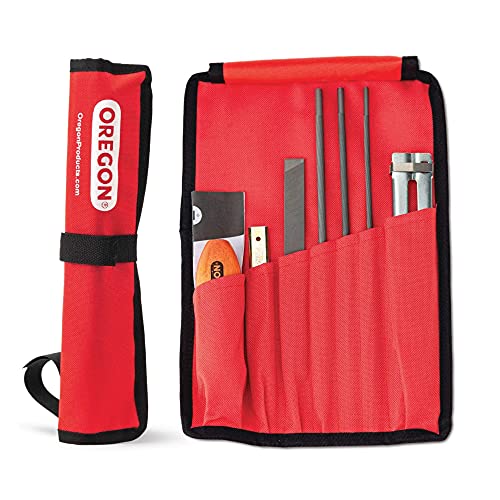
This portable universal chainsaw sharpening kit by Oregon makes it easy to keep your chainsaws, pole saws, and other tools sharp and ready to go
Safety Precautions
- Wear gloves to protect your hands while handling sharp blades.
- Use safety goggles to shield your eyes from metal shards.
- Ensure the hedge trimmer is unplugged or the battery is removed to prevent accidental activation.
- Work in a well-lit area to see the blades clearly.
- Avoid loose clothing or jewelry that could get caught in the equipment.
- Wrenches: Necessary for removing blades from the trimmer.
- File or Sharpening Stone: Essential for achieving a sharp edge. Use a flat file for straight edges and a round file for curved edges.
- Wire Brush: Helps in cleaning debris and sap off the blades before sharpening.
- Safety Gear: Includes gloves and goggles for personal protection during the process.
- Lubricant: A light oil or lubricant keeps the blades moving smoothly after sharpening.
Step-by-Step Guide to Sharpening Hedge Trimmer Blades
Sharpening hedge trimmer blades requires precise techniques to ensure efficiency. Follow these methods for optimal results.
Recommended Products

Durable monocrystalline diamonds coated full tang stainless steel. The diamond coating of this product has a very high hardness. It can sharpen all your tools like new ones.
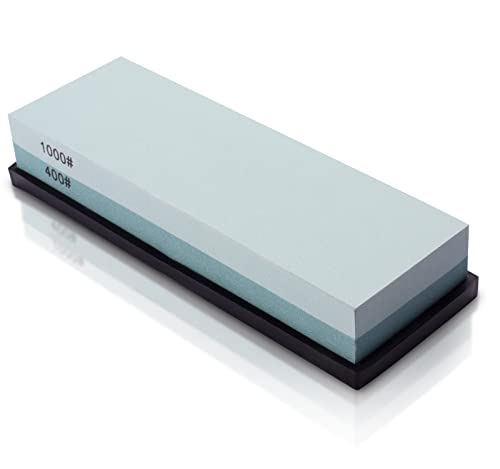
DUAL SIDED SHARPENING STONE: Made from durable silicon carbide(processes and inspections.), this two-sided sharpening block comes with both a 400-grit side, used for returning edges to their original shape, and a 1000-grit side used for smoothing and polishing cutting edges. Corrosion-resistant, heat-resistant, edges, and corners are clearly demarcated

Made with superior silicon carbide, the 400 grit side is suitable for any daily sharpening, such as repairing the knives with big cutting edges, and polishing the knives, the 1000 grit will help you to make the knives more smooth after using the 400 grit
Manual Sharpening Techniques
- Remove the Blade
Detach the hedge trimmer blade using the appropriate wrenches. Ensure you place the screws safely to prevent loss. - Clean the Blade
Use a wire brush to remove debris, sap, and residue. A clean blade allows for smoother sharpening. - File the Edges
Use a metal file or sharpening stone. Maintain a consistent angle, about 30 to 45 degrees, while filing each edge. Stroke in the direction of the blade’s edge for best results. - Check for Uniformity
Regularly assess the blade’s sharpness. Ensure both sides of the blade are equally sharpened to maintain balance during use. - Lubricate
After sharpening, apply lubricant to the blade. This enhances efficiency and prolongs the blade’s life.
- Choose the Right Sharpener
Select an electric sharpener designed for hedge trimmer blades. Confirm compatibility with your trimmer’s blades. - Prepare the Workspace
Set up in a well-lit area, ensuring you have access to an electrical outlet. - Insert the Blade
Securely position the blade in the sharpener, aligning it according to the manufacturer’s guidelines. - Engage the Sharpener
Turn on the sharpener, applying gentle pressure. Don’t press too hard, as this can damage the blade. - Monitor Progress
Frequently check the sharpness during the process. Stop sharpening when the desired sharpness is achieved, typically with a clean, smooth edge. - Finish and Clean
Power off the sharpener and clean the blade again to remove any metal filings. Lubricate the blade post-sharpening for effective use.
Finding Tutorials on YouTube
Finding quality tutorials on YouTube enhances the blade sharpening process. You can discover numerous channels dedicated to gardening tools and maintenance.
Recommended Channels
- Garden Tool Repair: This channel focuses on various garden tools, including hedge trimmers. It offers straightforward guides and maintenance tips.
- DIY Garden: DIY Garden shares helpful videos on garden projects and equipment care, featuring detailed blade sharpening methods.
- Home Improvement How-To: This channel covers a broad range of home improvement topics with practical steps for sharpening and maintaining tools.
- Search Specific Terms: Use targeted keywords like “sharpen hedge trimmer blades” for best results.
- Watch Multiple Videos: Viewing various guides can provide different perspectives and techniques, allowing you to find what works best for you.
- Take Notes: Jot down crucial steps and tips as you watch. This helps retain information and acts as a helpful reference.
- Pause and Rewind: Use the pause and rewind features to follow along with the techniques demonstrated.
- Check Comments for Tips: Read through the comments section for additional advice and experiences from other users. This feedback can enhance your learning.
By following these steps, your experience with sharpening hedge trimmer blades improves significantly.
Maintenance Tips for Hedge Trimmer Blades
Keeping your hedge trimmer blades well-maintained ensures efficient cutting and prolongs their lifespan. Regular maintenance not only improves performance but also enhances safety during use.
Recommended Products

Quick and easy

Sturdy Material: high hardness titanium plated chainsaw sharpener bits are made of quality emery grain, which has good polishing effect, uniform and delicate carving, hard texture, the material is rust and wear resistant, sturdy and lightweight, not easy to break, deform or bend

Push blade lawn mower sharpening kit to maintain the cutting power of the blades
Regular Care and Cleaning
Clean your hedge trimmer blades after each use to remove debris like grass, leaves, and sap. Here’s how to do it:
- Disconnect the Power: Always unplug the trimmer or remove the battery before cleaning.
- Use a Wire Brush: Gently scrub the blades with a wire brush to dislodge any stuck material.
- Check for Rust: Inspect the blades for rust or corrosion. If rust appears, use sandpaper or a wire brush to remove it.
- Lubricate the Blades: Apply a light coating of oil to the blades after cleaning. This helps reduce friction when cutting and prevents moisture build-up.
Regularly checking your blades for damage or wear keeps them in optimal condition and enhances cutting efficiency.
When to Replace Blades
Understand when it’s time to replace your hedge trimmer blades. Signs of wear include:
- Dents or Chips: Look for visible damage like dents or chips on the blade edges. Small imperfections can lead to poor cutting performance.
- Significantly Dull Blades: If sharpening doesn’t restore the cutting edge, replacement may be necessary.
- Increased Vibration or Noise: Noticeable changes in vibration or noise during operation can indicate blade issues.
You can often find replacement blades through the manufacturer’s website or your local hardware store. Always refer to your trimmer’s user manual for compatibility.
Conclusion
Keeping your hedge trimmer blades sharp is key to achieving a clean and tidy garden. By following the steps outlined and taking proper care of your tools you’ll not only enhance their performance but also extend their lifespan. Remember to prioritize safety while sharpening and regularly maintain your blades to prevent wear and tear.
If you notice any signs of damage it might be time to consider replacements. With a little effort and the right techniques you can turn your hedge trimmer into a reliable gardening companion. Happy trimming!
Frequently Asked Questions
What causes hedge trimmer blades to become dull?
Dull hedge trimmer blades can result from regular use, contact with hard surfaces, or cutting through tough materials. Over time, wear and tear diminish their effectiveness, making it crucial to maintain sharp blades for efficient trimming.
How do I know when to sharpen my hedge trimmer blades?
You should sharpen hedge trimmer blades when you notice difficulty cutting, noticeable tearing of branches, increased vibration, or any unusual noise. Regular maintenance every few uses can also prevent them from becoming overly dull.
What safety precautions should I take before sharpening blades?
Always wear gloves and goggles for hand and eye protection. Ensure the trimmer is unplugged or the battery is removed, and work in a well-lit area. These precautions help prevent injuries during the sharpening process.
What tools do I need to sharpen hedge trimmer blades?
You typically need a sharpening file, sharpening stone, or angle grinder depending on your preference. Additionally, you may require cleaning brushes and lubricating oil for proper maintenance after sharpening.
How can I maintain my hedge trimmer blades?
Regularly clean the blades after each use to remove debris, and lubricate them to reduce friction. Check for signs of wear and perform sharpening as needed. Consistent care helps prolong the lifespan of your blades.
When should I replace hedge trimmer blades?
Replace hedge trimmer blades when you see visible signs of wear, such as dents, chips, or if they feel loose. Increased vibrations or noise during use can also indicate that it’s time for a replacement.
Where can I find replacement blades for my hedge trimmer?
Replacement blades can often be found at the manufacturer’s website, local hardware stores, or home improvement centers. Always check your trimmer’s user manual for compatibility before purchasing new blades.
I’ve always been drawn to trees.As a kid, I spent most of my free time outside, climbing, exploring, and trying to figure out the names of the trees around me.That early curiosity eventually led me to study arboriculture and horticulture at Michigan State.Later, I completed a degree in forestry at the University of Michigan.
I’ve been working in tree care and education ever since.These days, I enjoy helping people learn more about the trees in their own backyards.How they grow, how to care for them, and why they matter.You don’t need to be an expert to appreciate trees.A little curiosity goes a long way.