
I like to keep my pottery projects simple and use whatever clay I have around.
Handbuilding vases has become one of my favorite ways to spend an afternoon.
I have tried out various techniques over the months and noted which ones give good results.
Some of my attempts led to vases that actually hold up well after firing.
I decided to collect 24 of those ideas in this post for anyone looking to try something similar.
Two-Tone Handbuilt Bud Vase
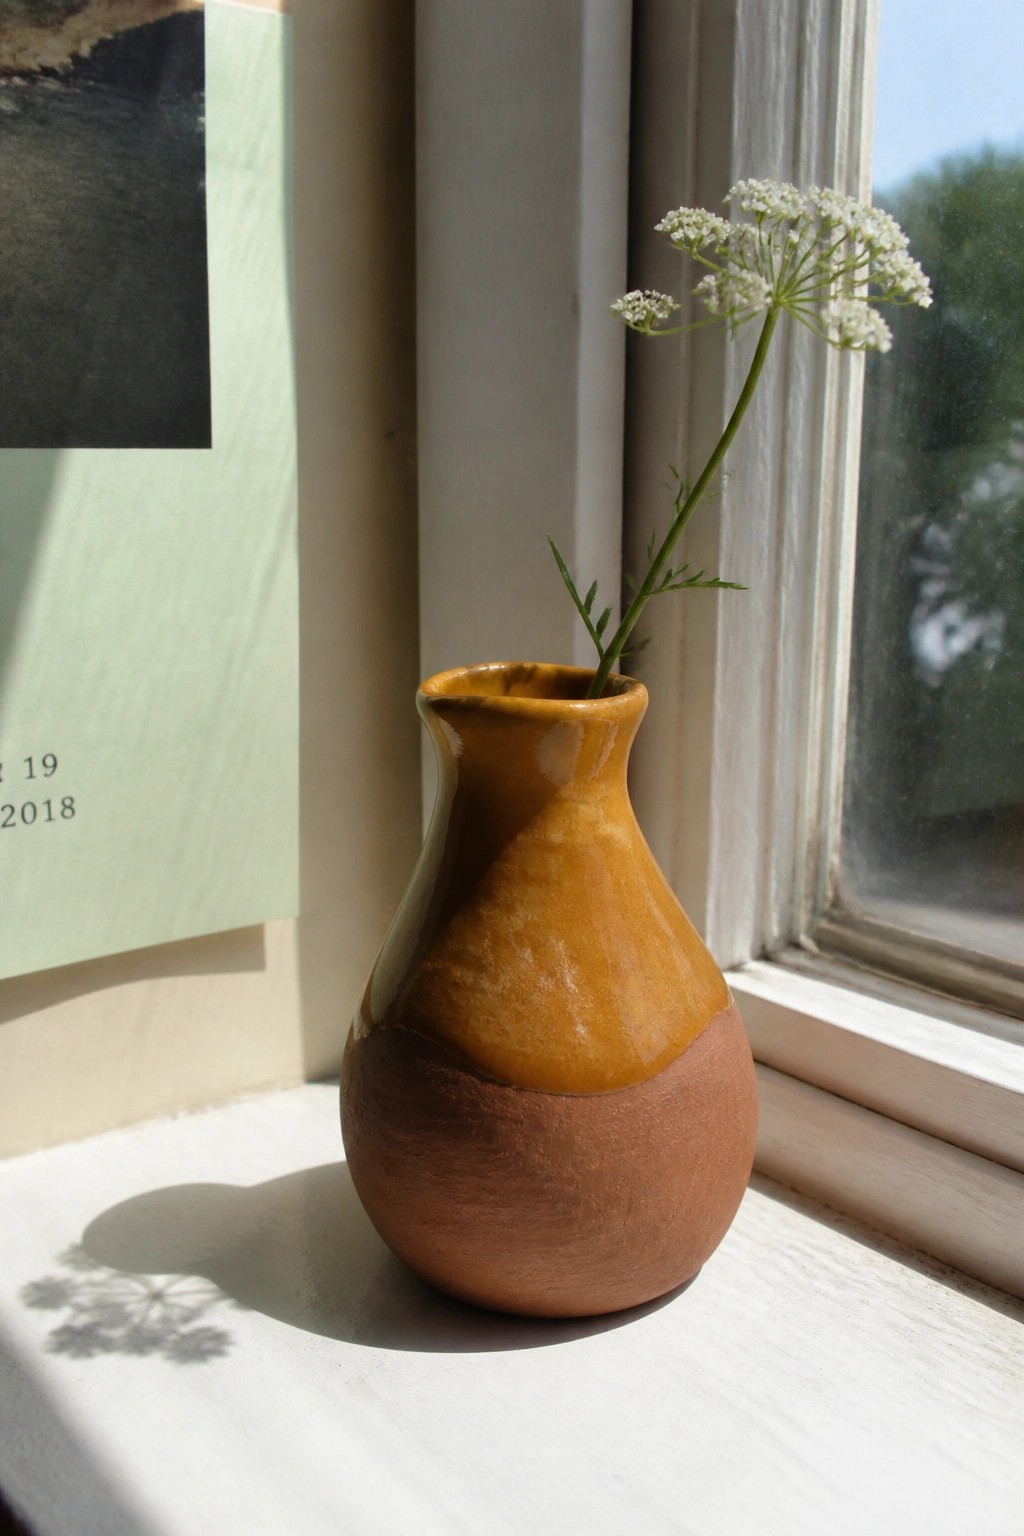
A small handbuilt vase gains interest from a simple two-tone treatment where the top section receives a glossy amber glaze and the bottom stays in its natural terracotta color. The rounded body and short neck come from basic pinching or coiling, keeping the form soft and slightly irregular. This approach works as a bud vase because the narrow opening holds a single stem or small cluster upright without extra supports.
What makes this idea useful is how the color split draws attention to the shape while hiding minor surface marks from handbuilding. You can repeat the same division on a taller cylinder for a desk piece or shorten the glazed area on a wider bowl form. The unglazed base also lets the vase sit on raw wood or stone without looking out of place. For Pinterest, the clean contrast photographs clearly against bright windows or neutral backgrounds.
Wall Pocket Vase with Incised Leaves
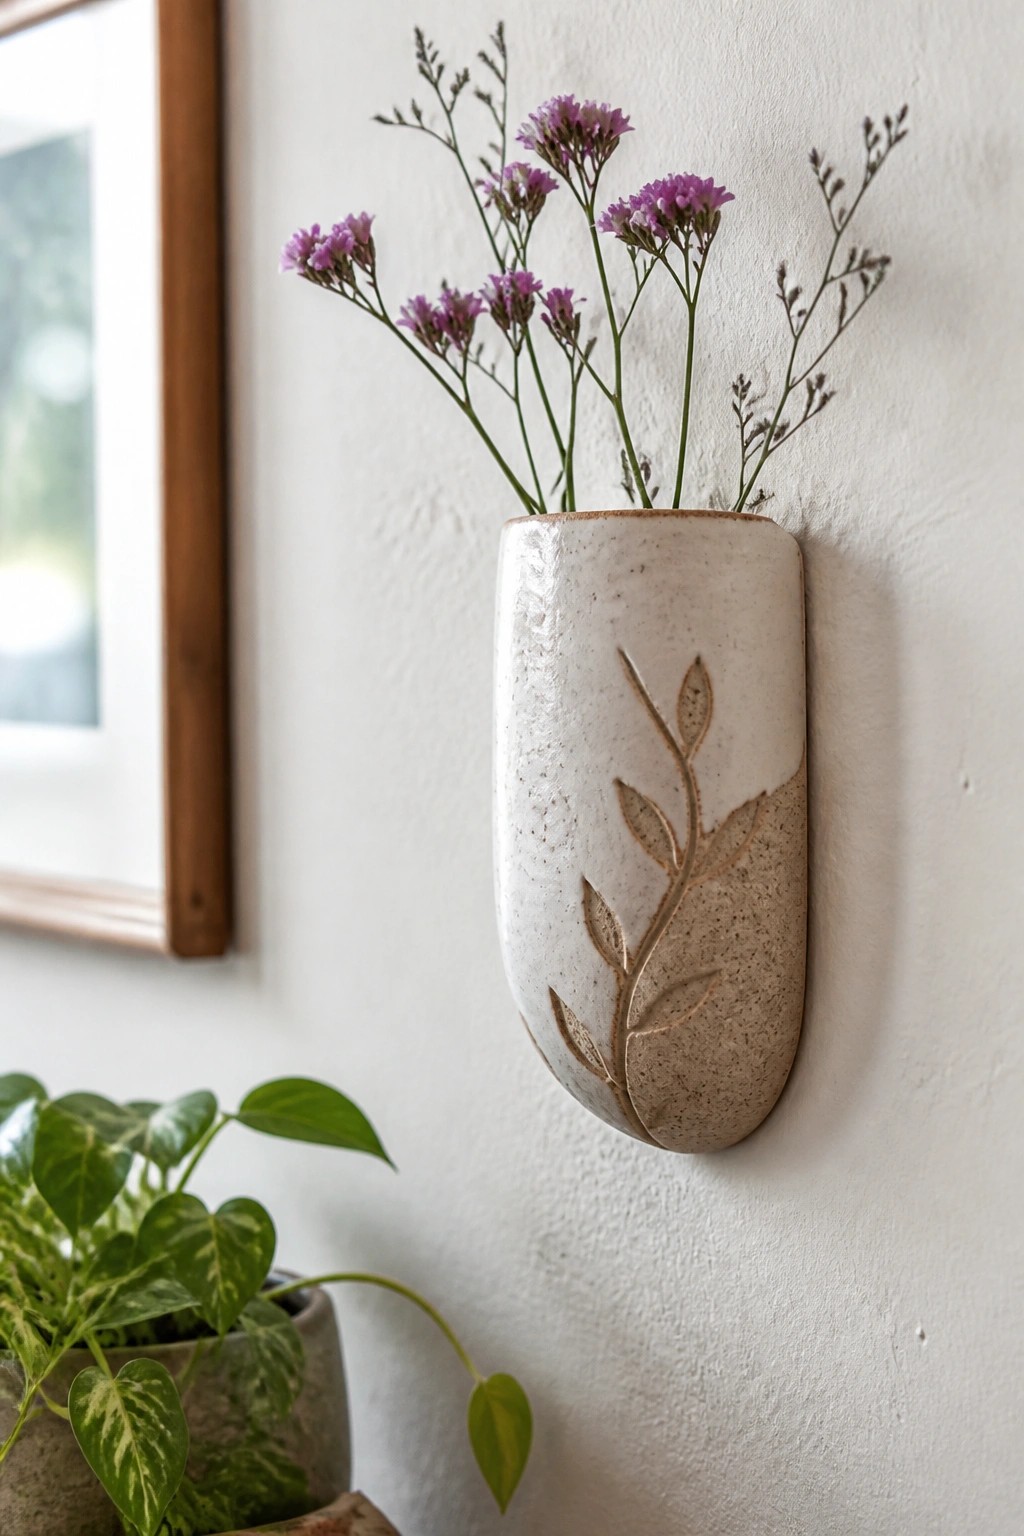
A handbuilt wall vase made from a flattened slab forms a shallow pocket shape that hangs flush against the wall. The upper section is finished in a light matte glaze while the lower half shows the raw clay body, creating a clear horizontal division. A simple branch and leaf pattern is carved into the lower half to add surface texture and a botanical accent. This keeps the overall form minimal while turning the vase into both a flower holder and a piece of wall decor.
What makes this idea useful is how the flat profile works in narrow spaces where a round vase would not fit. You can adapt the leaf carving to other plant outlines or shift the glaze line higher or lower depending on the size you build. For a gift, the same shape can be made smaller and fitted with a hanging hole or wire. The contrast between the two surfaces also makes the piece easy to style in photos next to real plants.
Coiled Ridge Tall Vase
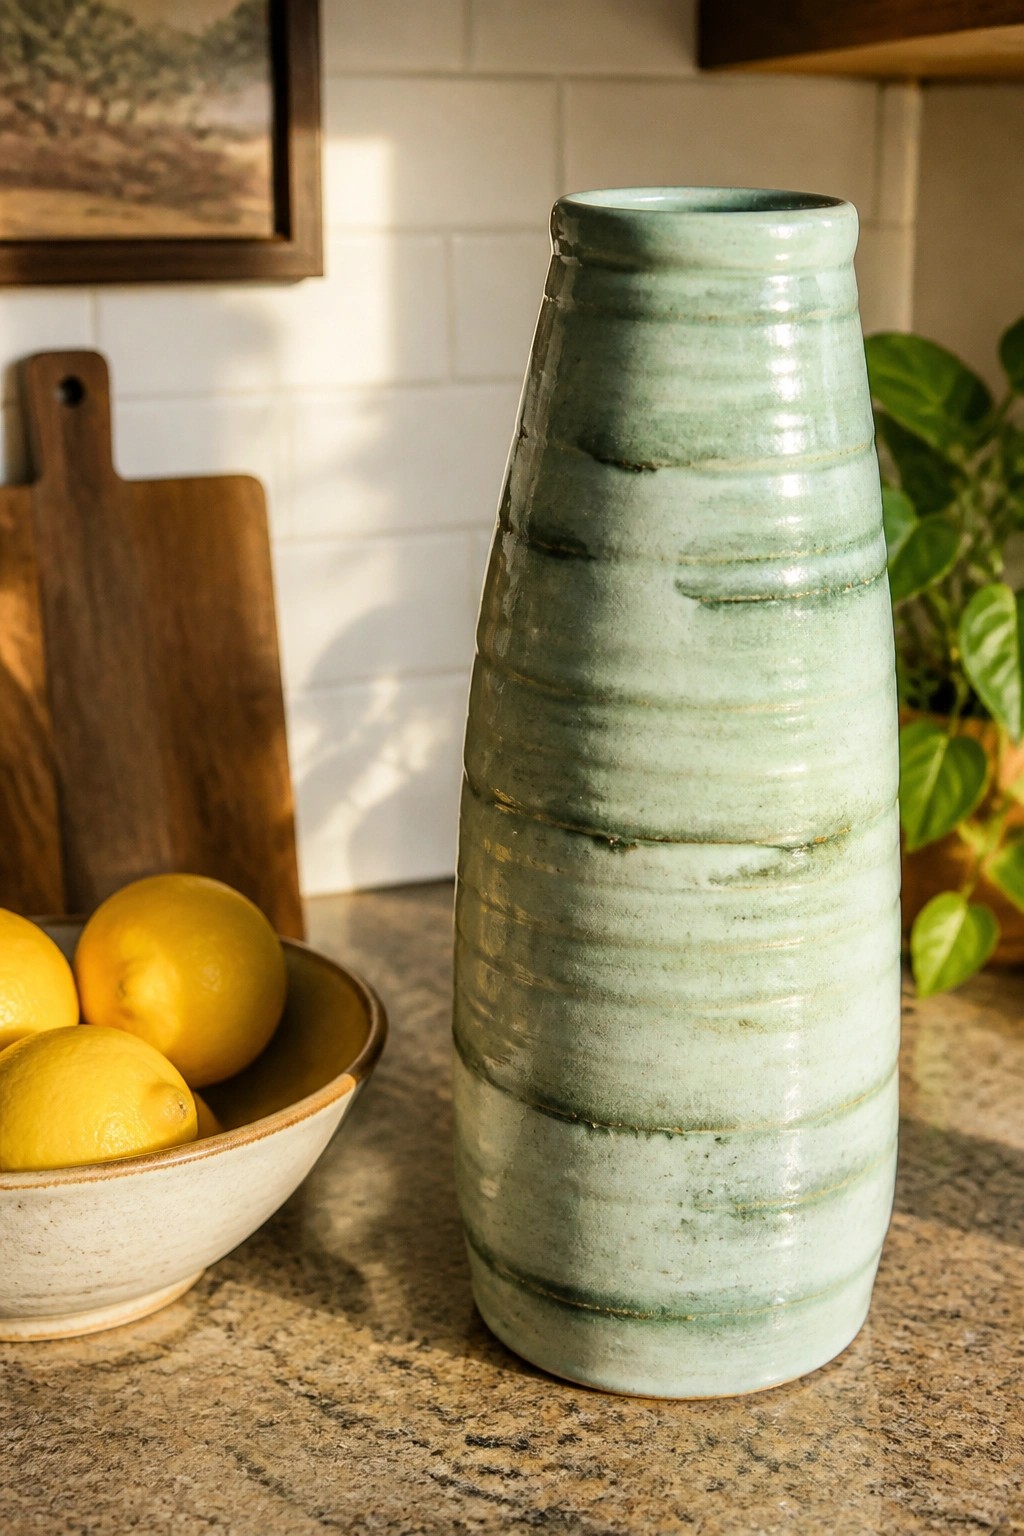
Stacking coils to form a tall tapered vase leaves visible horizontal ridges that become the main surface detail. The shape narrows slightly at the top while the ridges create shadows that give the piece depth even with a single glaze color. A light green glaze pools in the grooves and softens the texture without hiding the construction lines. This method turns a basic handbuilding step into the finished design for a vase.
What makes this idea useful is that the ridges do most of the visual work so you can finish with one simple glaze. The tall narrow shape fits on a counter or shelf without taking much room and works for flowers or dried stems. You could shorten the same coil build for a utensil crock or switch the glaze to a matte white or deep blue for a different look. The vertical form also photographs cleanly for sharing the finished piece.
Polka Dot Pattern on a Pinched Neck Vase
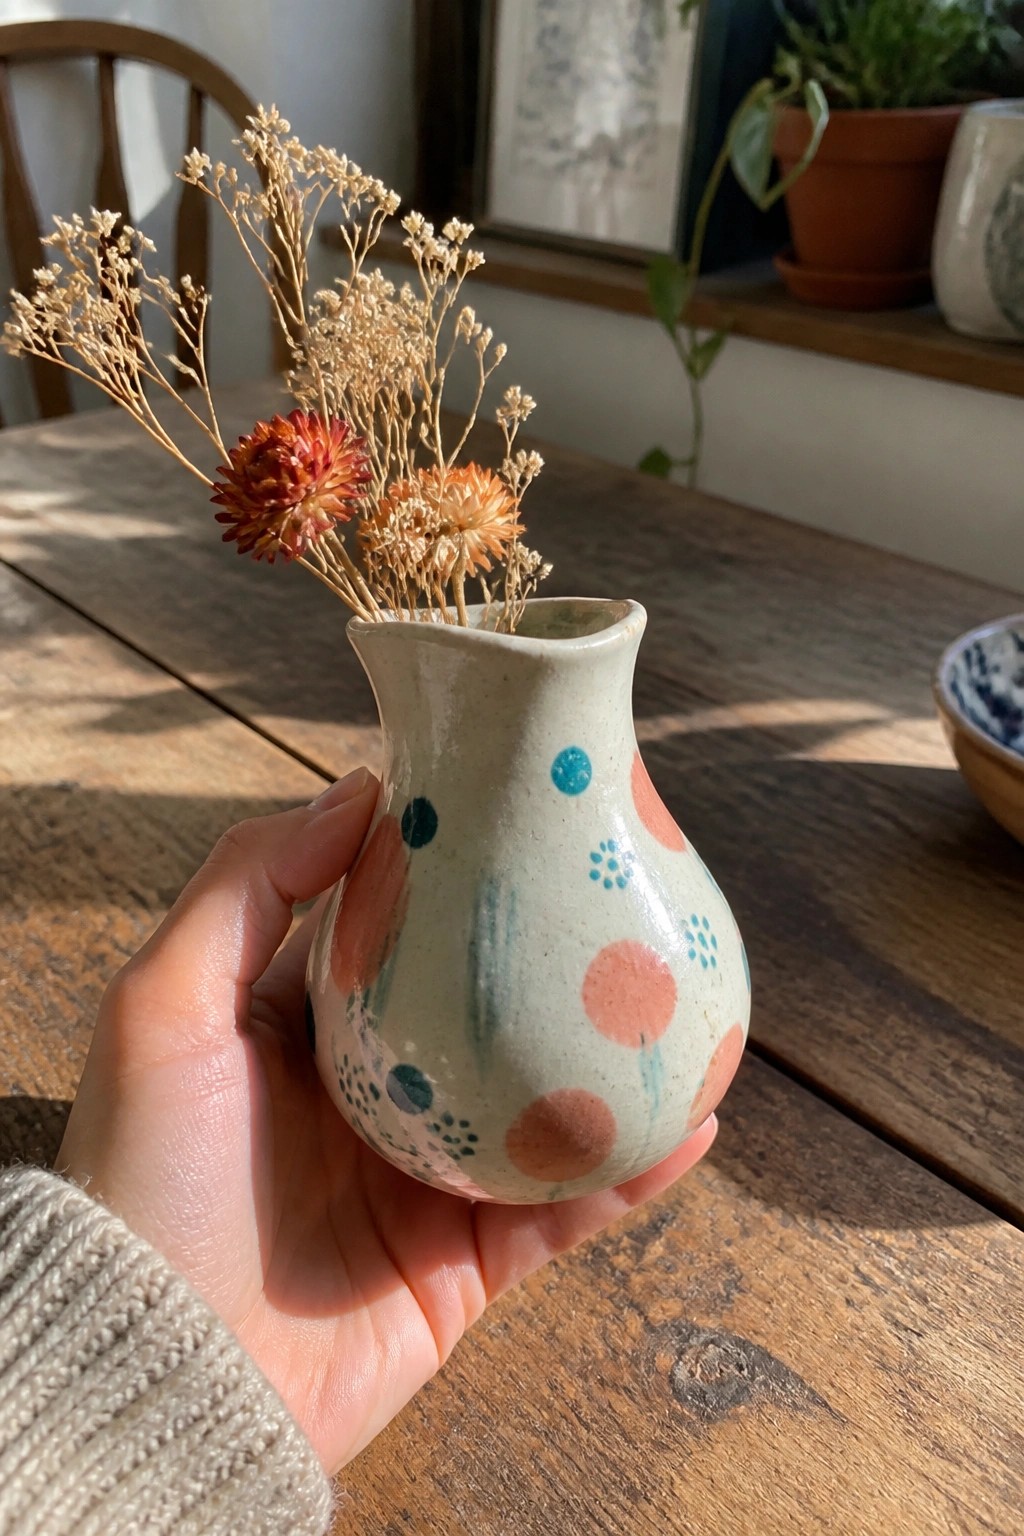
A small handbuilt vase with a rounded body and slightly flared rim gives you a simple surface for adding painted dots in two or three colors. The light speckled clay lets the coral and teal dots read clearly while the smaller blue clusters add variety without needing precise lines. This approach works as a basic vase project because the shape can be formed by pinching or coiling and the dots applied with underglaze before a single glaze firing.
What makes this idea useful is how the compact size keeps material use low and lets you finish the piece in one or two sessions. The dot layout can be adjusted for spacing or color to suit other forms like a small pitcher or a set of bud vases. In a kitchen or on a side table the shape holds just a few stems and the painted detail pairs easily with everyday dishes. You could repeat the same dot colors on a matching tray to create a quick coordinated set.
Double Vase with Joined Chambers
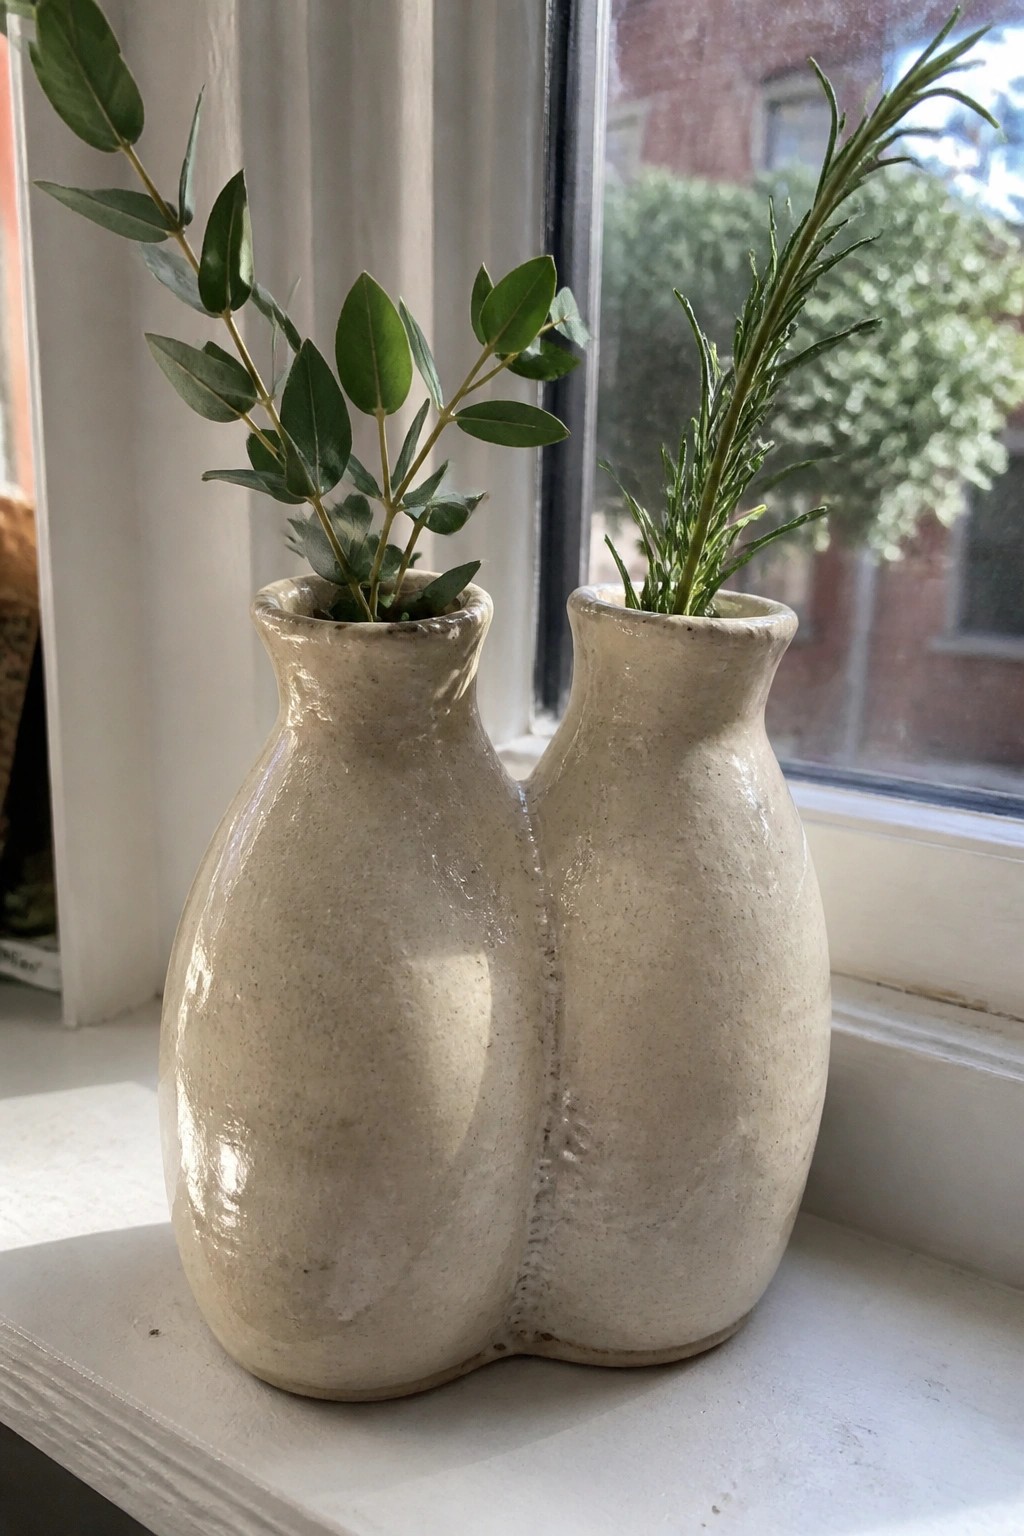
A handbuilt double vase made by joining two rounded chambers side by side gives you two separate openings in one compact piece. Each chamber holds its own stems or cuttings, so you can combine different greens or flowers without crowding a single neck. The soft bulb shape and visible seam line add structure while the light speckled surface keeps attention on whatever you place inside.
What makes this idea useful is that it solves the problem of displaying mixed stems on a narrow ledge or table without multiple separate vases. You can scale the same joined form down for a desk or up for a larger windowsill arrangement, and the connection point adds stability. For a variation, try making three chambers or adjust the neck heights so one side sits taller than the other.
Asymmetric Handbuilt Vase with Glazed and Raw Clay Contrast
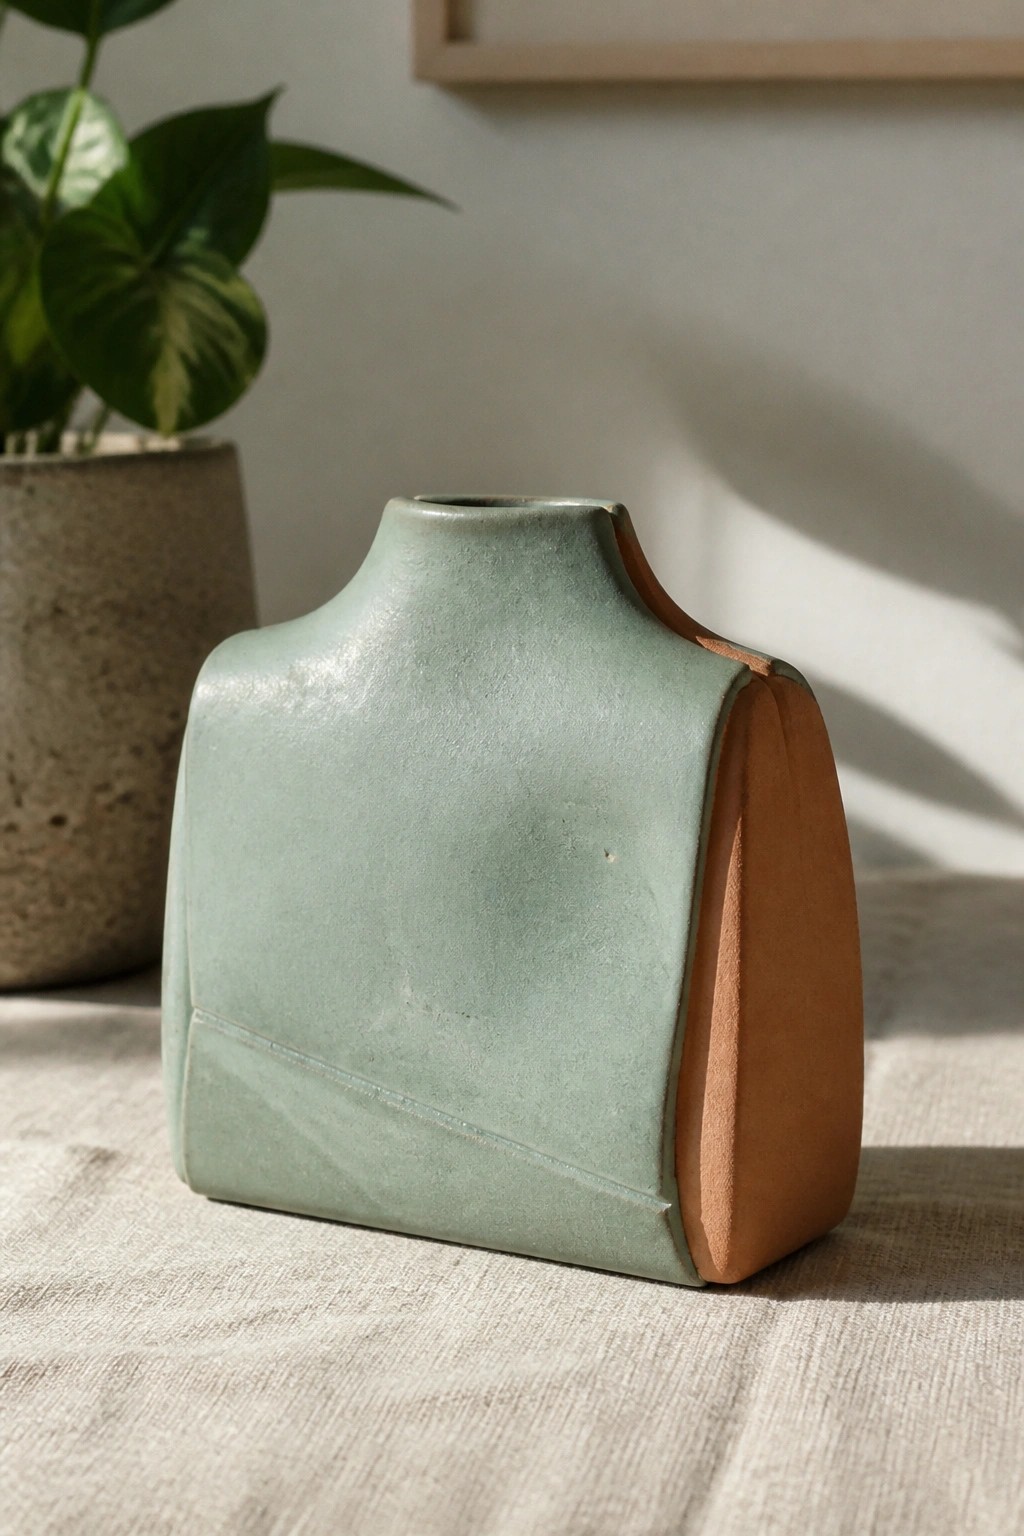
This handbuilt vase is made from slabs joined into a flattened, pouch-like form with an angled neck that has a deliberate cutout on one side. The main body is finished in a matte green glaze while a vertical section on the right stays unglazed to reveal the terracotta clay underneath. Subtle scoring lines on the green surface add quiet structure without overpowering the shape. The overall effect comes from the contrast between the smooth glazed area and the exposed clay panel rather than from added decoration.
The shape does a lot of the work here because the wide body and low profile let it sit stably on a shelf or mantel while still holding a few stems. You could adapt the same construction by flipping the notch to the other side or trying a different glaze that stops short of the edge to create a similar raw clay accent. This idea works well for small-batch gifts since the form is simple to repeat once you have a template. The two-tone surface also photographs cleanly for Pinterest without needing extra styling.
Fox-Shaped Clay Vase with Painted Details
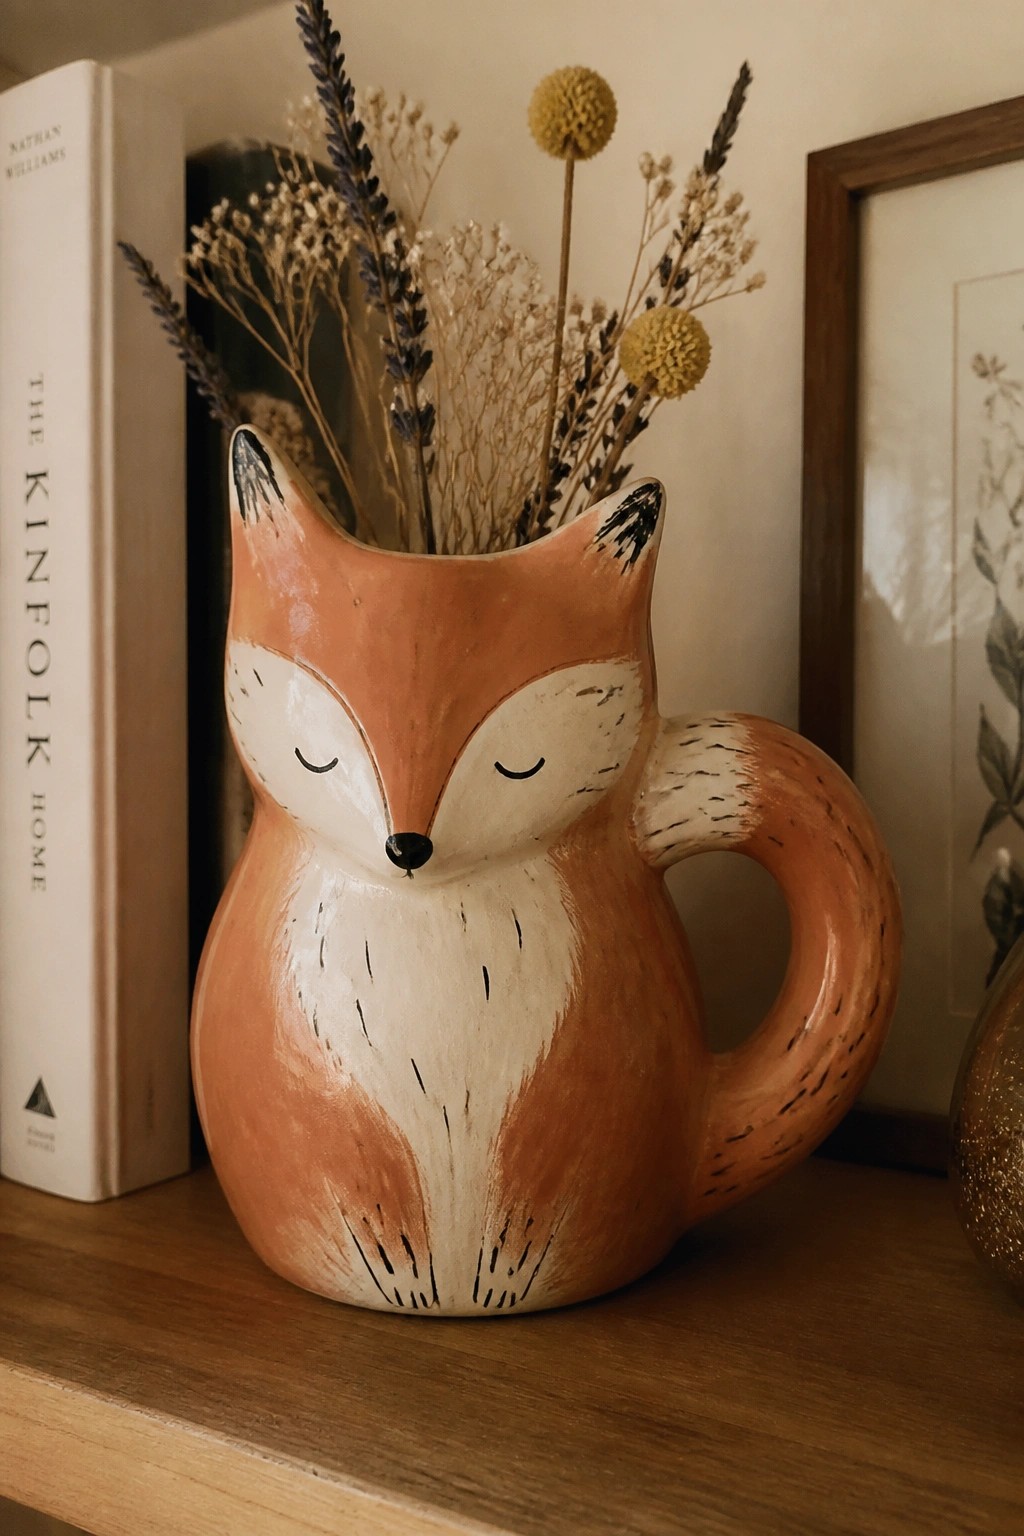
A handbuilt clay vase formed into a seated fox shape works as both a vessel and a sculptural object. The rounded body includes pointed ears at the rim, a short spout opening, and a curved handle on one side. Simple painted sections in orange and cream with black line details create the face, chest, and fur markings without needing multiple glazes. This approach fits the decorative vase category and suits small arrangements of dried stems.
The shape does a lot of the work here by turning a basic cylinder into something recognizable with just a few added forms. A piece like this works especially well as a shelf accent or small gift because the animal form draws attention while still holding flowers or branches. You could simplify the painting to fewer colors or rework the same body shape into a different animal like a cat or rabbit. For a mantel or entry table, the compact size keeps it from taking over the space.
Impressed Leaf Vase
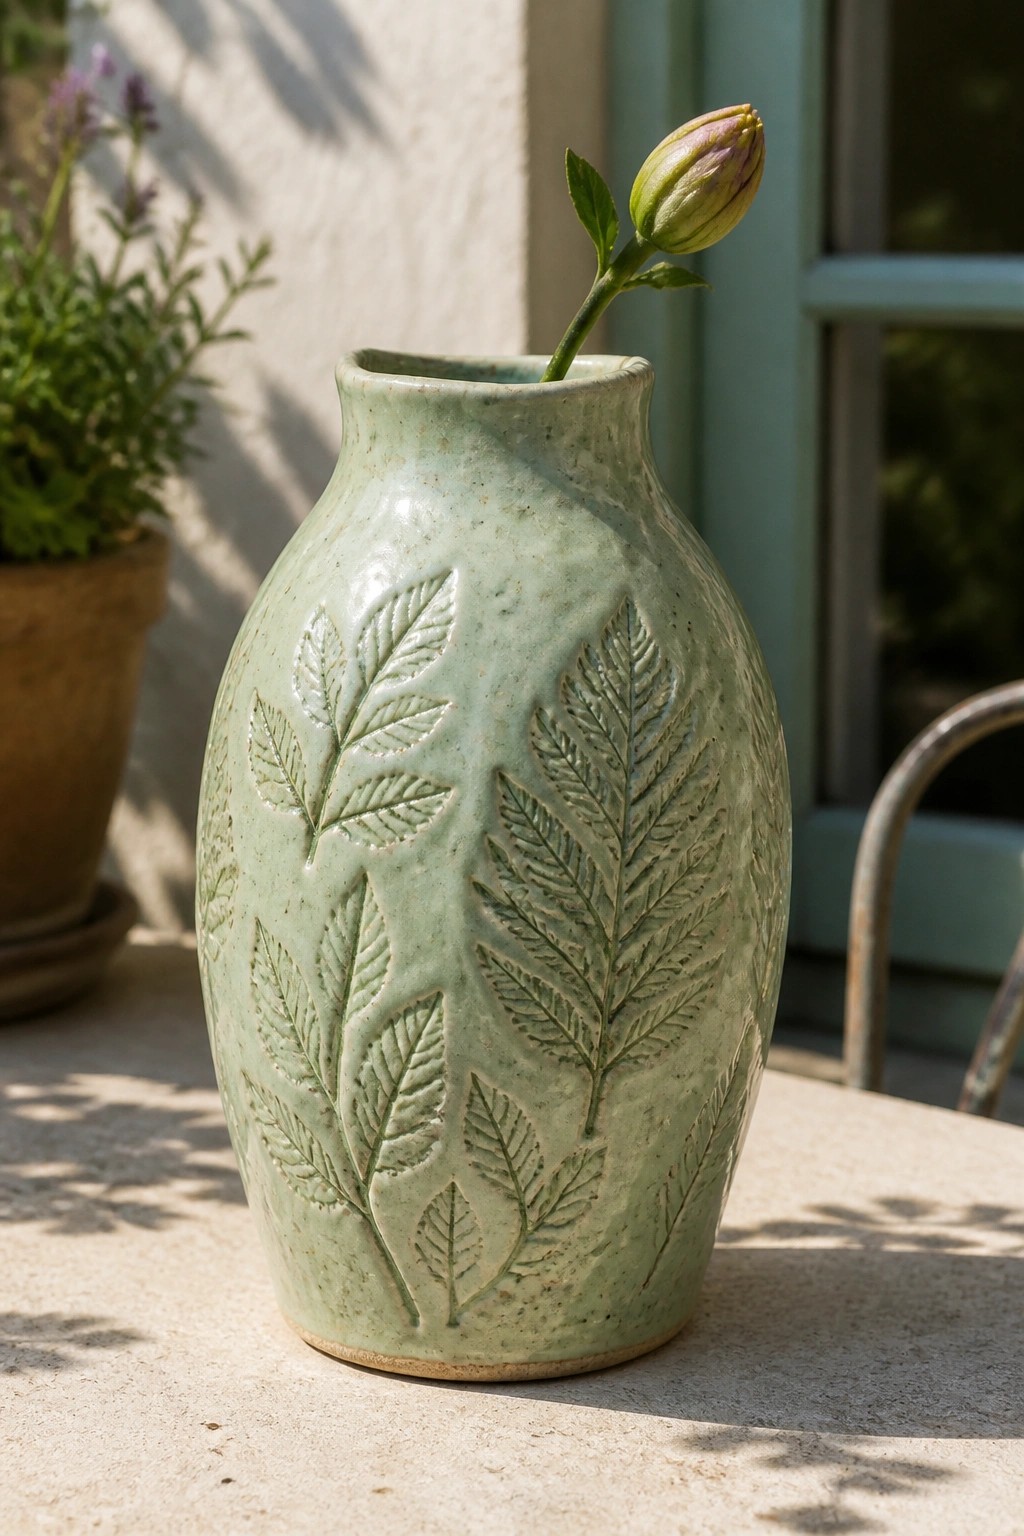
A rounded vase form gets covered with pressed fern or leaf details that create raised texture across the surface. The soft sage green glaze settles into the grooves and highlights the leaf shapes while keeping the overall finish matte and speckled. This approach works as a straightforward way to add natural surface detail to a standard vase without needing advanced carving tools.
What makes this idea useful is how the stamping step can be repeated on other shapes like pitchers or jars using the same leaves. The muted green tone pairs easily with fresh flowers or dried stems and still looks good empty on a shelf. You could simplify it by pressing fewer leaves or change the scale by applying the same pattern to a smaller bud vase.
Twisted Clay Coil Vase
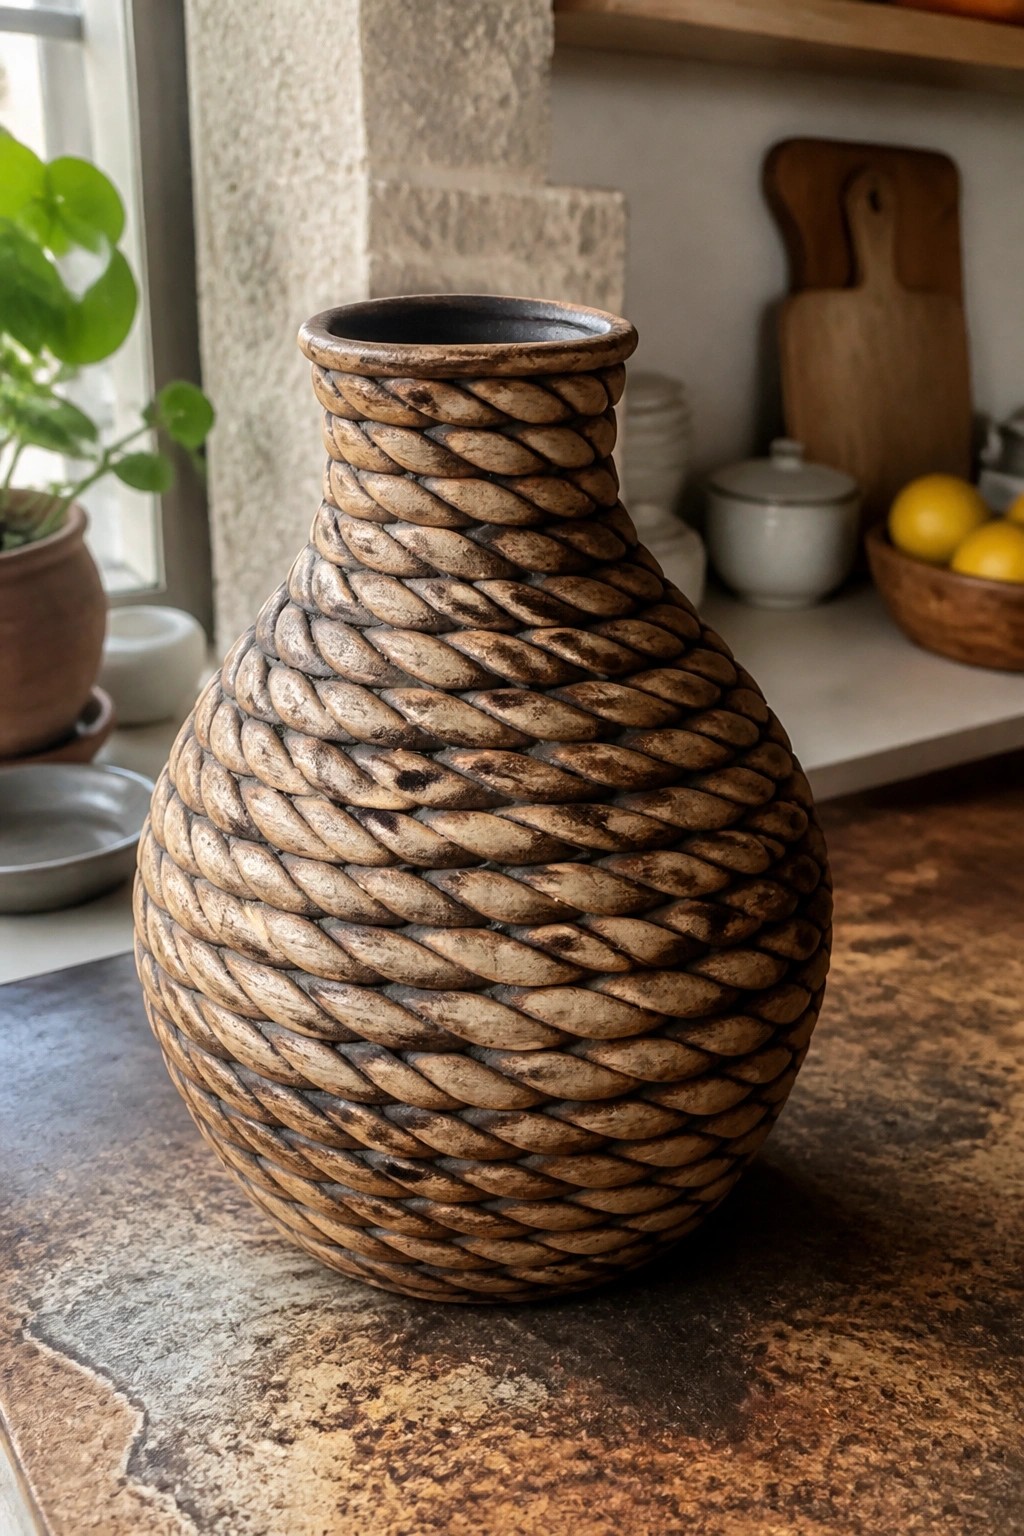
This handbuilt vase uses long ropes of clay twisted and stacked in repeating rows to form both the structure and the surface pattern. The body swells into a wide, rounded shape before narrowing at the neck, with the coils creating a consistent diagonal weave effect around the entire form. The matte, two-tone finish keeps the focus on the raised texture rather than color or shine. It belongs to the category of sculptural vases that rely on coil-building techniques for visual interest.
What makes this idea useful is that the coils add strength while creating the decoration in one step. The shape works especially well as a standalone piece on a shelf or table where the texture shows from every angle. You could scale the same twisting method down for smaller vases or try it on a flatter form like a tray. In a kitchen or entryway, the neutral tones and matte surface keep it from competing with other objects.
Two-Tone Slab Vase with Leaf Relief
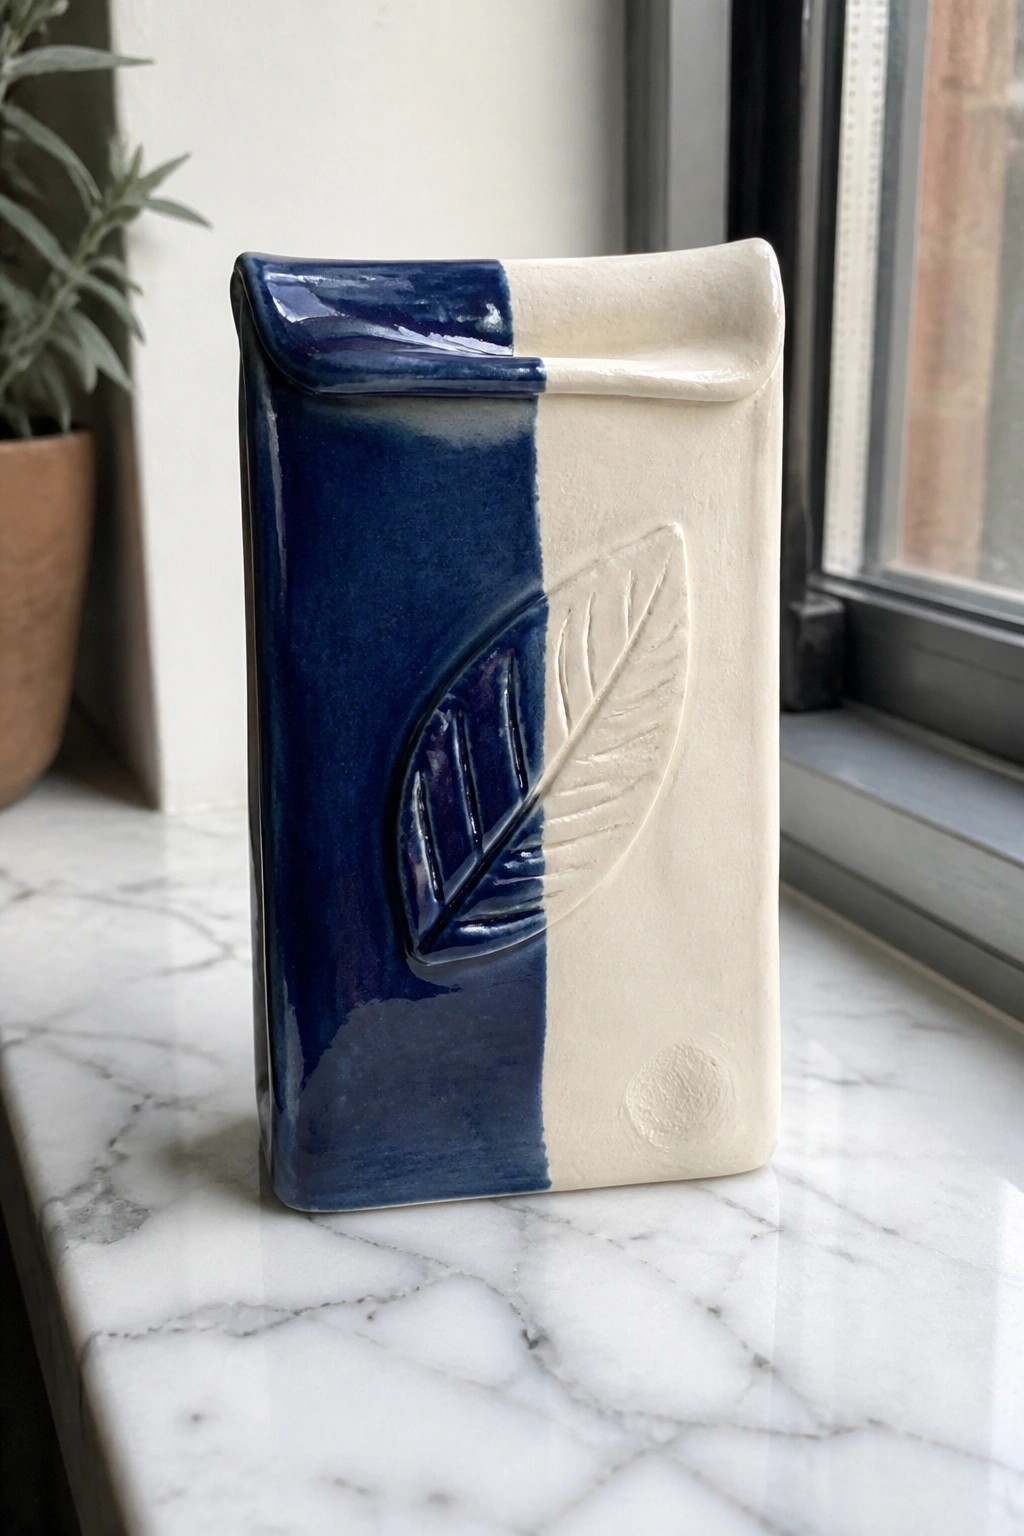
A rectangular slab-built vase gets its look from splitting the surface vertically into two glazes, with one side in deep blue and the other left white. A single leaf is pressed into the clay so the veins show in relief, catching the blue glaze on one half and staying matte on the white side. The top edge is gently folded over to finish the form without adding extra parts or handles.
What makes this idea useful is how the color split and leaf placement turn a basic box shape into something that stands out on a shelf. The same construction works for a small bud vase or a narrow planter, and you can swap the leaf stamp for other simple textures or change the glaze colors to match different rooms. For a gift, the folded top gives it a finished look that still stays simple to build from a few flat slabs.
Faceted Bud Vase Built from Pinched Clay
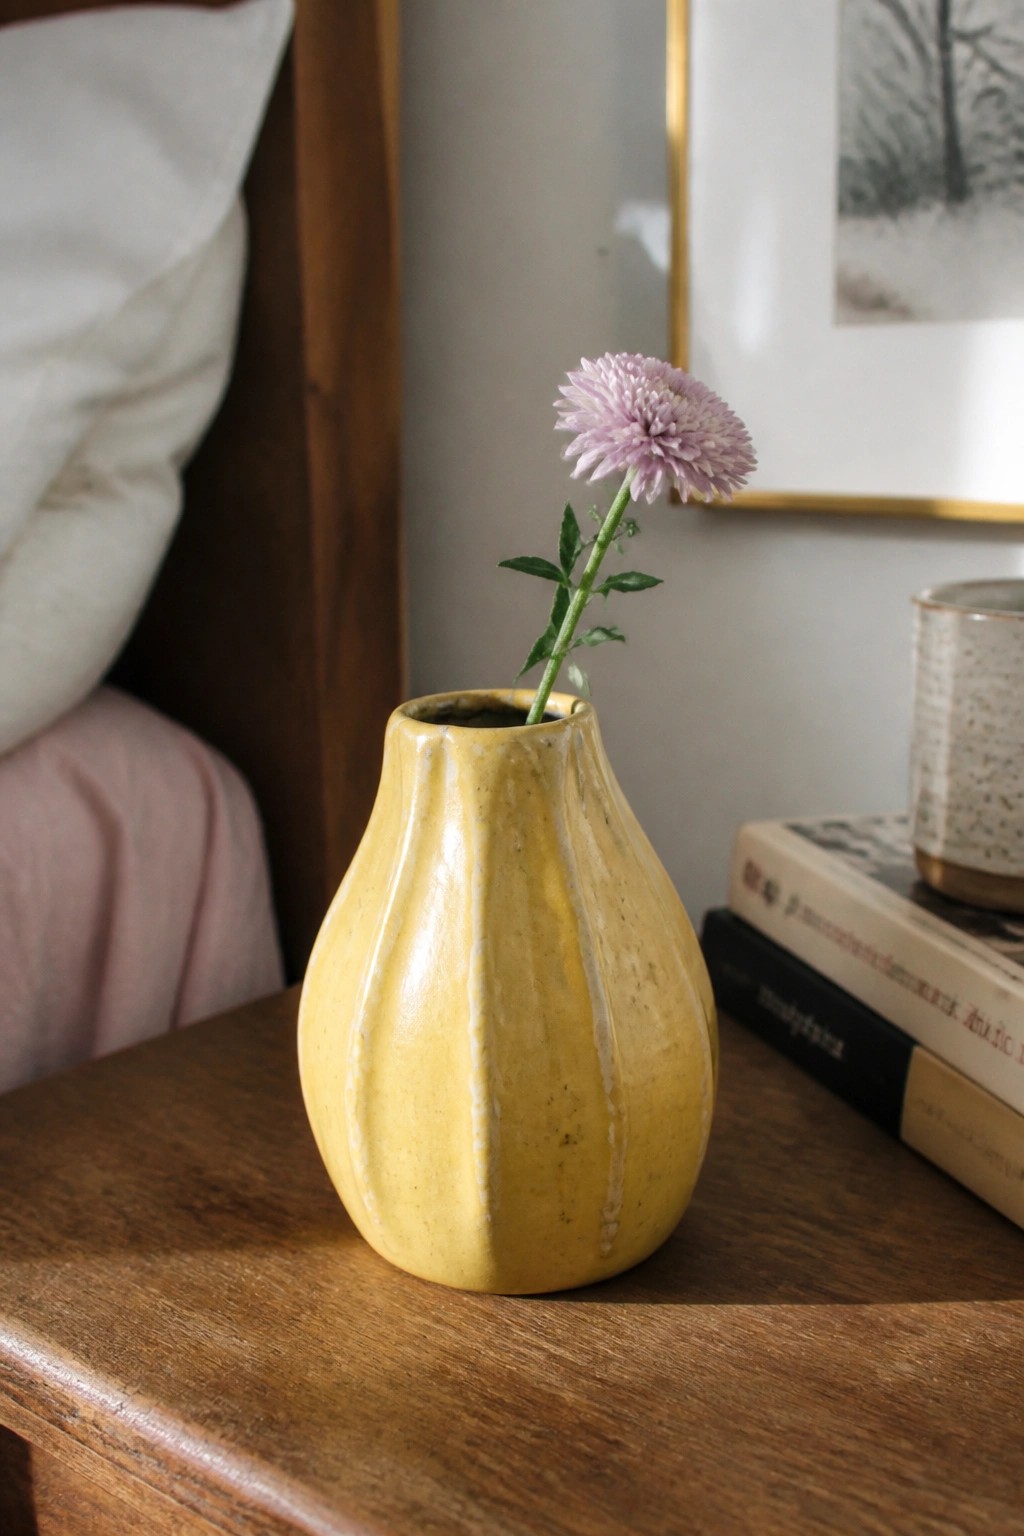
A small handbuilt vase with a pear shape and vertical ridges makes an effective bud vase for single stems. The ridges are formed by pinching or folding the clay walls to create subtle facets before the form is closed and smoothed. A yellow glaze with lighter streaks highlights those ridges and keeps the surface lively without added decoration. This keeps the project straightforward while giving the vase more presence than a plain round shape.
What makes this idea useful is how the faceted body can be scaled up or down depending on the flowers you want to display. The compact size fits a nightstand, desk, or shelf where a single stem needs support. You could rework the same pinching method into a taller cylinder for multiple stems or use slabs instead of coils for crisper edges. The bright glaze color also helps the finished piece photograph clearly for sharing.
Faceted Slab-Built Vase
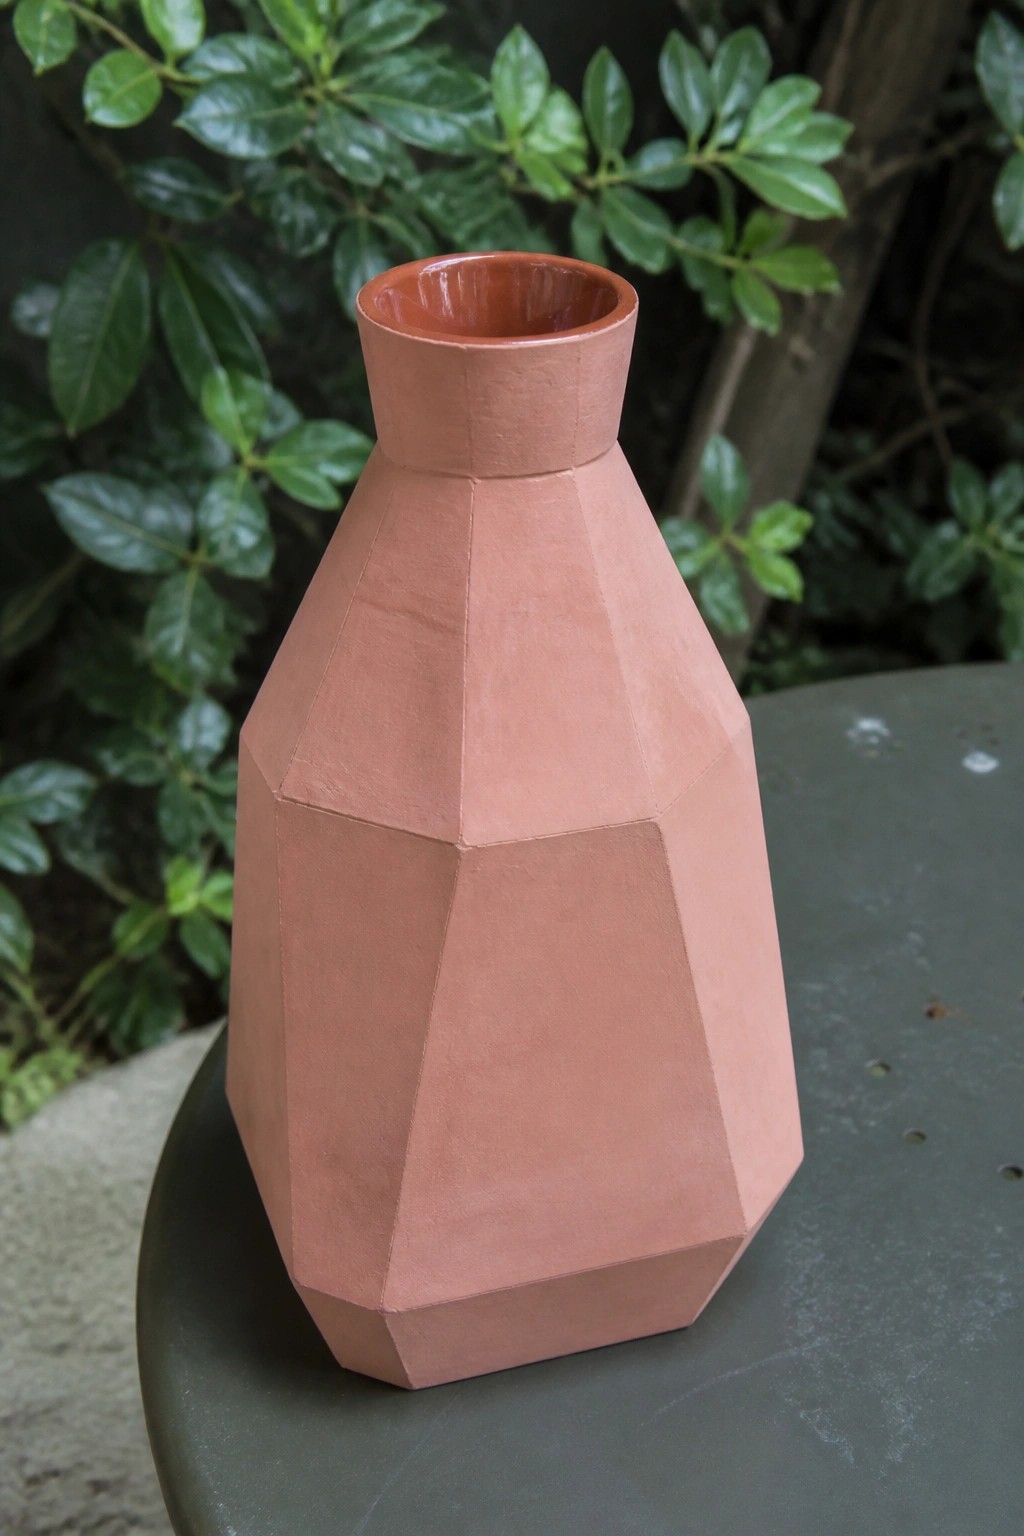
A handbuilt vase assembled from flat clay slabs creates a series of angular planes that form a tapered, multi-sided body. The construction starts wide at the base, narrows through the midsection, and finishes with a short cylindrical neck. This method produces a clean geometric shape that depends entirely on the cut edges and joined seams for its visual impact.
What makes this idea useful is how easily the same slab technique can be resized or reshaped for different proportions. The faceted form works well on a mantel or side table where the planes catch light without needing glaze or carving. You could shorten the height for a desk vase or widen the base to make a small planter, keeping the same angular joins throughout.
Dimpled Oval Texture on a Simple Handbuilt Vase
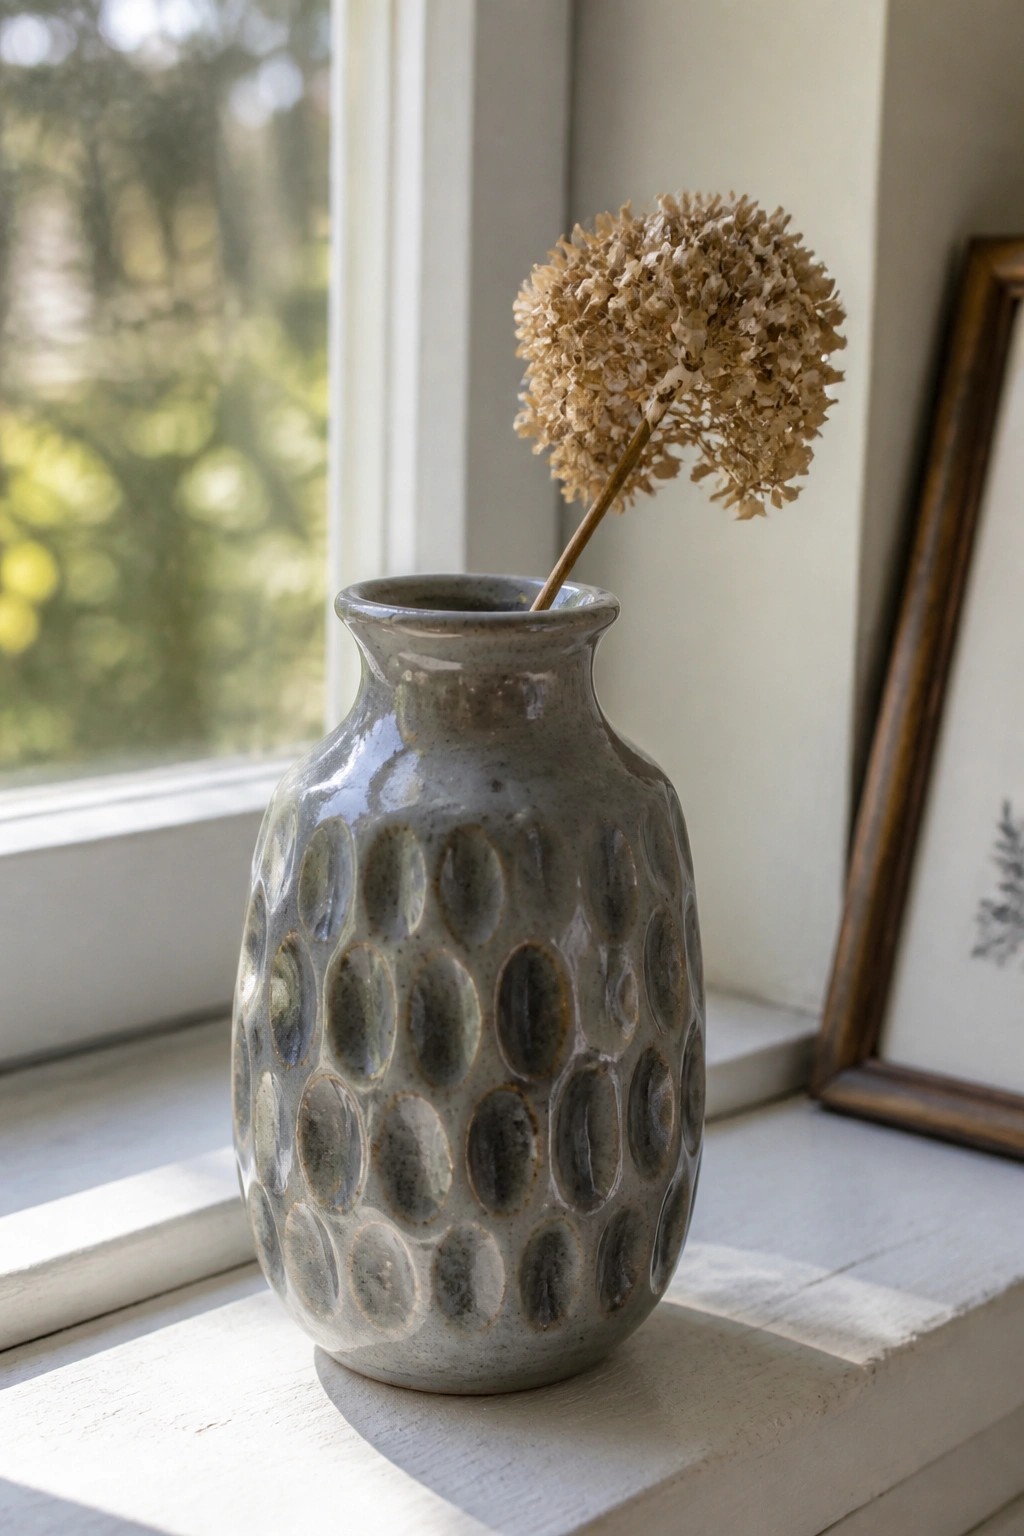
A handbuilt vase with rows of oval dimples pressed into the clay gives the surface a repeating pattern that catches light without added color. The rounded body narrows to a short neck sized for one or two stems, keeping the focus on the texture. A matte gray glaze settles into the recesses and leaves the raised ovals slightly lighter, so the pattern stays visible. This idea belongs in the category of decor vases that use surface impressions instead of carving or painting.
The small scale works well on windowsills or narrow shelves where larger pieces would crowd the space. You can recreate the dimples with any rounded tool or even your fingertip before the clay firms up, then adjust spacing to match the size of your piece. For a different version, try the same texture on a shorter cylinder that doubles as a small planter. The pattern photographs clearly against plain backgrounds, which helps it perform well in searches for textured pottery ideas.
Polka Dot Vase With a Rounded Form
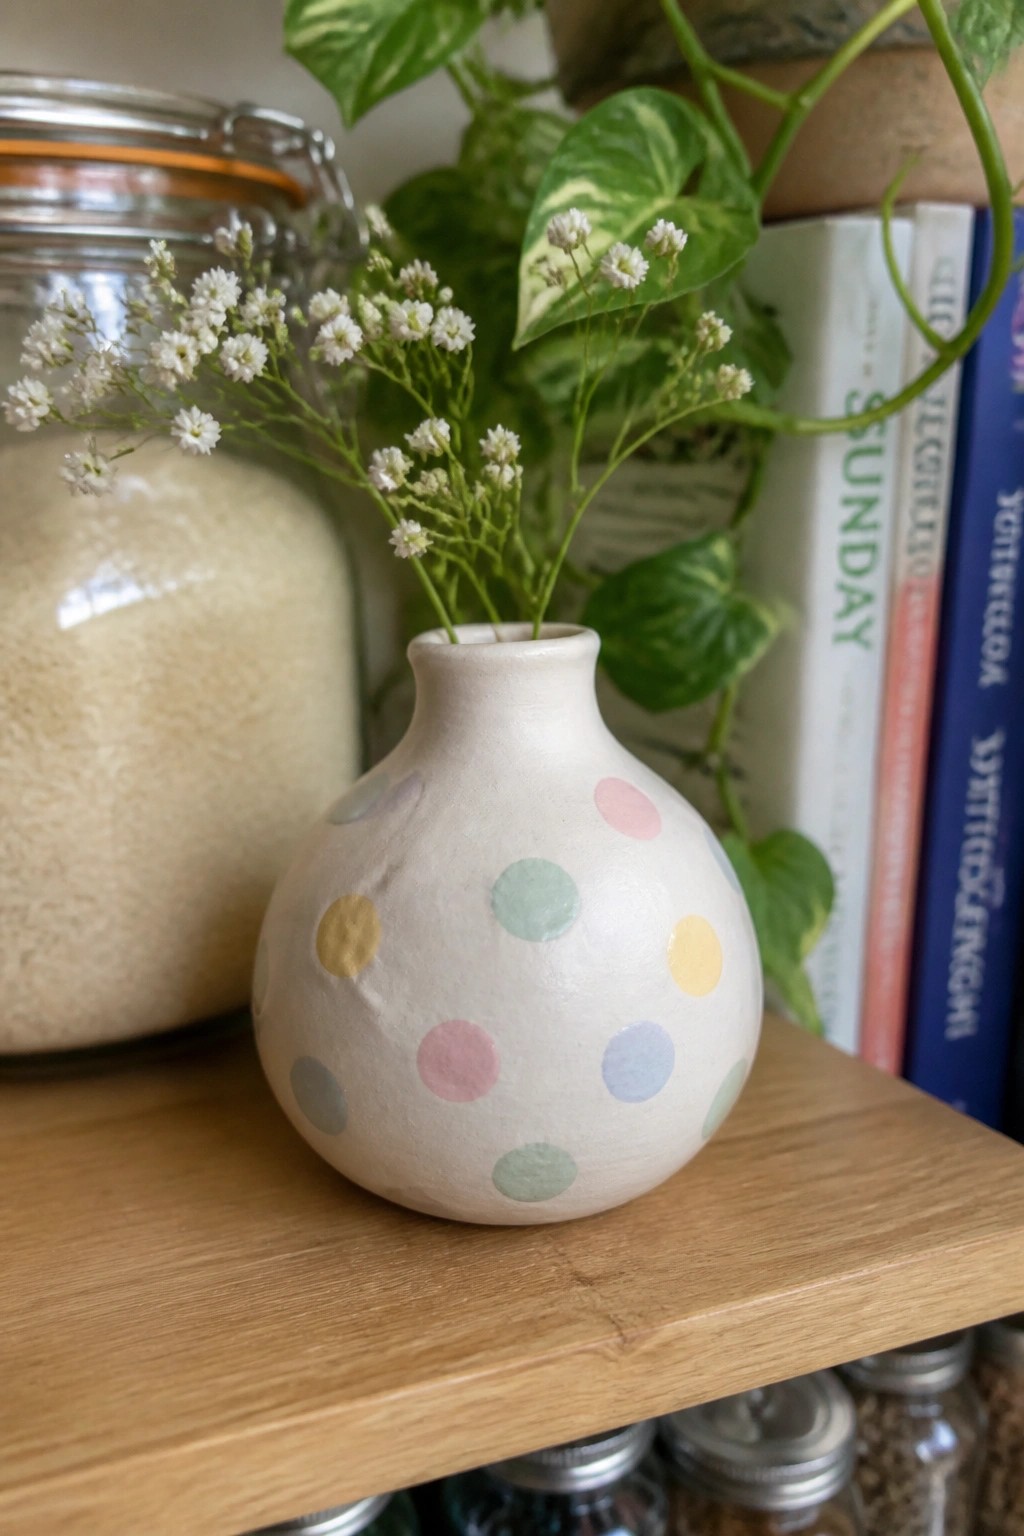
A small clay vase formed into a rounded bulb shape gives you a stable base and a narrow neck that holds a few stems without tipping. The matte surface lets the painted dots stand out clearly, and the mix of soft colors keeps the pattern light rather than busy. This approach works as a simple vase project because the shape itself does most of the work and the dots require only basic painting after the form is made.
What makes this idea useful is how the same rounded body can be repeated in different sizes to suit a desk, windowsill, or bathroom counter. The dots adapt easily to whatever colors you already have on hand or want to match with a room. You could try the pattern on a taller cylinder or a low bowl using the same painting steps. For a gift, the small scale means it takes less clay and still looks finished with just a few brushstrokes.
Incised Leaf Pitcher with Grid Base
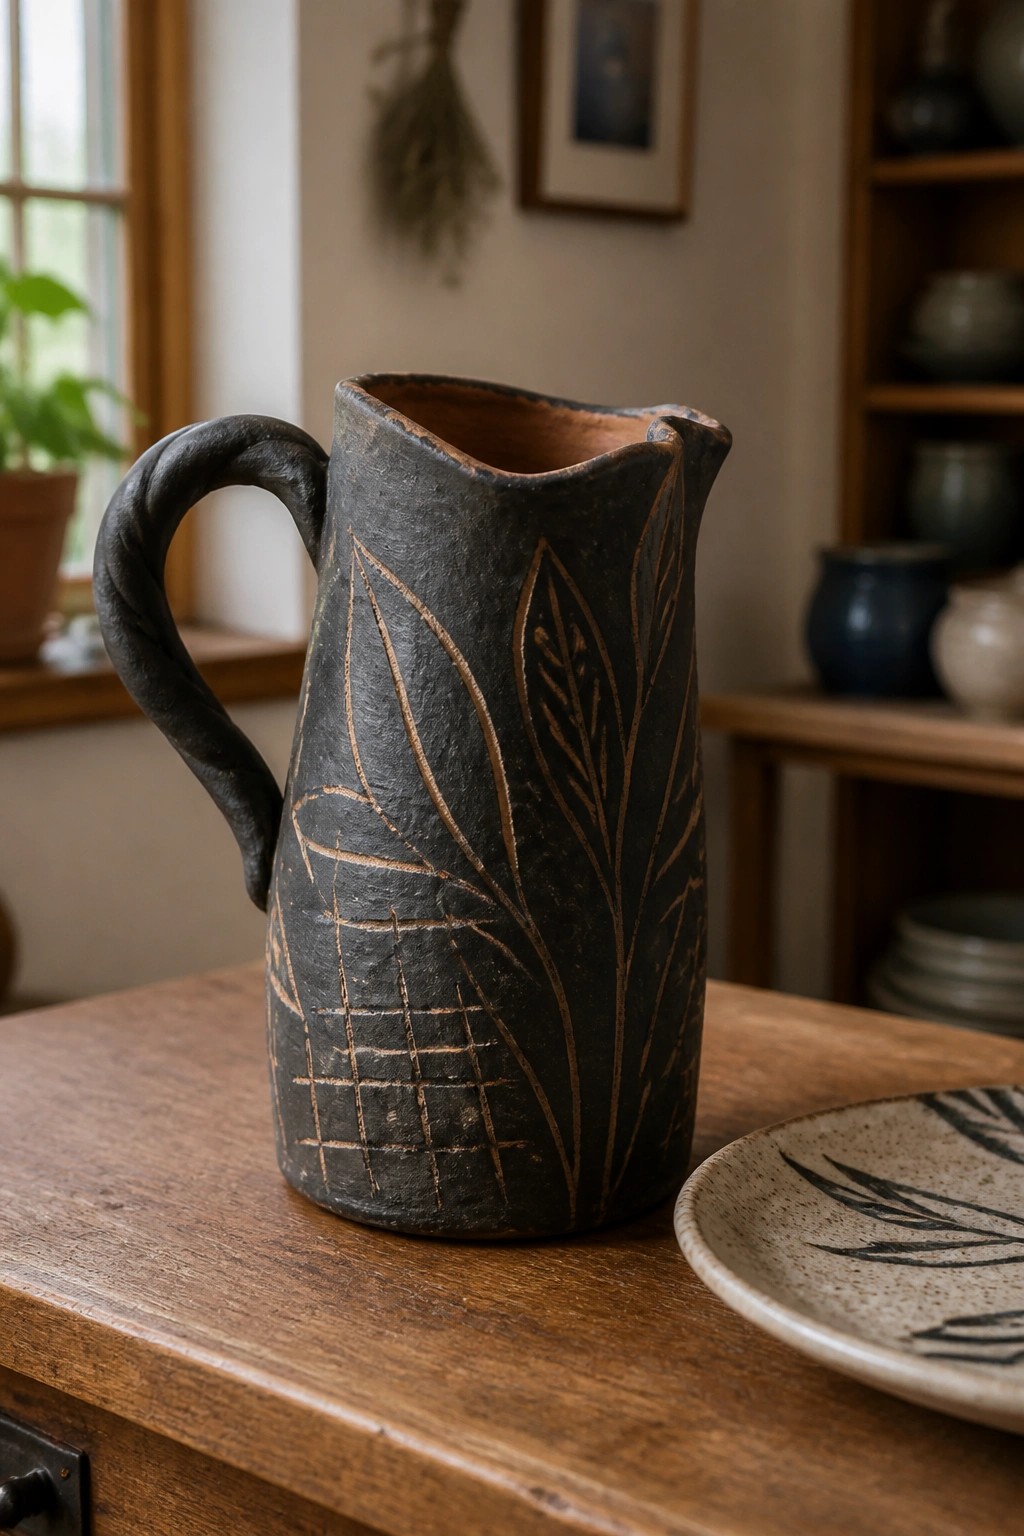
A handbuilt pitcher gains visual interest when you carve simple leaf shapes into the leather-hard clay and leave a grid pattern near the base. The dark clay body with lighter recessed lines creates clear contrast that makes the foliage stand out without extra color. A twisted handle adds a functional element while keeping the form straightforward to build from slabs or coils. This style fits the vase category but works equally well as a serving pitcher.
What makes this idea useful is how the tall shape holds flowers or pours liquid without extra attachments. You could repeat the leaf carving on a shorter cylinder to make a utensil holder or scale the grid pattern alone onto a set of small bowls. The dark surface with light incisions keeps the piece visible on open shelves where busy glazes might compete with other decor. For a gift, something like this adapts easily by changing the leaf size or adding a second color in the carved areas.
Ribbed Vase Built with Horizontal Texture
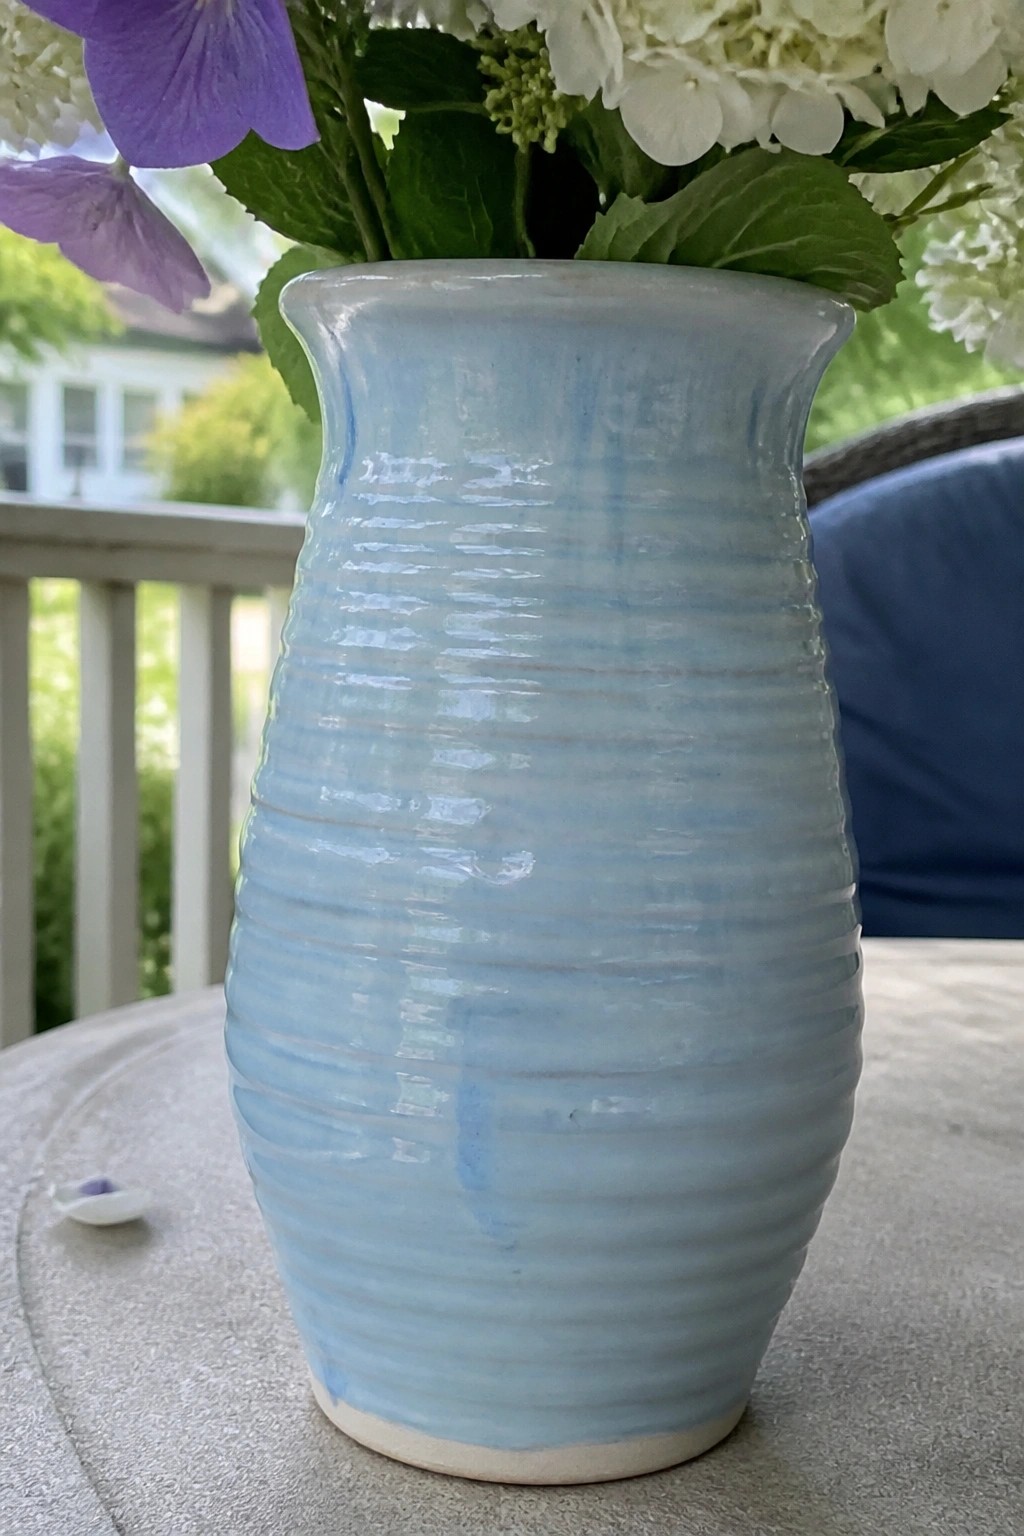
A handbuilt vase formed with repeated horizontal ridges gives the surface a clear linear pattern that holds glaze in the grooves. The pale blue glaze sits evenly overall but pools enough in the ridges to create subtle variation without added color work. This shape stays simple enough to build from slabs or coils while the ridges supply the main visual detail.
What makes this idea useful is how the ridges do most of the work once the basic form is complete. You can keep the same proportions for a taller version or shorten the height for a wider planter base. The soft blue works with many glaze brands, so it is easy to match to existing tableware or switch to a matte finish. For a gift this size fits on a side table or mantel without needing extra display space.
Sculpted Face Wall Pocket Vase
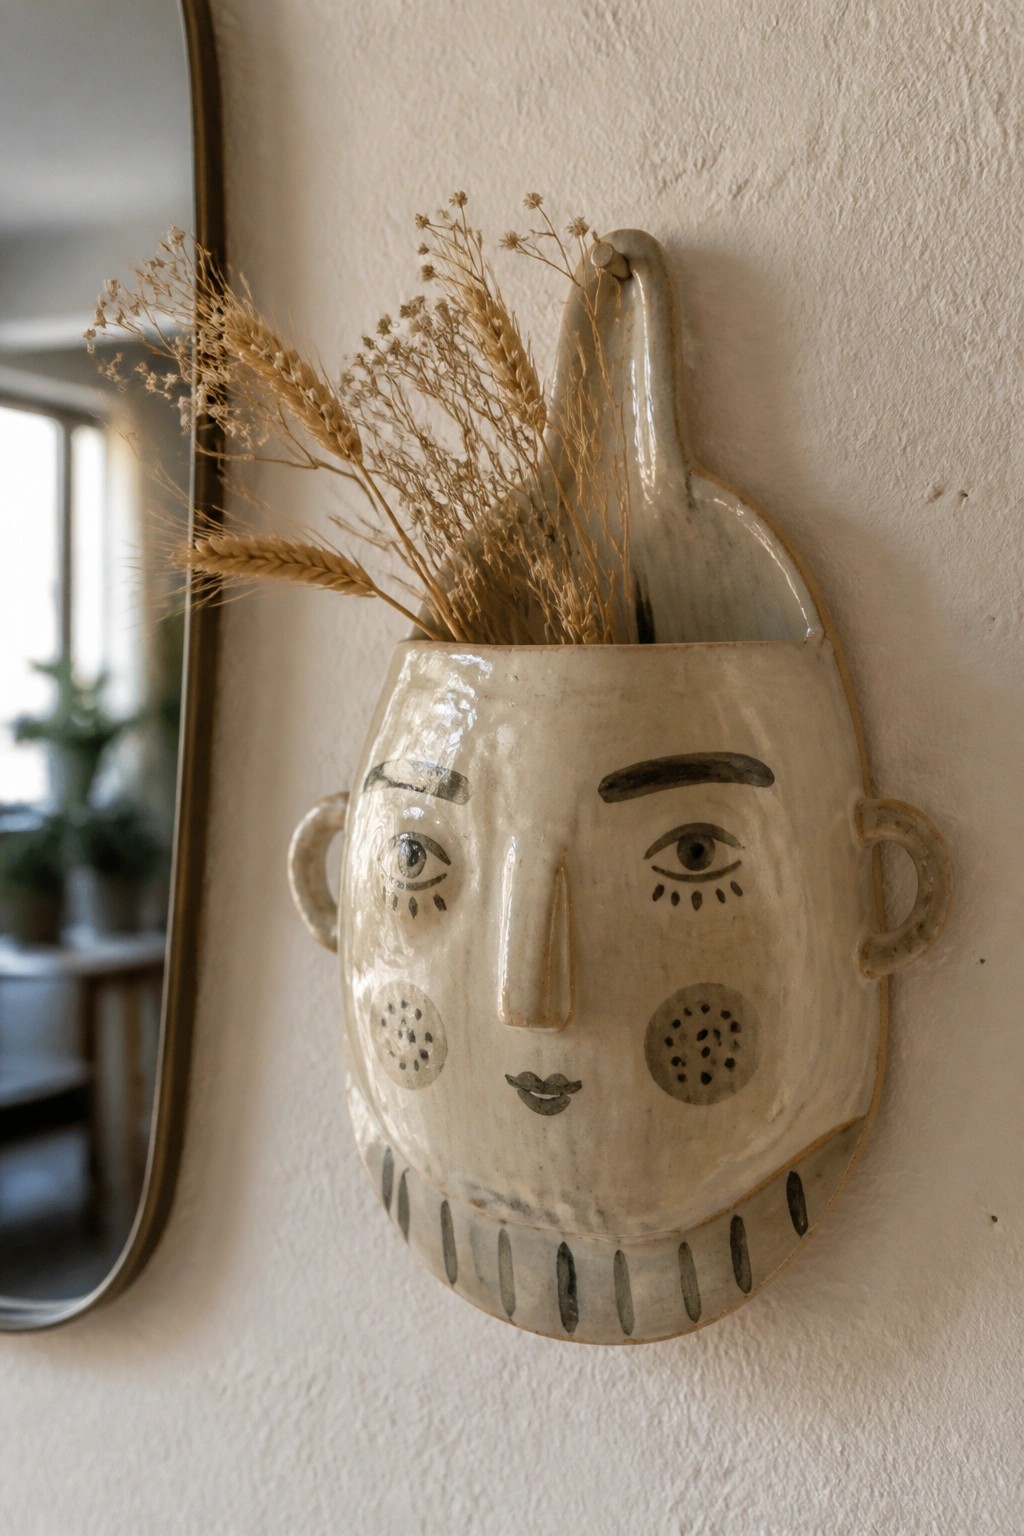
A handbuilt clay wall vase shaped like a face gives you a compact holder for dried stems or small cuttings. The form is built with a flat back and an open top so it sits flush against the wall while the loop at the back allows easy hanging. Painted facial details such as dotted eyes, simple brows, and a line of texture along the chin add interest without extra carving or relief. Side loops that read as ears and the overall rounded shape keep the piece balanced and easy to make from slabs or coils.
What makes this idea useful is how the flat back and hanging loop turn a basic vase shape into wall storage without extra hardware. You could rework the same face motif on a shorter version to hold toothbrushes in a bathroom or skip the features entirely and use just the painted dots on a plain pocket shape. The small scale makes it simple to adapt for a desk or narrow hallway where a full-size vase would not fit. For a gift, something like this works especially well if you keep the glaze light and the painted lines minimal so it pairs with most decor styles.
Slanted Neck Vase with Clay Ball Band
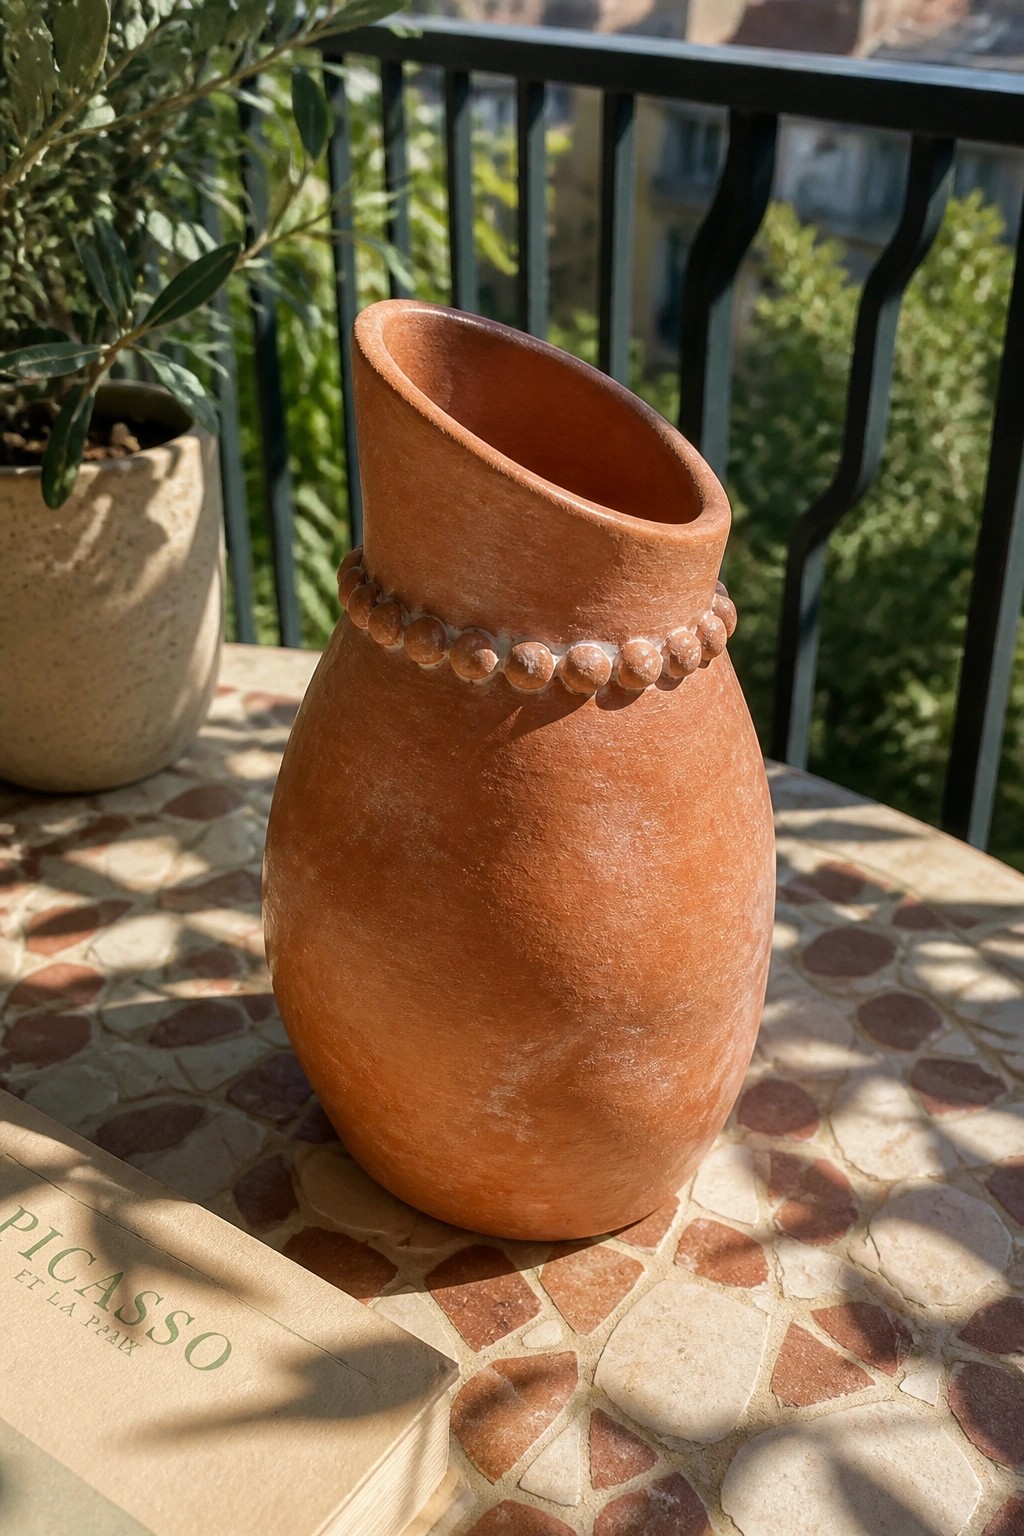
A handbuilt vase with a rounded body and a sharply tilted neck gives the form an off-balance look that draws attention to the opening. The row of small clay balls pressed around the neck adds a simple repeating detail that breaks up the smooth surface without requiring extra tools. This kind of vase works as a standalone decor piece where the shape itself carries the interest rather than surface patterns or glaze.
What makes this idea useful is that the bead trim can be rolled quickly from any leftover clay and attached before drying. The same neck tilt could be applied to a taller or narrower version to hold branches or dried stems. In a living room or entryway, the shape stands out on a shelf even when left unglazed. You could also skip the balls entirely and just focus on refining the angle of the neck for a cleaner result.
Draped Slab Vase with Folded Edges
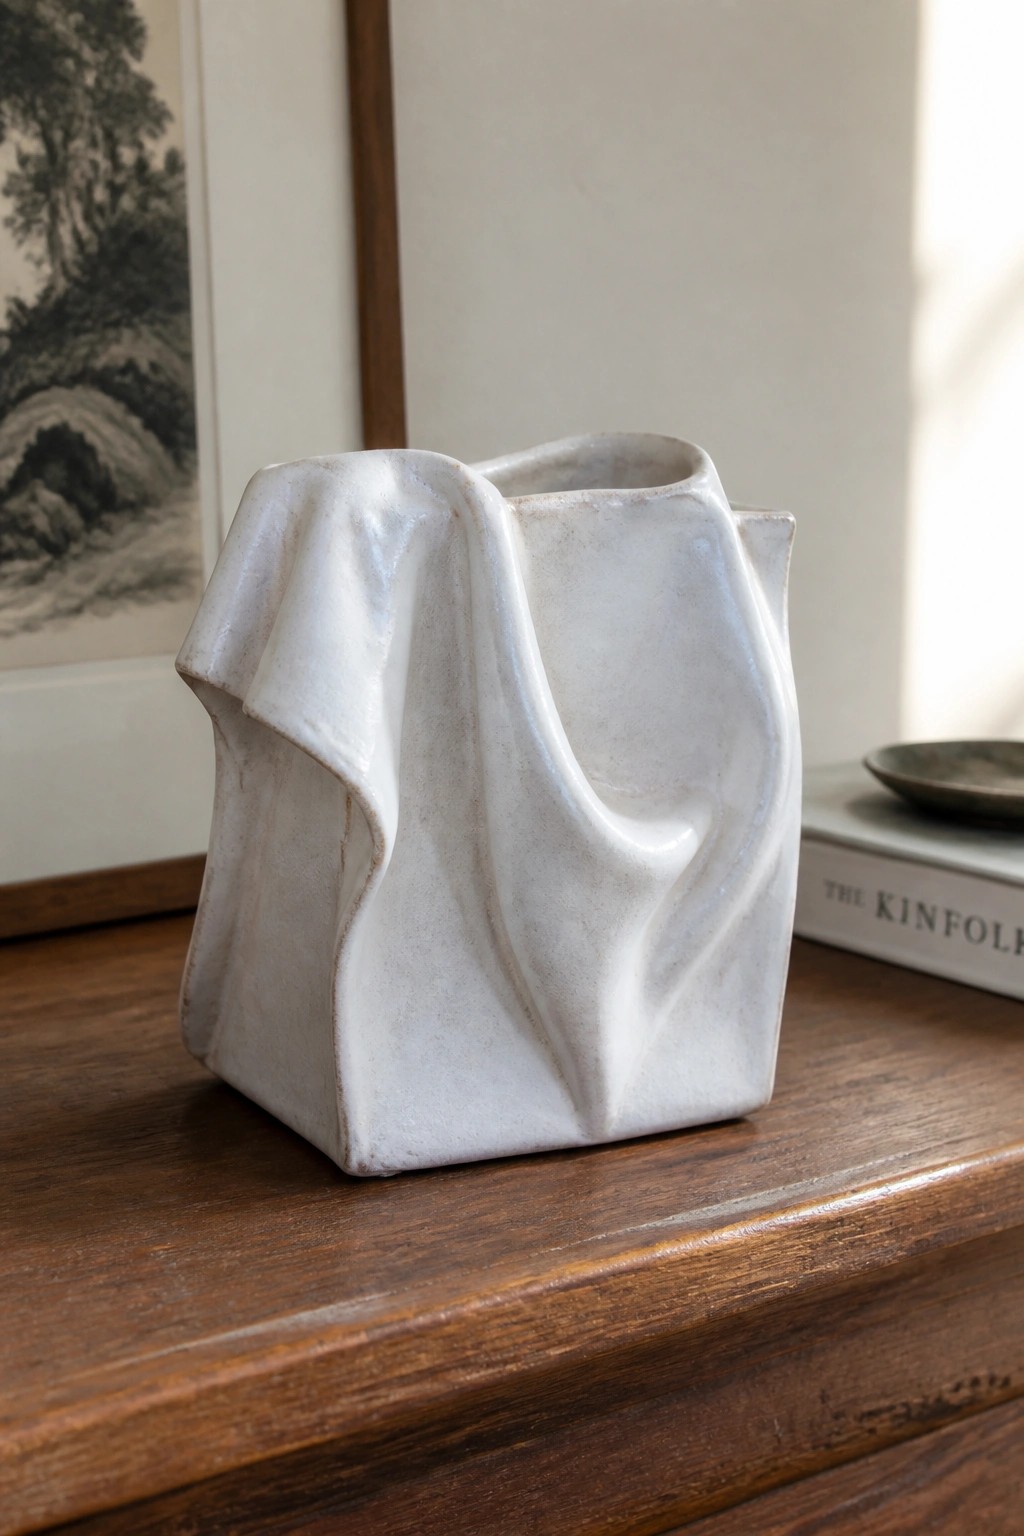
A handbuilt vase made by joining clay slabs and then folding and pinching the walls to create soft drapes and creases. The square base stays stable while the upper sections are manipulated to look like fabric that has been gathered and allowed to fall. This gives the piece an irregular top edge and a surface full of shadows from the folds. The matte white glaze keeps attention on the form itself.
What makes this idea useful is how the folds create interest using only basic slab work and no carving. The shape works especially well as a standalone decor piece on a mantel or side table. You could scale the same folding method down for smaller bud vases or try it with a colored slip to highlight the creases. For a gift this stands out because the draped surface feels more considered than a plain cylinder.
Sculpted Cactus Vase with Added Arms
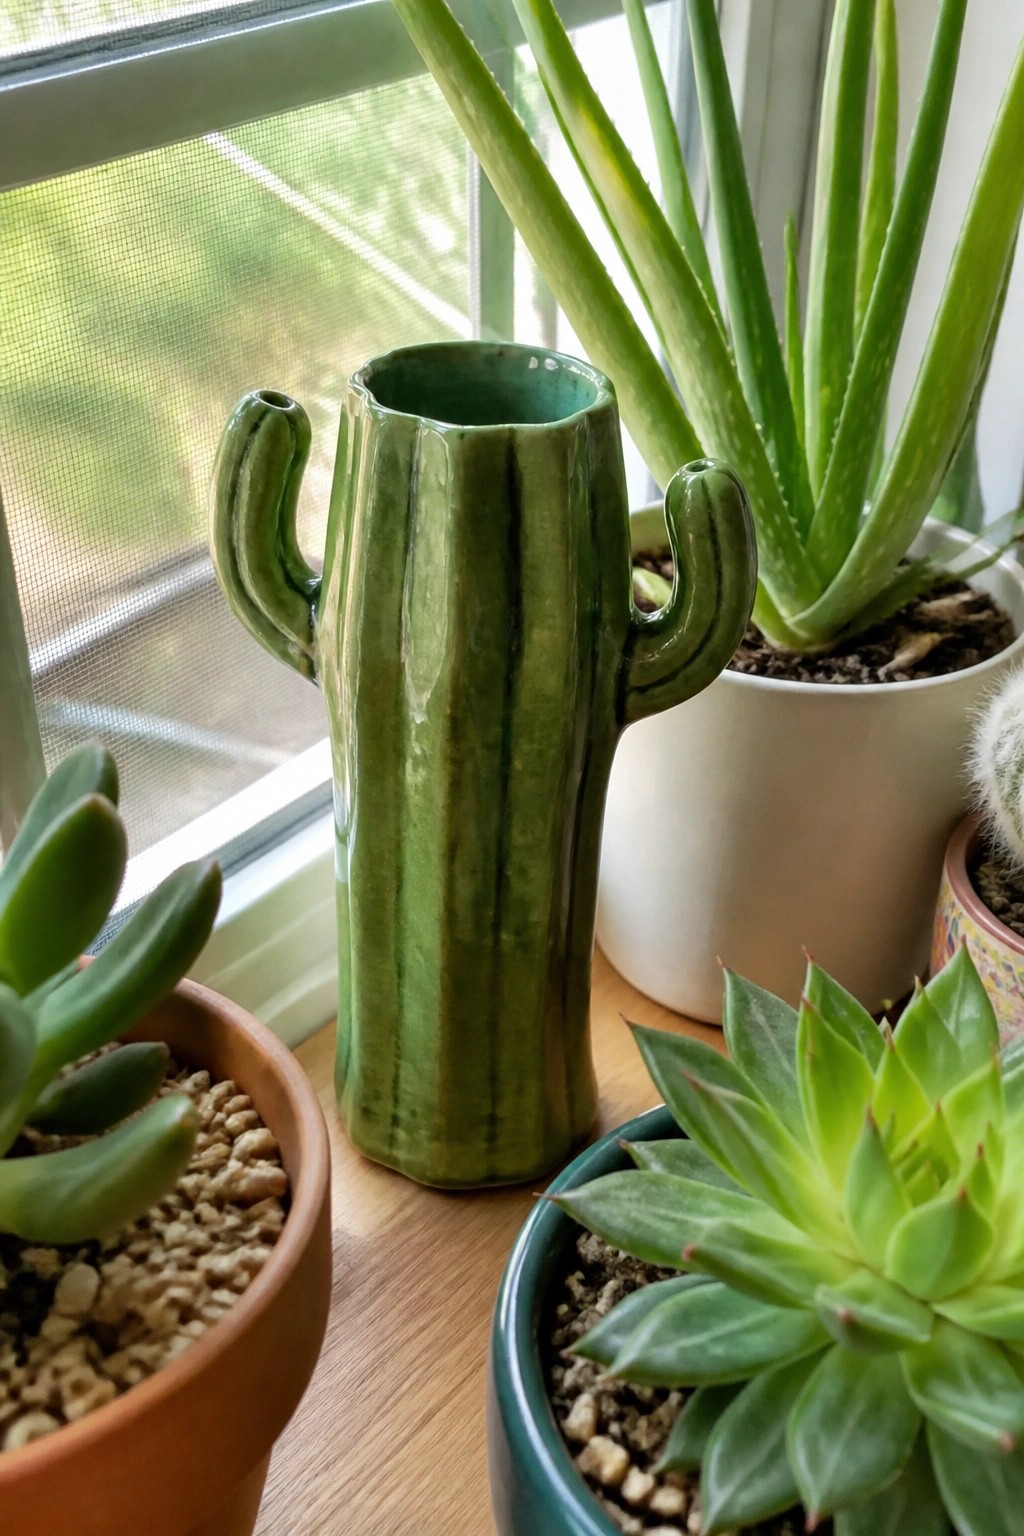
A cactus-shaped vase starts with a tall, narrow cylinder of clay that you score vertically to suggest ribs. Short coils or pinched sections form the arms on either side, then a streaky green glaze with darker lines gives the surface the look of a real cactus. The result is a functional vase that doubles as a plant-themed object and pairs naturally with succulents or aloe.
What makes this idea useful is that the same basic cylinder and arm shapes work at different heights or widths, so you can scale it down for a bud vase or widen it slightly for a small planter. The vertical texture is simple to add with a tool or rib before glazing, and the cactus form lets the piece blend into a windowsill display without extra decoration. For a gift, you could keep the arms short and use a single matte green glaze to make the shape the main focus.
Double-Necked Vase from Joined Clay Forms
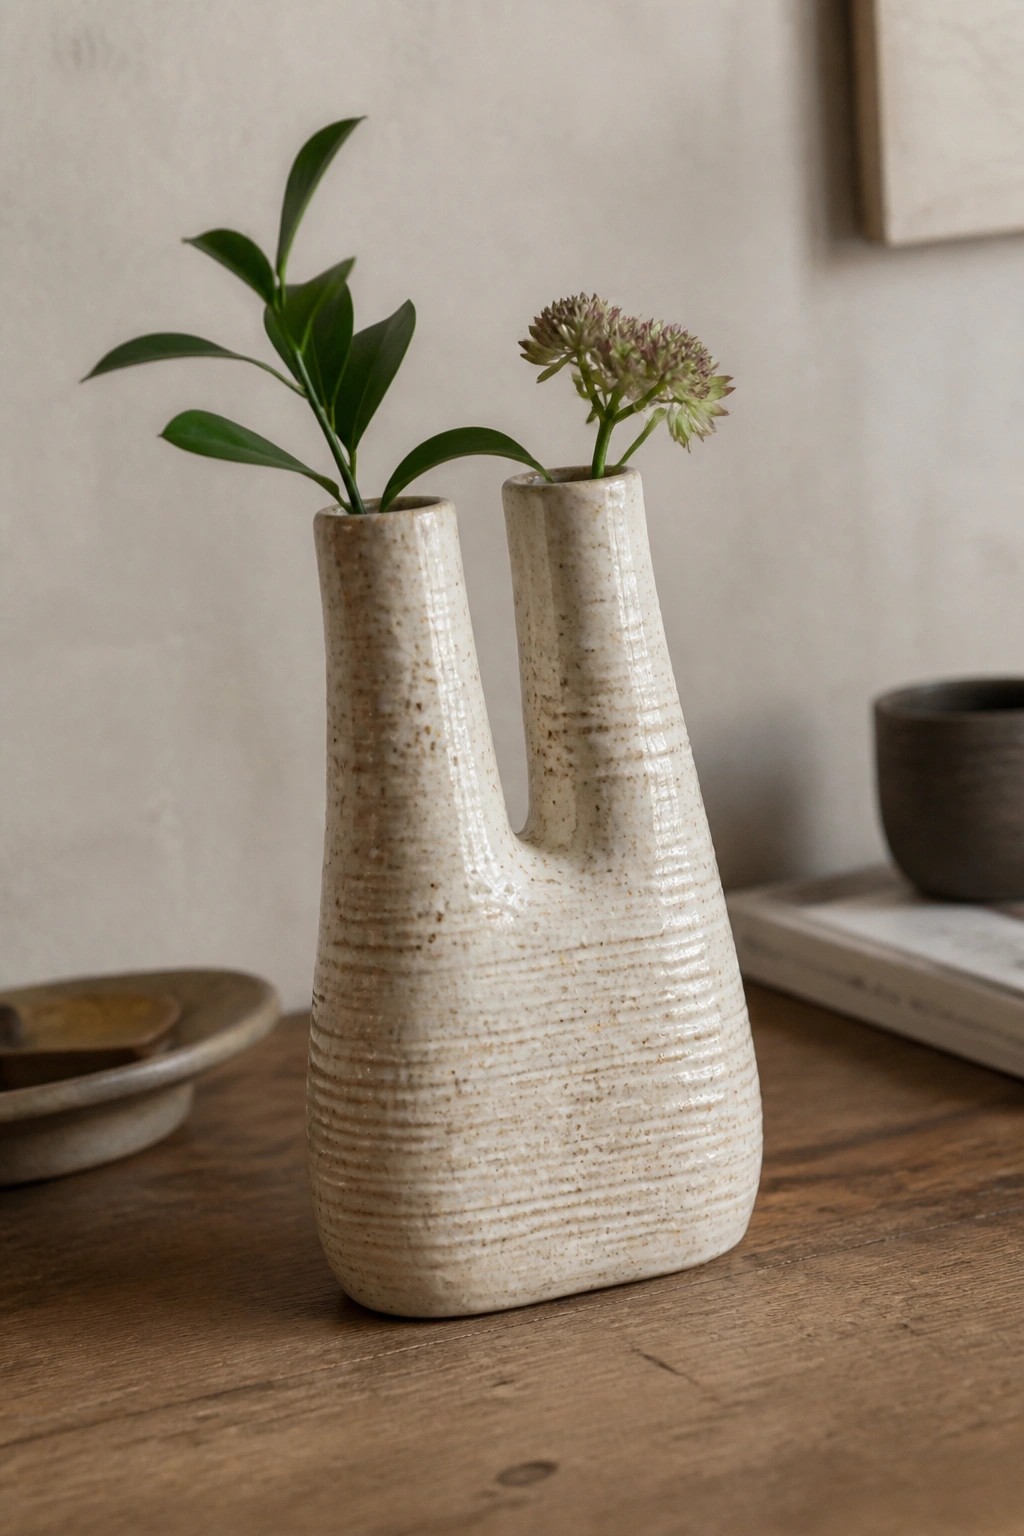
A handbuilt ceramic vase formed by merging two tapered cylinders at the base gives two separate necks for holding stems or cuttings. Horizontal ridges pressed into the clay add texture and help define the shape without extra decoration. The speckled matte glaze in a light tone highlights the form while keeping the surface simple and functional. This vase idea fits the category of a plant holder or decor piece that displays multiple small arrangements at once.
What makes this idea useful is the joined shape that lets one piece handle two different plants or flowers without crowding a single opening. The ridged texture comes from basic handbuilding steps, so you can adapt it by changing neck heights or adding a third opening on a wider base. Scale the form smaller for a bathroom counter or try a matte black glaze to create stronger contrast with green stems. For Pinterest, the clean silhouette and dual openings make it easy to photograph in different settings.
Pinched Rim Vase with Gradient Glaze
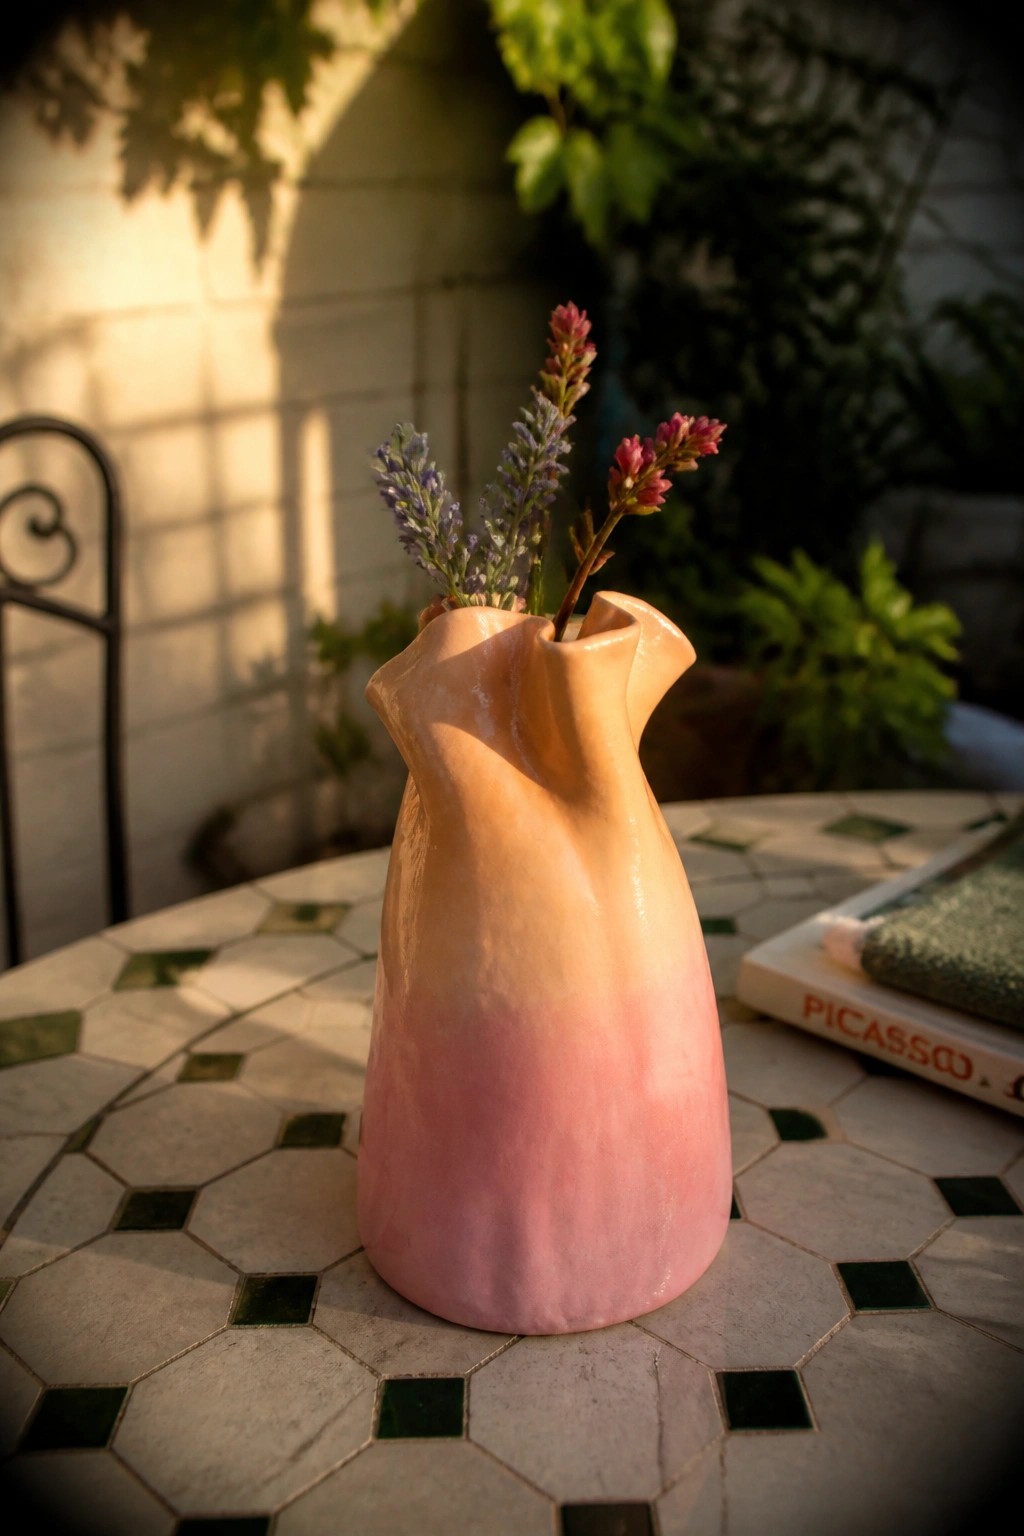
A handbuilt vase shaped by pinching and folding the upper clay walls produces an uneven, soft-edged opening that sits above a rounded body. The form tapers gently from a wider base to a narrower neck, keeping the overall profile compact. A glaze applied in two tones creates a smooth shift from peach near the rim to pink at the base, giving the surface movement without added carving or texture. This style fits the category of a small decorative vase suited for a handful of stems or cuttings.
What makes this idea useful is how the folded rim adds interest using only basic handbuilding steps. The same shape can be adapted by changing the glaze colors or by stretching the folds wider for a different opening. It works well on a side table or shelf where a low vase keeps flowers visible without taking up much space. The approach is easy to repeat in a matching pair or to adjust slightly taller for different stem lengths.
Coil-Built Ribbed Vase with Horizontal Texture
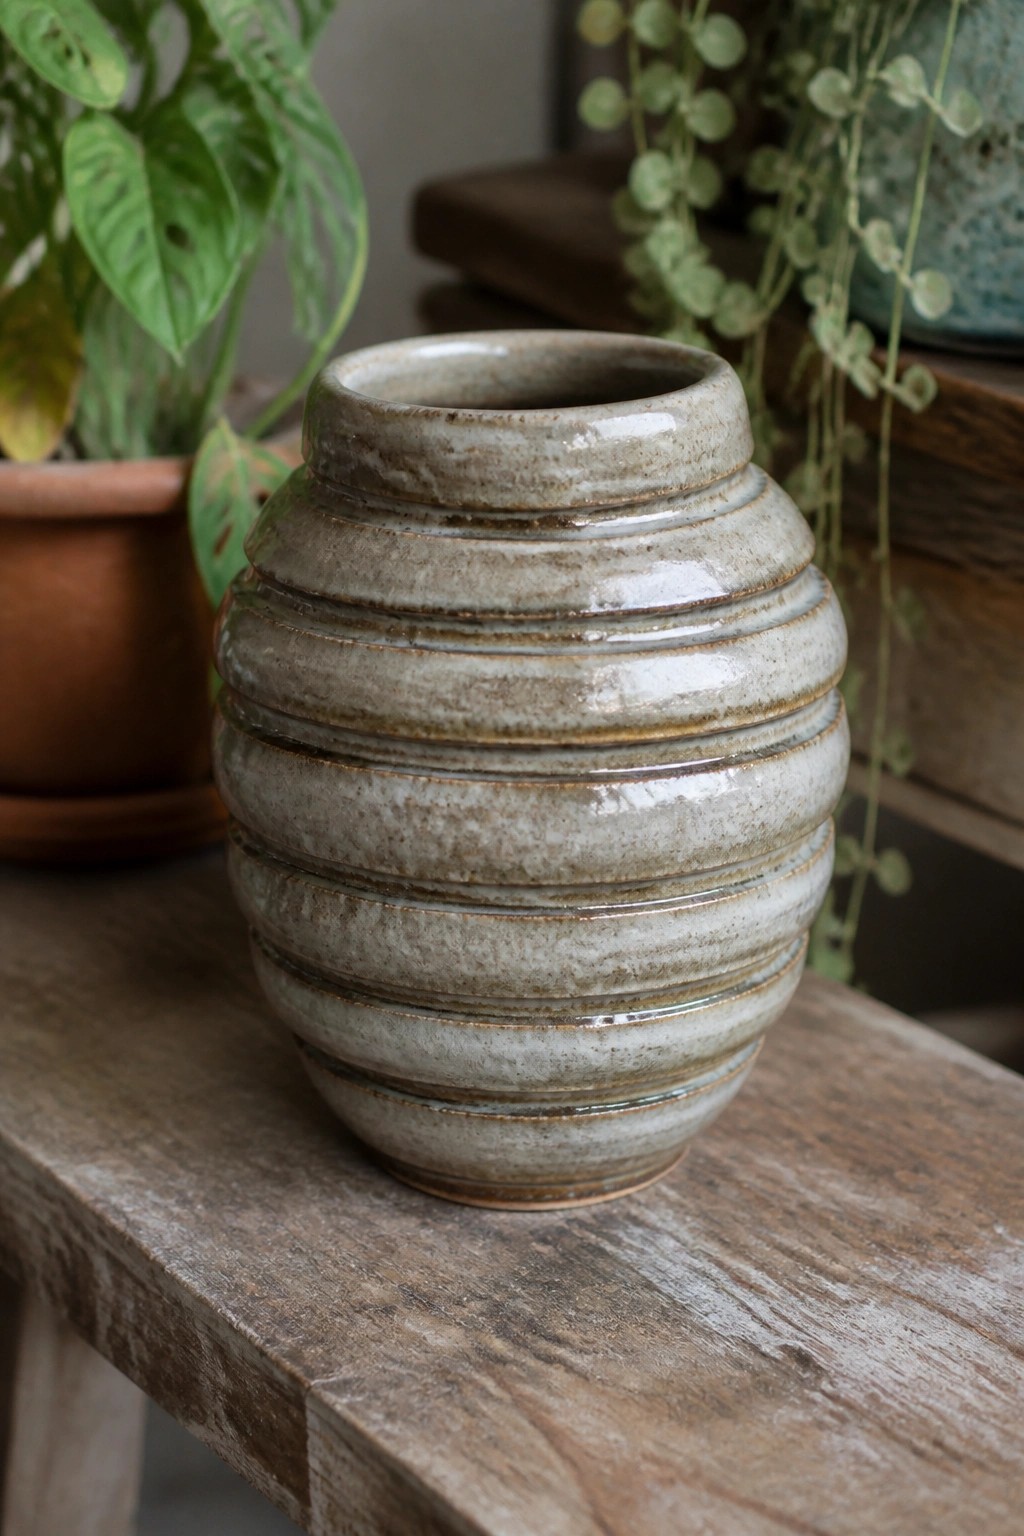
A handbuilt vase formed by stacking and smoothing coils creates a rounded body covered in even horizontal ridges. The shape stays compact with a short neck and wider midsection that gives it stability. A matte glaze in soft gray-brown tones pools lightly in the grooves to emphasize the lines without overpowering the surface.
What makes this idea useful is how the coil ridges do most of the visual work once the piece is glazed. The same method works for making a set of three vases in different widths or for adjusting the neck height to suit longer stems. Place it on a windowsill or entry table where the texture shows up well against plain walls. You could also skip the neck entirely and turn the base form into a low planter or candle holder.
Combined Bud Vase and Ring Dish
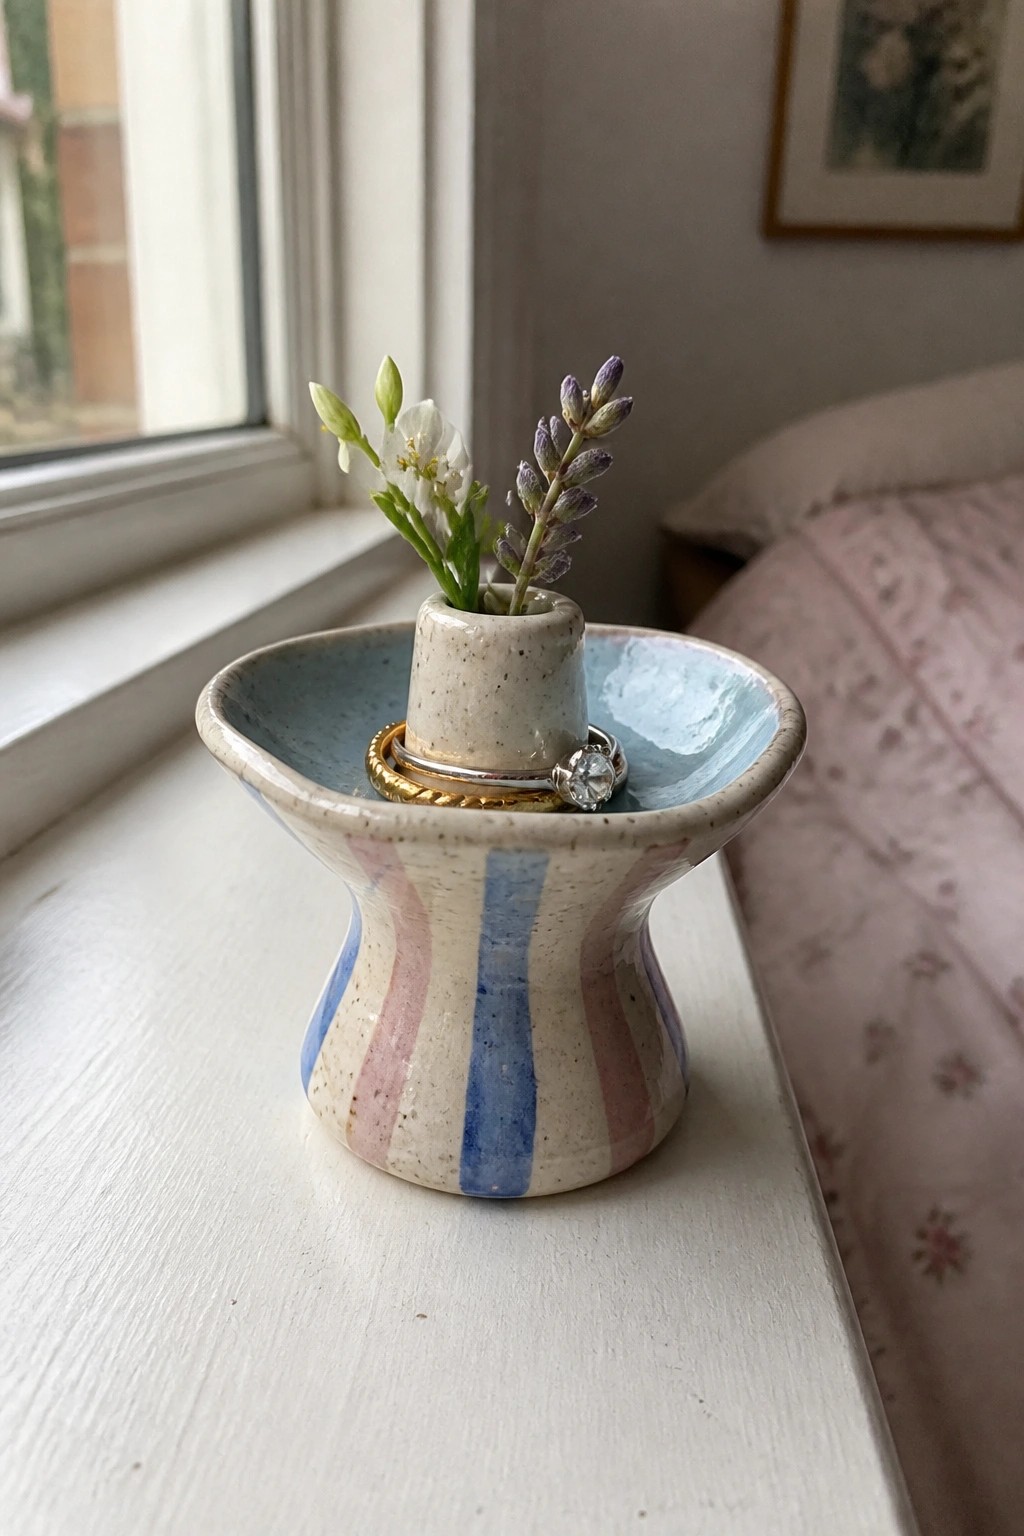
This handbuilt piece pairs a small central cylinder for holding a few flower stems with a wide surrounding bowl that catches rings or small objects. The pedestal base lifts the whole form off the surface, while the soft blue and pink stripes add a simple pattern without overpowering the shape. Speckled clay shows through the glaze, keeping the surface texture visible and the overall scale compact enough for a windowsill or bedside table.
What makes this idea useful is the built-in dual purpose. The bowl keeps everyday rings in one spot while the vase holds a quick flower cutting, so the piece earns its place on a dresser or desk. You could simplify the stripes to solid color or swap them for underglaze lines, and the same form works as a standalone tiny vase if you skip the ring function. The small size also means it uses little clay and fires quickly, which helps when testing new glaze combinations or color placements.
Frequently Asked Questions
What clay should I choose for these handbuilt vase projects? A beginner friendly option is a plastic earthenware or stoneware clay that fires between cone 04 and cone 6. These bodies hold shape well during pinching and coiling yet remain forgiving if you need to smooth seams or adjust forms. Test a small sample first to confirm it matches your available kiln or studio firing range.
What basic tools do I really need to try the techniques in the article? Your hands are the main tools, but a few inexpensive items make the work easier. Keep a rolling pin or slab roller for even slabs, a wooden rib for compressing coils, a scoring tool or fork for joining pieces, and a damp sponge for finishing surfaces. Most of the 24 ideas rely on these simple supplies rather than specialized equipment.
How can I stop my vases from cracking while they dry? Cover each finished piece loosely with plastic for the first two days so moisture leaves slowly. After that, uncover gradually over the next several days while keeping the vase away from heaters, windows, or fans. Turning the piece occasionally helps it dry evenly and reduces stress on the joins created by coiling or slab methods.
Can I make waterproof vases without a kiln? Air dry clays allow you to build the same shapes at home, yet they stay porous unless sealed. Once the piece is fully dry, apply two or three coats of a waterproof acrylic sealer inside and out, letting each coat cure completely. For truly durable, food safe results, locate a local pottery studio or firing service that accepts student work.
How do I add personal style to the 24 vase ideas without extra skills? Press leaves, lace, or textured fabric into soft slabs before assembling to create surface patterns. Try mixing two clay colors together for a marbled effect or attach small coils as raised lines that form simple geometric designs. These low skill additions keep the focus on handbuilding while making each vase unique.

Pottery Path is my cozy corner of the internet where I share clay ideas, pottery inspiration, and simple projects you can recreate at home. I love exploring everything from air dry clay to handbuilt pottery to cute minis that brighten your day. My goal is to make clay crafting feel easy, fun, and welcoming for anyone who wants to try it.
You will find beginner friendly tutorials, creative pottery painting ideas, and lots of warm inspiration for slow and happy crafting. If you enjoy hands on creativity, this space will feel like home.