
I started making coil bowls because they are straightforward and do not need much equipment.
Adding texture to the surface has always been the part I enjoy most.
It can be as simple as pressing in some fabric or using tools I already have around.
I put together these ideas from my own experiments and a few things that worked well for me.
Some bowls turned out better than others but they all show different ways to play with the surface.
Coiled Bowl With Speckled Glaze And Dot Row

A coil-built bowl gains visual interest when the exterior ridges stay unglazed and the interior receives a light speckled glaze in one color. The row of yellow dots placed along the curve creates a simple repeating motif that draws the eye inward without competing with the texture. This keeps the piece firmly in the decorative bowl category while the contrast between matte ridges and glossy interior gives it clear handmade character.
The small scale works especially well for jewelry, keys, or small desk storage. You could swap the yellow dots for another color or extend the same ridge pattern to a larger tray shape. The unglazed exterior also means less glaze work overall, which makes the idea easy to repeat in a weekend session.
Braided Coil Bowl With Impressed Leaf Texture
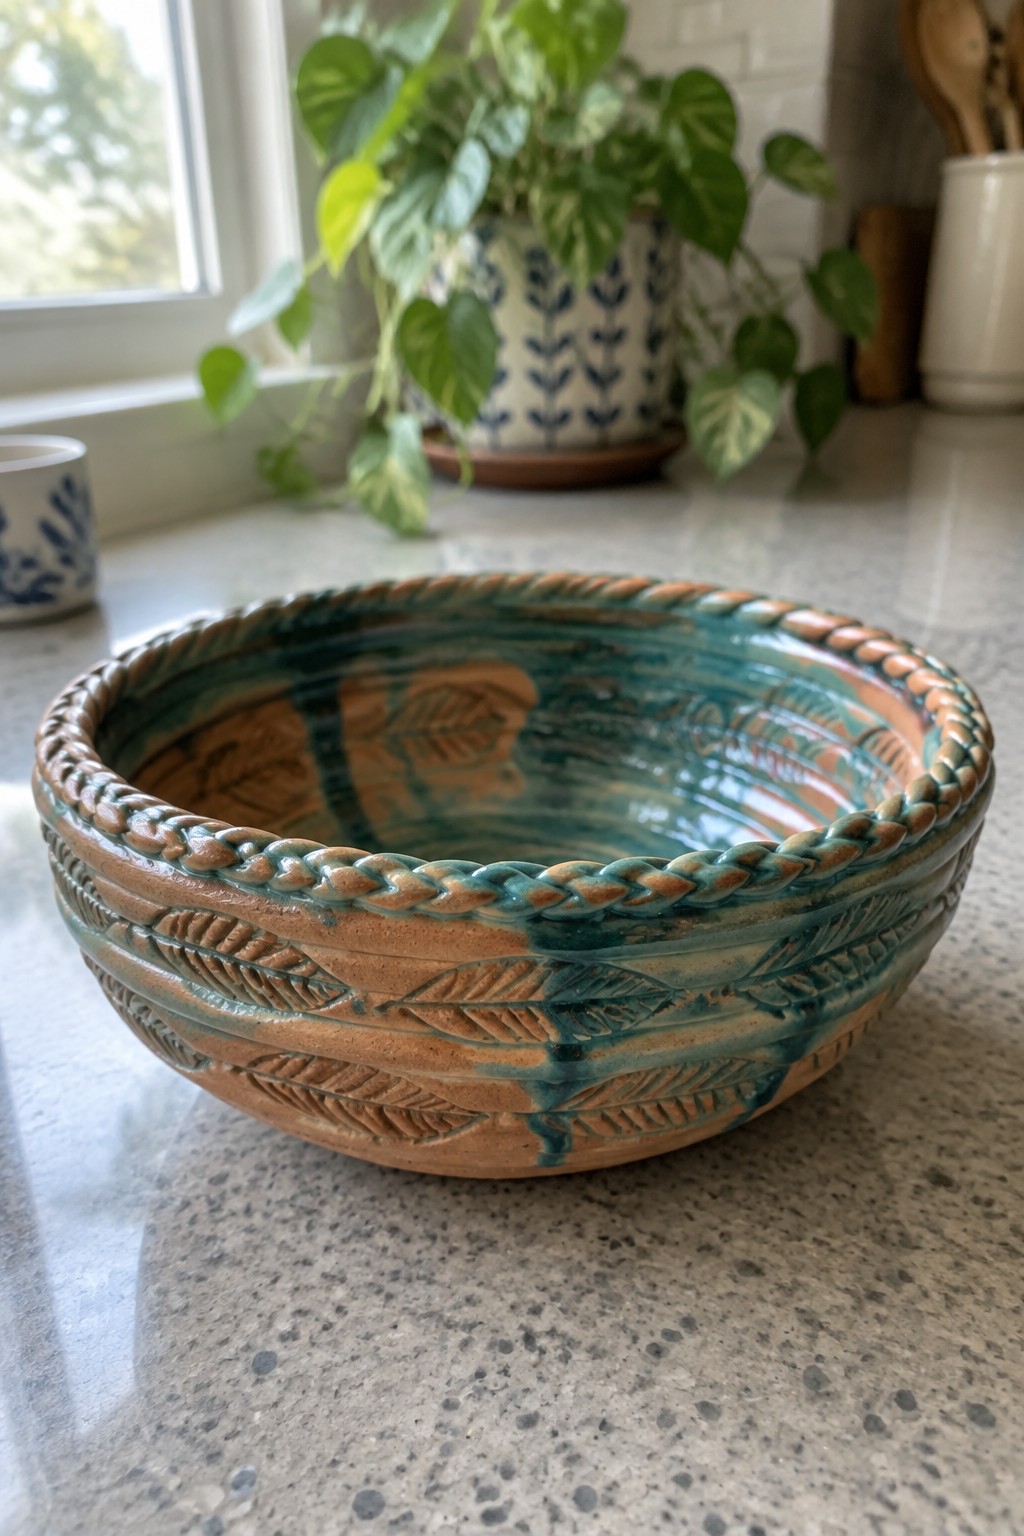
A coil-built bowl gains its structure from a thick rope-like rim that wraps the entire opening. Impressed leaf or feather patterns ring the exterior walls in repeating bands, while a teal glaze pools into the carved lines and drips over the warmer clay base. The contrast between the raised braid and the recessed motifs gives the surface depth without needing additional color layers. This approach works as a decorative bowl that prioritizes texture over smooth form.
The shape does a lot of the work here since the wide, low profile makes the rim and wall details easy to see from multiple angles. You could adapt the same braided edge and impressed patterns to a smaller tray or a taller planter by changing only the coil thickness. In a kitchen or entryway, the bowl functions as a catch-all that still reads as intentional decor. The impressed texture is simple to repeat with basic stamps, so the idea scales well for someone who wants visible surface interest without complex glazing.
Stacked Coil Planter With Arched Impressions
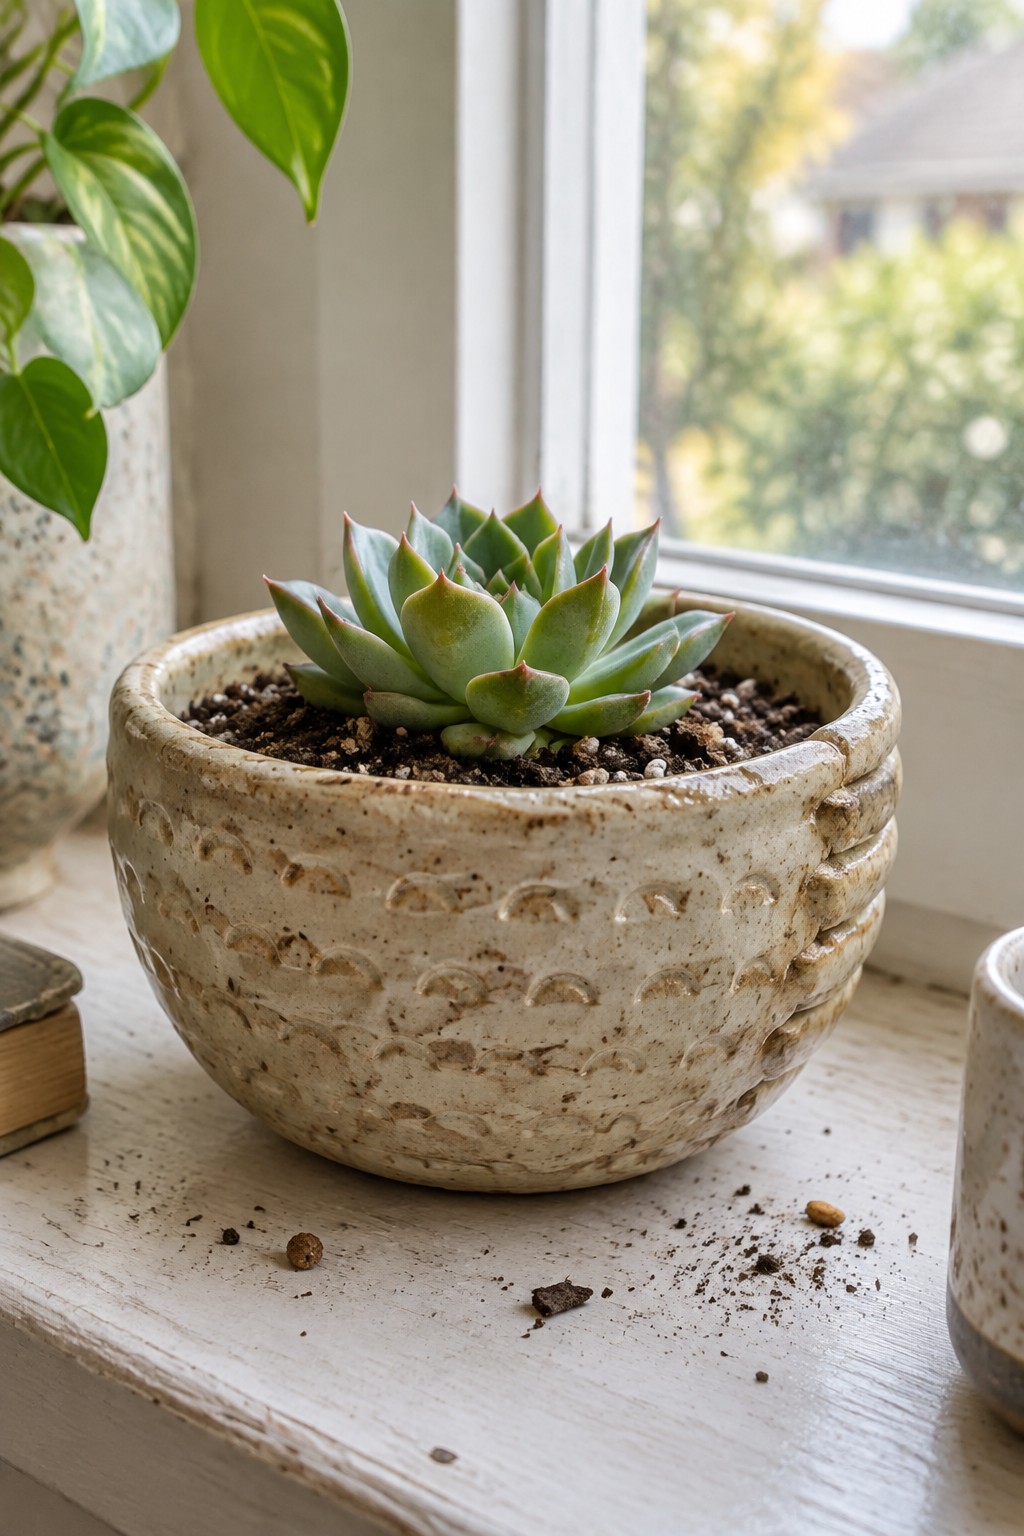
A low, wide coil-built bowl makes an effective succulent planter when the coils are stacked to form a slightly flared rim and the walls are covered with repeated arched impressions. The texture comes from pressing a simple curved tool or stamp into the clay before the final shaping, which catches light and shadow across the surface. A matte, speckled glaze in neutral tones lets the handmade marks stay visible while protecting the piece for indoor plant use.
What makes this idea useful is that the coil structure itself creates both the form and the main decorative element, so you build and texture in one go. The compact size works well on a windowsill or shelf where a larger pot would crowd the space, and the same arched stamp pattern could be adapted to a tray, a set of small nesting bowls, or a taller herb planter. For a gift, this shape needs only a small plant cutting and a bit of soil to feel complete.
Hanging Coil Bowl With Horizontal Ridges
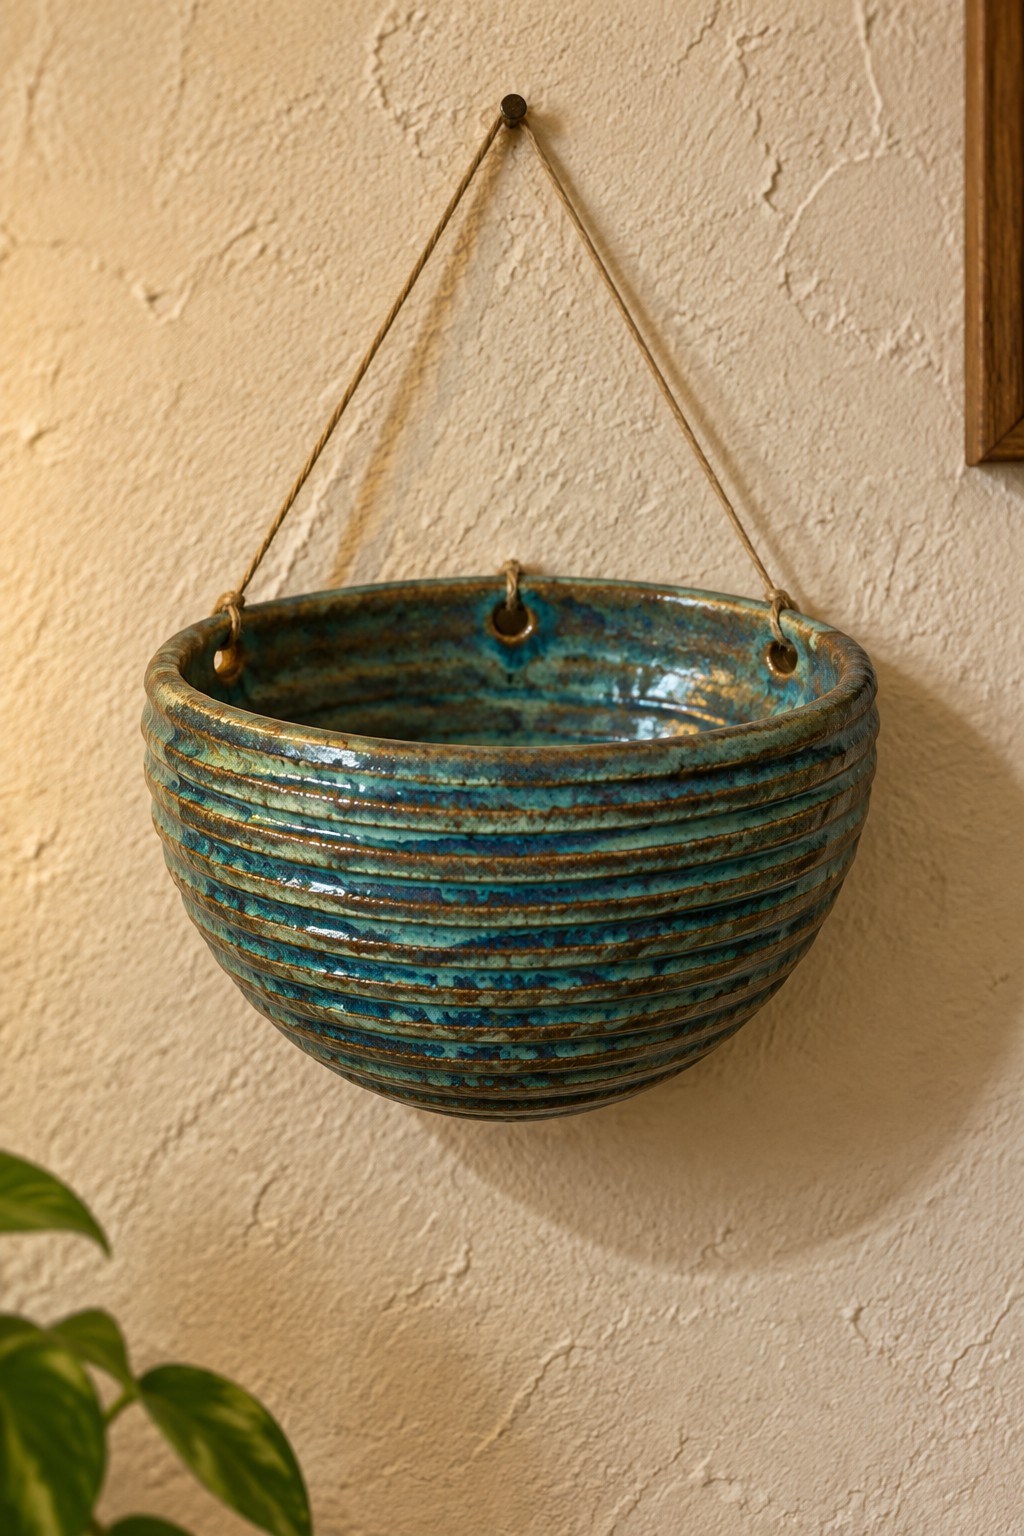
A bowl built from stacked coils forms clear horizontal ridges that create a simple repeating texture across the surface. Three small holes drilled near the rim allow rope to thread through and suspend the piece from a single wall hook. The blue-green glaze pools slightly in the grooves, making the coil lines stand out while keeping the overall shape clean and functional as a hanging planter.
What makes this idea useful is how the rope suspension turns a standard bowl into something that saves counter space. You could rework the same coil ridges on a shorter, wider form to hold fruit or keys instead of plants. The three-hole hanging method also adapts easily to different rope colors or chain if you want a different look without changing the clay work itself.
Coil Yarn Bowl With Spiral Motif

A coil-built yarn bowl uses stacked horizontal coils to form a rounded shape with built-in ridges that create surface texture. The rim includes a notch that holds yarn in place during use, while a simple spiral accent on the side adds a focal point against the multicolored glaze. Earthy blue-green and brown tones settle into the ridges and emphasize the handmade form without extra decoration.
What makes this idea useful is how the coil ridges serve as both texture and grip, so the bowl stays practical for knitting or crochet. You could replace the spiral with another carved motif or switch to a single glaze color if you want the coils to stand out more. This shape fits a craft table or makes a straightforward gift for someone who works with yarn, and the same coil method can be adjusted to make a smaller version for embroidery thread.
Ribbed Coil Serving Bowl
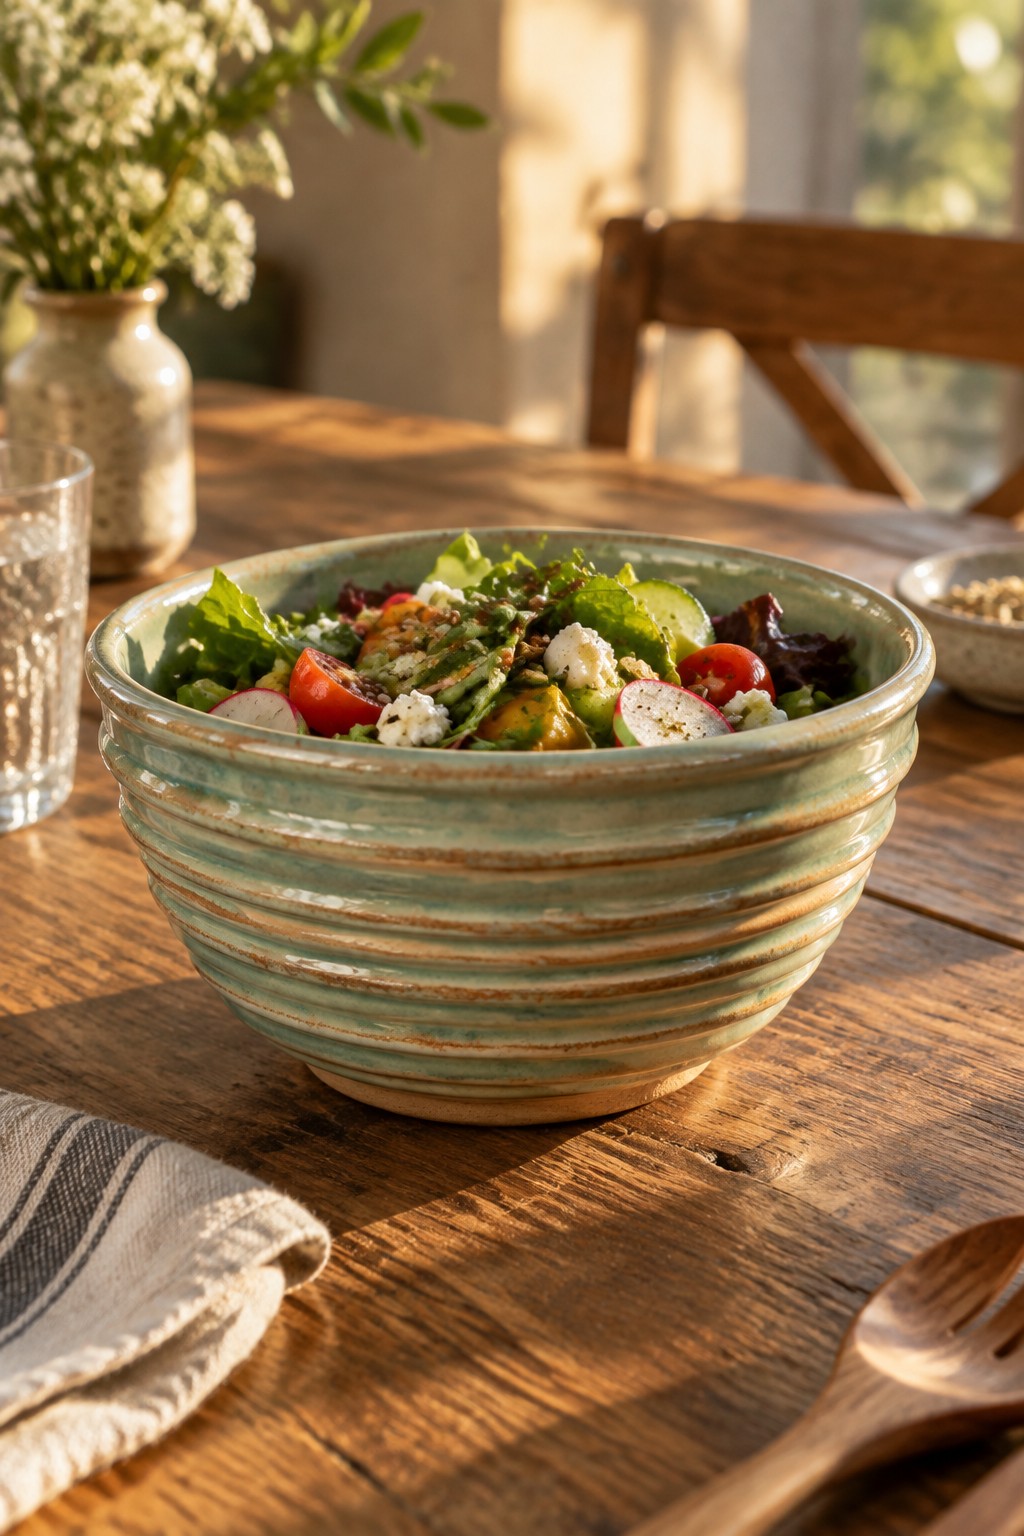
A large coil-built bowl displays even horizontal ridges left from the construction process, creating a textured surface that holds glaze variation nicely. The mottled turquoise glaze with brown edges settles into the grooves and leaves the raised coils slightly lighter, giving the form clear definition. This type of bowl works as a functional serving piece while keeping the coil texture as the main decorative element.
The wide shape makes it practical for salads, snacks, or bread on a dining table. You could repeat the same ridge pattern on smaller bowls for a matching set or adjust coil spacing to change how much texture shows through the glaze. The simple color palette pairs easily with wood and linen, so the piece fits into everyday kitchen use without needing extra decoration.
Scalloped Petal Bowl With Impressed Texture

A small coil-built bowl shaped with an outward scalloped rim creates a simple flower-petal effect that works well for a catch-all or ring dish. The interior carries a glossy pink glaze while the exterior uses a matte green with vertical impressed lines and small dots running along each section. This combination keeps the form compact and gives the surface enough detail to stand out without extra carving or added pieces.
The shape does a lot of the work here since the scalloped edge forms naturally when you flare and pinch the final coil. A piece like this works especially well as a bedside tray for jewelry or a desk holder for small items. You could repeat the same rim treatment on a slightly larger bowl for keys or adapt the dotted texture alone to a plain cylinder if you want fewer steps. The compact size also makes it quick to test new coil textures before committing to bigger work.
Wavy Coiled Bowl with Contrasting Blue Glaze

A coil-built bowl gains its character from the visible stacked coils that form horizontal ridges around the exterior, creating a textured surface that catches light and shadow. The deep blue glaze on the inside provides a smooth, reflective contrast against the matte, earthy clay outside. This combination works especially well for a larger serving bowl meant for meals like noodles or soup, where the interior color frames the food without competing with it.
The shape does a lot of the work here because the wide opening and sturdy walls make it practical for both table use and display. You could simplify the coil ridges by smoothing some sections or rework the same idea into a smaller salad bowl by adjusting the overall scale. For a gift, this kind of piece adapts easily if you change the interior glaze to a neutral tone that fits more kitchen styles. The textured exterior also photographs well for sharing ideas online since the ridges show up clearly against the glaze.
Triple Compartment Salt Cellar with Ribbed Texture
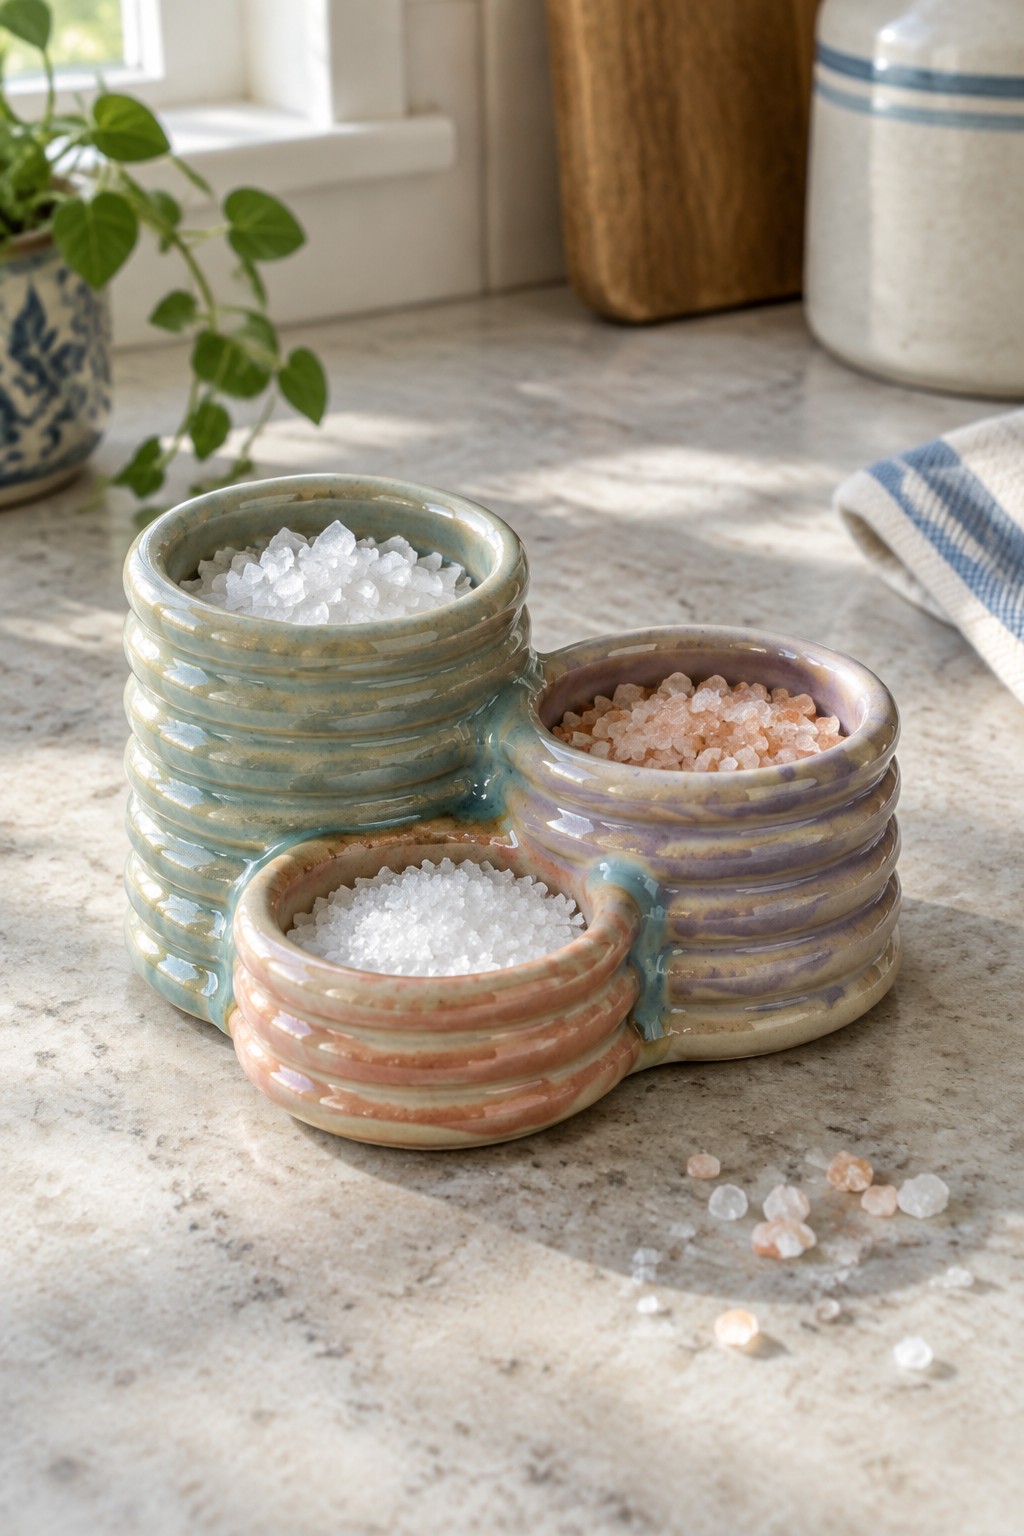
A three-section ceramic dish makes a practical kitchen holder for different salts or small seasonings. The connected form keeps separate bowls joined at the base so you can reach multiple options without juggling several pieces. Ribbed walls on each compartment add surface interest while the varied glaze tones help the sections read as distinct even though they sit together. This shape fits the category of a functional countertop item that stays compact enough for everyday use.
What makes this idea useful is how the joined layout organizes three ingredients in one footprint on a counter or table. You could rework the same connected form into a smaller version for spice blends or a two-section tray for oil and vinegar. The ridged texture comes from simple coil building or stamping, so it adapts easily if you want to change the number of compartments or try different glaze combinations. In a kitchen this kind of piece keeps salt and pepper within reach without looking cluttered.
Coil Bowl with Sculpted Cat Relief

A coil-built bowl becomes more distinctive when a sleeping cat is added in relief around the outside. The cat’s head sits low on one side with closed eyes and incised whiskers while the body and tail follow the curve of the bowl. Different brown glazes separate the textured fur from the ridged coil surface so both elements remain visible. This turns a basic coil form into a finished decorative bowl that can hold small items or a plant.
The compact round shape fits easily on a bookshelf or desk where a taller vessel would feel crowded. You could simplify the idea by using just one glaze color or swap the cat for another animal that still wraps around the form. The raised details make the bowl stand out in photos which helps when sharing finished work online. For gifts the same build works well because the sculpture adds interest without requiring complex glazing.
Ridge And Stamp Coil Bowls In Earthy Tones

Coil built bowls pick up strong surface pattern when each added ring gets pressed with repeated circular stamps while the clay is still soft. The larger bowl shows how those horizontal ridges and indentations create depth that shows through a mottled brown and green glaze. The smaller bowl keeps the same color range but uses a simpler spiral on the inside to balance the textured rim. This combination turns a basic bowl shape into a decorative piece that still works for serving or display.
What makes this idea useful is that the stamp pattern and coil lines do the visual work with minimal extra carving. In a kitchen the darker glaze hides stains while the bowls hold fruit, nuts, or bread. You could repeat the same ridge and stamp method on a set of smaller ramekins or stretch the texture up the sides of a taller serving dish. The two sizes also stack neatly for storage when not in use.
Shell-Imprinted Coil Bowl with Layered Ocean Glazes
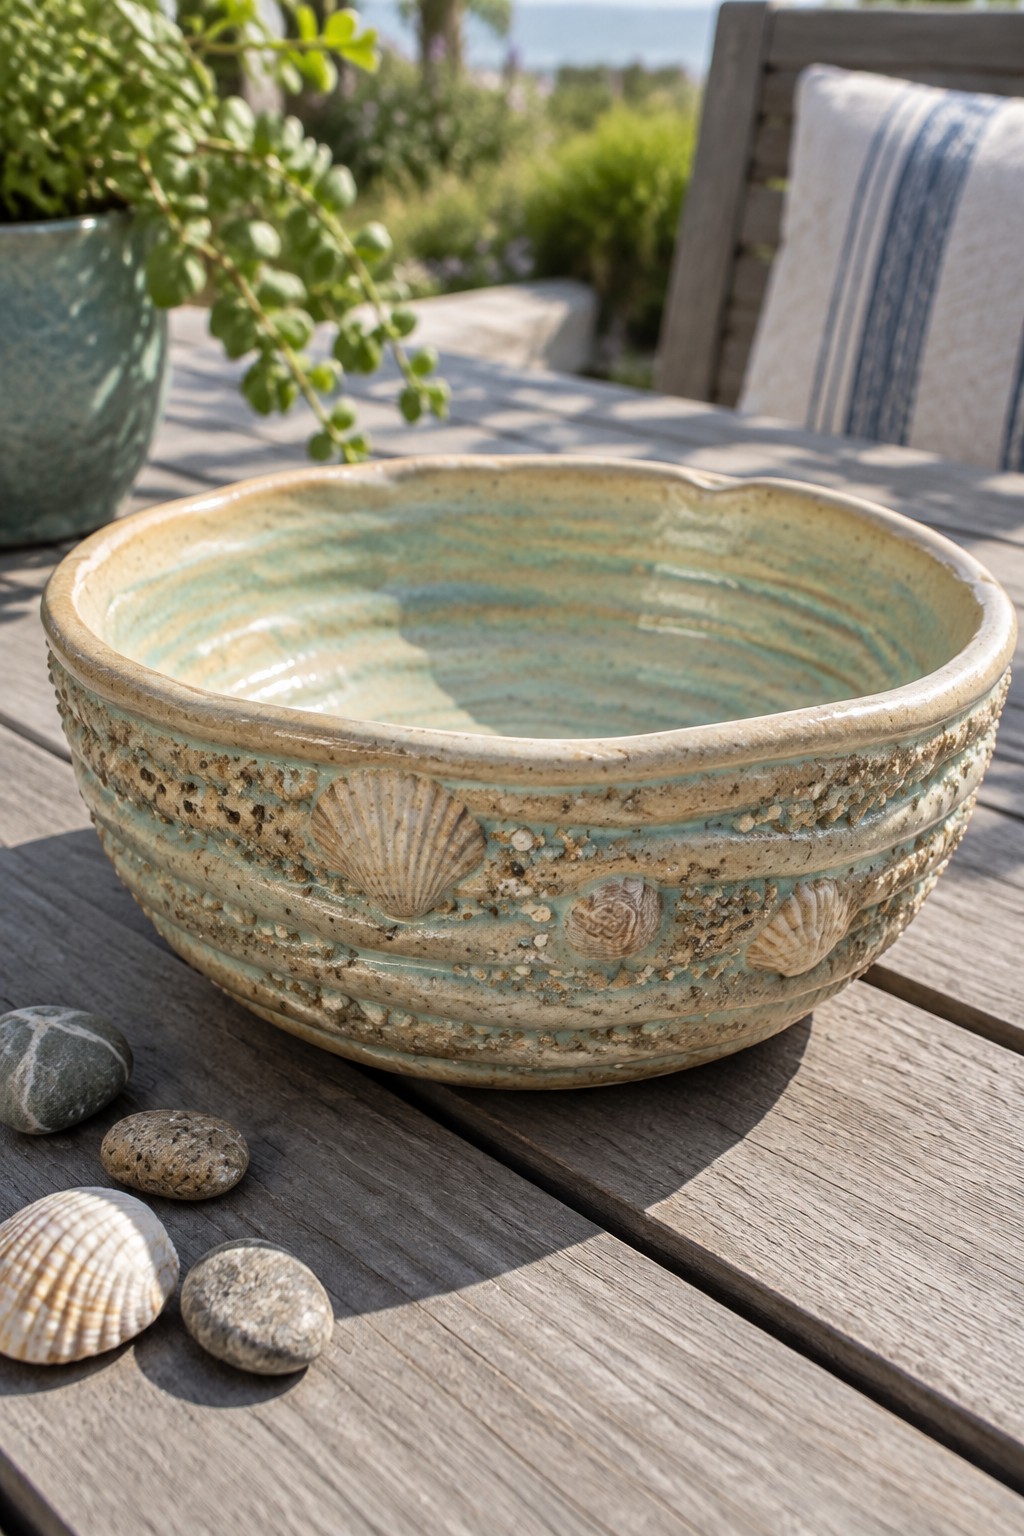
This coil-built bowl forms a wide, shallow shape that puts the exterior band of texture front and center. Real shells and small coral pieces were pressed into the soft clay to create raised impressions, then a sandy speckled glaze was applied along the rim while a turquoise wash settled into the grooves and interior. The contrast between the matte raised details and the glossy pooled glaze makes the surface read as layered rather than flat.
What makes this idea useful is that the impressions require only collected beach finds or simple molds, so the same band of texture can be added to any coil bowl without advanced carving skills. The shallow form works well as a tabletop catch-all or plant saucer, and the technique adapts easily to taller vases or small trays by moving the textured strip higher or lower on the form. You could swap shells for leaves or geometric stamps while keeping the coil construction and two-tone glaze approach.
Rope-Coiled Bowl With Contrasting Glazed Interior
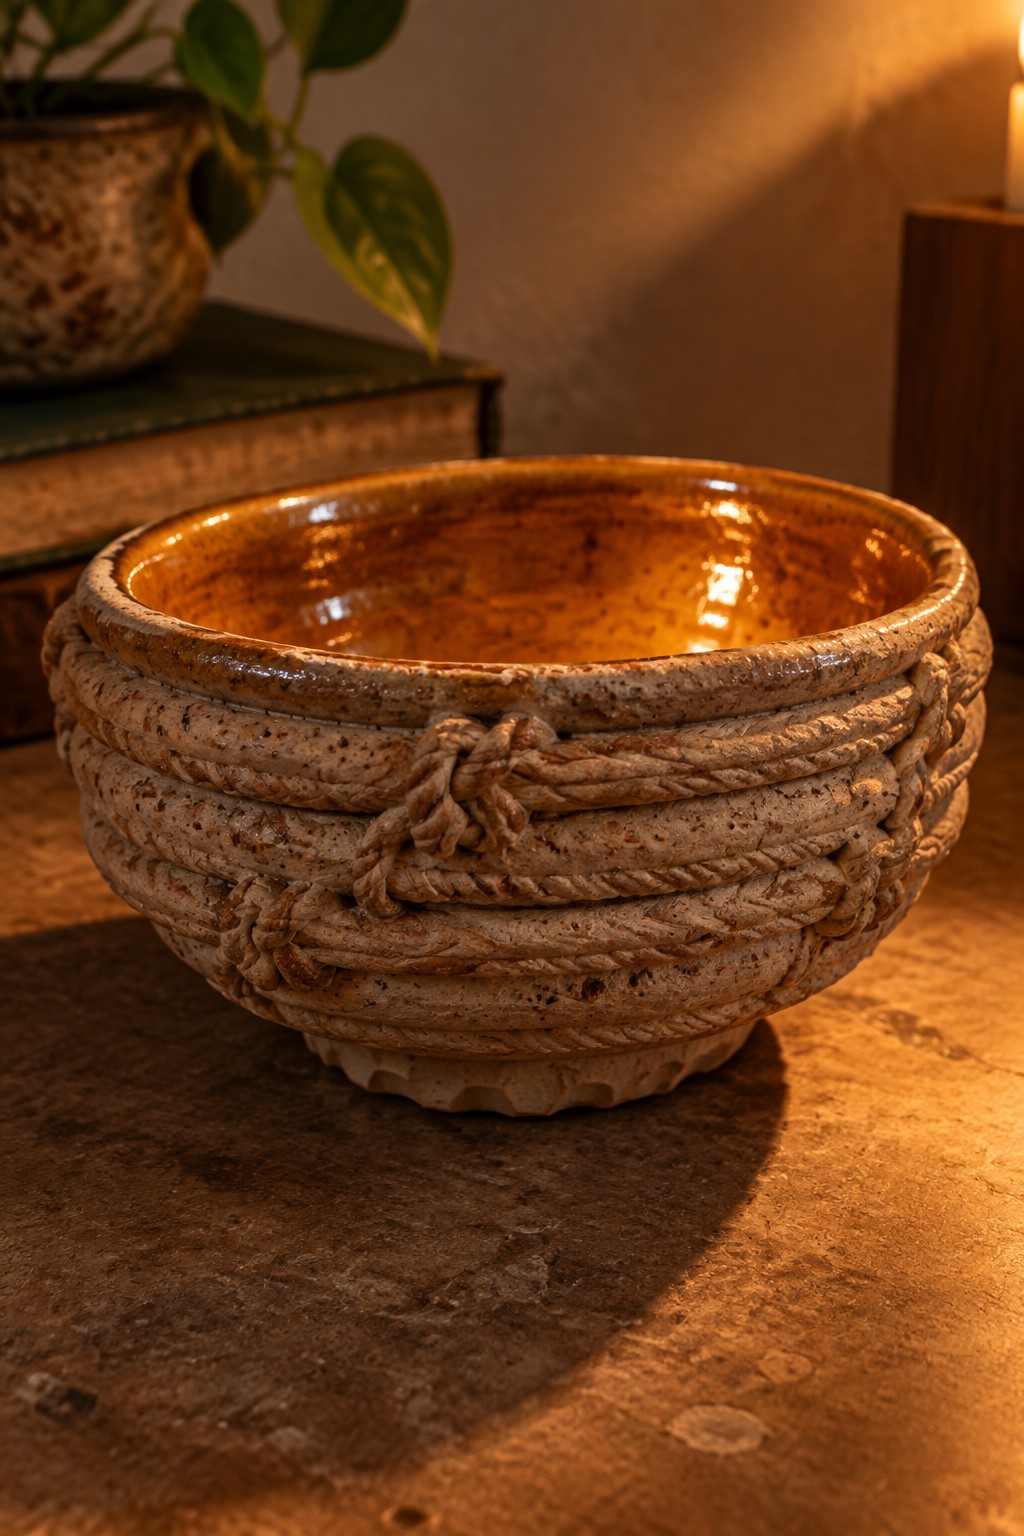
A bowl formed by wrapping thick rope-like coils of clay around the exterior gives the piece strong surface texture while keeping the shape simple. The coils stay matte and rough so the texture reads clearly, while the interior receives a glossy warm glaze that reflects light and creates contrast. This method fits the decorative coil bowl category and works especially well when the coils vary slightly in thickness to emphasize the handmade construction.
What makes this idea useful is that the rope coils do most of the visual work, so you can keep the form basic and still end up with something distinctive. The bowl shape suits a coffee table catch-all or a small plant holder, and the same coil technique scales easily to a taller vase or a low tray. You could also swap the warm interior glaze for a matte white or deep green to change the mood without altering the exterior texture.
Sculpted Leaf Coil Bowl with Open Rim

A coil-built bowl gets its main impact from rows of raised leaf forms pressed into the exterior walls. The leaves create repeating texture that catches light differently than a smooth surface, while the yellow interior glaze makes the green leaves pop. Cutouts along the upper edge keep the shape from feeling heavy and give the bowl an airy outline that still holds fruit or small items securely.
What makes this idea useful is how easily the leaf texture can be adapted with stamps or simple hand-cut shapes on any coil pot. The same rim cutouts and two-tone glazing would work on a smaller bowl for keys or jewelry, or scaled up for a larger centerpiece. In a kitchen it doubles as both decor and functional fruit holder without needing extra surface patterns. The dimensional leaves also photograph well for sharing, which helps the finished piece stand out among smoother bowl projects.
Beaded Coil Rim on a Deep Red Bowl

A coil bowl gains its surface interest from small rolled clay pieces placed side by side along the rim to form a beaded edge. The deep red glaze covers the ridged body while leaving the tips of some beads lighter, which creates a simple repeating pattern without added paint. This method keeps the detail limited to the rim so the rest of the form stays clean and functional.
The shape works well as a serving bowl or table centerpiece where the rim can be seen from above. You could scale the same bead pattern down for the edge of a tray or planter by spacing the coils farther apart. The contrast between the dark glaze and lighter bead tips makes the texture easy to photograph, which helps the piece stand out in a feed of similar bowls.
Scalloped Scale Texture on a Coil Built Bowl
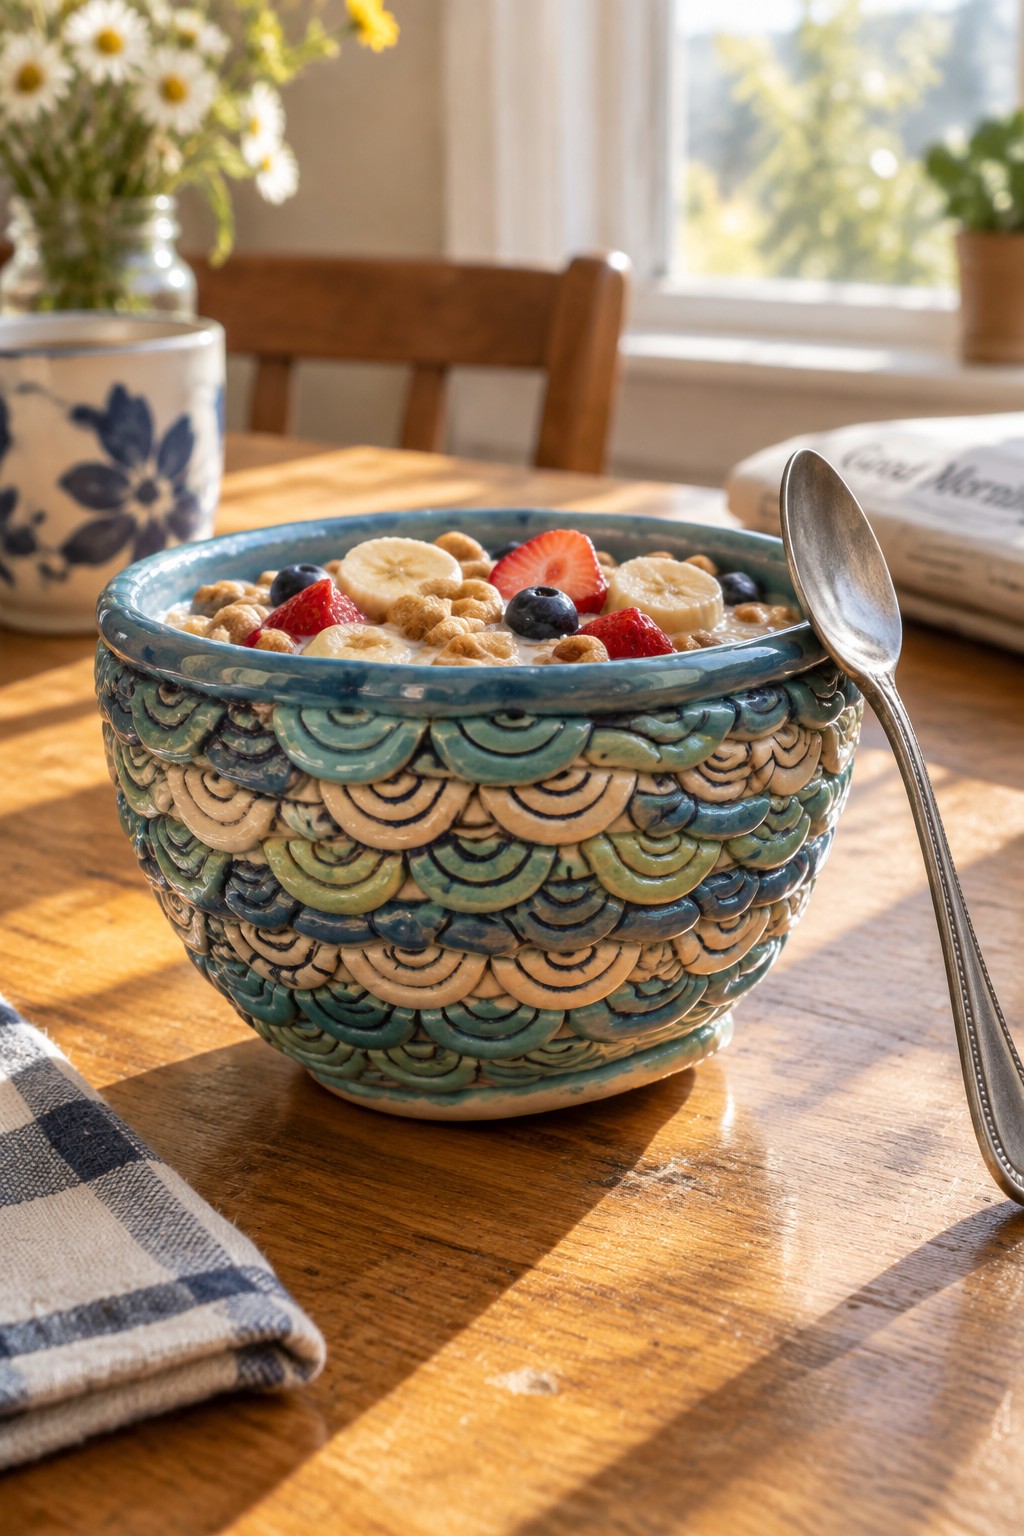
A coil built bowl stands out when the exterior is covered in overlapping scalloped shapes pressed or attached in horizontal rows. The pattern creates a layered surface that catches light and shadow, especially when glazed in shifting tones of teal, blue, and beige. This approach keeps the bowl functional for serving while making the texture the main feature. The rounded form and simple rim let the scale pattern carry the design without extra decoration.
What makes this idea useful is how the same scallop texture can be adjusted in size and spacing to suit small breakfast bowls or larger serving pieces. The multi-tone glazing works with basic glaze combinations and helps the surface read clearly even from a distance. In a kitchen this kind of bowl doubles as both everyday ware and a display piece on open shelving. The technique also transfers easily to low trays or small planters if you want to test the pattern on a different shape first.
Textured Coil Bowl for Incense Spirals

A coil bowl built to hold burning incense spirals uses a wide, low shape with a metallic interior that contains ash cleanly. The exterior keeps a rough, ridged texture from hand-building while the inside gets a copper-toned glaze that reflects light and contrasts with the dark clay. This approach turns a simple bowl into a dedicated holder that works on a shelf or altar without extra stands or trays.
The shape does a lot of the work here because the open form accepts standard incense coils and the texture hides minor surface flaws during making. You could scale the same idea down for a small ring dish or swap the copper lining for a matte glaze if you want a quieter look on a desk. For a gift this type of bowl stays practical since it needs no special care beyond normal ceramic handling and the strong surface contrast shows up clearly in photos.
Looped Coil Rim Bowl in Blush Pink
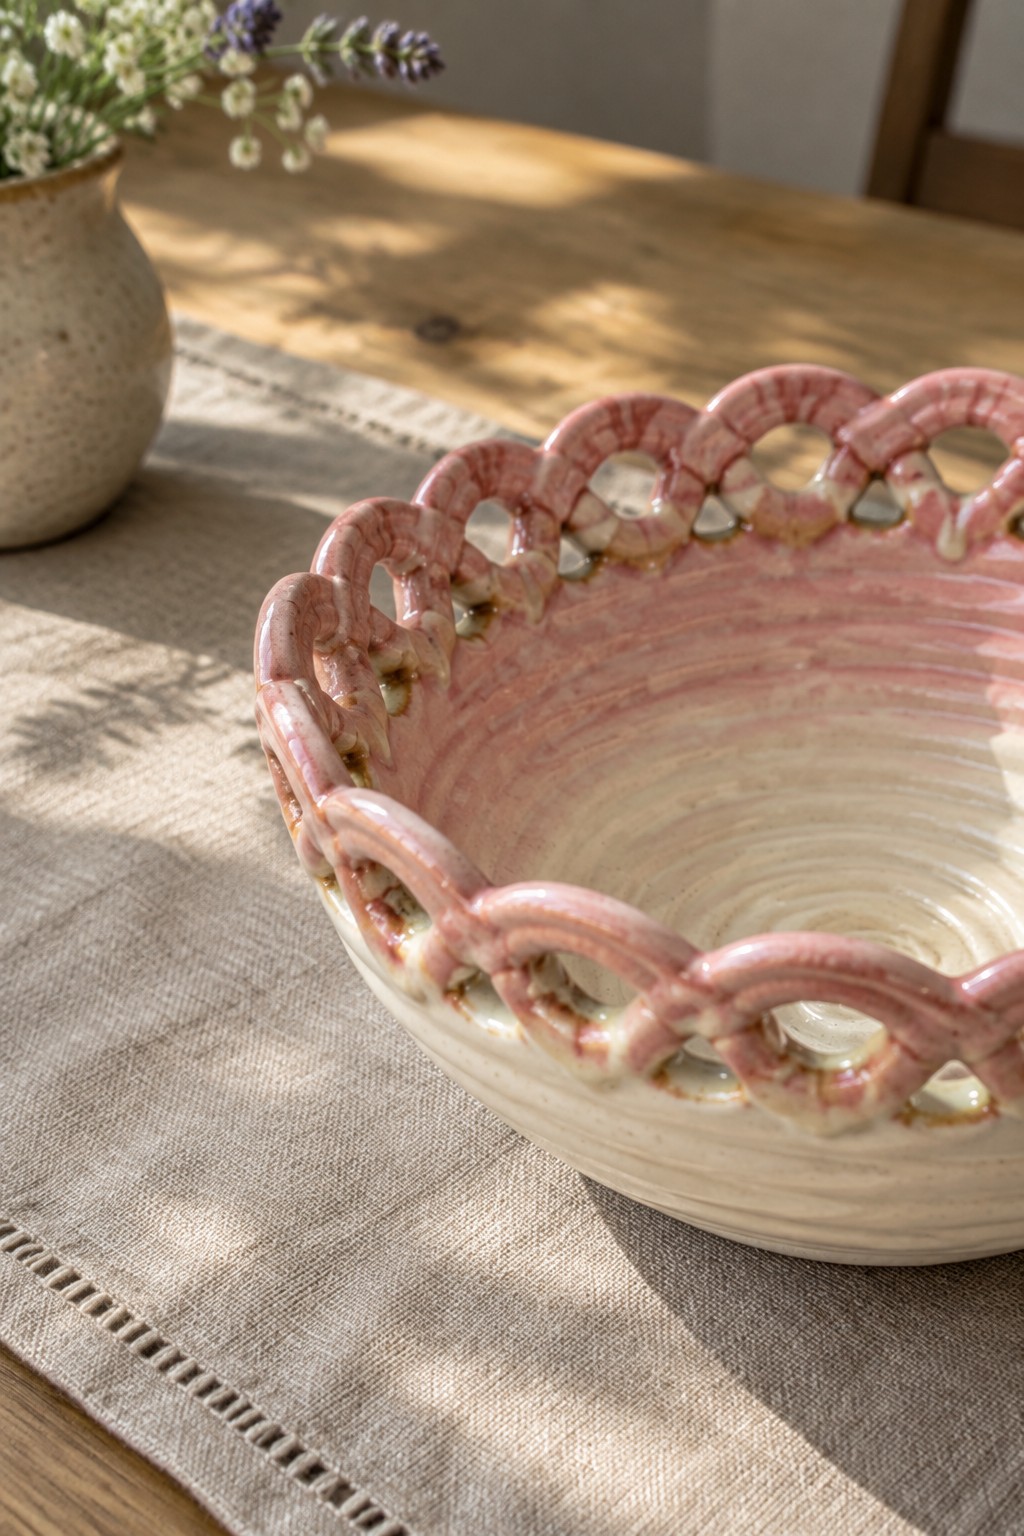
A handbuilt ceramic bowl uses coils of clay shaped into repeating loops and arches to form a raised, openwork rim. The pink glaze covers the rim and catches in the textured areas while the interior stays mostly cream with visible throwing lines. This turns a basic bowl shape into a decorative piece where the rim carries the main visual interest.
The looped rim works especially well on a shallow bowl meant for table display or holding small items like keys or jewelry. You could adapt the coil pattern to a smaller dish or change the glaze to a single solid color for a simpler version. The same rim idea also scales to a larger serving bowl if you want more presence on a dining table.
Stacked Coil Planter with Incised Bands

A coil built bowl creates clear surface interest through repeated horizontal ridges and short incised lines pressed into the clay while it is still soft. The wide, low shape works well as a planter because the open top supports trailing vines and the thick walls hold up under outdoor use. A matte glaze that breaks over the raised coils and settles into the grooves gives the surface extra depth without additional carving.
What makes this idea useful is that the ridge pattern reads clearly even on a simple two-tone glaze, so the bowl stands out on a balcony rail or shelf without needing bright colors. You can adapt the same stacking method to a smaller tray or a taller cachepot by changing the coil count and rim width. The incised marks can be left out entirely if you want a faster build that still keeps the layered look.
Berry Cluster Details on a Ridged Coil Bowl

A coil-built bowl keeps the construction ridges visible as horizontal texture bands that run around the form. The rim carries small painted clusters of berries and leaves in red and green that repeat at regular intervals. A light crackle glaze sits over the clay and lets some of the base color show through between the coils. This combination gives the bowl a clear decorative purpose while still functioning as a container for fruit or small items.
The painted berry motifs work well on a kitchen table or picnic setting where the bowl can hold actual fruit. You can swap the berry design for other simple repeating shapes like leaves or dots if you want to change the season or color scheme. The same rim treatment scales down easily for smaller dishes or can be left off one side to create an asymmetrical look. Keeping the coil ridges exposed under the glaze adds surface interest without requiring extra tools or carving.
Raised Spiral Coil Bowl
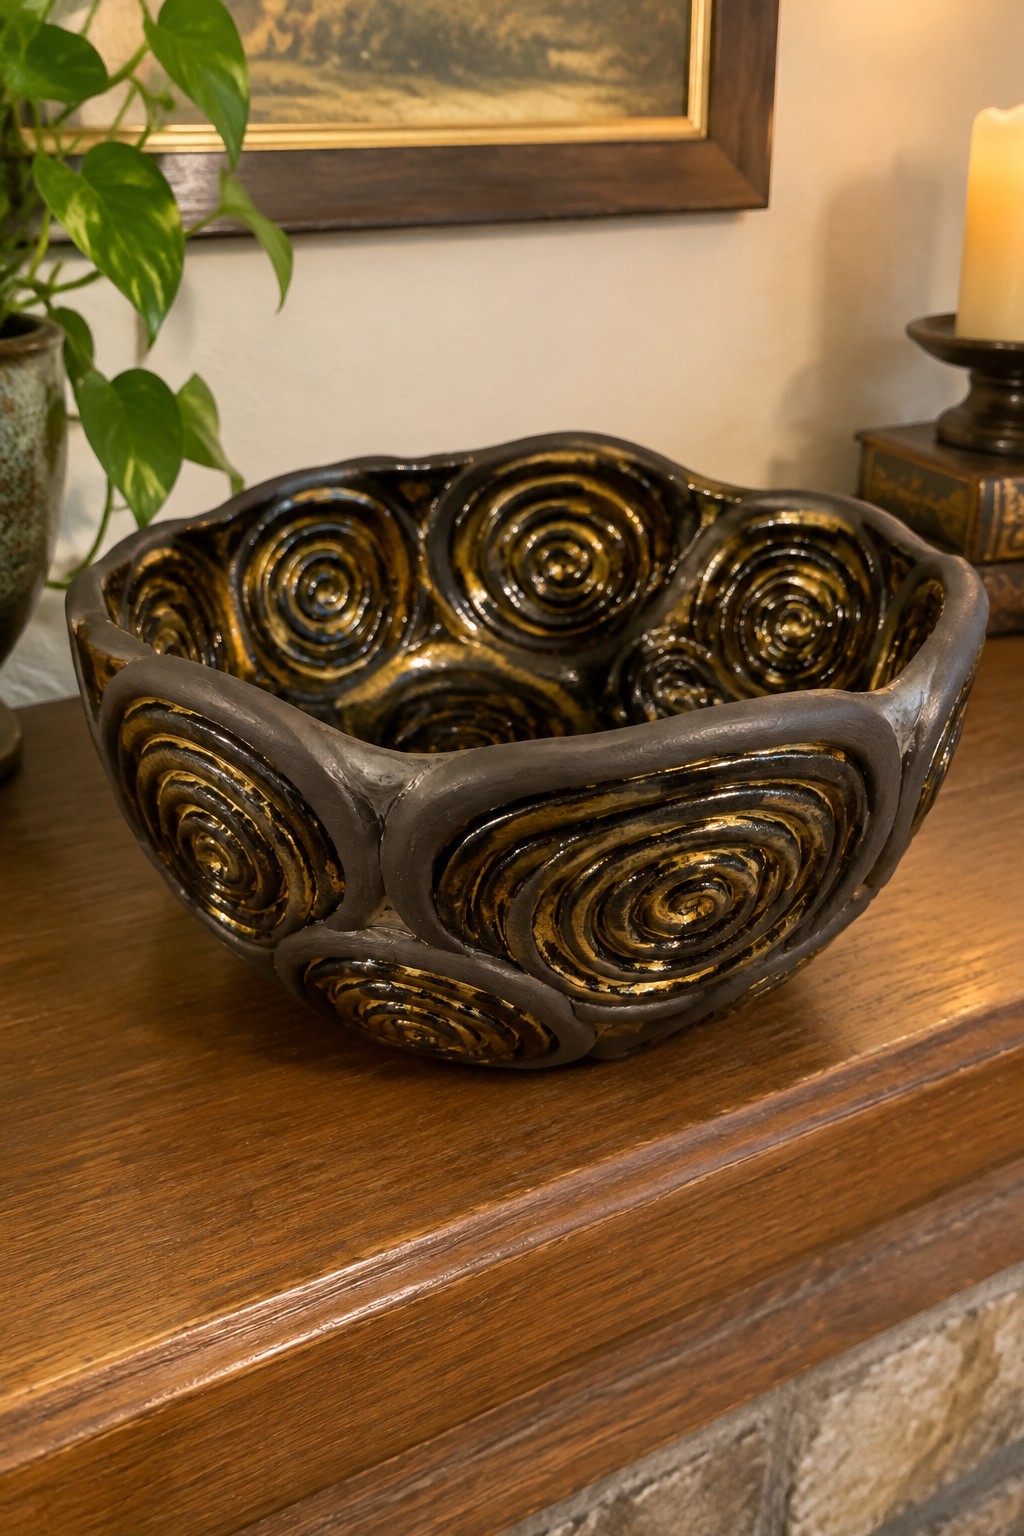
A coil-built bowl uses thick ropes of clay shaped into large repeating spirals that cover the exterior walls. The spirals sit slightly raised from the surface, creating a strong pattern that runs all the way around the form. A dark matte glaze covers the recessed areas while a metallic gold glaze highlights only the raised coils, making the texture read clearly from a distance. This turns a basic bowl shape into a decorative piece that relies on surface pattern rather than color or form.
The raised coils do most of the visual work here, so the same idea works on any size bowl without extra carving. You can scale the spirals down for a smaller catch-all dish or stretch them out on a wider serving bowl. Using just two contrasting glazes keeps the focus on the texture and makes the piece easier to photograph for sharing. The approach also adapts well to a tray or low planter if you want to try the same coil pattern on a different shape.
Frequently Asked Questions
What materials are needed to create decorative coil bowls with textured surfaces?
You will need clay suitable for hand building such as earthenware or stoneware, along with basic tools like a wire cutter for slicing coils, a rib tool for smoothing, and various items to create texture including stamps, combs, sponges, or natural objects like leaves and shells. Keep a bowl of water nearby for slipping coils together and plan access to a kiln for firing the finished pieces.
How do I add texture without damaging the coil structure?
Work with the clay at the leather hard stage so it holds shape but still accepts impressions. Press textures gently into the surface after the basic coil form is built and use a spray bottle to keep areas moist if needed. Avoid deep cuts that weaken the walls and test small samples first to see how the clay responds to different pressures and tools.
Are these bowls meant to be functional or only decorative?
Many of the ideas focus on decorative use because textured surfaces can trap food particles or glazes may not be food safe. If you want functional bowls select food safe clay and glazes then fire to the recommended temperature for vitrification. Always check manufacturer guidelines for the specific materials you choose.
What steps help prevent cracking during drying and firing?
Dry the bowls slowly under plastic for several days to allow even moisture loss especially around textured areas that may retain water differently. Once bone dry fire according to the clay type and avoid rapid temperature changes. Scoring and slipping each coil join thoroughly during building also reduces weak points that lead to cracks.
How can beginners adapt the 21 ideas for their first attempts?
Start with smaller bowls using only two or three simple textures rather than complex combinations. Practice rolling uniform coils and joining them securely before adding decoration. Watch short online videos on basic coil techniques and build up gradually to larger or more detailed designs as your confidence grows.

Pottery Path is my cozy corner of the internet where I share clay ideas, pottery inspiration, and simple projects you can recreate at home. I love exploring everything from air dry clay to handbuilt pottery to cute minis that brighten your day. My goal is to make clay crafting feel easy, fun, and welcoming for anyone who wants to try it.
You will find beginner friendly tutorials, creative pottery painting ideas, and lots of warm inspiration for slow and happy crafting. If you enjoy hands on creativity, this space will feel like home.