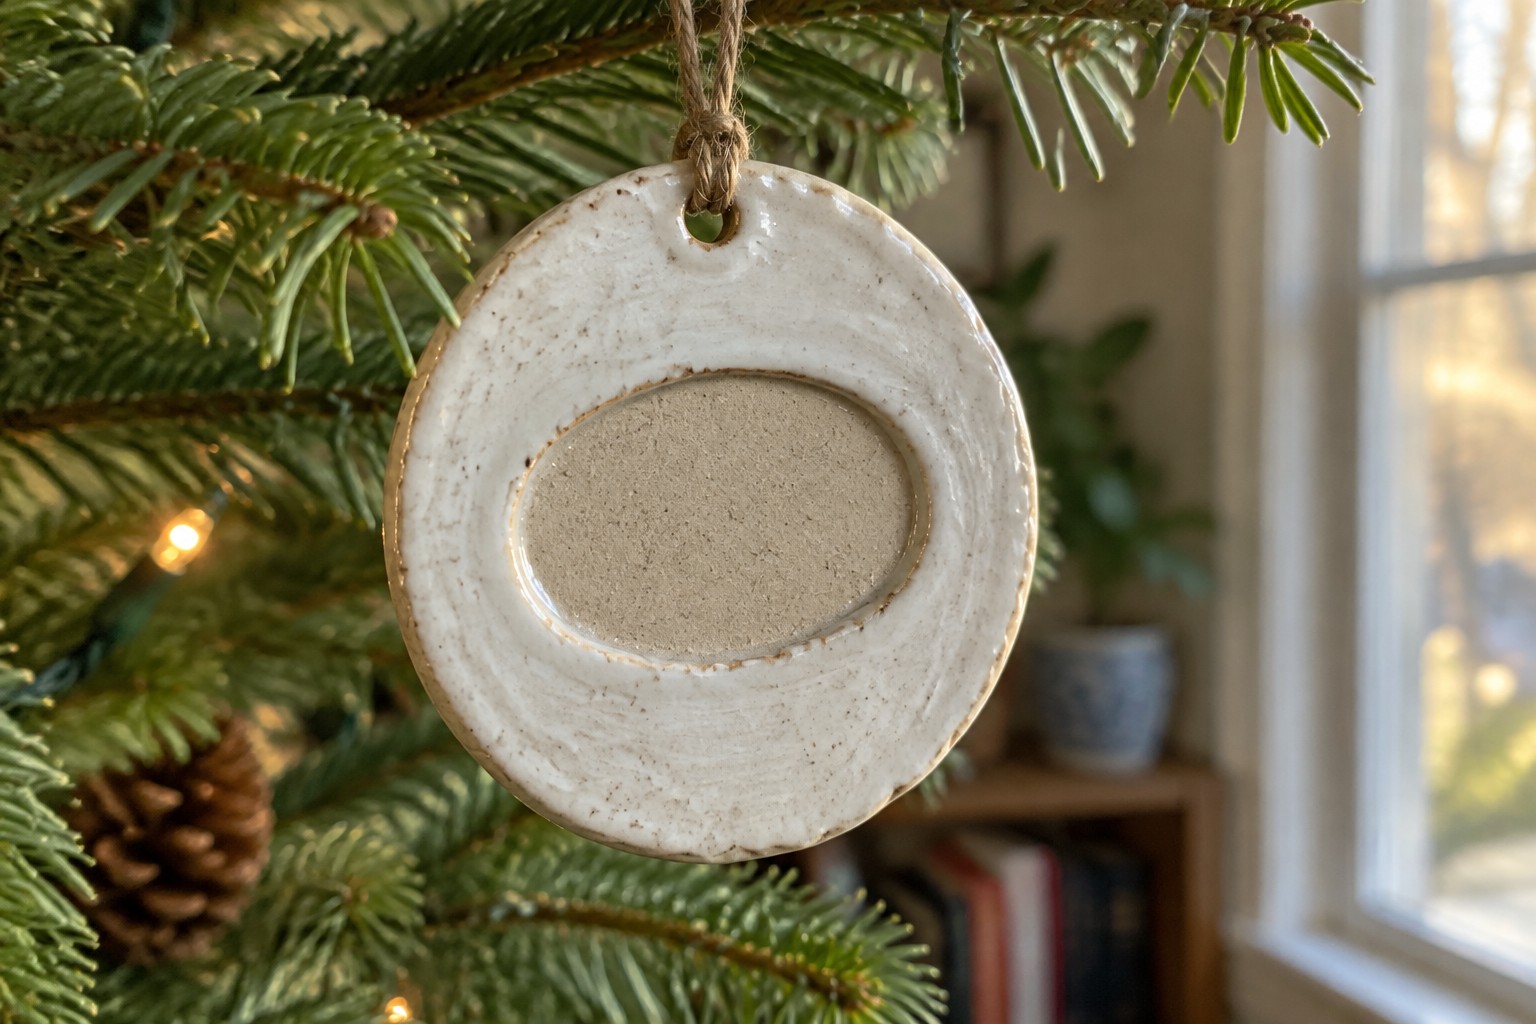
I have been making ceramic ornaments for my own tree for a few years now.
It is nice to add something handmade each season.
Personalizing them with names or little drawings makes them feel more like part of the family.
I usually shape them by hand and fire them in my small kiln at home.
Here are some ideas that might work for your own holiday setup.
Ring Ornament with Oval Center Cutout
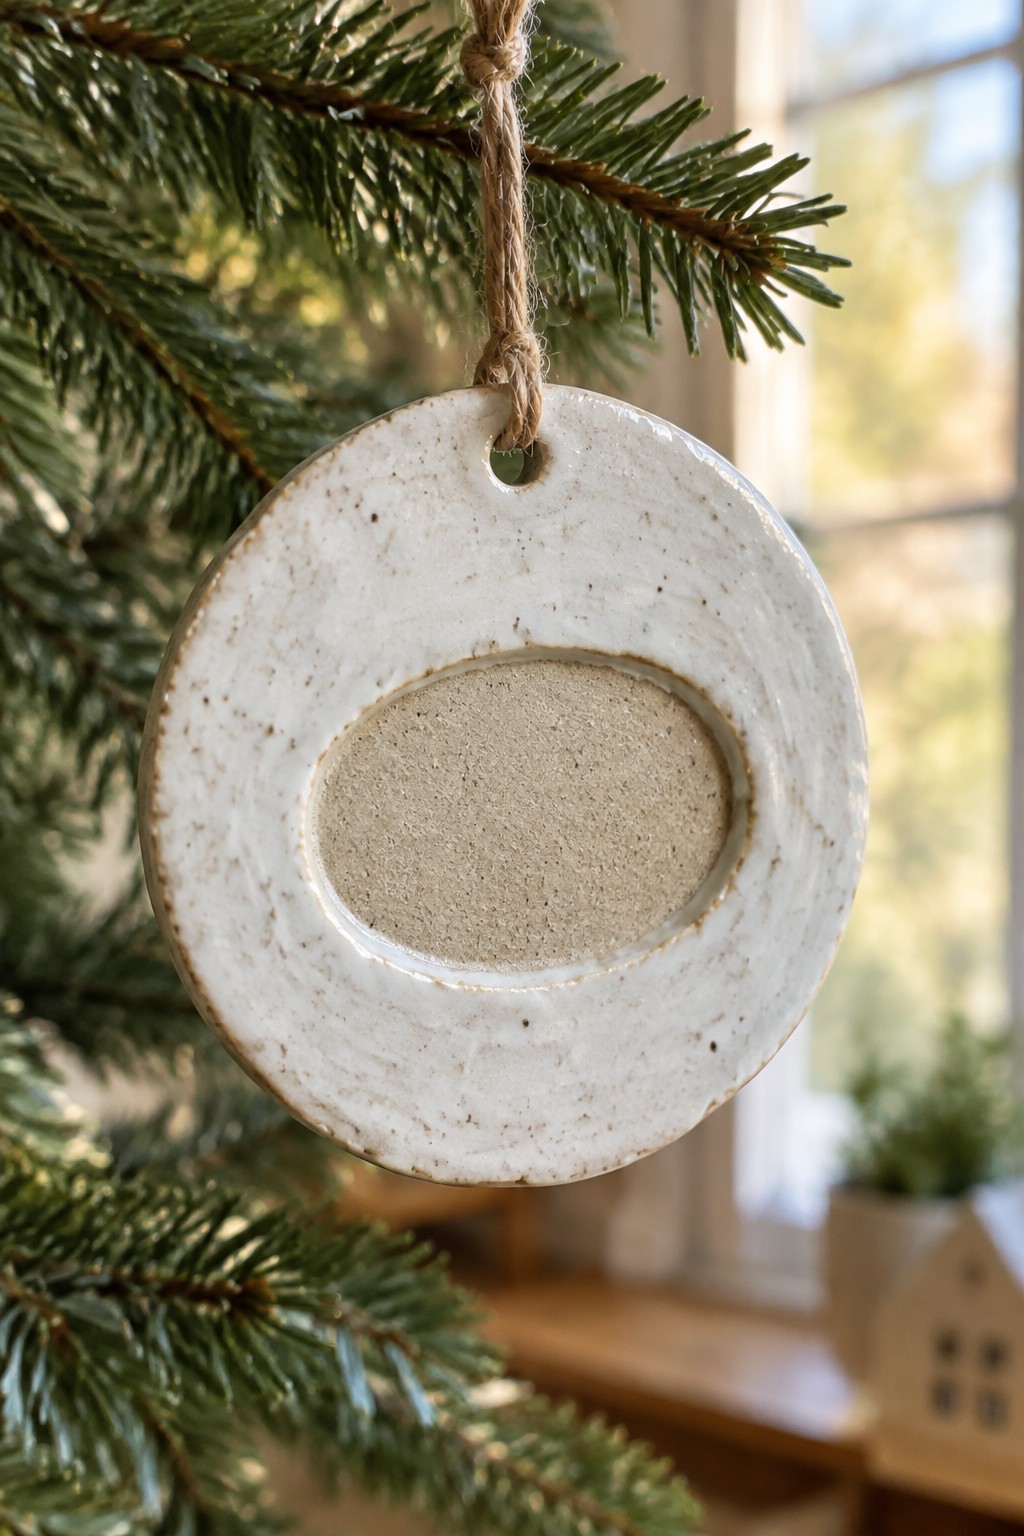
A ring-shaped ceramic ornament gives you a clean way to add an open, airy piece to the tree. The circular form with an oval cutout in the middle keeps the object light while the negative space lets branches show through instead of blocking them. A simple drilled hole at the top lets you hang it with twine or ribbon, and the speckled matte glaze adds subtle texture without extra surface decoration. This style of decor object works as a basic building block because the shape is easy to scale or repeat.
What makes this idea useful is how the open center reduces weight and keeps the ornament from feeling heavy on smaller branches. You could adapt the same ring by swapping the oval cutout for a square or heart, or by stamping a short name or year along the rim before the bisque fire. For gifts, the flat ring surface gives you a clear spot to add underglaze color or a small initial without crowding the design. The small size also means you can produce several at once and vary the glazes for a matching set.
Pastel Striped Star Ornament
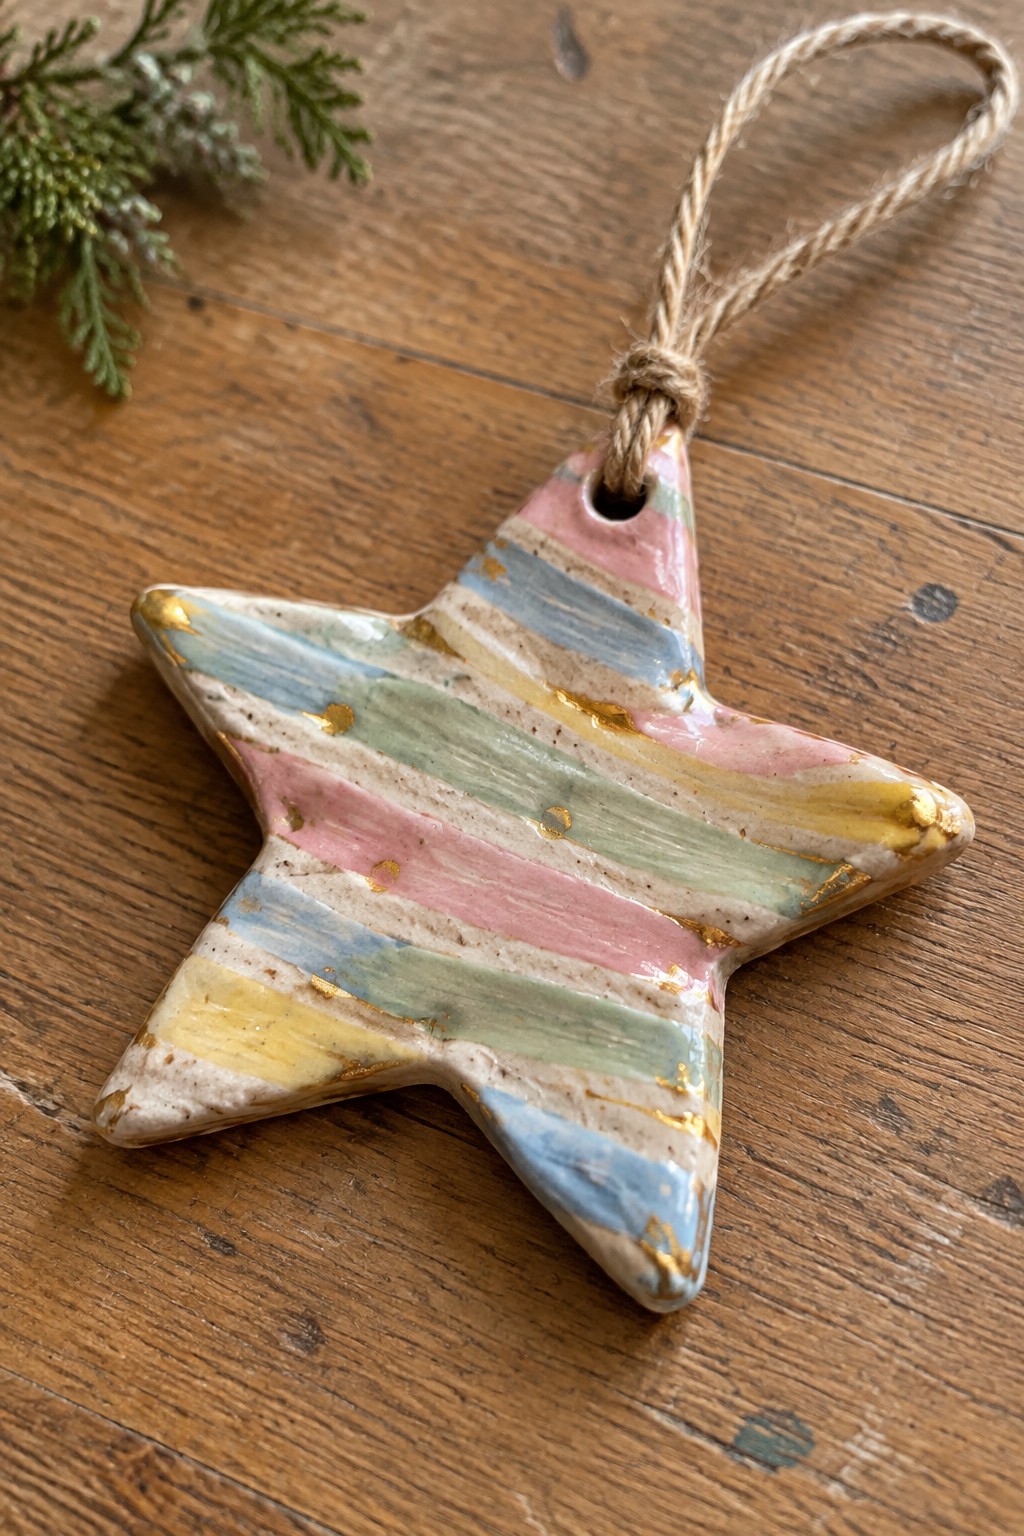
A star-shaped ceramic ornament made from clay gives you a flat surface that works well for simple stripe patterns. Horizontal bands of soft pink, blue, green, and yellow run across the points, with small gold accents added after the base glaze. This approach keeps the focus on clean color blocks rather than detailed painting, which suits a hanging decor object.
The small scale makes this easy to produce in batches for gifts or tree sets. You could change the stripe order or swap in different pastel tones to match specific color schemes, or apply the same banded glaze treatment to round or heart shapes. A piece like this works especially well as a tree ornament because the flat form hangs straight and shows the pattern from both sides.
Fingerprint Heart Ornament

A heart-shaped clay ornament becomes personal when you press a fingerprint directly into the surface before glazing. The pink speckled glaze sits in the ridges and leaves the print easy to read while keeping the overall shape simple. A small hole at the top lets you add twine or ribbon so the piece hangs flat. This approach fits the ornament category because the form stays light and the detail stays contained in one clear area.
The shape does a lot of the work here since the heart already signals a gift or keepsake without extra carving. You can swap the fingerprint for a thumbprint, initial stamp, or short date and still use the same mold or cutter. The small scale makes it simple to batch out several in one afternoon for a tree, gift tags, or small wreaths. The same fingerprint technique also transfers to round or oval blanks if you want matching pieces for multiple family members.
Mini Mug Ornament with Snowflake Motif

A small ceramic mug works as a tree ornament when formed at miniature scale and finished with a dark green glaze. The white snowflake sits centered on the body, and the glossy surface makes the motif readable from a distance. Twine threaded through the handle lets it hang without extra hardware. This keeps the project in the decor object category while reusing a basic mug shape.
What makes this idea useful is how the handle already supplies a built-in hanging point. The compact size lets you fire several at once and vary the painted motif across a set. You could replace the snowflake with a name, year, or simple geometric pattern and still keep the same mug form. In a kitchen or gift batch, the same shape works equally well as a small votive holder once the season ends.
Ceramic Bell Ornament

A bell shape formed from clay creates a simple hanging ornament once it is glazed and fitted with a cord through the top loop. The body flares outward from a narrow neck into an open base, and a small clay ball tied inside acts as the clanger. A single red glaze with natural variation in tone covers the surface, letting the form and the slight texture from the clay do the visual work without added carving or painting.
This shape works especially well as a tree ornament or door hanger because the bell silhouette reads clearly even when kept small. You can adapt the same idea by switching to a different glaze color, stamping a short name or year on the side before firing, or scaling it up for a larger porch bell. The basic form also translates easily into a set of matching ornaments if you repeat the shape in several sizes. For a gift, something like this needs only a simple cord and tag to feel finished.
Scalloped Ceramic Disc Ornament

A round ceramic ornament with a scalloped rim and a shallow central well creates a simple hanging piece for the tree. The crackle glaze covers the surface while the brown rim accent follows the edge detail. A small hole at the top holds twine for hanging. This shape works as a flat disc ornament that leaves room for added names, dates, or small painted elements.
The flat center makes it straightforward to personalize with stamps or hand lettering. You could produce a set in different glaze tones or sizes to match various tree styles. For gifts, the disc form packs flat and adapts easily to other uses like gift tags or cabinet knobs. The scalloped edge adds enough shape that the ornament still looks complete with light decoration.
Ceramic Mitten Ornament
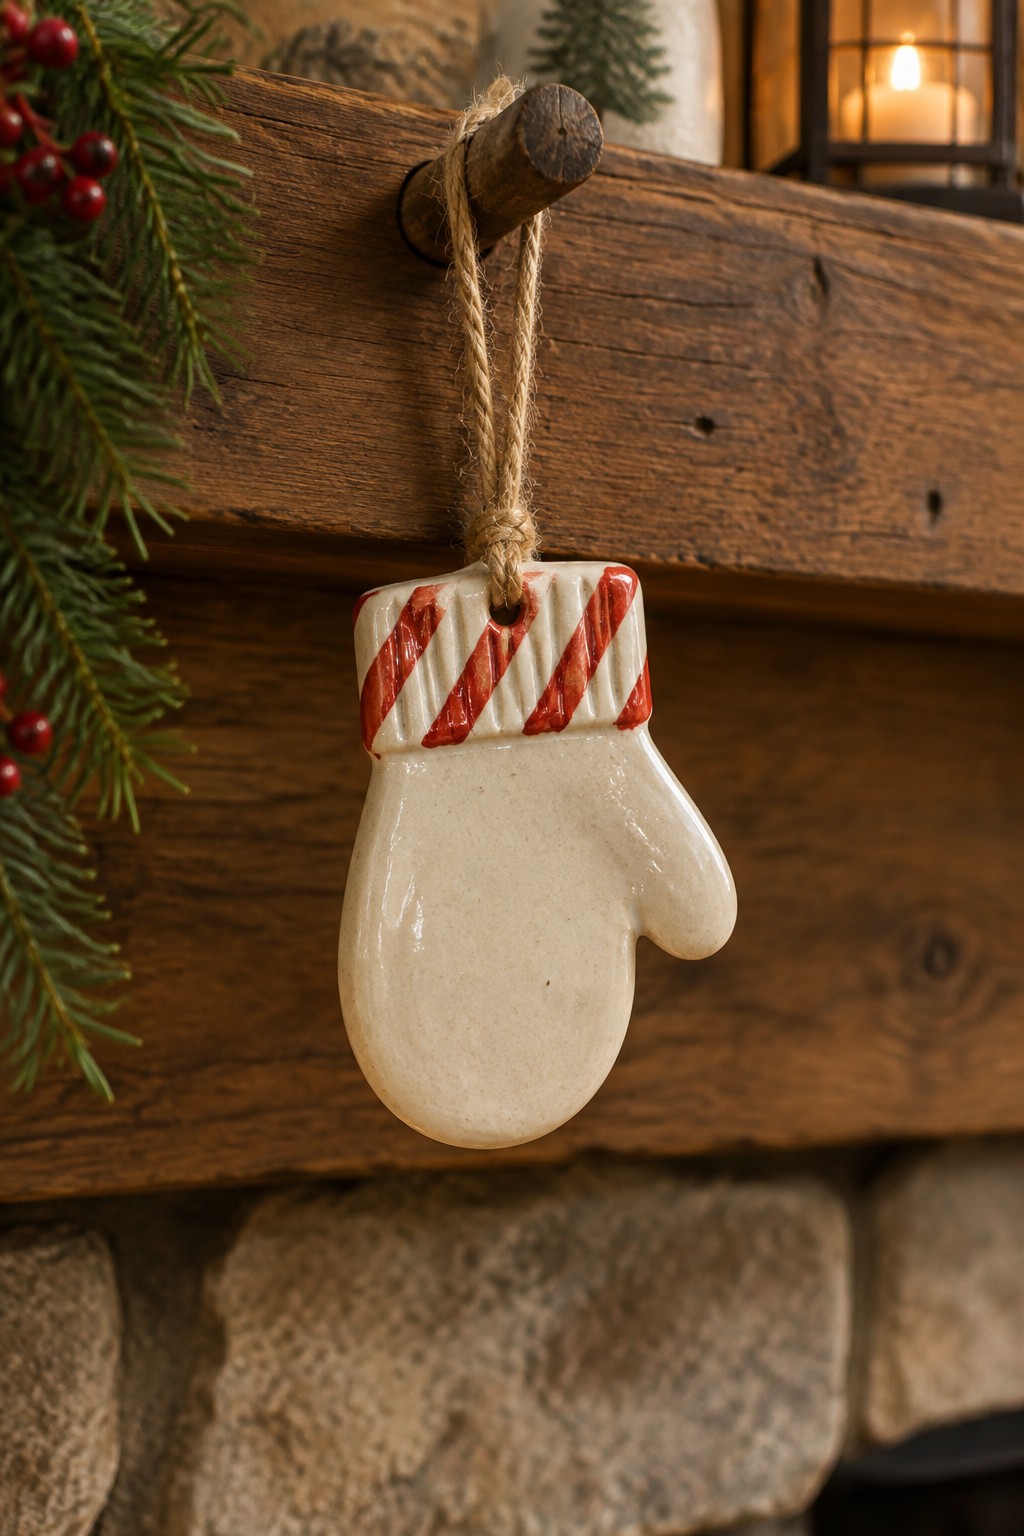
A mitten ornament is a simple clay project where the basic shape is cut or sculpted from a slab or hand-built form. The cuff area gets painted with diagonal red stripes over a white base before a clear or matte glaze covers the rest of the piece. The hanging hole is placed at the top of the cuff so the ornament sits straight when strung on twine or wire. This keeps the design minimal while still reading clearly as a holiday object.
The small scale works well for tree branches or garlands without taking up much space. You can change the stripe direction, swap the red for another color, or add initials on the front with underglaze. The same mitten shape can be turned into a gift tag by adding a second hole at the bottom or repeated in different sizes for a matching set. Because the form is easy to reproduce, it fits well into a batch of ornaments made for gifts or market sales.
Mini Ceramic House Ornament
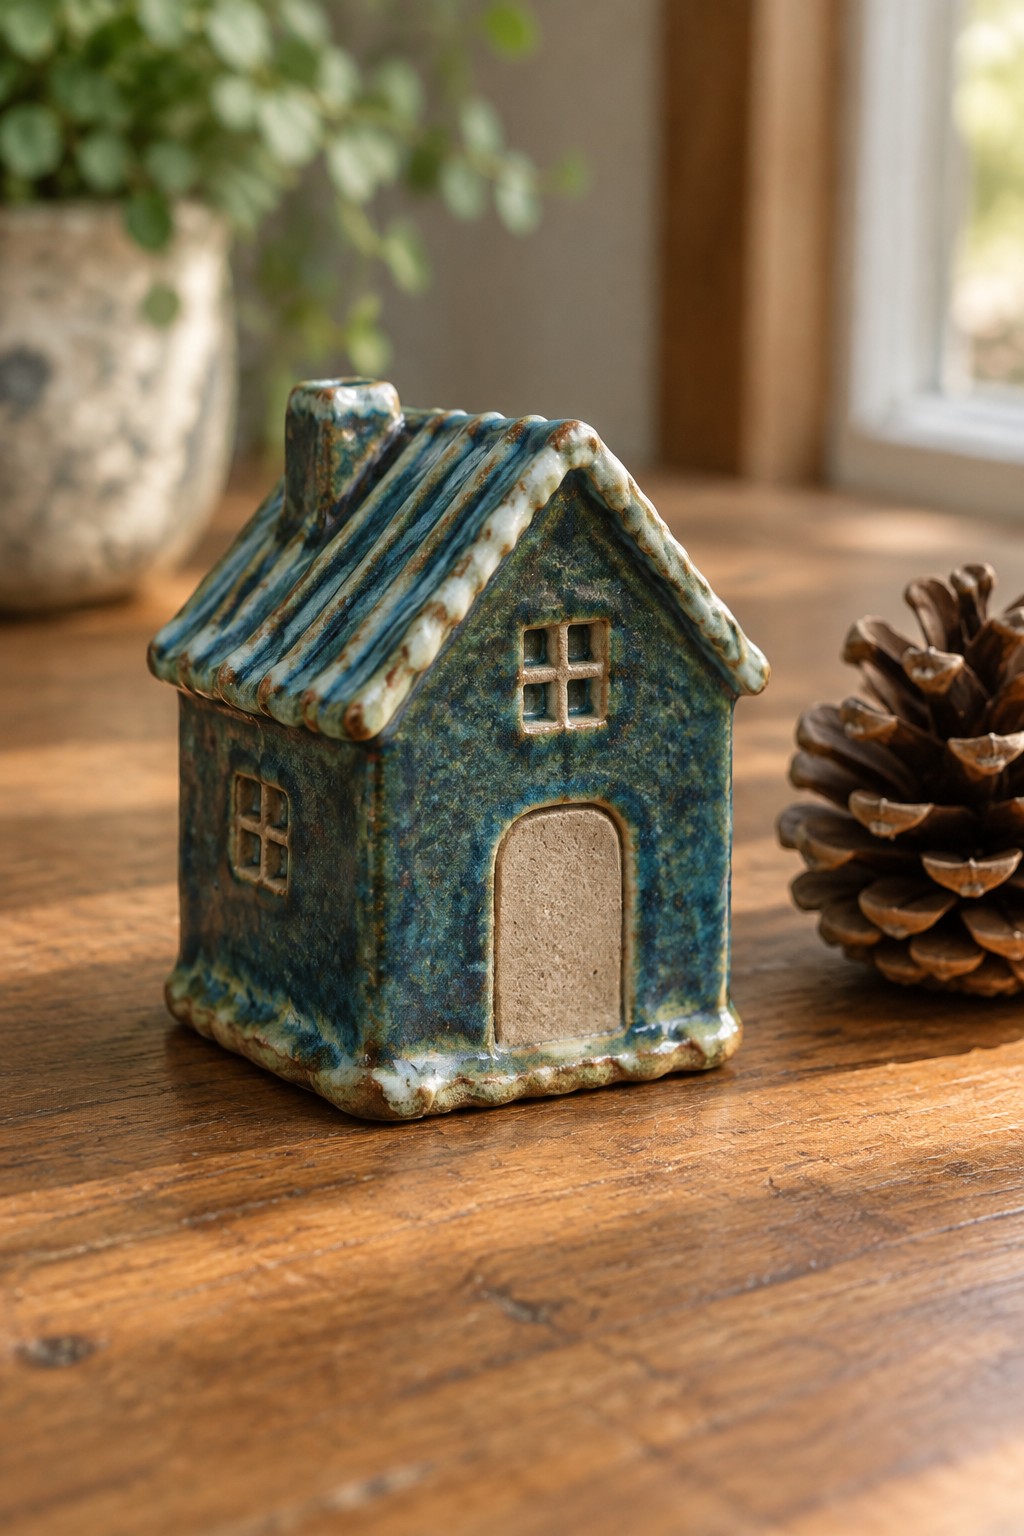
A small hand-built ceramic house works as a compact ornament or shelf piece. The form uses simple slab construction with a sloped roof, chimney, and basic window and door cutouts. The mottled blue-green glaze covers most of the surface while leaving the door area unglazed for contrast, and the roof shows subtle line texture from the forming process.
The small scale makes this easy to hang on a tree or cluster on a mantel. You can adapt the same house shape by changing the glaze color, adding a hanging loop before the bisque firing, or simplifying the roof to a flat top for quicker building. For Christmas versions, test a white or speckled glaze and keep the overall size under four inches so it does not overwhelm other ornaments.
Tiered Ceramic Tree Ornament
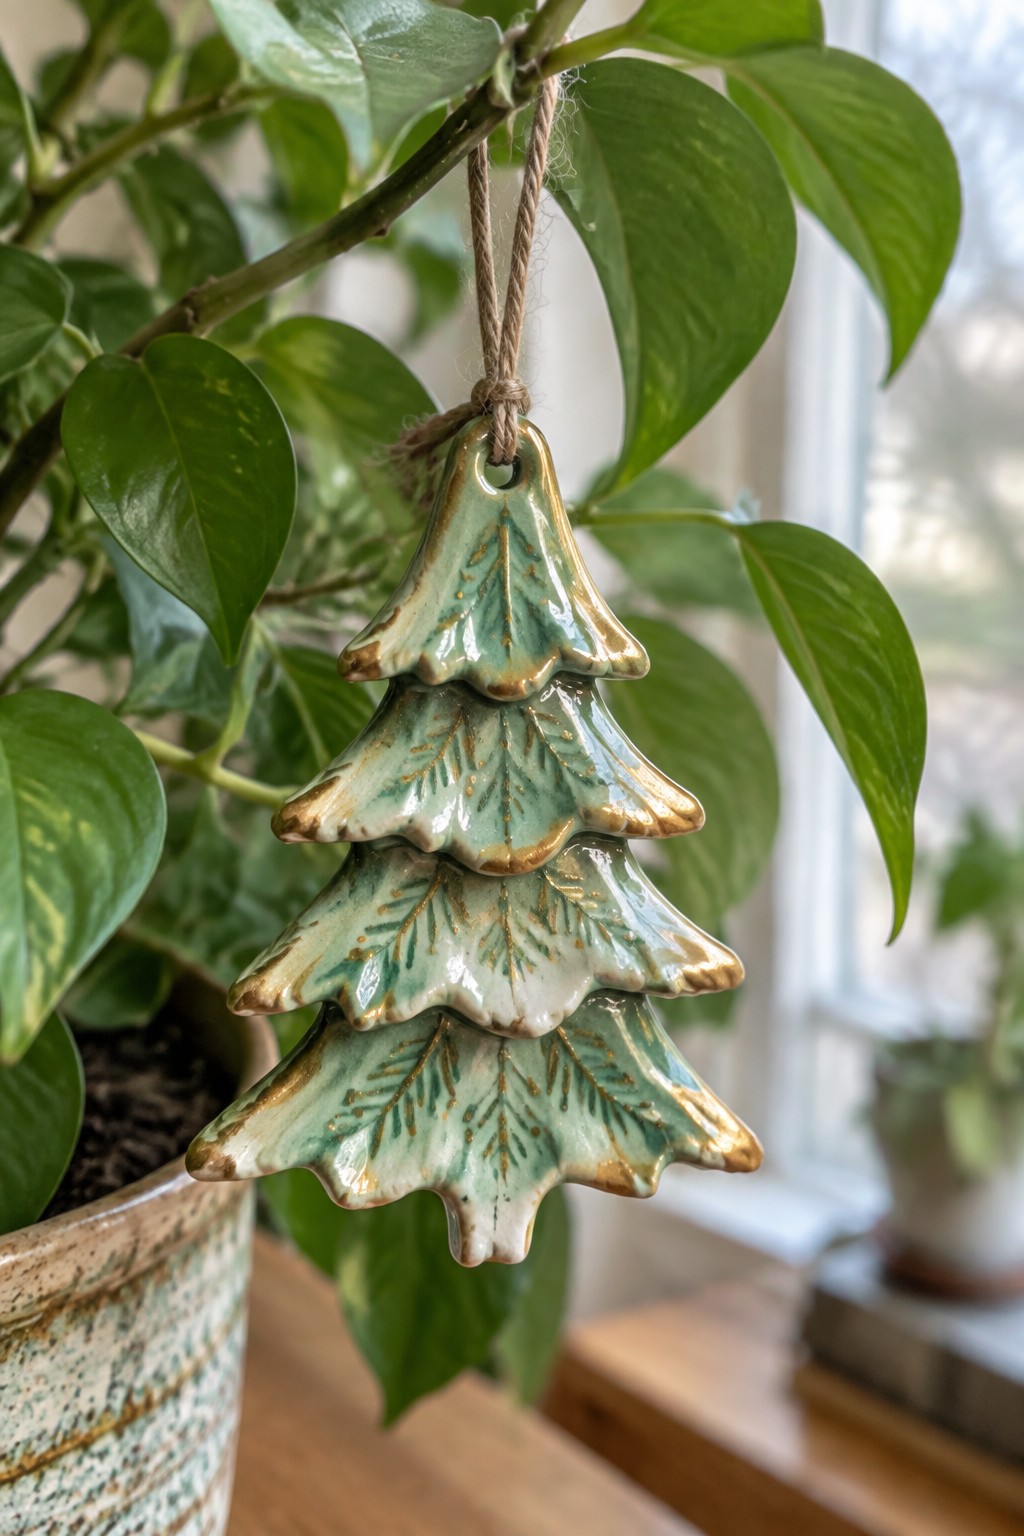
A ceramic Christmas ornament built from stacked, graduated tree shapes creates a simple three-dimensional form that stands out from flat cutouts. Each tier carries impressed pine needle textures that hold the green glaze in the recessed lines, while the gold edge trim sharpens the outline and adds contrast. The single hole at the top allows it to hang easily, making this a straightforward hanging decor object suited to holiday trees or small gift tags.
The compact size makes it easy to produce several at once for gifts or market sales. You can change the tier count or swap the tree template for stars or houses while keeping the same stacking and glazing method. Adding a small stamped initial or date on the back before the final firing gives a quick personalization option without extra steps. This construction works especially well when you want more depth than a single slab can provide.
Citrus Slice Ring Dish
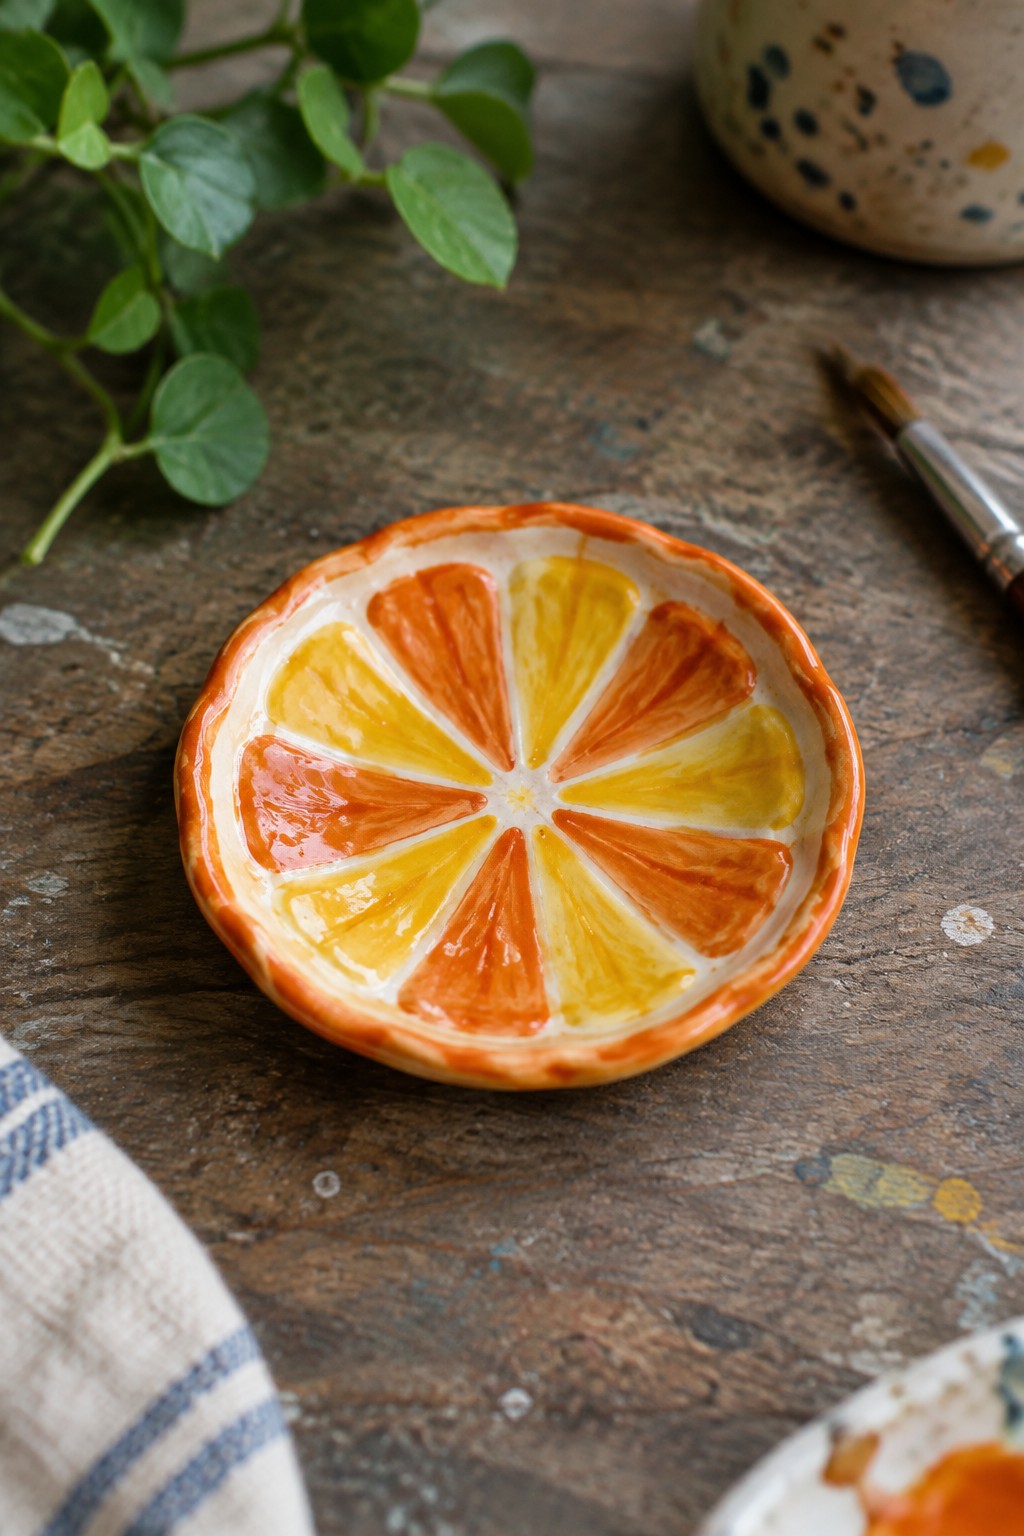
A small ceramic dish formed and painted as an orange slice makes a simple ring dish or trinket tray. The round shape is divided into wedge segments using yellow to orange gradients with white lines radiating from the center, all sealed under a clear glossy glaze. The painted motif carries the whole idea, turning a basic dish into something recognizable without extra sculpting or carving.
The small scale makes this easy to adapt into a hanging ornament by adding a small hole or loop before the final firing. You could swap the citrus colors for holiday versions like red and green segments or keep the orange but add a name or year on the back. In a bathroom or on a dresser the dish keeps small items in one spot while the bright pattern stands out against neutral surfaces. For gifts the same painted layout works on a flatter ornament blank if you want to skip the dish form entirely.
Ceramic Deer Head Ornament
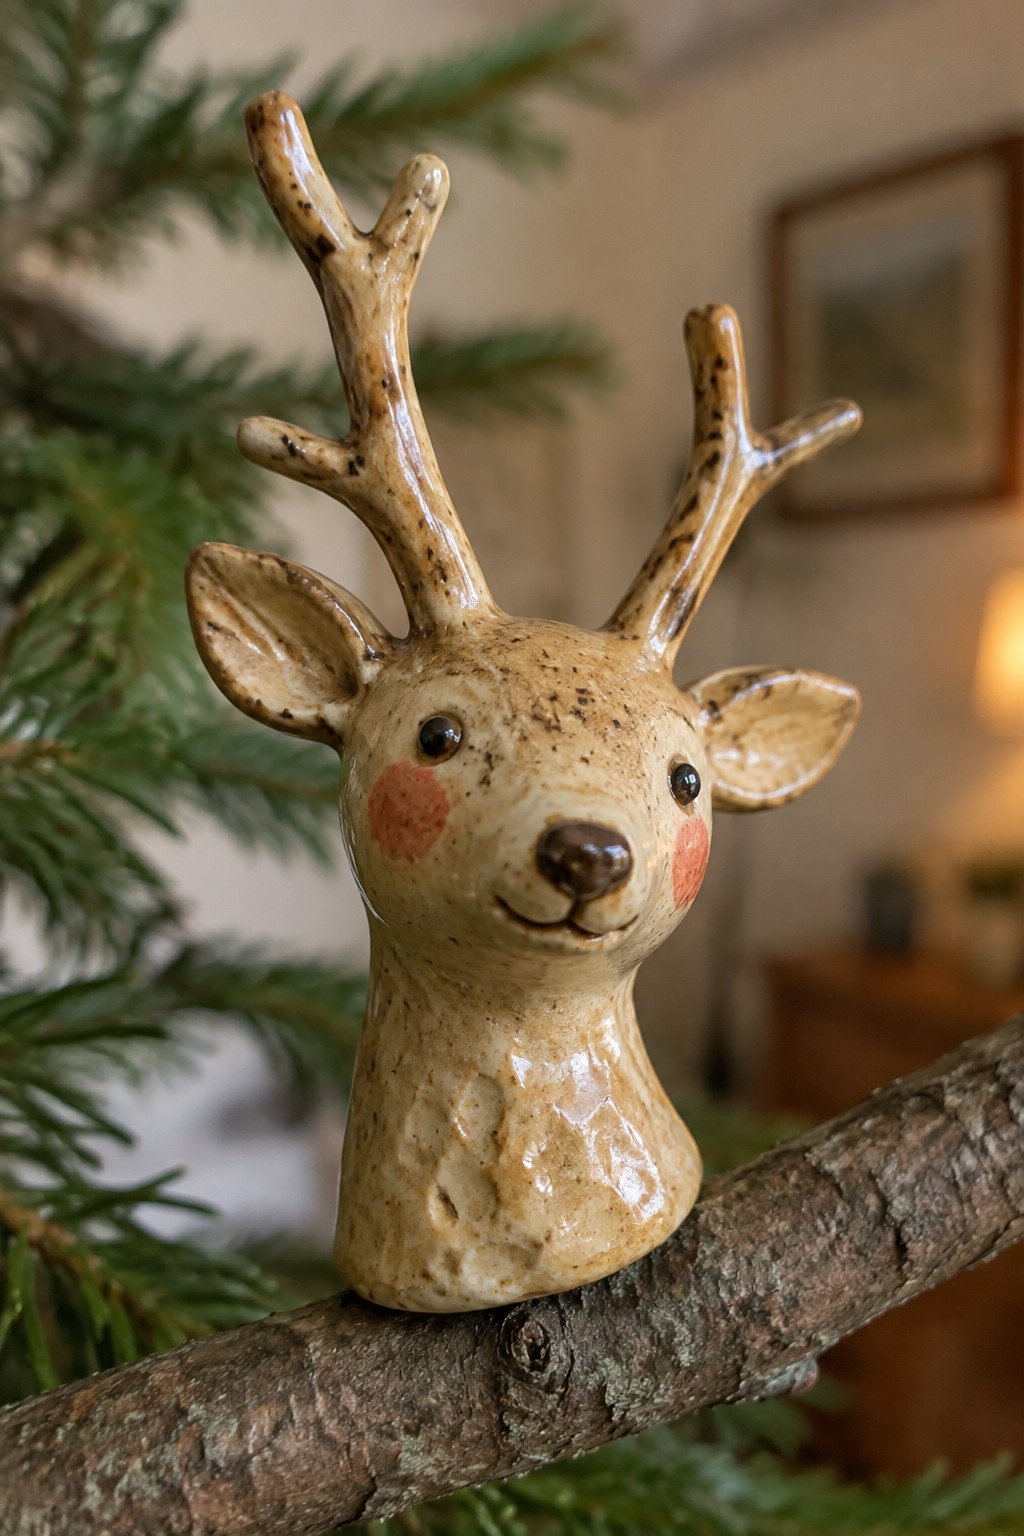
A small ceramic deer head ornament uses a single sculpted form that combines the face, ears, and antlers into one piece. The speckled glaze covers the main body while simple painted marks define the eyes, nose, and cheeks. This keeps the shape readable from a distance and works well as a tree ornament or branch accent.
The compact size lets you make several in one firing session and vary the face details for different family members. You can add a small hole at the back for hanging or leave it as a sitting piece for mantels and wreaths. The same head shape can be reworked into other animals by changing the ear and antler placement before the clay dries.
Blue Ceramic Bell Ornament with Ridged Texture
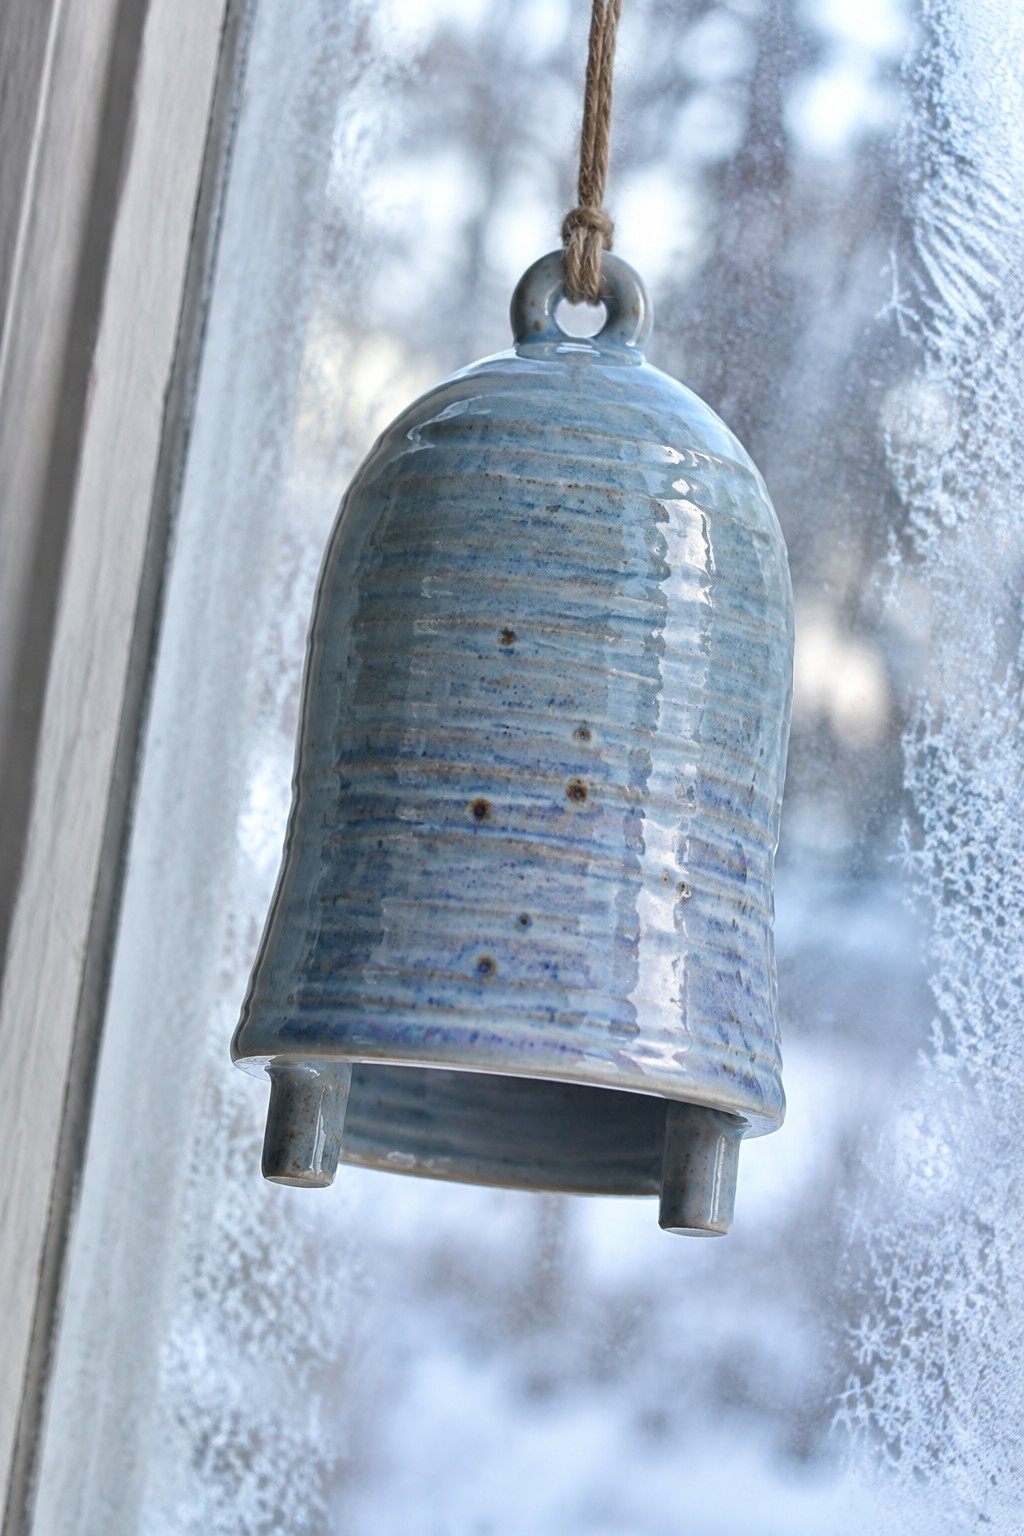
A ceramic bell ornament starts with a rounded bell form that narrows slightly at the top and includes a small loop for hanging. Horizontal ridges rolled into the surface give the glaze places to pool and break, creating the streaked blue and brown finish visible here. The open base and two short feet at the bottom keep the shape stable and allow the piece to hang straight without tipping.
What makes this idea useful is how the bell shape works at multiple sizes for both tree branches and wreath accents. You can swap the blue glaze for red or green to match different color schemes or add a small stamped name on the side for personalization. The same form can be simplified by skipping the feet and using it as a plain hanging tag instead. These ornaments store easily in a box because the shape nests without fragile protrusions.
Striped Ceramic Stocking Ornament

A small ceramic stocking ornament starts with a basic stocking shape that includes a rolled cuff at the top. Horizontal bands of red and white alternate down the body, with the red stripes carrying a raised texture that catches light and adds depth. A hole drilled near the cuff holds twine or ribbon for hanging. This keeps the piece firmly in the category of lightweight holiday decor objects rather than functional pottery.
The small scale makes this easy to adapt into multiple color schemes or stripe widths without using much clay. You can add a name or date on the white cuff, switch the red for another holiday tone, or shorten the shape into a mini version that doubles as a gift tag. These hold up on a tree, mantel hook, or wreath year after year without fading or tearing. The simple form also translates well to slab construction if you want to make a batch quickly.
Ceramic Wreath Ornament with Molded Leaves and Berries

A small circular ceramic ornament shaped as a wreath gives you a compact holiday piece built from repeated leaf and berry forms pressed or sculpted onto a ring base. The glossy green glaze on the leaves and the separate red glazed berries create contrast that reads clearly from a distance once the piece is fired. This type of project sits in the decor object category since its main purpose is to hang rather than hold or serve food.
The small scale makes this easy to adapt by swapping leaf shapes or berry groupings to fit other seasons or color schemes. You can turn the same ring base into multiple ornaments in one firing session which keeps production simple if you want sets for gifts or a tree. A piece like this works especially well when you add a name or date stamp on the back before glazing so each ornament feels personal without extra steps.
Impressed Baby Footprint Ceramic Ornament

An oval ceramic ornament formed by pressing a baby’s foot into soft clay creates a recessed print that stays visible after firing. The piece uses a neutral speckled glaze over a simple oval shape, letting the texture of the footprint stand out as the main detail. This type of project falls into the category of small personalized hanging decor, where the impressed element replaces painted or added motifs.
The oval form keeps the ornament compact enough to hang on a tree or from a hook without taking much space. You can adapt the same impression method to a handprint, add a stamped year, or switch to a round or rectangular blank for variety. For gifts, this approach works especially well because the size and neutral finish make it easy to produce several versions in one batch.
Marbled Glaze Ceramic Bauble

A round clay ornament formed on the wheel or with a mold gets its character from a marbled glaze that blends teal and copper tones across the surface. The sphere tapers into a short neck with a small loop at the top so it hangs straight from a branch or hook. The glossy finish after firing makes the colors shift and reflect light without any added paint or decals.
What makes this idea useful is that the marbling happens during glazing so every piece looks different even when you repeat the same colors. The compact shape works well for tree branches but also fits in a bowl as loose decor or on a mantel hook. You can simplify the form by hand-building instead of throwing and still get the same effect with just two or three glazes. For gifts, rolling out a small batch in one glaze combo keeps production quick while the patterns stay one of a kind.
Scalloped Ceramic Ornament with Star Cutout
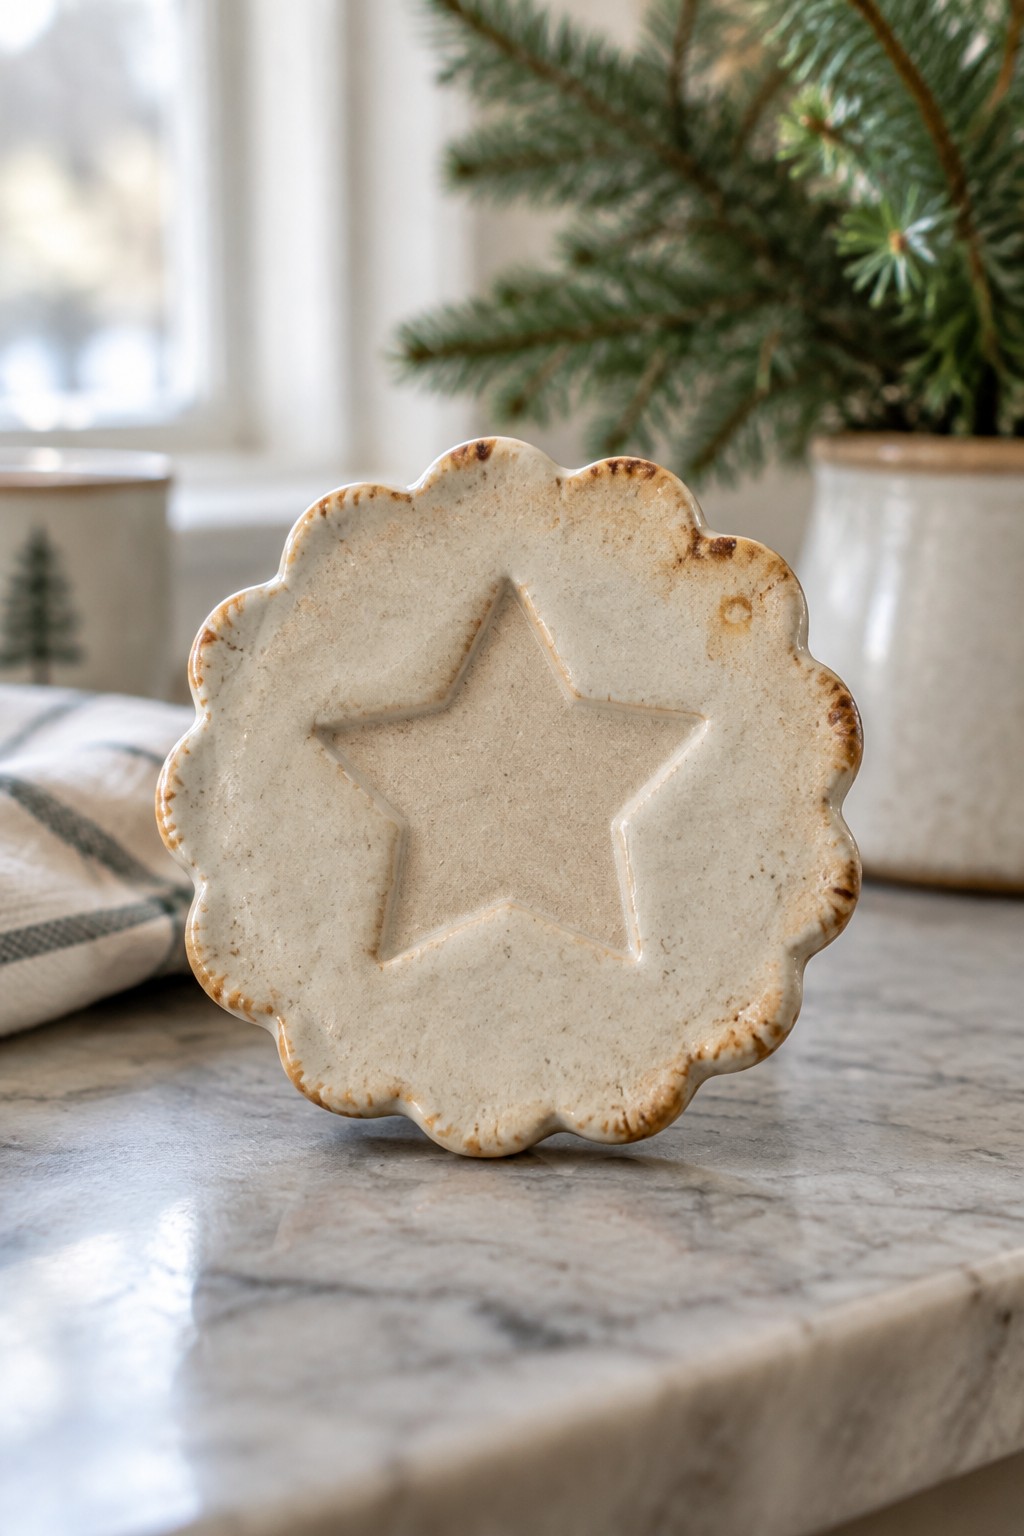
A flat ceramic ornament with scalloped edges and a large star-shaped cutout through the center makes a simple hanging piece for the tree. The round form mimics a classic cookie cutter shape while the open star keeps the design light and easy to see from both sides. A creamy glaze with slight brown speckling along the edges gives the surface texture and helps the cutout stand out without added paint.
The small scale and open center make this ornament quick to produce in multiples and easy to hang with a simple ribbon or wire. You could swap the star for other cutout shapes like a tree or initial to personalize batches for gifts. The neutral glaze also lets the piece blend with different color schemes or stand alone on a neutral tree.
Pressed Leaf Ceramic Tag Ornament

A rectangular clay tag ornament takes shape when you press a real leaf into soft clay to capture the veins and edges in detail. After firing, a muted green glaze settles into the recessed areas and leaves the raised clay slightly lighter for contrast. The drilled hole at the top turns the finished piece into a simple hanging ornament that works on a tree or as a package tag. This method relies on the natural texture of the leaf rather than added carving or painting.
The small size makes the tag easy to produce in batches for gifts or a full set of ornaments. You can swap in different leaves or press multiple smaller ones across a larger slab and cut the tags afterward. A single glaze color keeps the process straightforward while still showing the leaf pattern clearly in photos. This approach adapts quickly if you want to try other flat natural materials like seed pods or thin twigs for variety.
Ceramic Angel Ornament

A small ceramic angel ornament combines a simple bell-shaped body with attached wings and a halo loop for hanging. The design uses a cream glaze with visible texture and minimal painted details like closed eyes and soft pink cheeks to keep the focus on the sculpted form. This approach fits the figurine ornament category, where the shape and hanging loop make it ready for tree use or window display without extra hardware.
What makes this idea useful is the compact size that works for both tree branches and gift wrapping. You can add a name or year on the back before firing to personalize it without changing the overall shape. The same basic body and wing construction could be adapted into a star or tree silhouette if you want to make a matching set. For Pinterest, the clear handmade texture and simple color palette help it stand out from smoother commercial ornaments.
Ceramic Camera Photo Frame Ornament
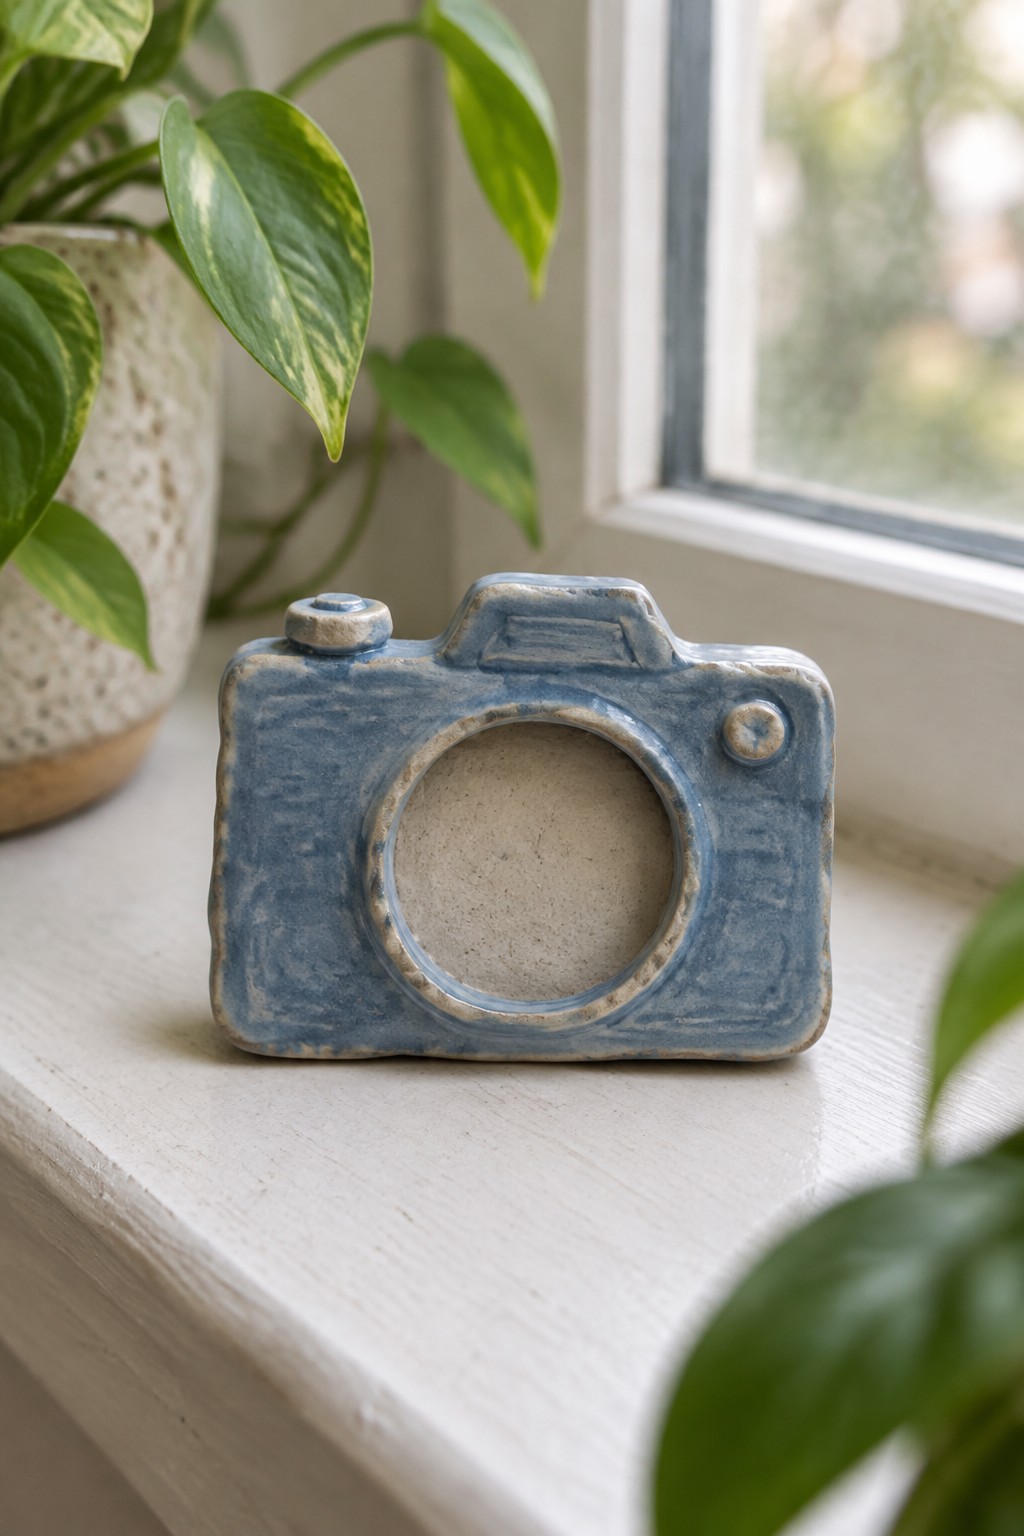
A small ceramic camera works well as a photo frame ornament when the lens area is left open as a circular cutout. The form is built from basic slabs or a simple mold, then glazed in a single blue tone that shows the clay texture underneath. This keeps the piece recognizable as a camera while letting the open center do the main job of holding a small printed photo or image.
The shape does a lot of the work here because the cutout already suggests where a picture goes, so you can skip complicated surface carving. It fits easily on a desk, shelf, or windowsill without taking much space. You could adapt the same idea by changing the glaze color, stamping a short name or date on the body, or adding a small hanging hole at the top to turn it into a tree ornament. For gifts, the camera form also scales down cleanly if you want to make several at once.
Ceramic Stocking Ornament with Bell

A ceramic stocking ornament gives you a compact holiday shape that works well as a tree decoration. The form follows a classic stocking silhouette with a wide cuff at the top and a rounded foot at the bottom. The glaze treatment uses a speckled red and white cuff against a matte off-white body that keeps the clay texture visible. A small bell suspended inside the open base adds a simple functional detail without complicating the overall form.
The narrow top section makes it easy to add a cord or wire for hanging. You can adapt the same shape by switching the cuff color, stamping a name into the clay before firing, or making a set in different glaze combinations. Because the piece stays small, it uses little material and stores easily between seasons. For gifts, the stocking works better than flat ornaments since the three-dimensional form stands out when people unpack their decorations.
Crackle Glaze Winter Transfer Dish

A small round ceramic dish with concentric raised rings around the rim receives a crackle glaze in muted greens and blues. The flat center holds a transferred winter landscape showing snow-covered trees and mountains. This format creates a compact framed piece that functions as a trinket dish, coaster, or standalone tabletop ornament.
The small diameter makes it easy to batch out several versions for gifts or tree decor without using much clay. Swapping the transfer for a family photo, custom illustration, or holiday greeting lets you personalize each one quickly. The ridged rim adds visual weight while the crackle glaze covers small surface flaws, so the same shape works for both simple and more detailed attempts.
Frequently Asked Questions
1. What materials do I need to create personalized ceramic ornaments at home? Gather air-dry clay or oven-bake clay, acrylic paints, fine-tip markers for names and dates, cookie cutters in holiday shapes, and clear sealant spray. These supplies allow you to replicate many of the 22 designs while keeping costs low and the process accessible for beginners.
2. How can I personalize the ornaments with family names or special dates? Roll out the clay to about a quarter-inch thickness, press in names using letter stamps or write them carefully with a toothpick before baking, and add birth years or anniversary dates in a matching font style. This approach works well for several of the 22 ideas such as snowman families or tree silhouettes.
3. How long should the ornaments bake and how do I avoid cracking? Follow the clay package instructions, usually 15 to 30 minutes at 200 to 250 degrees Fahrenheit depending on thickness, and let them cool slowly inside the turned-off oven. Thinner pieces from the 22 collection bake faster and are less likely to crack if you avoid sudden temperature changes.
4. What is the best way to hang these ceramic ornaments on the tree without damage? Drill a small hole near the top before baking or attach a ribbon loop with strong glue after sealing, then use lightweight hooks or twine. This method supports even larger designs from the 22 options and prevents chips when the tree is moved or stored.
5. How should I store the ornaments after the holidays to keep them looking new? Wrap each one individually in tissue paper or bubble wrap, place them in a sturdy box with dividers, and store in a cool dry location away from direct sunlight. Proper storage protects the painted details on all 22 designs for many future seasons.

Pottery Path is my cozy corner of the internet where I share clay ideas, pottery inspiration, and simple projects you can recreate at home. I love exploring everything from air dry clay to handbuilt pottery to cute minis that brighten your day. My goal is to make clay crafting feel easy, fun, and welcoming for anyone who wants to try it.
You will find beginner friendly tutorials, creative pottery painting ideas, and lots of warm inspiration for slow and happy crafting. If you enjoy hands on creativity, this space will feel like home.