I’ve been making pottery for a few years now and I like to try new projects around Christmas.
Handbuilding works well when you don’t have a wheel or much space.
I came up with these ideas after testing a few things myself in my small studio.
They are all beginner friendly and use basic tools and clay.
Some of them make nice gifts or decorations for the season.
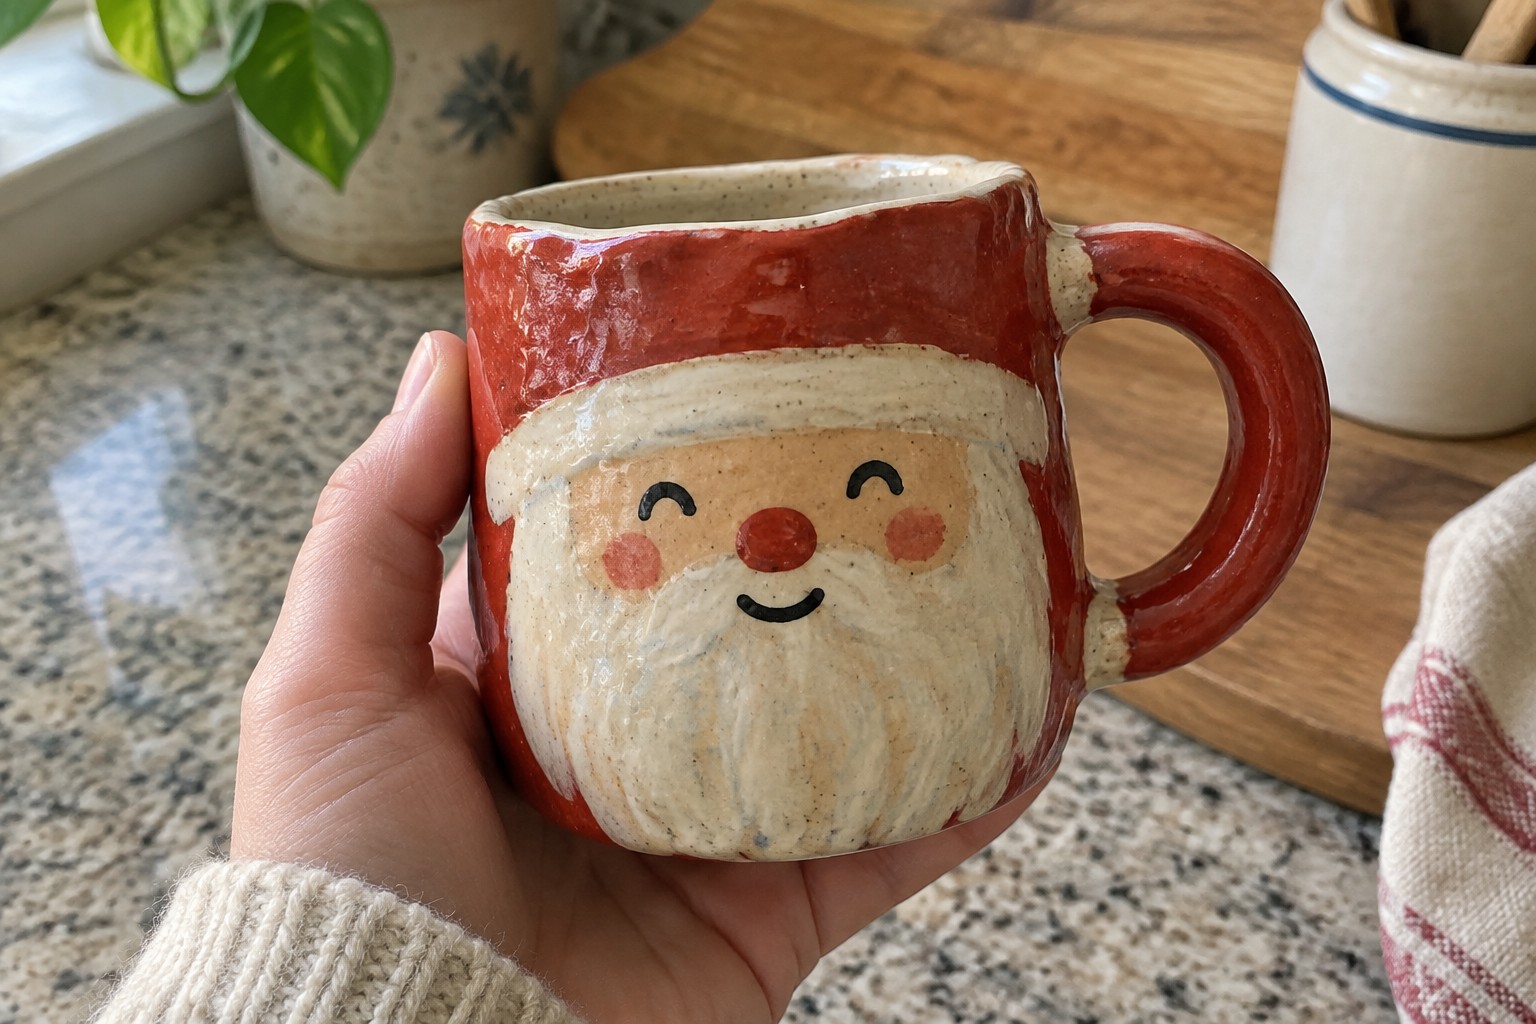
Santa Claus Mug
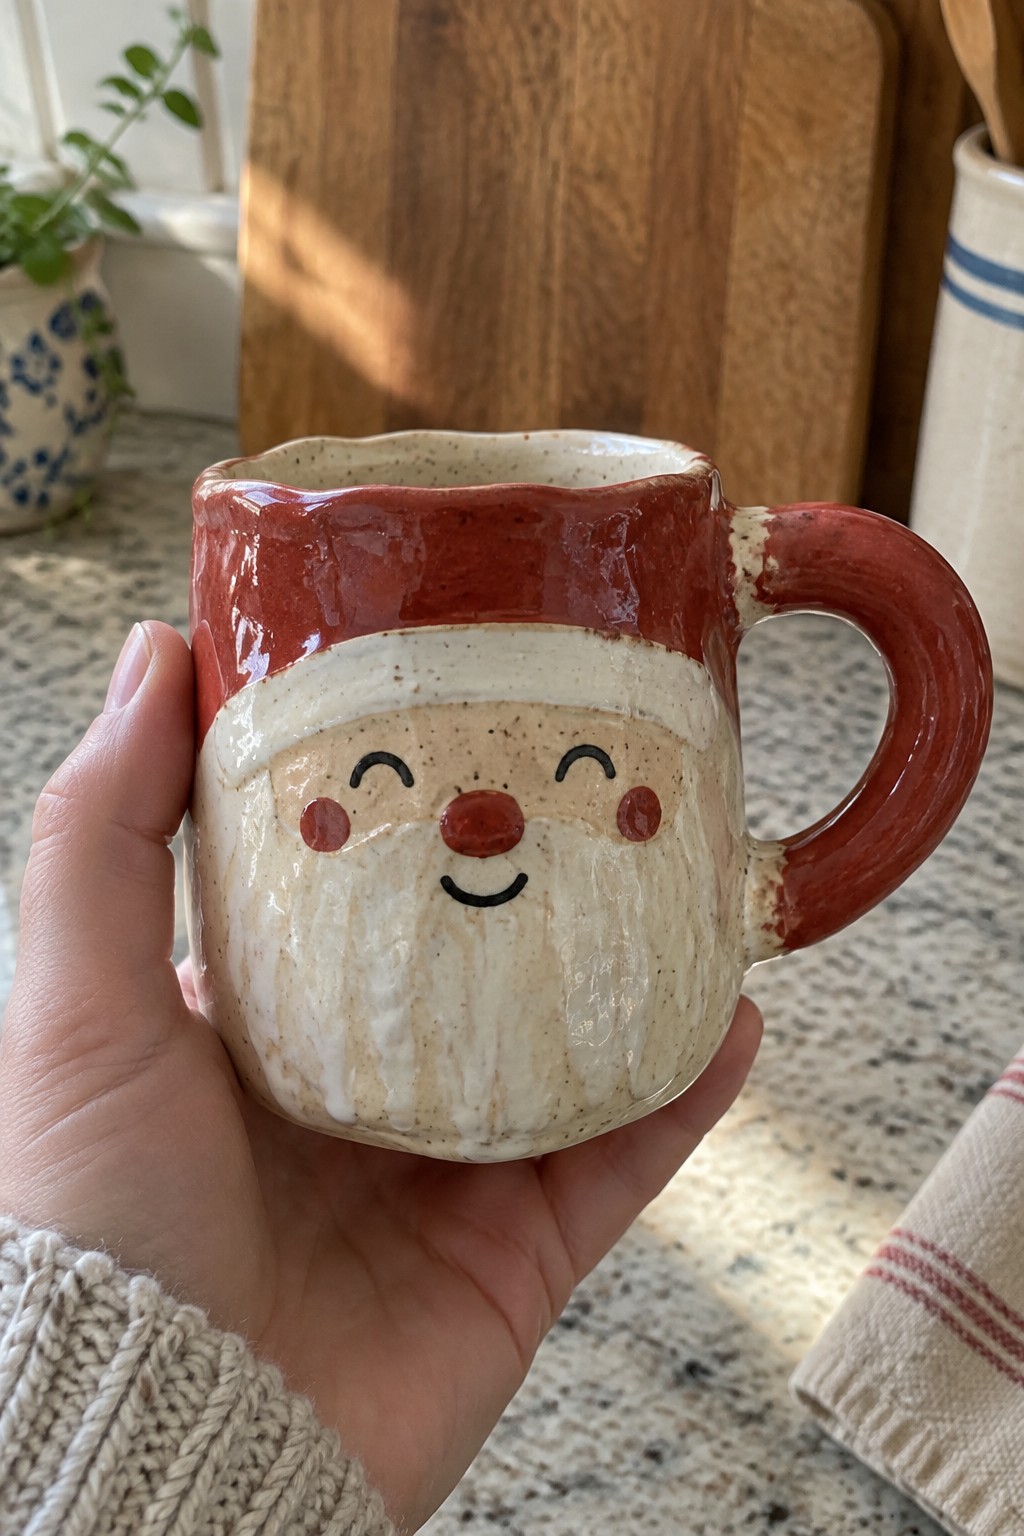
A Santa Claus mug starts with a simple handbuilt cylinder that gets a pulled or attached handle. Red glaze covers the upper section to form the hat, a white band sits below it as trim, and the remaining body stays in a lighter clay tone for the face and beard. Painted details stay minimal with curved black lines for eyes and mouth, small red circles for cheeks, and a solid red dot for the nose. The speckled clay surface and slight drip texture on the lower half give the beard area visual interest without extra carving.
What makes this idea useful is that the mug stays fully functional for coffee or cocoa while the face requires only basic underglaze painting. You can keep the same cylinder shape and swap the features for other winter characters or skip the face entirely and just use the red and white bands. The small scale fits easily on a gift table or in a holiday drink station, and the design works on either a wheel-thrown or slab-built form. For a variation, try the same layout on a smaller espresso cup or a taller travel mug.
Round Snowflake Ornament

A flat clay disk ornament gives beginners an easy starting point because you roll out a slab, cut a clean circle, and add a small hole near the top edge for hanging. The snowflake sits in the center as a simple stamped or painted motif using blue underglaze against a white or cream base so the pattern reads clearly from a distance. This approach keeps the project in the holiday decor category while avoiding complex forms or handles.
What makes this idea useful is how quickly you can swap the snowflake for other winter shapes like stars or trees without changing the overall process. The compact size works well for batch making, so you can produce several ornaments in one sitting to use as gift tags or tree decorations. You could also add a name or date on the back before firing to turn the same disk into a personalized keepsake without extra steps.
Peppermint Star Dish
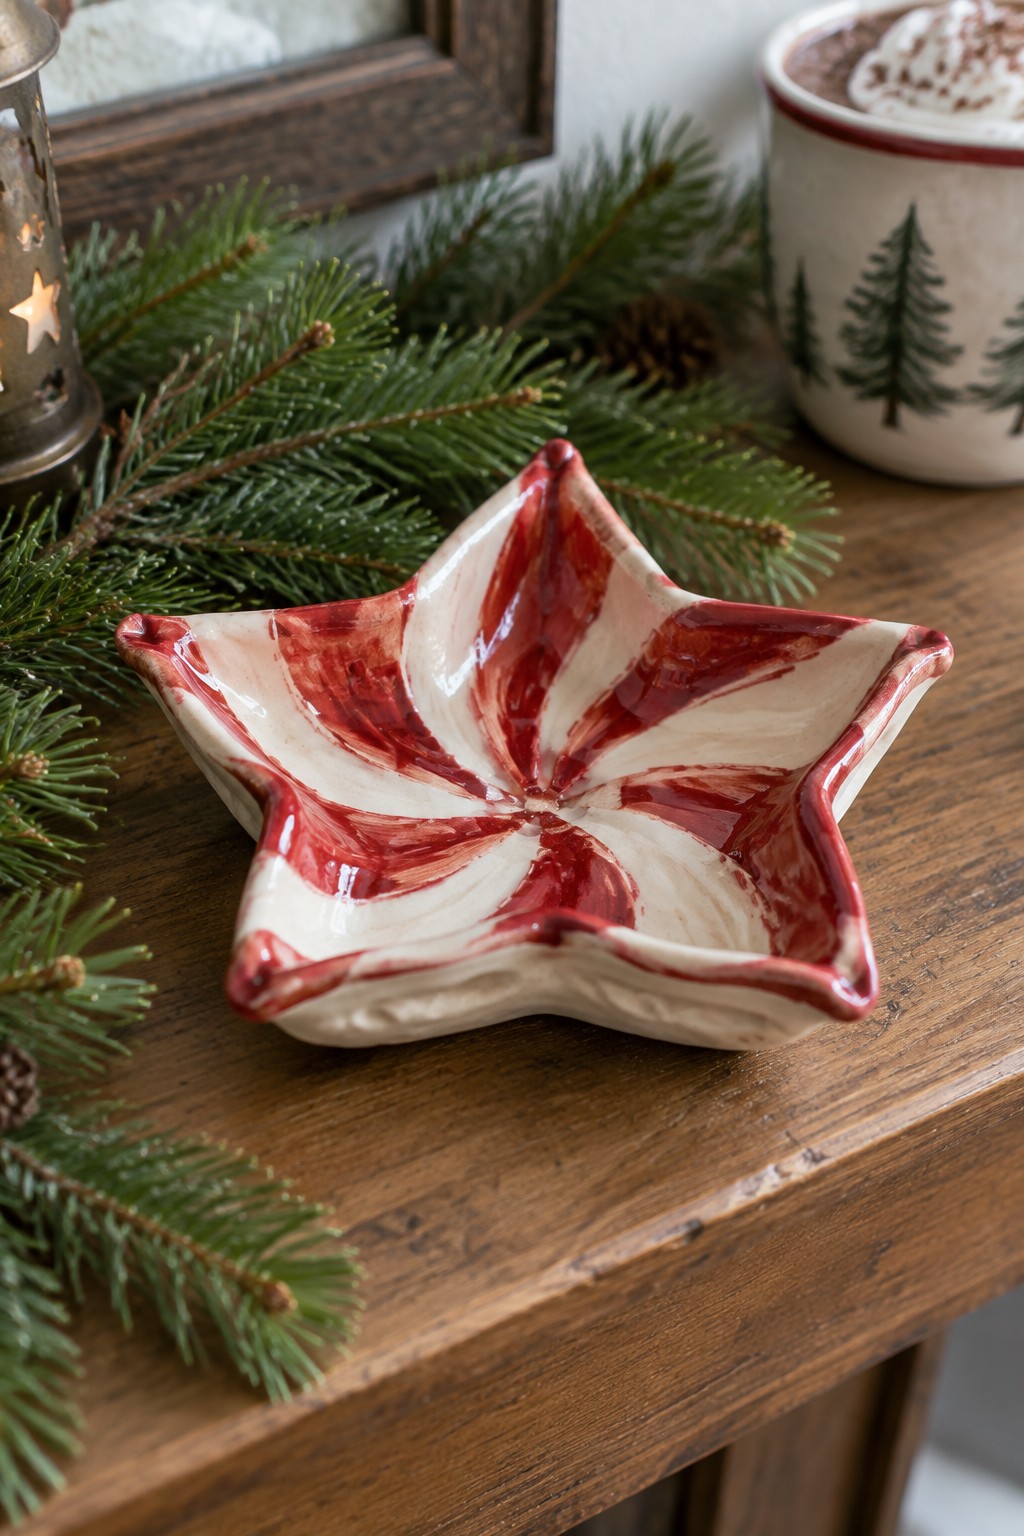
A star-shaped ceramic dish with red and white striped glaze gives you a quick way to make a holiday-themed piece using basic handbuilding. The form is pinched and shaped into a shallow bowl with six points, then covered in a swirled pattern that mimics a peppermint candy. This approach works well as a small decor object or ring dish because the bright stripes stand out even on a simple white clay body. The project stays beginner-friendly since it relies on slab or pinch methods rather than precise wheel work.
The small scale makes this easy to adapt into coasters, soap dishes, or catch-all trays by adjusting the depth of the walls. You could swap the red for green to create a different holiday pairing or keep the star form but use solid colors if the stripe technique feels tricky at first. In a kitchen or entryway, the dish holds candies or keys without taking up much space, and the flat shape stacks well for storage or gifting. The high-contrast pattern photographs clearly, which helps the finished piece stand out if you post it as inspiration.
Star Impressed Tea Light Bowl

A small handbuilt ceramic bowl with a star shape pressed into the center creates a simple candle holder for the holidays. The green glaze and textured surface let the star detail catch light and shadow without extra decoration. This project combines a basic pinch or slab bowl form with one sculptural impression that turns it into a seasonal piece.
The small scale keeps the build quick and the firing straightforward for beginners. You could swap the star for a tree or snowflake stamp and make a set in different glaze colors for gifts. This shape sits well on a table or mantel and can shift into a ring dish or small catch-all if you leave out the candle.
Tree Stump Planter for Small Succulents
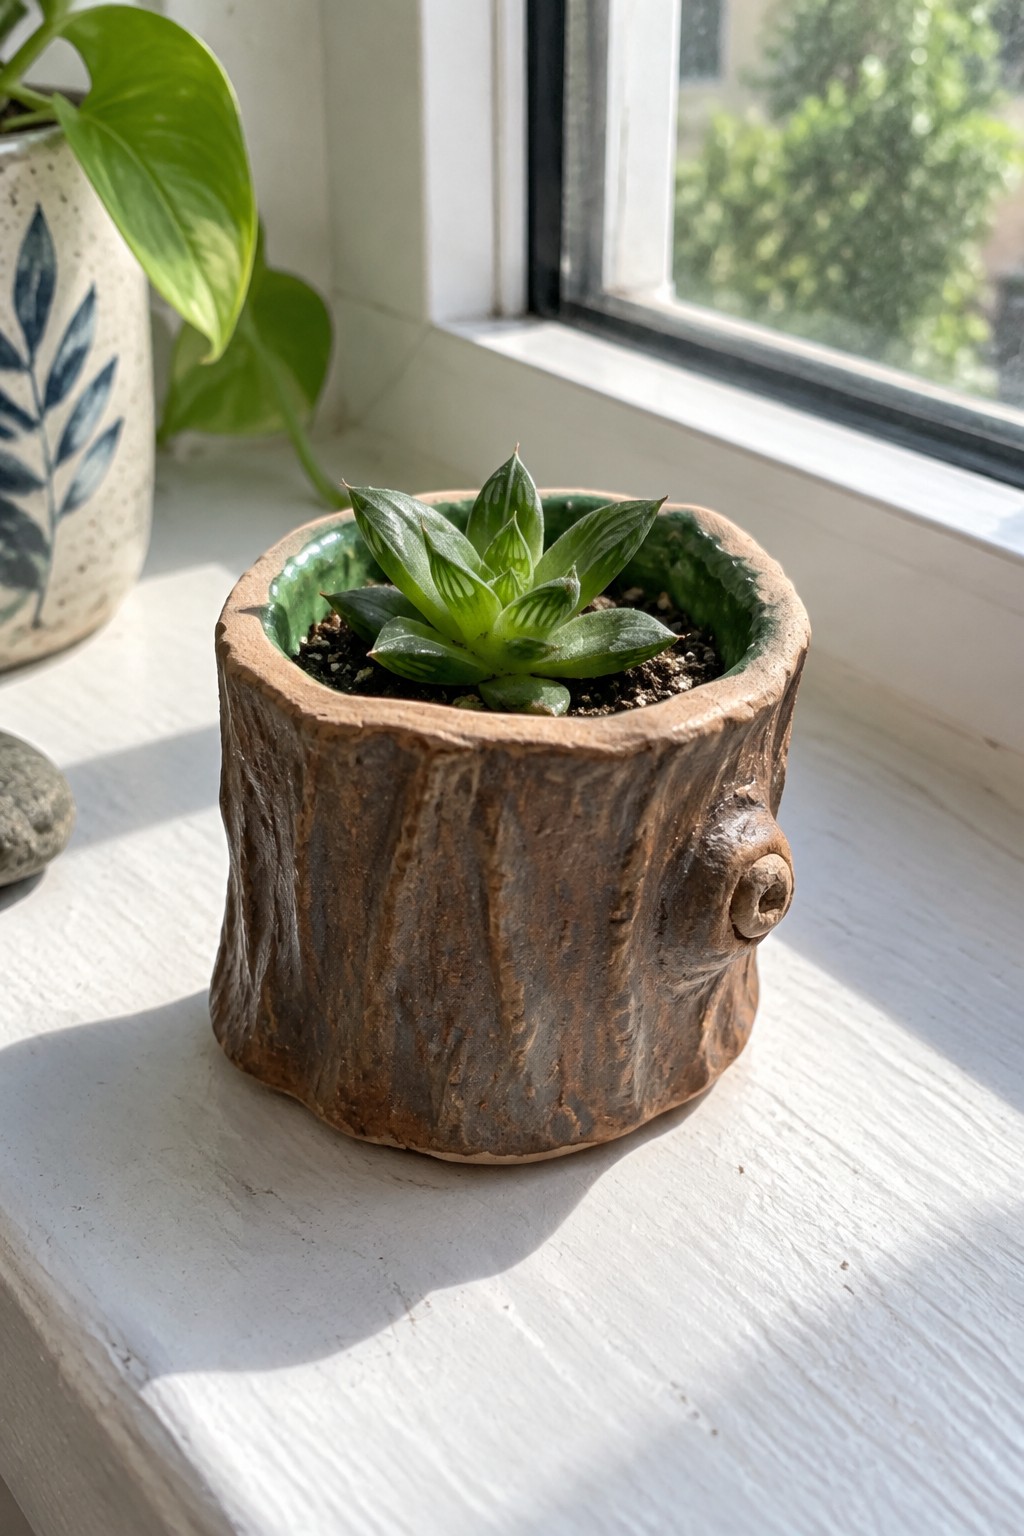
A handbuilt ceramic planter formed as a short tree stump gives a simple way to display a single succulent. The cylinder shape is textured on the outside to suggest bark while the interior rim is glazed in a contrasting color. This approach keeps the pot small enough to sit on a windowsill or shelf without competing with the plant.
The shape does a lot of the work here because the stump form already looks complete once textured. You can build several at once, vary the heights slightly, and group them as a set for gifts. The same cylinder base and exterior texture can be reworked into a small holder for pens or a tea light by adjusting the depth and interior finish.
Snowflake Spoon Rest

A spoon rest formed from clay into a long, shallow tray gives cooks a dedicated spot to set utensils while working. The wider end holds a raised snowflake motif pressed into the clay, and the narrower section shows a simple leaf texture under a glossy blue glaze. This shape keeps the piece stable on a counter while the motif adds a clear winter theme without extra pieces or attachments. It fits the kitchen item category for holiday projects.
What makes this idea useful is how the elongated form directly solves the problem of messy counters during cooking. The snowflake can be swapped for other simple holiday shapes like stars or trees using the same press or carve method. In a kitchen, the size works for both wooden spoons and smaller tools, and the design stays practical even if you simplify the texture or change the glaze color. You could also shorten the handle slightly to make a version that fits in a utensil crock.
Handbuilt Clay Wreath with Sculpted Leaves and Berries
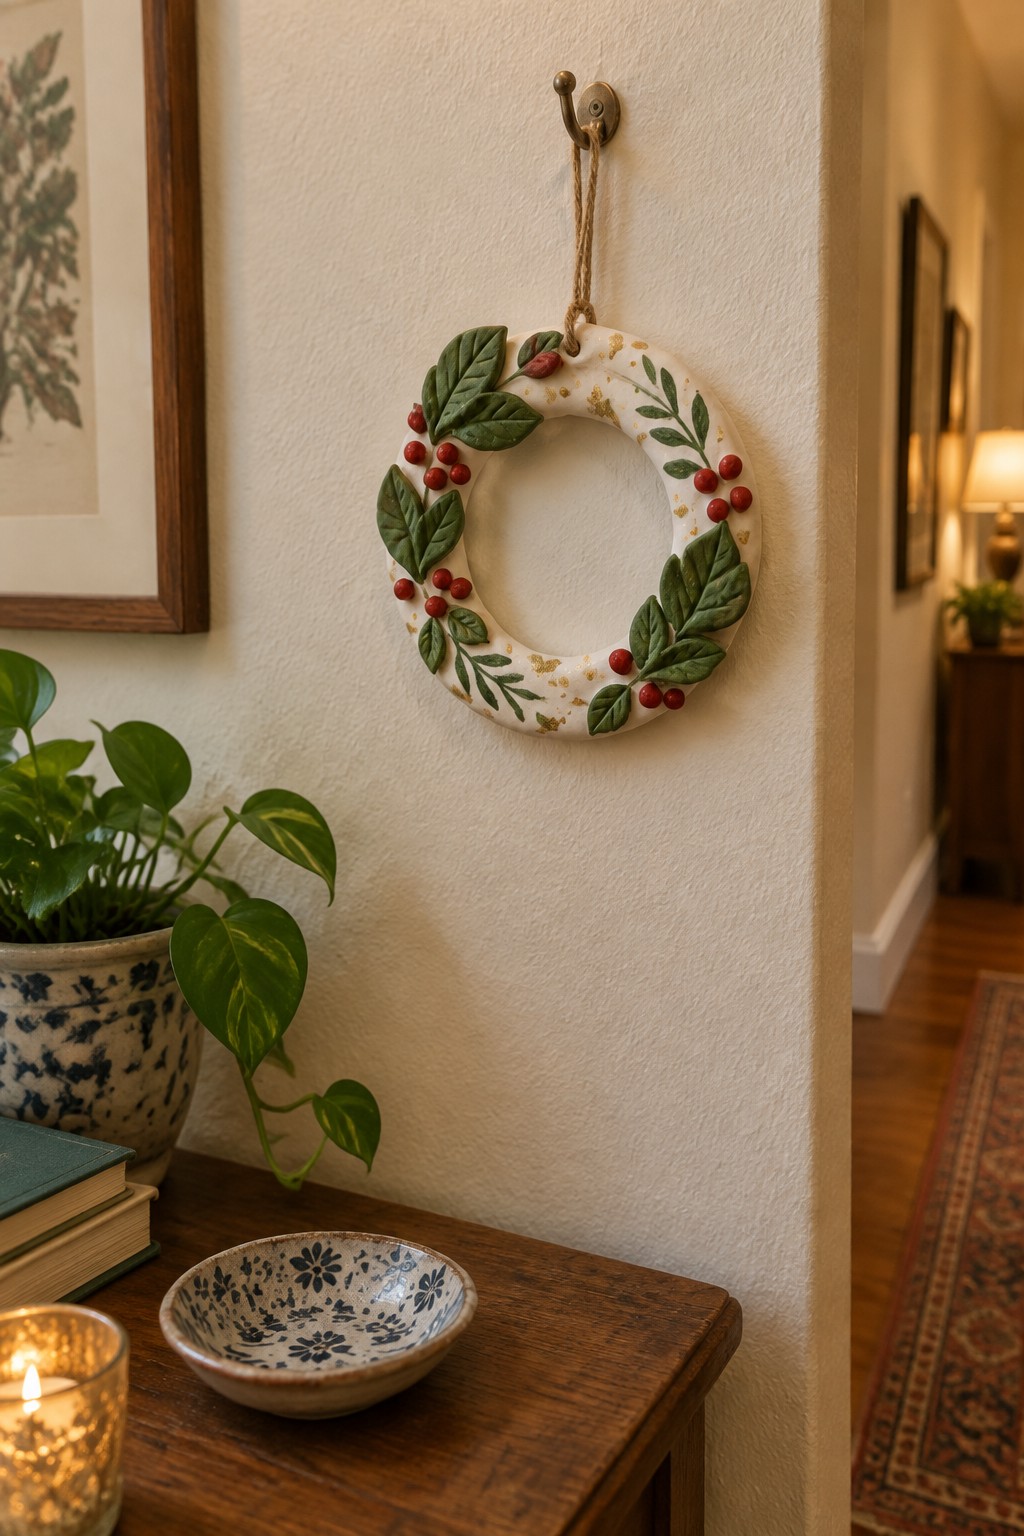
A handbuilt clay wreath starts with a simple ring form that you flatten and smooth before adding small leaves and berries around the edge. The white surface with light gold flecks keeps the background clean so the green leaves and red berries stand out without extra painting. This style fits the decor object category because the wreath stays compact and hangs easily with a piece of twine.
What makes this idea useful is how the flat ring shape lets you adjust the size for different spots like a narrow hallway wall or a shelf edge. You can swap the leaf and berry layout for other simple motifs or repeat the same wreath in different colors to match existing holiday pieces. The small scale means it takes less clay and dries faster than larger forms, so it works well when you want several matching items for gifts.
Peppermint Swirl Trinket Bowl
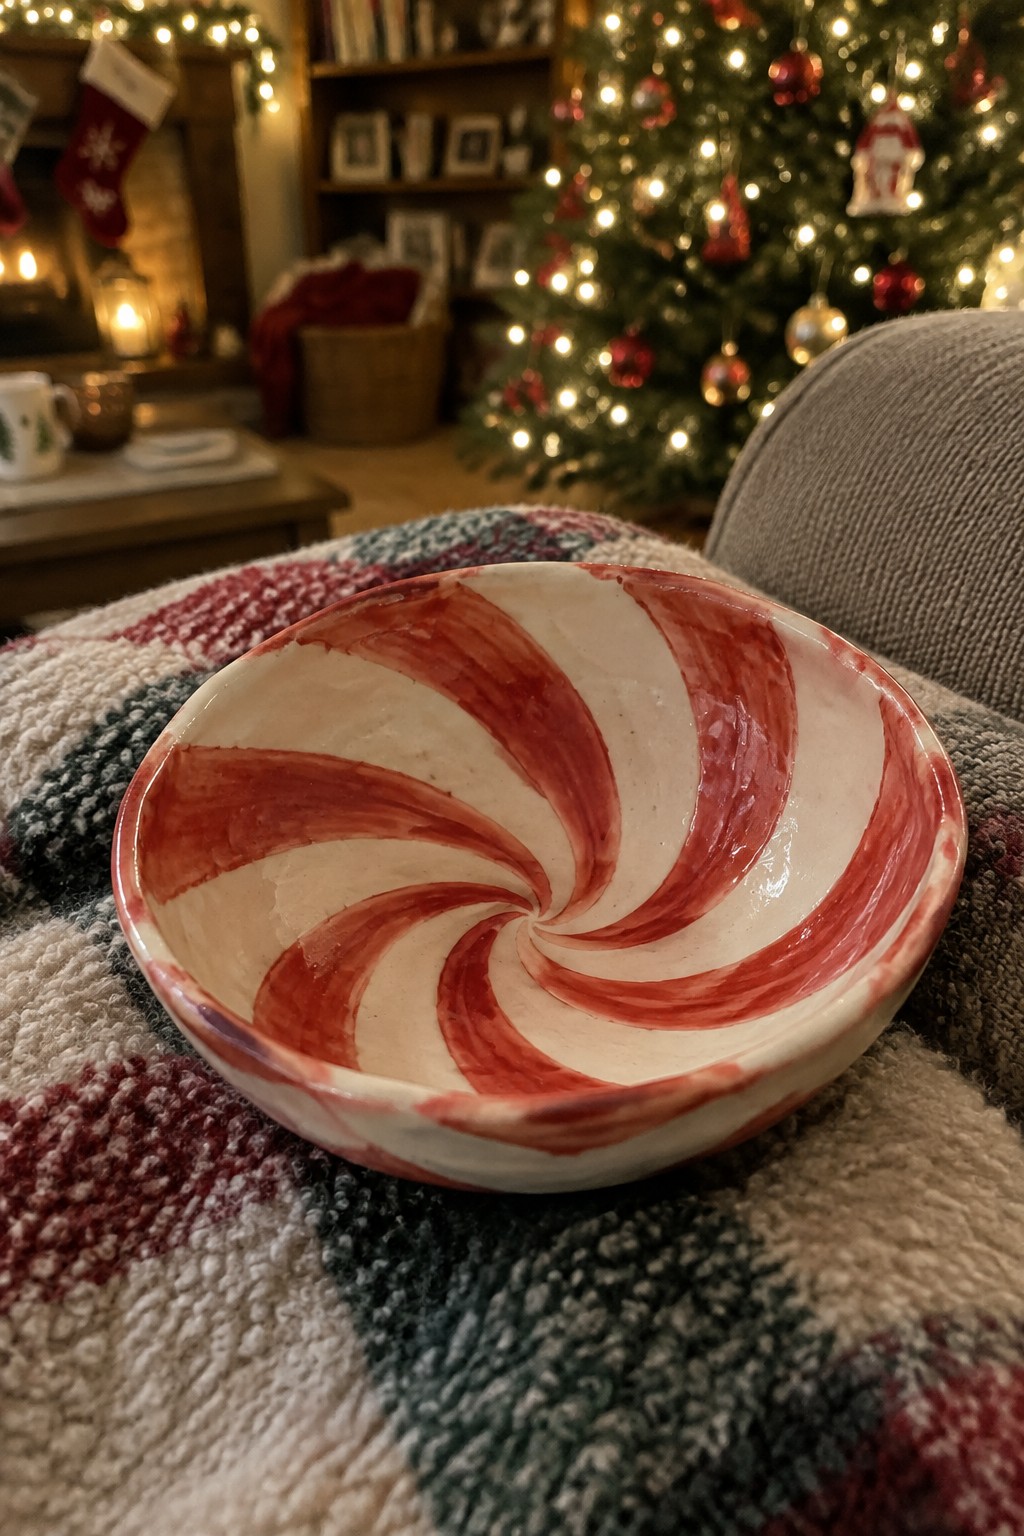
A small handbuilt bowl finished with a red and white peppermint swirl offers a straightforward Christmas project. The pattern is created by brushing red glaze or underglaze in broad, curving strokes over a white base so the colors twist toward the center. This style of decoration works on a simple pinched or slab-built form and suits any shallow dish shape. The result reads clearly as a holiday piece without requiring precise lines or advanced glazing skills.
What makes this idea useful is how the swirl pattern can be adjusted to fit whatever size or shape you build. A piece like this works especially well as a ring dish, small candy holder, or tea bag rest during December. You could rework the same motif onto flat ornaments, small plates, or even the inside of a mug by changing the direction of the strokes. The design also photographs well for sharing, which helps it perform on Pinterest boards focused on easy holiday makes.
Leaf-Shaped Ring Dish
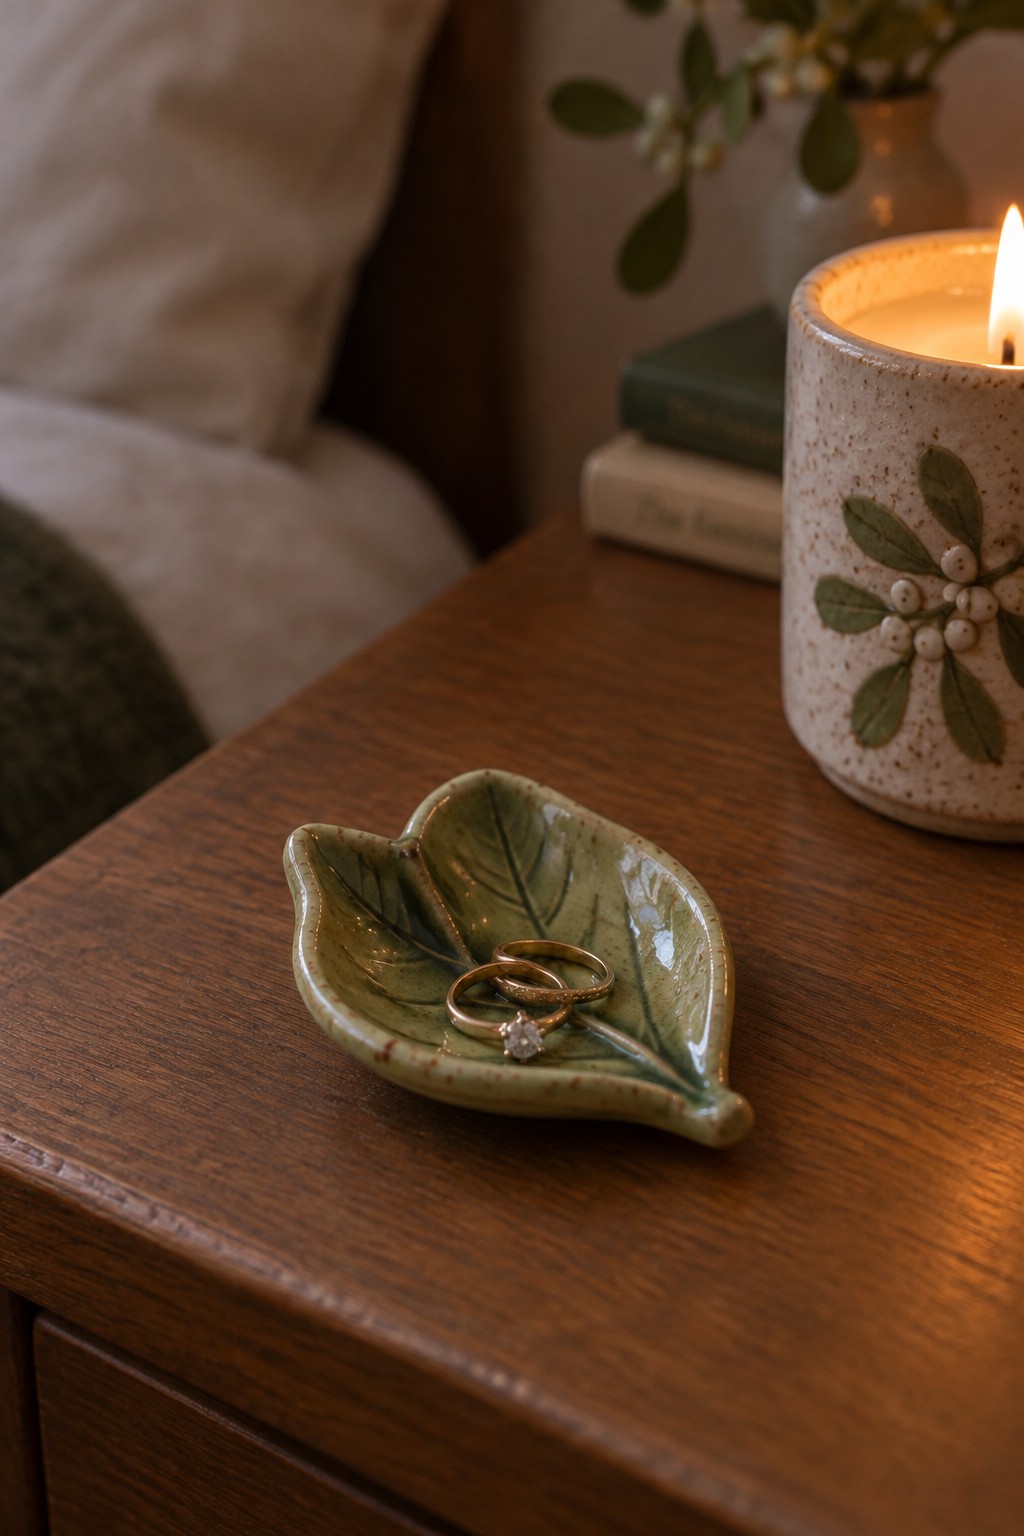
A leaf-shaped ring dish gives you a small, functional tray for holding rings or other tiny items on a nightstand or dresser. The project starts with a slab of clay cut and formed into a simple leaf outline, then veins are added with a tool or stamp before the edges are gently curved upward. A green glaze with fine speckling brings out the leaf texture and makes the finished piece look complete with minimal extra work.
The compact size means it takes little clay and dries quickly, which helps when you need several gifts ready before the holidays. You could swap the leaf style or make the dish slightly deeper to hold earrings or loose change instead. This shape also photographs well for sharing, since the raised veins and single glaze color create clear contrast without extra painting.
Double Christmas Stocking Salt Holders

This project creates a connected double holder shaped like two Christmas stockings for storing and serving salt or other dry seasonings. One stocking uses a holly sprig motif while the other features vertical red stripes on a cream clay body, with both sections left open at the top for easy access. The joined form at the center keeps the pair stable and together as a single piece. It works as a kitchen item that adds a seasonal element to everyday table or counter use.
The small scale makes this easy to adapt into a single stocking version or to resize for pepper and other spices. In a kitchen, this kind of piece sits well near the stove or on a dining table during meals. You could simplify the stripes to a single band or change the holly to a different simple motif like a tree to match existing dishes. For a gift, something like this stands out on Pinterest because it serves a clear purpose rather than just sitting as decoration.
Leaf Wreath Napkin Rings
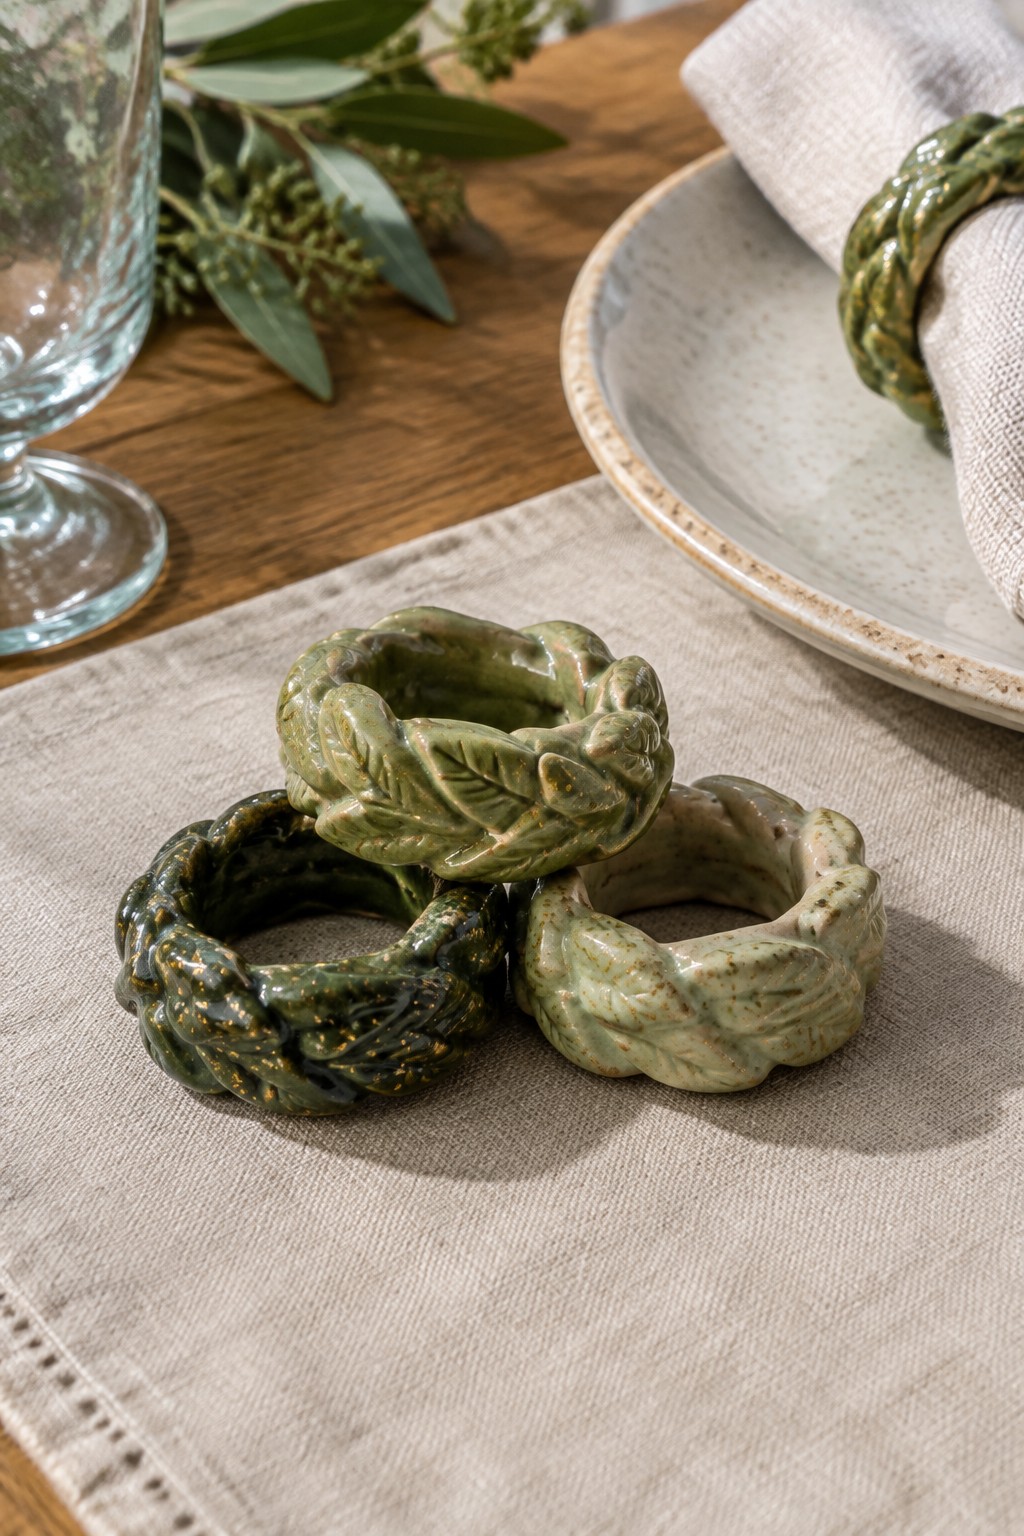
Napkin rings formed from clay give a table setting a finished look without much extra work. These rings use a simple circular shape with overlapping leaves and vines sculpted around the outside to create a wreath effect. The glossy green glaze with scattered gold flecks adds depth and catches light on the raised details. The size fits standard cloth napkins and keeps the focus on the table surface rather than competing with larger dishes.
What makes this idea useful is how the leaf texture can be added with stamps or molds before the clay is joined into a ring. A piece like this works especially well as a seasonal table accent that can be made in sets of four or six. The small scale makes this easy to adapt by changing the leaf type or switching to a solid color glaze for different holidays. For a gift, something like this can be produced quickly once you have a template for the ring diameter.
Clay Reindeer Figurine for Holiday Shelves

A handbuilt clay reindeer figurine uses a basic standing animal form with four legs, a short tail, and separately attached antlers that end in simple curls. The design relies on a solid body shape plus painted details like a lighter muzzle, dark nose, and pink cheek accents to create a clear reindeer look without extra carving. This keeps the project in the small decor figurine category, where the focus stays on sculpting and painting rather than complex construction.
The small scale makes it easy to produce several pieces at once for a mantel or shelf arrangement. You can change the antler style, body color, or facial markings to create variety while using the same basic template. For gifts, the form adapts well into other standing animals if you adjust the head and ear shapes. The painted face also helps the piece read clearly from a distance on a decorated surface.
Two-Part Snowman Figurine

A snowman figurine formed from two stacked clay spheres gives you a compact holiday decor piece that stays easy to build. The top ball carries painted black eyes and a small orange nose while the bottom ball shows two black buttons. A thin clay band around the middle suggests a scarf without adding bulk. The textured surface across both sections keeps the look consistent and avoids a flat finish.
This size works well on a shelf, mantel, or windowsill where larger pieces feel crowded. You can adjust the sphere sizes or swap the scarf band for a different accent to match other holiday items you already make. The painted details stay basic so the focus stays on shaping and joining the forms cleanly. For gifts the small scale packs easily and leaves room for people to add it to existing collections without taking up much space.
Gingerbread Man Painted Cookie Plate

A small ceramic plate with a scalloped rim works as a holiday cookie plate when decorated with repeated gingerbread man figures. The design uses brown paint or slip for the bodies, white lines to suggest icing details, and small red dots for buttons. The figures are spaced across the surface rather than clustered, which keeps the plate functional for holding actual cookies. This approach fits the category of a simple painted serving dish rather than a sculpted or carved piece.
The small scale makes this easy to adapt for beginners who want a quick painted project instead of building complex shapes. You could repeat the same gingerbread motif on a set of coasters or a larger platter using the same color palette. In a kitchen, the plate serves well for December cookie exchanges or as a gift paired with baked treats. The repeated motif stands out on Pinterest because it reads clearly as seasonal without extra texture or carving.
Star Ornament with Pressed Concentric Rings

A handbuilt ceramic star ornament makes a straightforward holiday project. The eight-pointed star is cut from a slab and the center is marked with a series of concentric rings that catch glaze during firing. A mottled blue-green glaze with brown speckling settles into the lines and creates contrast across the surface. This type of decor object stays small and hangs easily from a tree or hook.
What makes this idea useful is how the star shape can be cut quickly with a template and the ring pattern added with a simple tool or stamp. The same slab method works for other basic holiday shapes if you want to make a matching set. For gifts, these ornaments take up little shelf space while drying and can be glazed in different colors to vary the batch. The small size also means you can finish several in one session without needing much clay.
Christmas Stocking Soap Dish

A Christmas stocking soap dish works as a compact bathroom item built from clay and shaped like a mitten or stocking. The form includes drainage slots across the base so water runs off the soap bar, while the red glaze covers most of the piece and a white cuff section adds contrast at the top edge. Handbuilt details like the rounded toe and simple sculpted rim keep the shape recognizable without extra parts. This fits the kitchen or bathroom item category and gives a direct way to turn a standard soap holder into a holiday piece.
What makes this idea useful is how the small scale keeps material use low and lets you finish several pieces in one session. The stocking shape adapts easily by changing the cuff color or pressing in simple line textures before glazing. You could shorten the form into a plain mitten version or stretch it slightly to hold a larger bar. In a bathroom, this kind of piece replaces a basic dish for December without needing extra space on the counter.
Textured Ceramic Christmas Trees
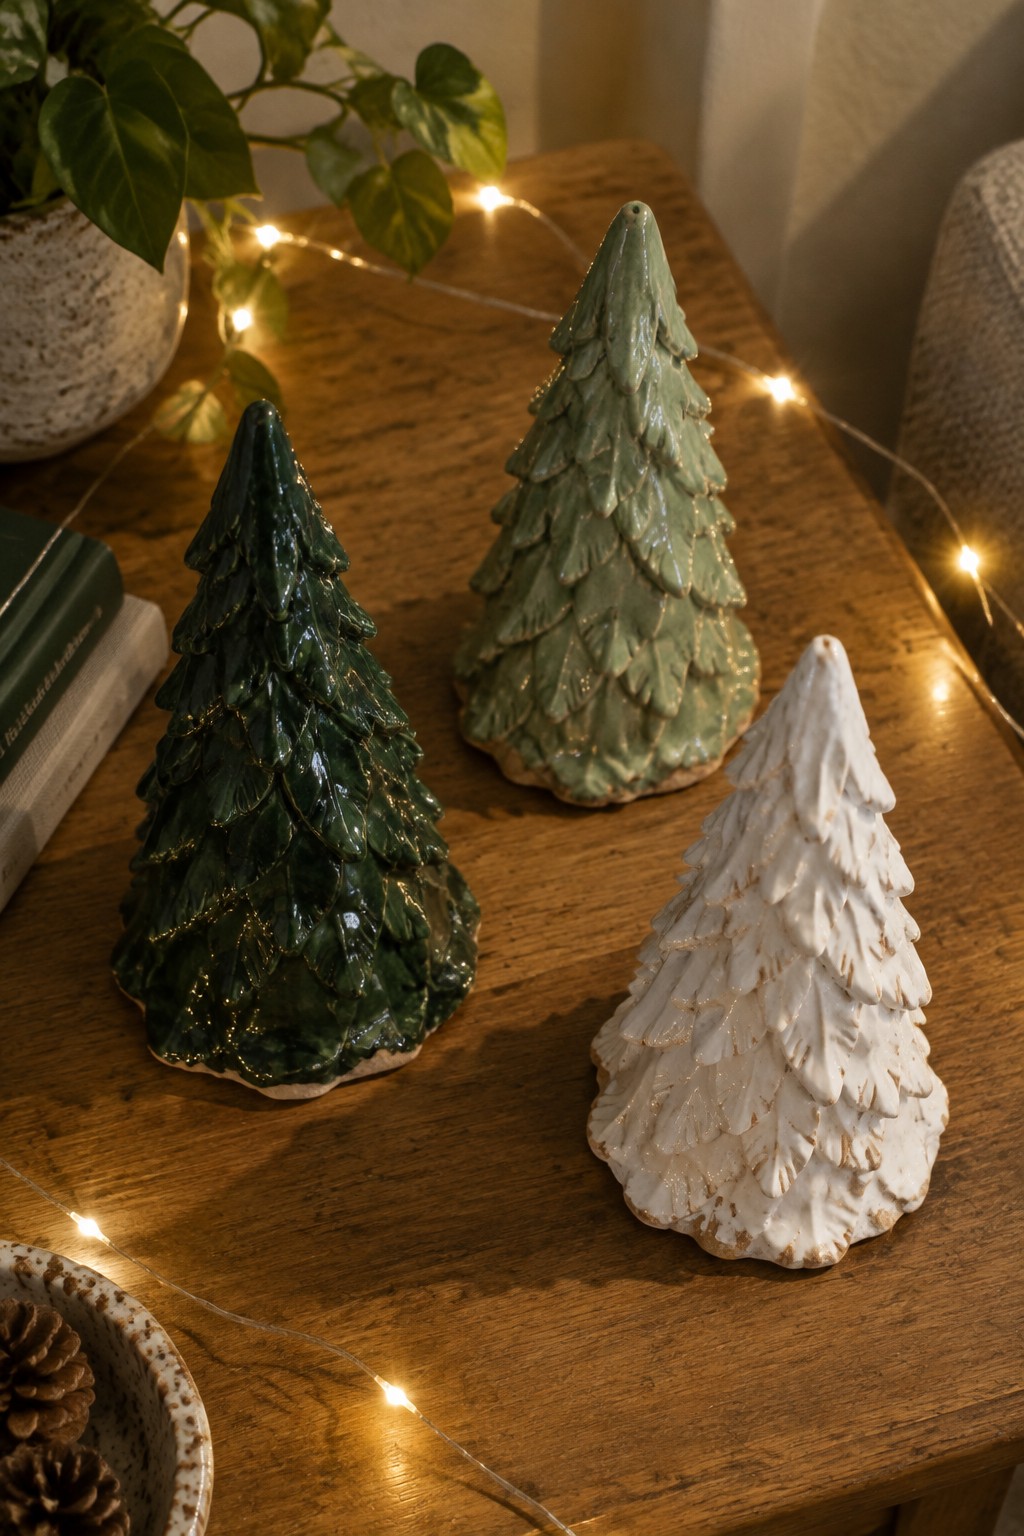
Handbuilt ceramic Christmas trees work well as a beginner project because you can form the basic cone from a slab or coil and then attach overlapping cut pieces to create the layered branch texture. The three examples use a glossy glaze that catches light on the raised edges, making the surface details stand out in deep green, sage, and white. This approach keeps the focus on simple assembly and surface texture rather than precise symmetry.
What makes this idea useful is how the small scale lets you test different glaze combinations without using much clay. You can adapt the same stacking method to make a matching set for a windowsill or vary the height slightly for visual interest on a shelf. The textured layers show up clearly even with basic glazing, which helps the finished pieces photograph well if you want to share the project. For a gift, a pair in contrasting colors gives you something quick to produce and easy to wrap.
Cutout Ceramic Bells
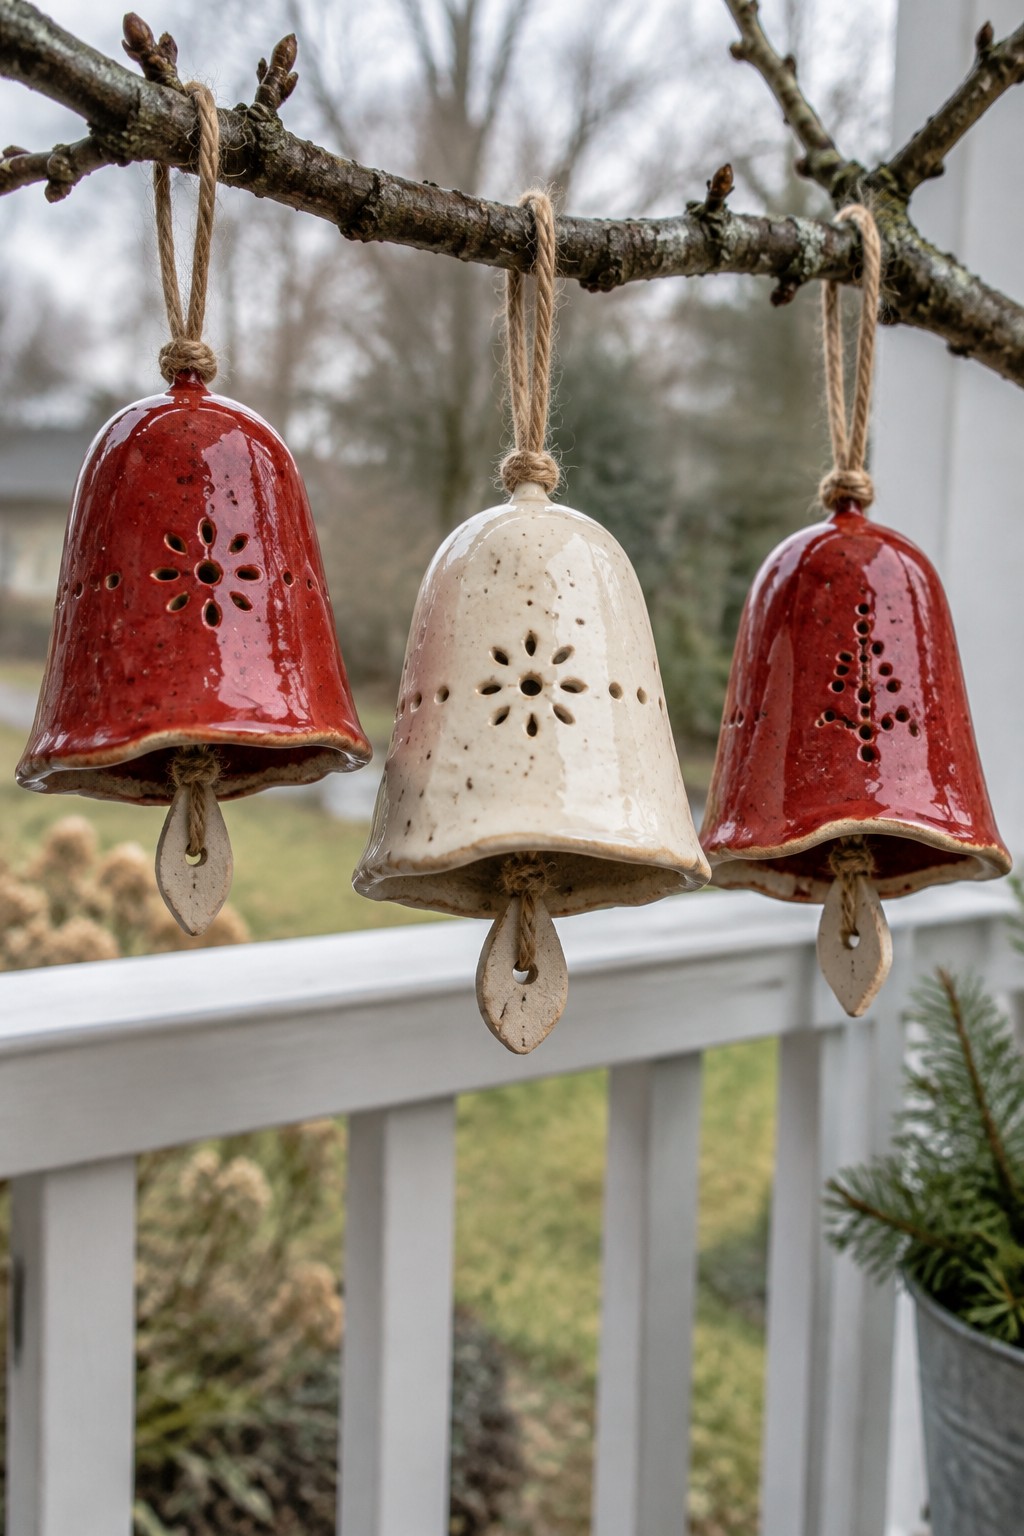
Ceramic bells are formed by shaping a simple flared cylinder or cone from clay, adding a hanging loop at the top, and cutting decorative patterns through the walls. These versions use red and off-white glazes that make the open designs stand out clearly, with a small clay clapper tied inside each one to produce sound. The project fits into the holiday decor category and works well as a beginner handbuilding exercise since the forms stay basic while the cutouts add interest.
What makes this idea useful is that the bells take up little room when hung on a branch, mantel hook, or wreath. You can change the cutout shapes to stars, trees, or snowflakes depending on the look you want, or make several in one glaze color for a coordinated set. For gifts, the small scale keeps material costs low and lets you finish a batch in a single studio session.
Handbuilt Ceramic Candle Holder with Central Tube

A small round ceramic candle holder combines a shallow dish base with a short central tube that holds a taper or thin candle upright. The form is built from a simple slab or pinched base with a coiled or extruded cylinder added in the center, then finished with a mottled green glaze that pools darker in the recesses and leaves a warmer orange-brown ring where the tube meets the dish. The slightly textured rim adds subtle detail without extra carving. This type of piece works as a compact decor object that fits easily into holiday arrangements.
What makes this idea useful is the built-in drip tray that keeps wax contained while the small scale lets you group several together on a mantel or table. The central tube shape can be adjusted for different candle thicknesses or reworked into a tiny vase for dried stems. A piece like this stands out on Pinterest when the glaze shifts from deep green to earthy tones that pair with evergreen or simple twine wraps. For gifts, the same base form can be made in sets with minor rim variations or left unglazed in spots for a two-tone effect.
Ceramic Christmas Stocking Planter
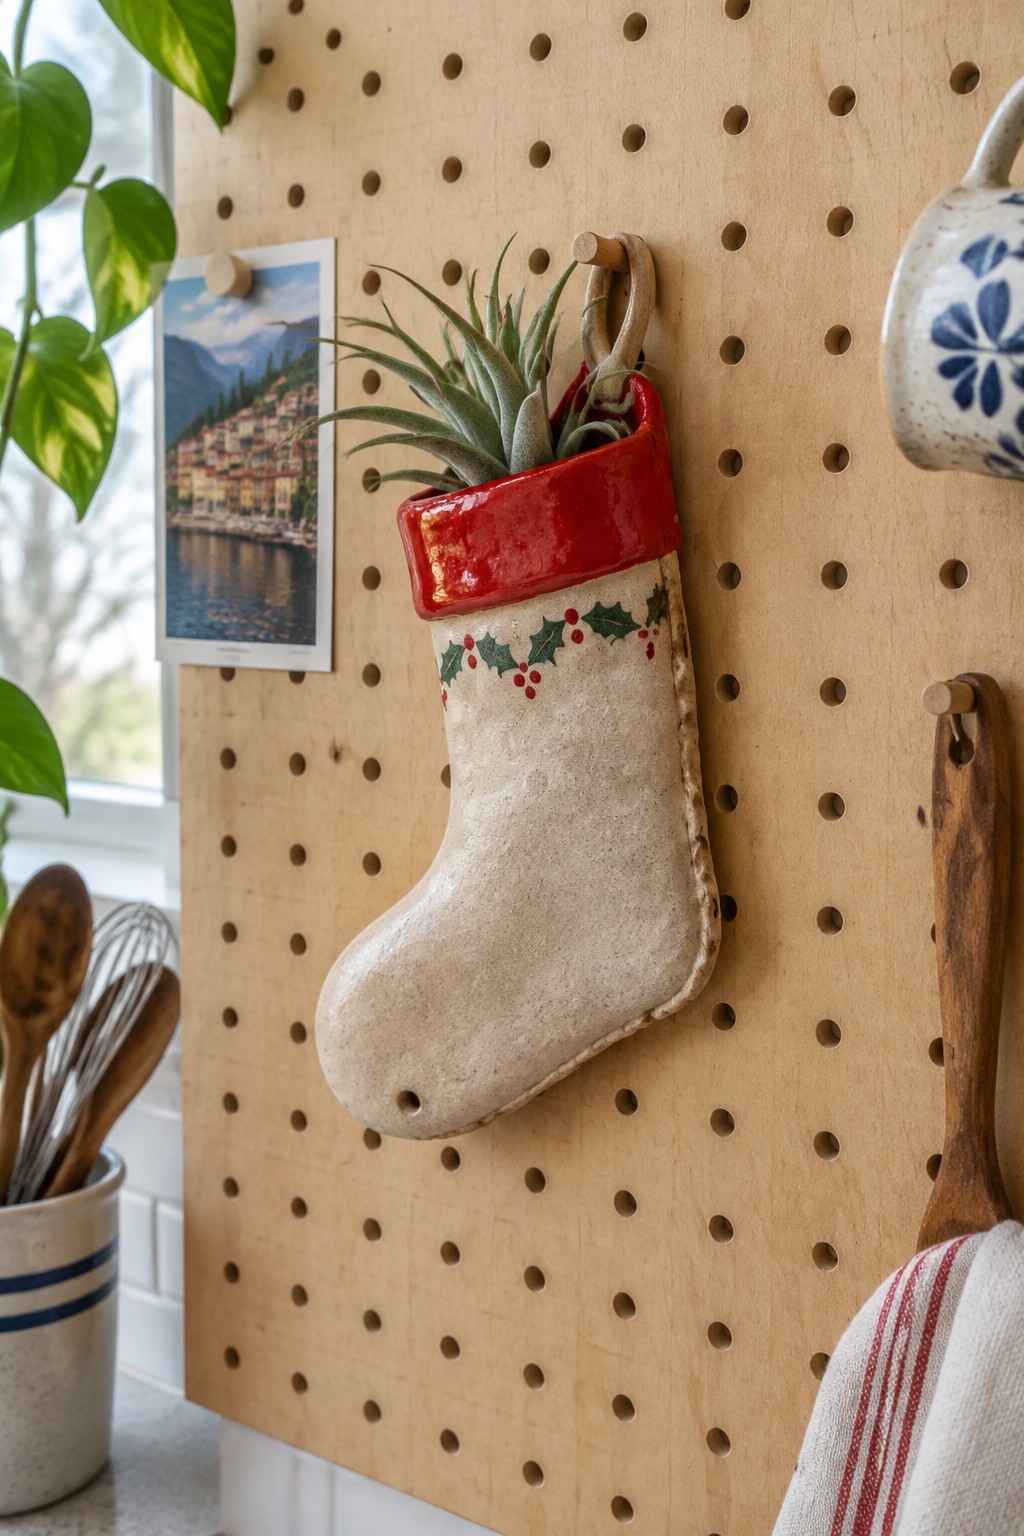
A ceramic Christmas stocking works as a small hanging planter sized for air plants or tiny succulents. The form includes a wide cuff finished in glossy red glaze and a simple band of painted holly along the upper section, while the rest of the stocking stays in a matte clay surface. This keeps the traditional holiday shape but turns it into a practical holder that can hang from a peg, hook, or small nail.
What makes this idea useful is the built-in hanging loop and the open top that fits plants without needing drainage holes. You can adapt the design by swapping the red cuff for another color or replacing the holly with basic dots and lines if you want faster painting. In a kitchen or workspace it gives you seasonal decor that stays useful after the holidays instead of getting packed away. For a gift, something like this works well because the shape already suggests the season without needing extra wrapping.
Santa Hat Ring Dish
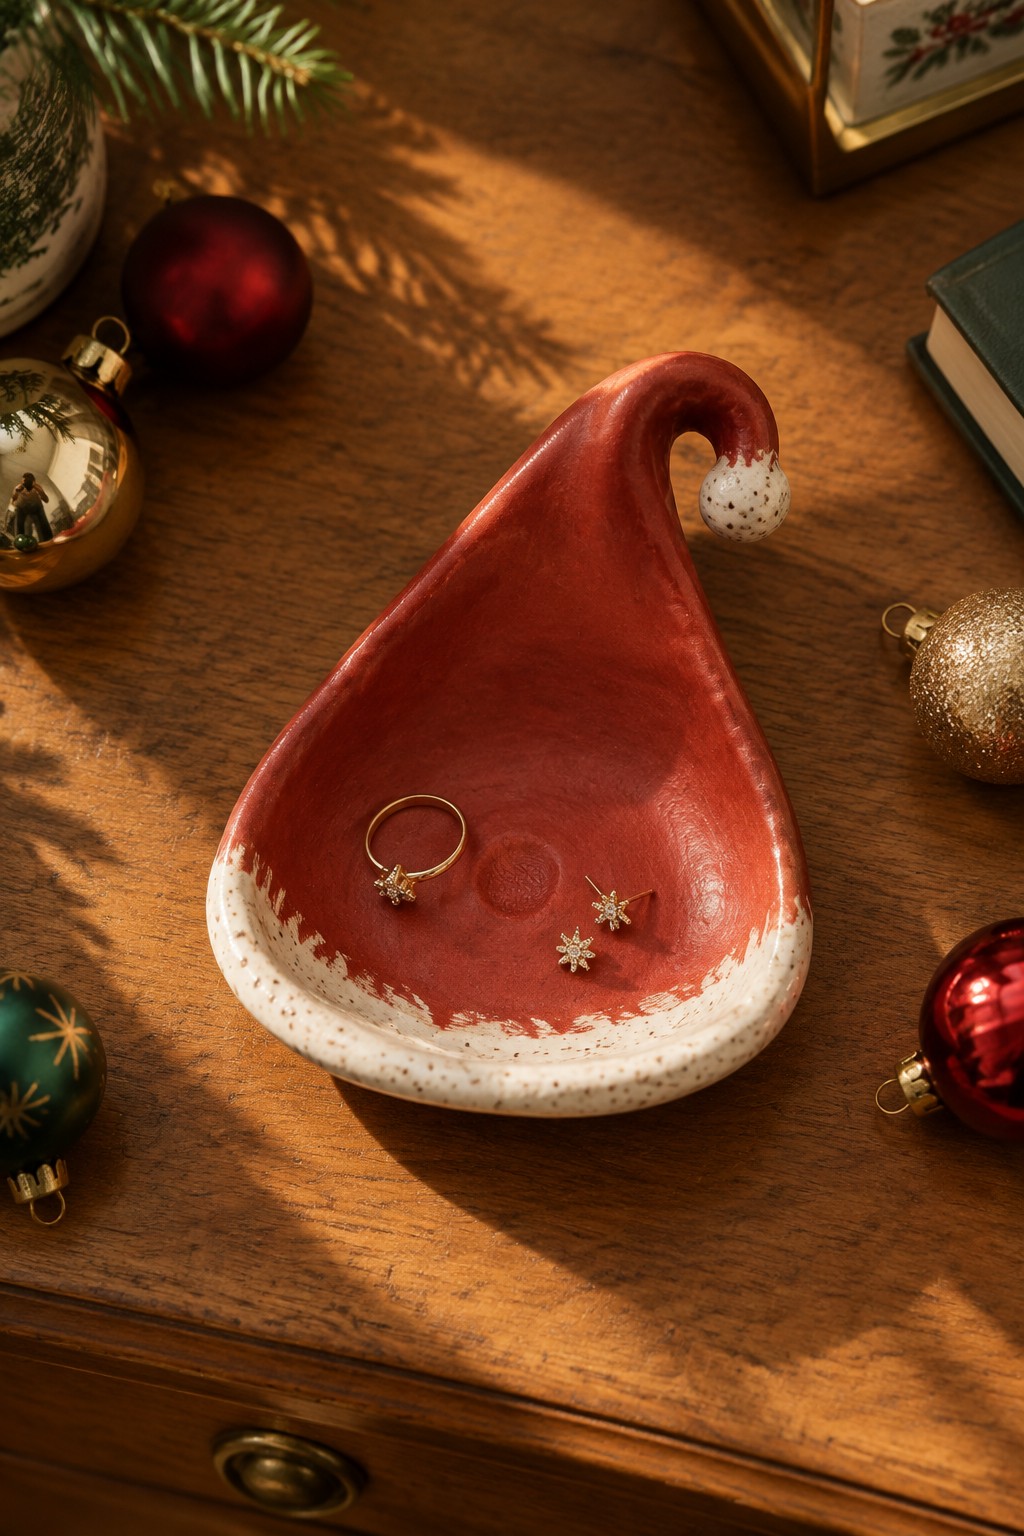
A Santa hat ring dish is a small handbuilt tray formed into the curved shape of a classic holiday hat, complete with a rounded brim and pointed tip. The red glaze covers the main body while the white section defines the brim and pom-pom, giving the piece clear seasonal recognition through color placement alone. This project fits the ring dish category and works well for holding small items like rings, earrings, or keys.
The compact size makes it practical for a dresser or bedside table where small jewelry tends to pile up. You could scale the same hat form larger for a catch-all tray or simplify the shape into a basic curved dish if you want fewer edges to form. For gifts, the recognizable outline helps the piece feel finished even with basic glazing, and the design adapts easily to other holiday colors or motifs.
Gift Box Divided Condiment Tray

A three-section ceramic tray built from connected rectangular boxes gives you separate compartments for salt, pepper, and spices in one piece. The handbuilt form uses slab construction to create the box shapes, then adds simple bow details on the front of each section before glazing in red, green, and cream. This kitchen item stays practical because the divisions keep contents from mixing while the holiday colors and bow accents turn a basic tray into seasonal decor.
The small overall size fits easily on a countertop or near the stove for everyday use. You could rework the same box shapes into a desk organizer or small jewelry holder by using neutral glazes and leaving off the bows. For gifts, the divided layout makes the piece more useful than a plain dish, and the clear Christmas theme helps it stand out when shared online.
Gingerbread Man Clay Ornaments
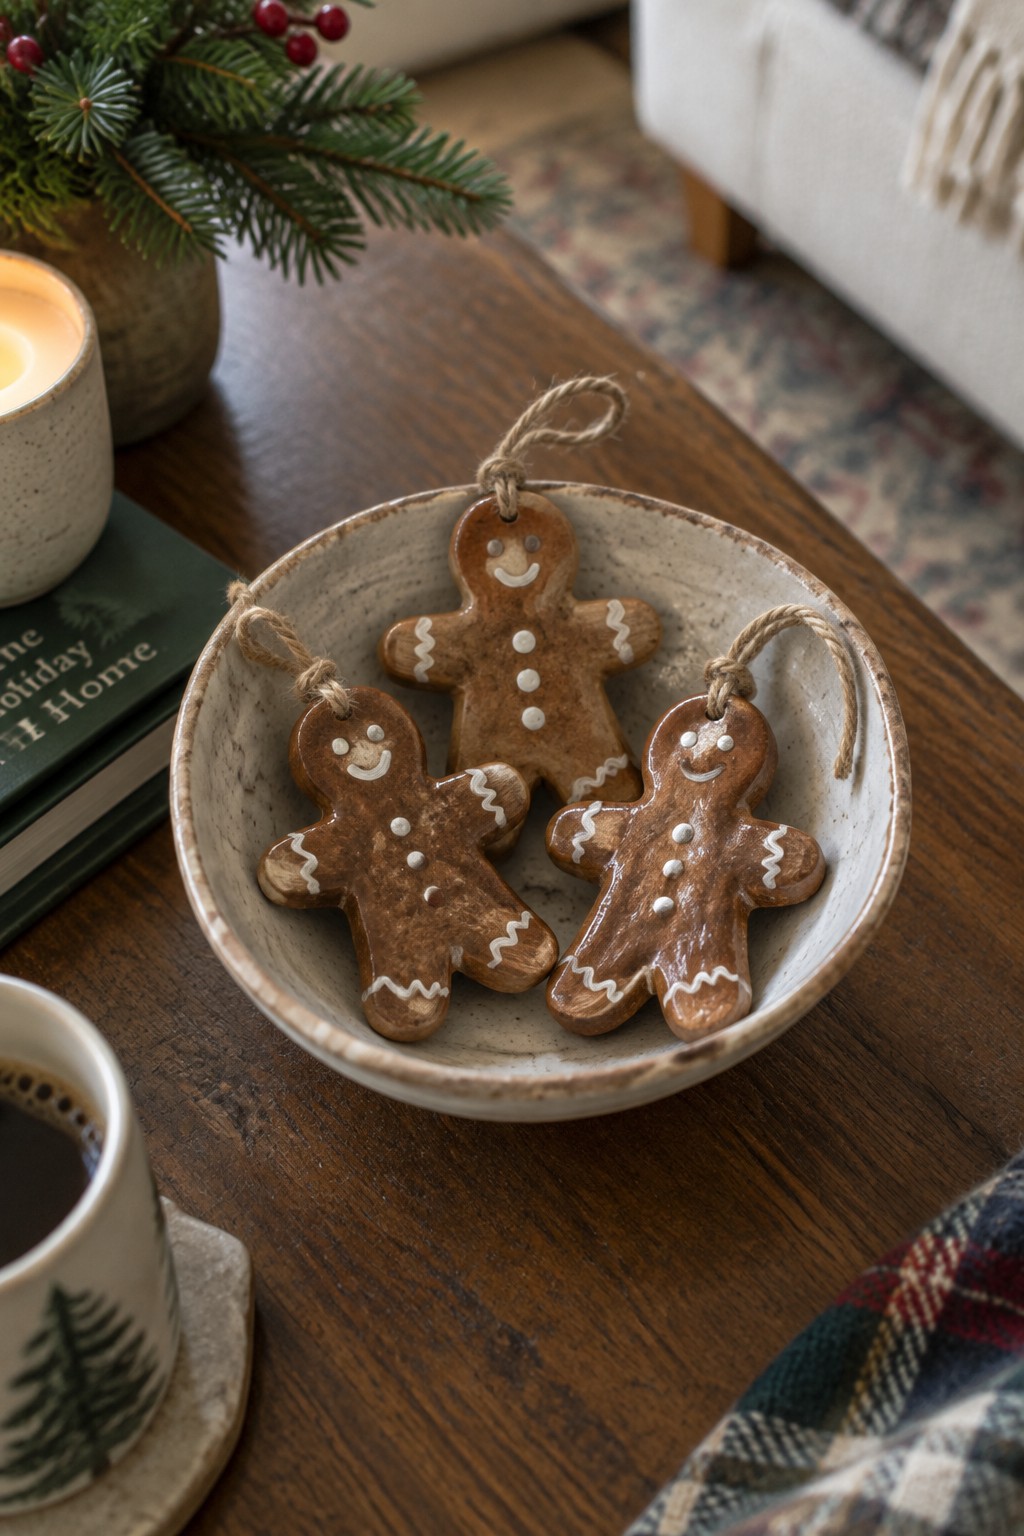
These ornaments are made by rolling out a slab of clay, cutting out the gingerbread man shape with a template, and poking a hole at the top before firing. A brown glaze covers the surface, then white slip or underglaze is used to add the icing-style lines, buttons, and simple face details. The flat form and string loop make them ready to hang on a tree or wreath once finished.
The flat shape keeps weight low so they sit well on branches without pulling them down. You can scale the template up or down or stamp names into the clay for quick gifts. The same cutting method works for other holiday shapes like stars or trees if you want a matching set. Small pieces like this also make good test tiles for new glazes since they take little space in the kiln.
Frequently Asked Questions
1. What basic supplies do I need to start these Christmas handbuilding projects? You will need air dry clay or kiln fired clay, basic tools like a rolling pin, clay knife, scoring tool, and sponges, along with Christmas themed cookie cutters or templates for shapes like trees and stars. For beginners, start with a small pack of white stoneware clay that is easy to work with and forgiving for handbuilding techniques such as pinching and coiling.
2. Are these projects suitable if I have zero pottery experience? Yes, the 23 projects are designed specifically for beginners and focus on simple handbuilding methods without a pottery wheel. Each one breaks down into easy steps like rolling slabs or forming coils, so you can follow along even if you have never touched clay before. Practice on a few test pieces first to get comfortable with the texture and drying times.
3. How can I finish and fire my pieces without owning a kiln? Many community centers, art studios, or local pottery shops offer firing services for a small fee. You can also use air dry clay for projects that do not require high heat, then seal them with acrylic paints and varnish for a durable holiday finish. Check with nearby craft stores to find affordable firing options in your area.
4. What tips help make the decorations and glazes look festive and polished? Apply underglazes in bright Christmas colors like red, green, and gold before the first firing, then add a clear glaze on top for shine. Use stencils for precise patterns on ornaments or mugs, and experiment with sgraffito techniques to carve designs into the clay surface. Allow pieces to dry slowly to avoid cracks that could ruin the holiday look.
5. How much time should I plan for completing a full project including drying? Most projects take one to two hours of active building time, but you need to factor in several days for air drying before firing or painting. For best results, work in stages over a weekend and keep pieces covered with plastic when not in use to control moisture levels. This approach helps prevent warping in your finished Christmas pottery.

Pottery Path is my cozy corner of the internet where I share clay ideas, pottery inspiration, and simple projects you can recreate at home. I love exploring everything from air dry clay to handbuilt pottery to cute minis that brighten your day. My goal is to make clay crafting feel easy, fun, and welcoming for anyone who wants to try it.
You will find beginner friendly tutorials, creative pottery painting ideas, and lots of warm inspiration for slow and happy crafting. If you enjoy hands on creativity, this space will feel like home.