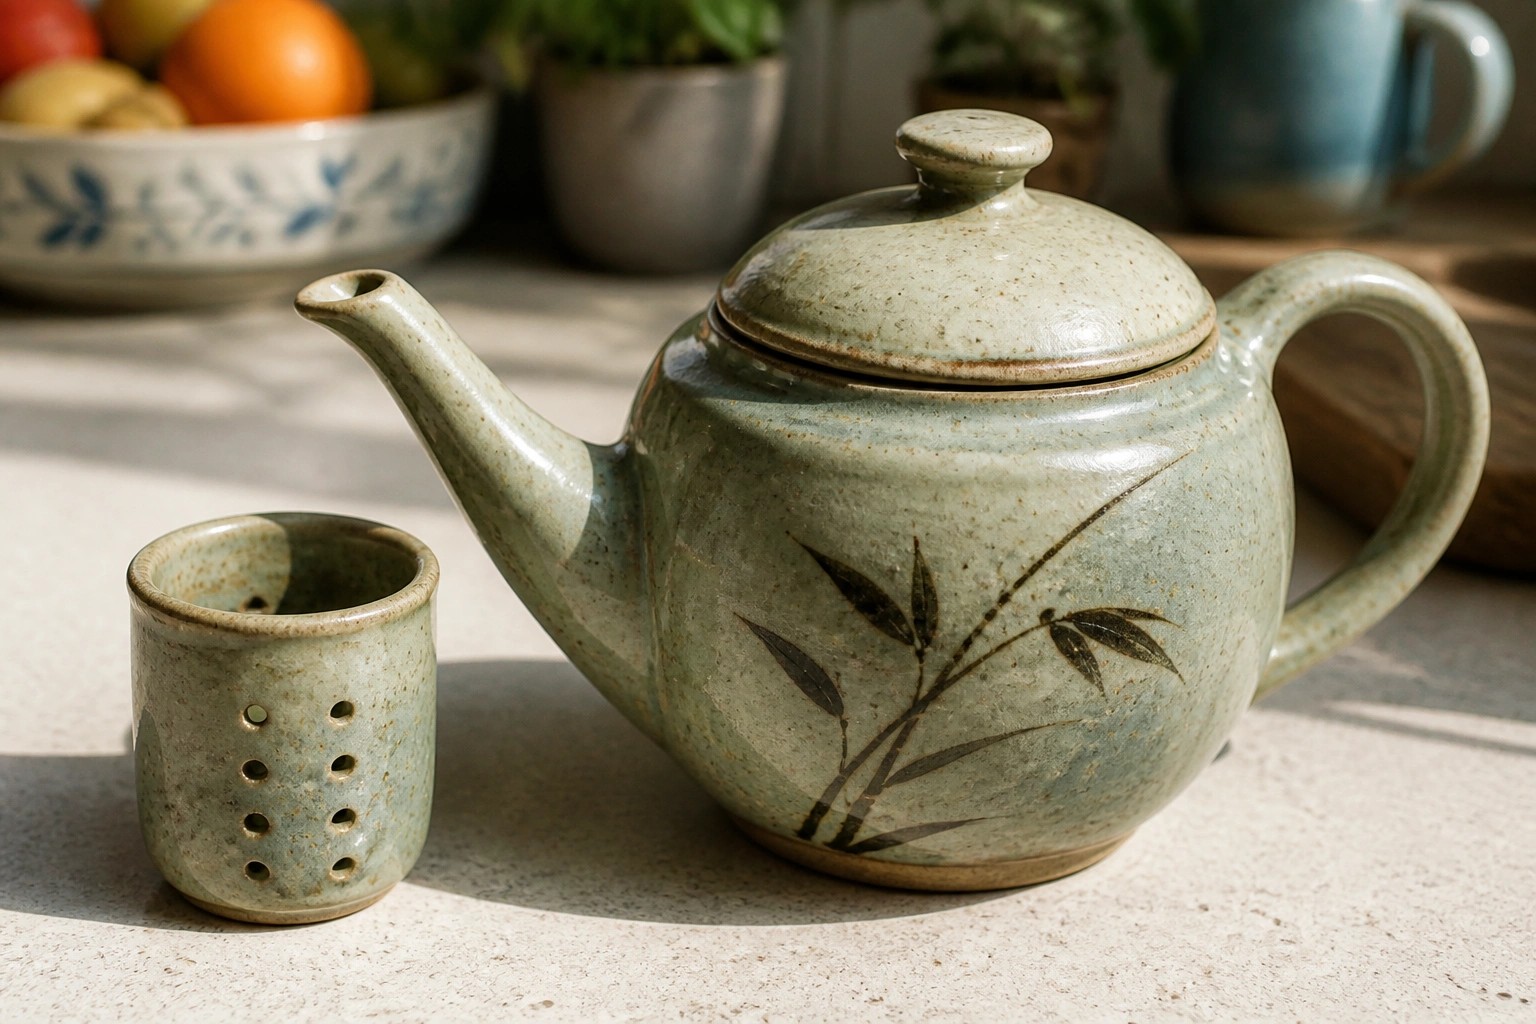
I’ve been practicing wheel throwing for some time and recently started trying more advanced techniques.
Precision has become important to me especially when making forms that need to fit together in sections.
I gathered 22 project ideas that center on those skills.
They include things like covered containers and assembled sculptures.
Working through them has helped me improve my control on the wheel.
Thrown Teapot with Separate Strainer
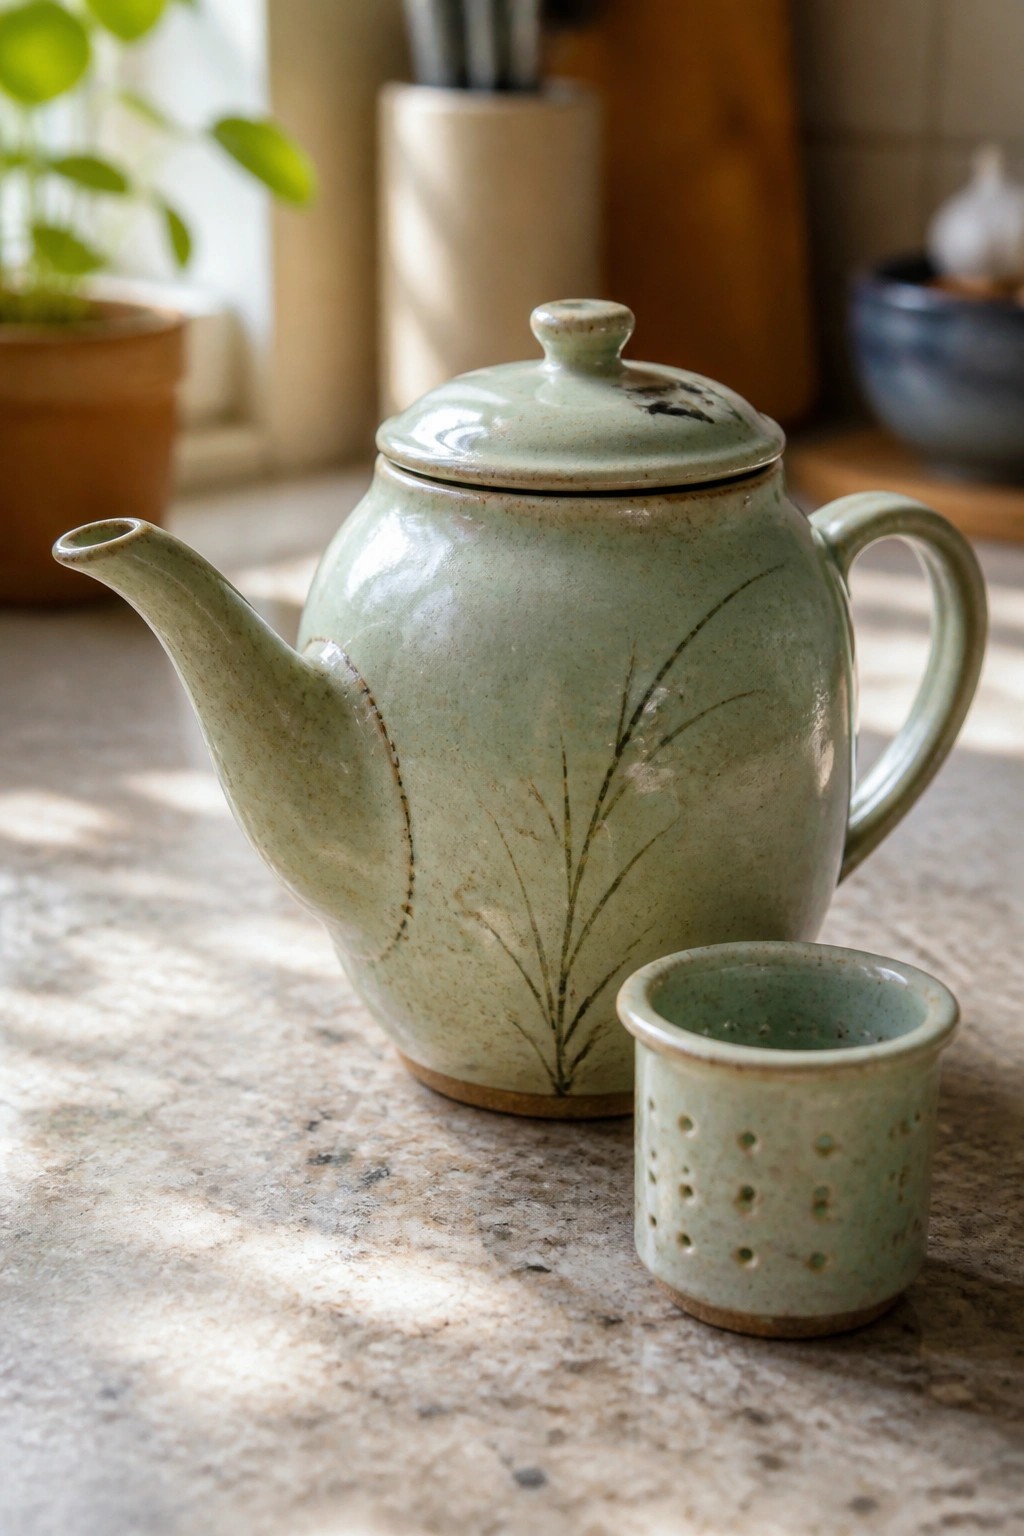
A wheel-thrown teapot with a fitted lid, spout, and handle pairs with a smaller cylindrical strainer that has evenly spaced holes. The main body carries a simple grass motif that follows the curve of the form, and the light green speckled glaze covers both pieces for a unified look. This setup treats the strainer as its own thrown and altered component rather than an afterthought, which keeps the overall profile clean while adding a working tea function. The project sits in the kitchen item category and shows how two separately thrown parts can be sized to work together without extra hardware.
The shape does a lot of the work here because the teapot stays compact enough for daily counter use while the strainer fits inside or beside it for easy pouring. You could scale the same body down for a single-serve version or swap the grass lines for a different repeating mark to match other dishes you already make. In a kitchen, this kind of piece gives you a complete set without needing separate store-bought strainers. For a gift, the two-part construction makes it feel more complete than a plain pot alone.
Three-Part Stacked Planter with Drainage Holes
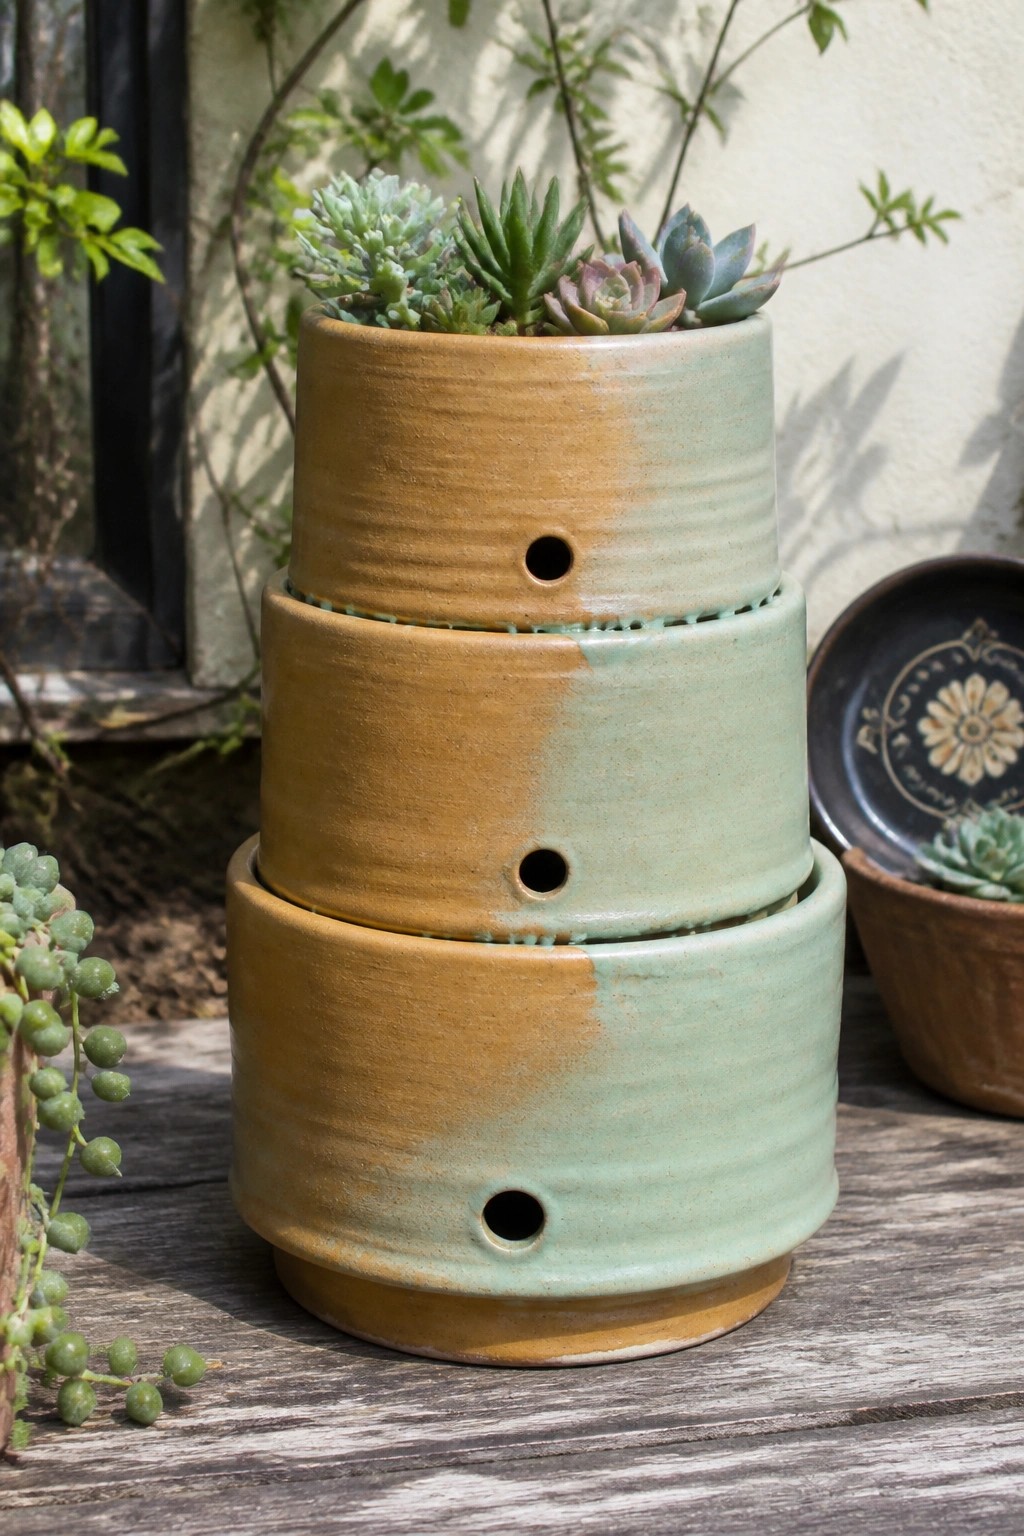
A three-section stacked planter makes a strong multi-part wheel throwing project because each cylinder must be thrown to matching diameters for stable assembly. The two-tone glaze split across the horizontal bands gives clear visual separation between sections while the punched holes provide side drainage and aeration for the plants. This form keeps the focus on precise centering and consistent wall thickness so the pieces nest cleanly without slipping.
What makes this idea useful is how the separate thrown sections let you vary heights or replace one level if needed without starting over. The same stacking method adapts to taller or shorter versions by adjusting the number of cylinders or their proportions. In a small garden or on a patio table, the vertical layout holds several plants in limited space while the drainage holes reduce root rot risk for succulents. You could simplify the project by making just two sections or turn the basic cylinders into a set of lidded jars by closing the bottoms and adding knobs.
Lidded Serving Pot with Matching Ladle
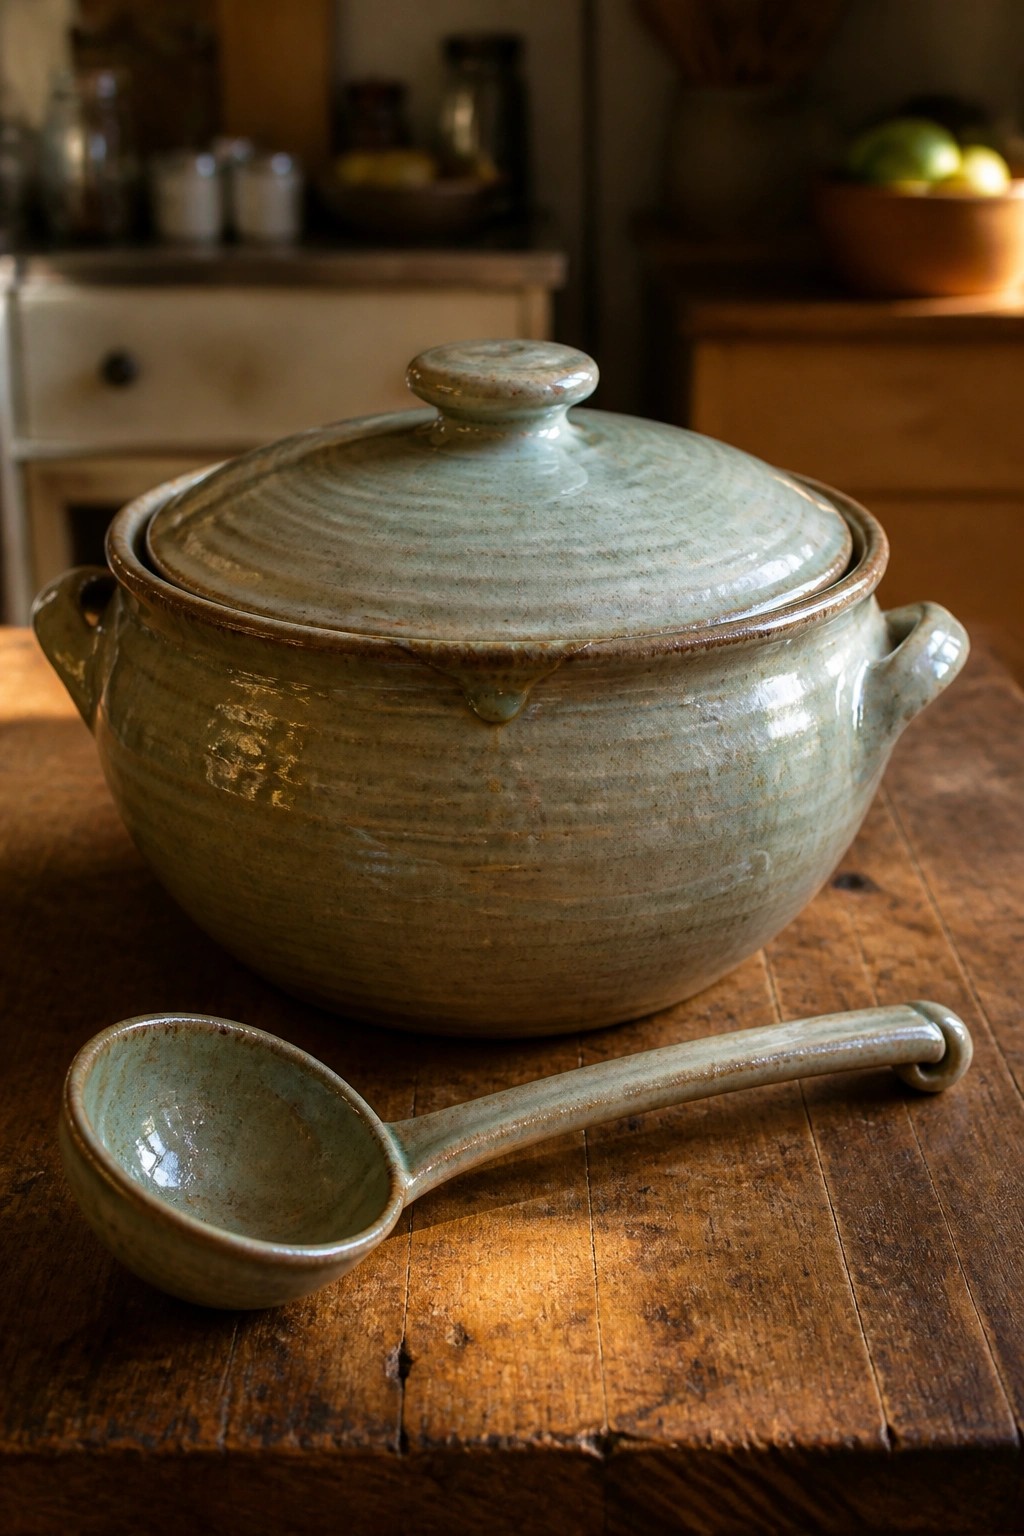
A wheel-thrown lidded pot like this serves as a functional kitchen piece for soups, stews, or casseroles. The body includes two pulled handles and a wide rim that supports a domed lid with a centered knob. A separate ladle thrown in the same clay and glaze completes the set. The visible throwing lines give the surface a consistent texture while keeping the focus on the form and fit.
What makes this idea useful is the way the lid and ladle turn a basic pot into a ready-to-serve item. You could scale the same shape down for smaller batches or swap the glaze for a matte finish if you want less shine in a kitchen setting. The multi-part construction also gives practice fitting lids and pulling handles at a larger size, which transfers to other wheel projects. This kind of set photographs cleanly for recipe posts or product shots because the pieces clearly belong together.
Wheel-Thrown Pitcher with Exposed Clay Foot
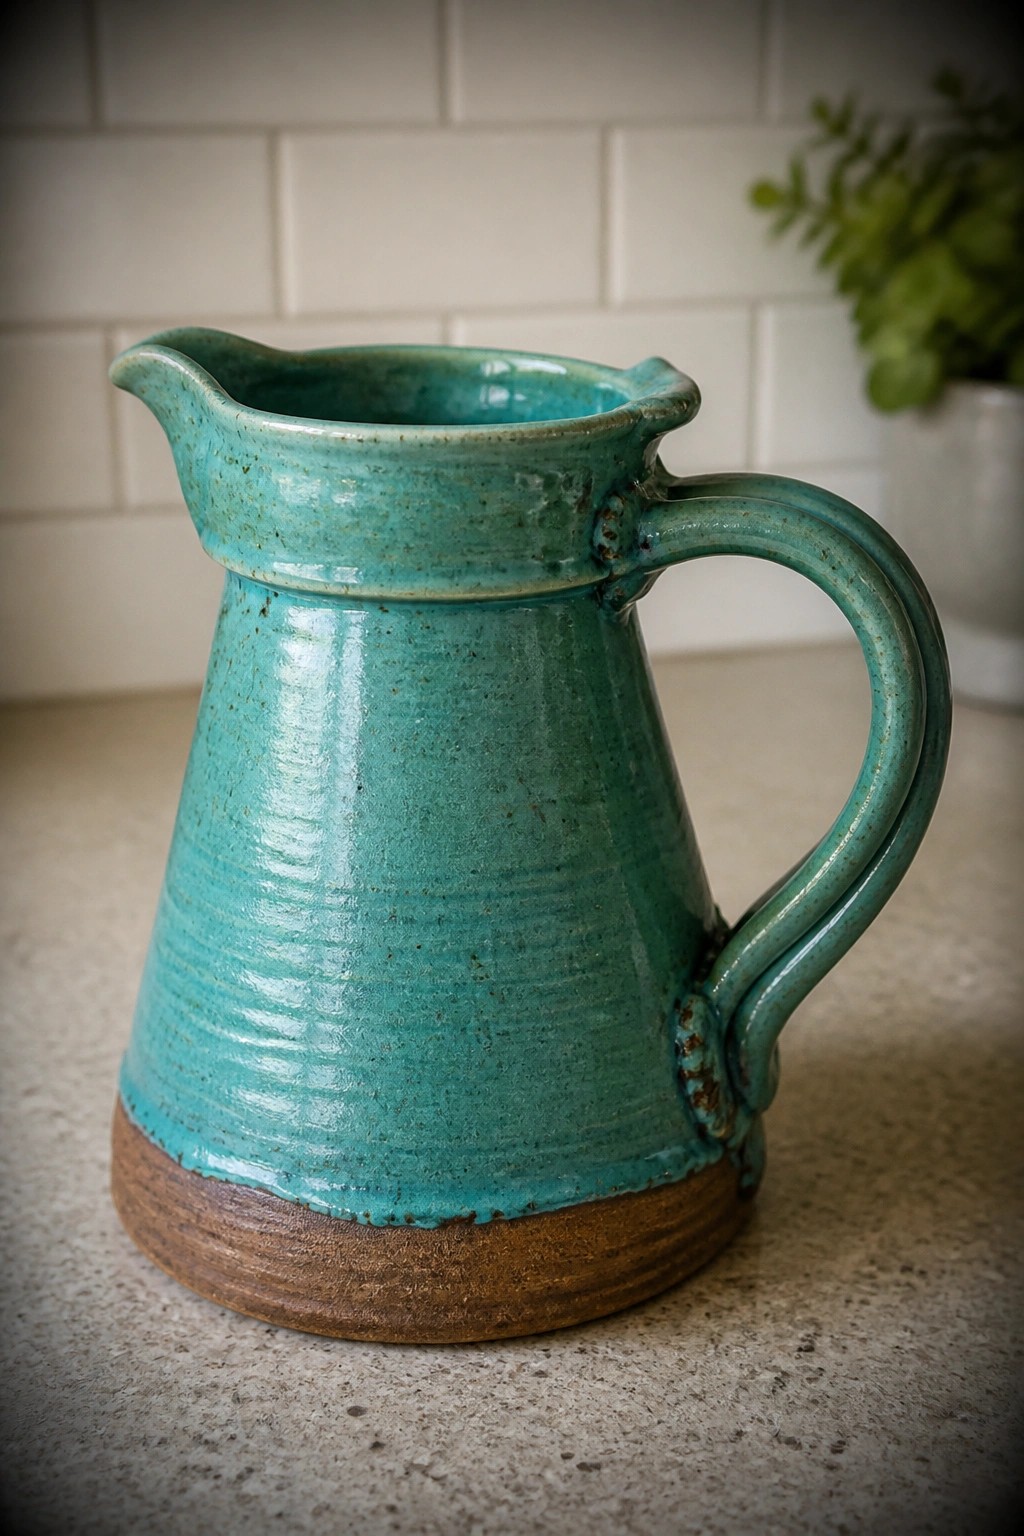
A wheel-thrown pitcher uses a tapered body that narrows toward the top, with a formed spout and a separately attached handle. The upper section receives a speckled turquoise glaze that stops short of the base, leaving the lower portion in raw clay to create a distinct two-tone division. This treatment emphasizes the horizontal throwing lines while keeping the foot stable and easy to grip during use.
What makes this idea useful is the clear separation between the glazed area and the raw base, which lets you adjust proportions by changing where the glaze stops. The shape works well for everyday serving on a table or counter without feeling oversized. You can rework the same form by varying the handle attachment points or testing different glaze heights to suit smaller or larger batches.
Swirled Glaze Nesting Bowls
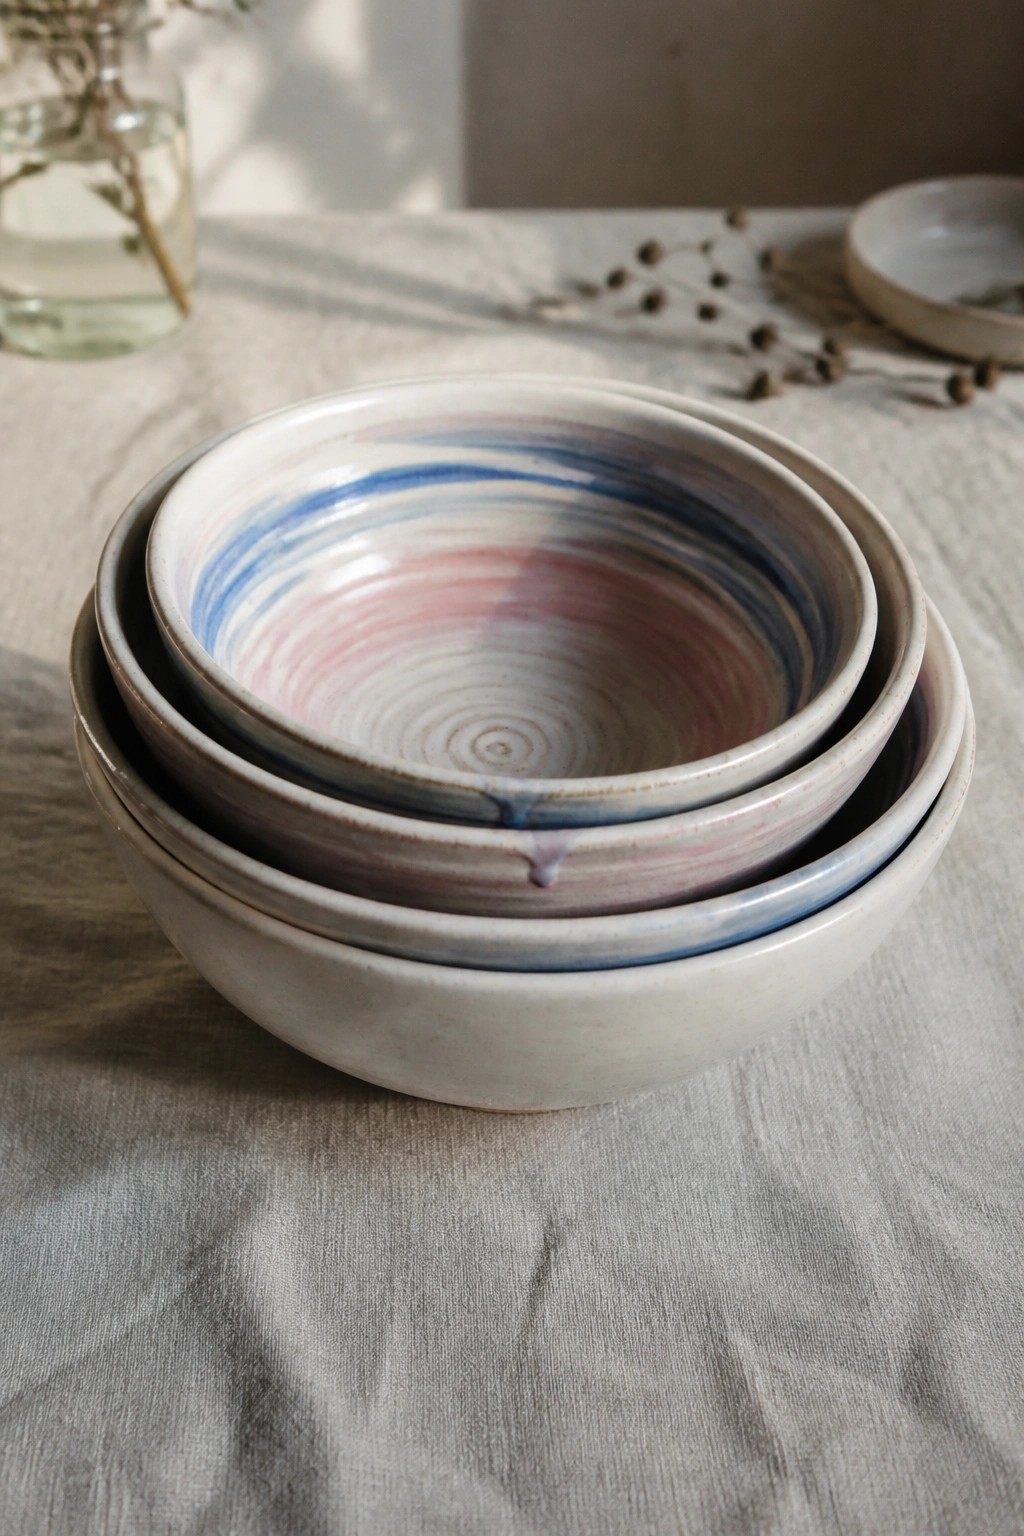
A set of three wheel-thrown ceramic bowls designed to nest together, finished with a multi-color glaze that swirls blue, pink, and gray across the interior surfaces. The glaze moves in loose concentric rings and drips slightly over the rims, creating a fluid pattern that varies from bowl to bowl. This approach suits kitchen use because the nesting shape keeps storage compact while the glaze gives each piece enough variation to feel intentional rather than uniform.
What makes this idea useful is that the same glaze layering can be repeated on a single large serving bowl or reduced to two smaller sizes for prep work. The soft color mix works in everyday kitchens without clashing with other dishes, and the pattern can be adjusted by changing which glazes overlap. For a gift, a set like this stands out because the functional nesting design pairs with a surface that looks different from standard solid glazes. You could simplify the project by throwing just the two largest bowls if a full set takes too much time on the wheel.
Fitted Lid Tea Canister Thrown in Two Parts
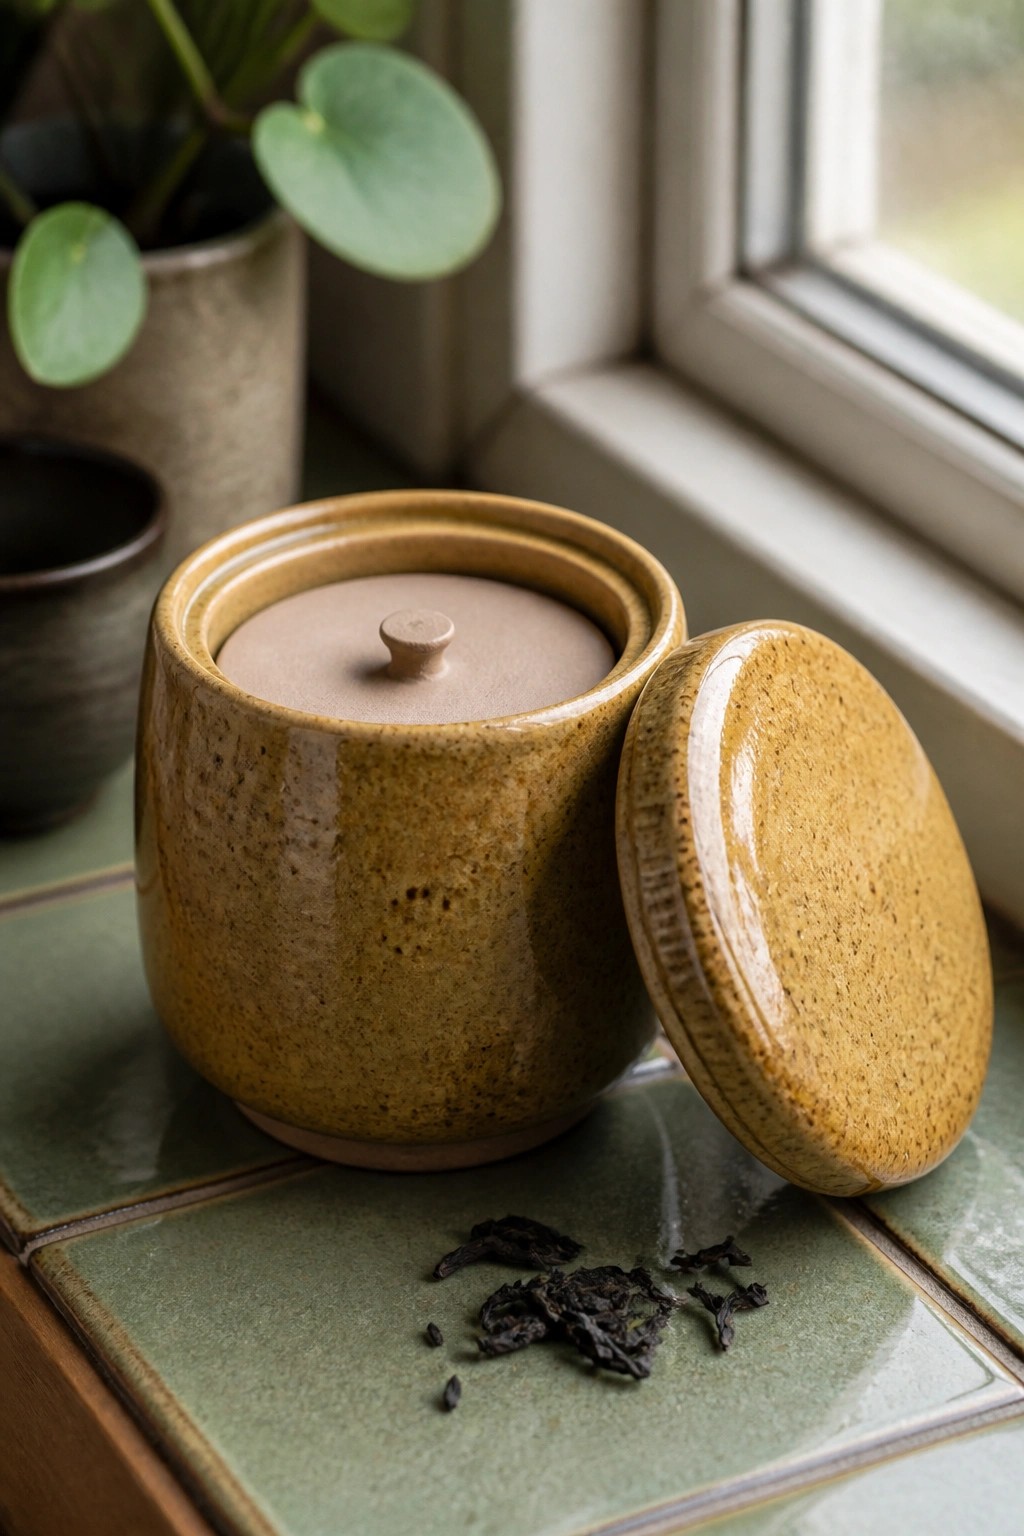
A wheel-thrown lidded jar makes a practical tea canister when the body and lid are formed separately and matched for fit. The rounded cylinder shape includes a slight inward curve at the rim to create a gallery that holds the lid in place. The speckled glaze in warm earth tones covers both pieces evenly, giving the jar a simple, durable surface that works for everyday kitchen storage. This project focuses on precision in centering and trimming so the lid sits level without gaps.
What makes this idea useful is the separate lid throwing step, which builds accuracy in measuring and drying two pieces from the same batch. The compact size keeps it handy on a counter or shelf for loose tea access. You could scale the same form down for a smaller spice jar or rework the lid knob into a simple pull for easier handling. In photos the matte lid against the slightly glossy body creates clear contrast that shows the form clearly.
Two-Piece Pierced Lantern with Neck Insert
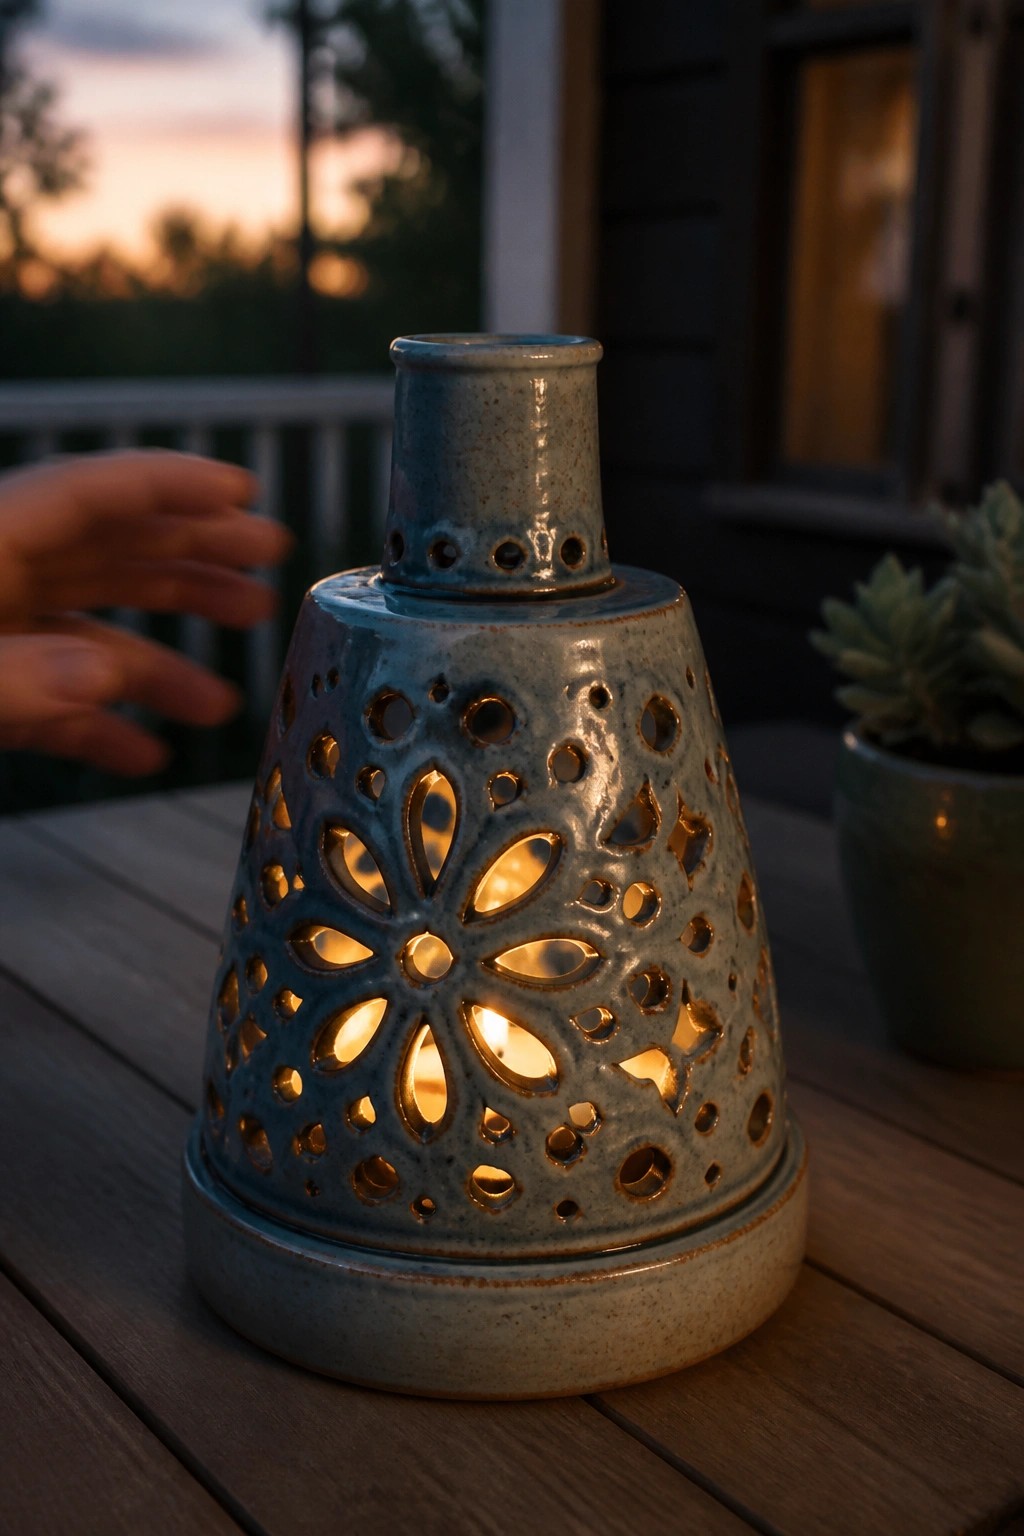
A wheel-thrown candle lantern made in two parts gives you both structure and light control. The main body is formed as a wide bell shape with a flat base, while a separate narrow neck piece sits inside the top rim to close the form and create a chimney effect. Precise cutouts, including a central flower motif and surrounding irregular holes, let the flame shine through without direct exposure. The matte blue glaze keeps the surface simple so the light patterns stand out at night.
The shape does a lot of the work here by providing a stable wide foot that supports the added neck without extra fittings. You can adapt the same two-part construction for a taller vase or a smaller tea light holder by changing only the cutout layout. This style works well on a patio table or mantel where you want soft patterned light rather than a solid glow. The construction also makes it easy to swap the neck for a plain rim if you want a quicker version on the wheel.
Lidded Creamer and Sugar Jar Set
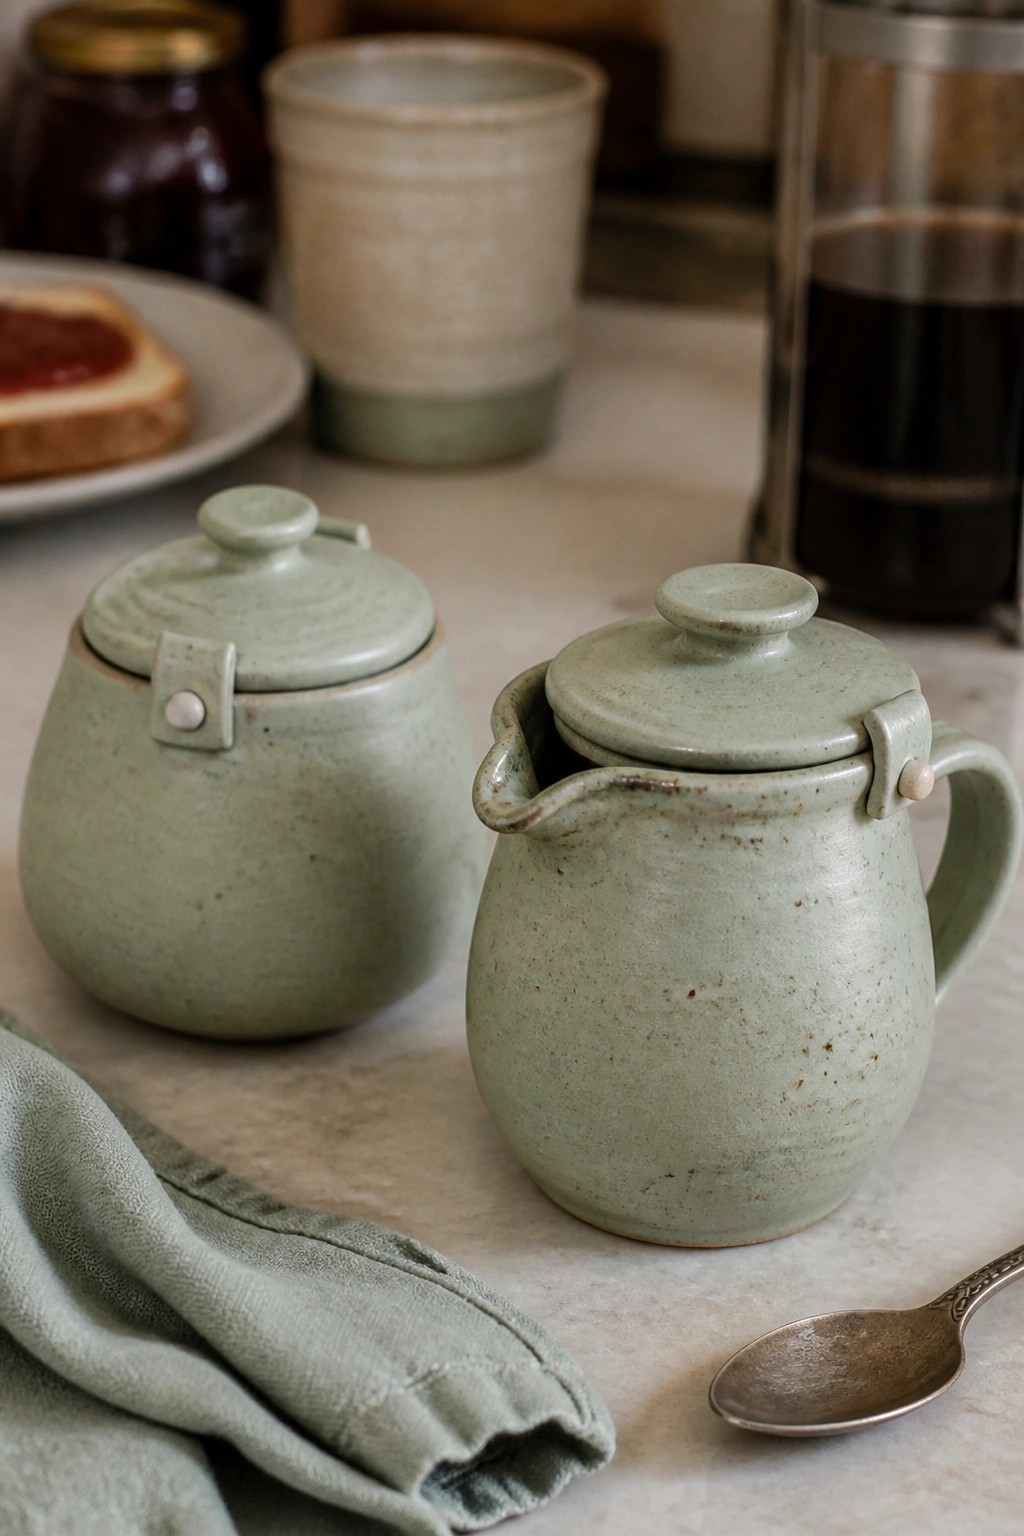
These wheel-thrown forms create a coordinated pair of small lidded kitchen containers. One piece is shaped into a pitcher with a pulled spout and attached handle, while the second stays as a rounded jar. Both use fitted lids held in place by simple clay tabs and knobs, finished in a speckled light green glaze that shows the throwing lines clearly. The approach focuses on combining multiple thrown parts into compact, matching serving pieces.
What makes this idea useful is how one basic thrown shape can be modified into either a spouted pitcher or a plain lidded jar with only small changes to the rim and handle. The set fits easily on a kitchen counter or breakfast table for cream, milk, or sugar. You could repeat the same tab-and-knob lid system on taller cylinders to make a small teapot or storage jars. Keeping the glaze and scale consistent across both pieces makes the project simple to document and share.
Three-Tiered Serving Stand
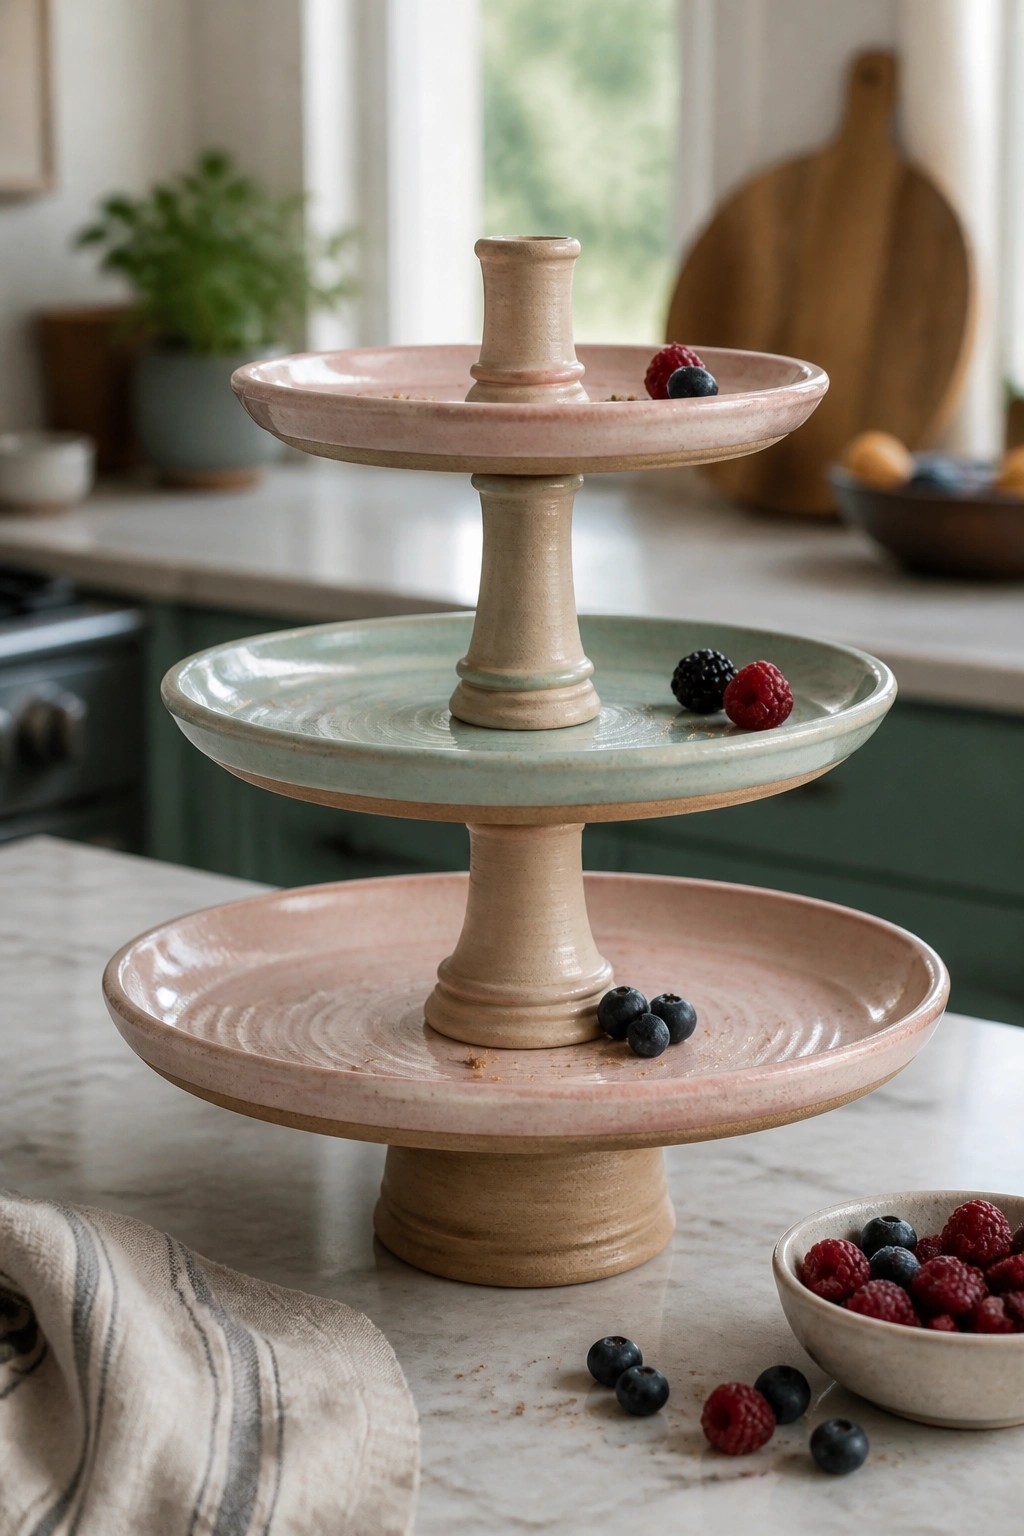
A three-tiered serving stand built from separate wheel-thrown sections gives you a functional display piece with clear visual separation between levels. The tiers decrease in size from bottom to top and use contrasting glazes in soft pink and sage green to keep the stacked form from feeling heavy. The central column and foot are thrown as single pieces, then joined to the plates for stability. This approach fits the category of assembled multi-part forms where each section is finished individually before construction.
What makes this idea useful is the way the graduated plates create built-in serving zones without needing extra dishes. You could rework the same stacking method into a two-tier version for smaller counters or swap the glaze colors on each level to match different table settings. In a kitchen, this kind of piece works well for fruit or pastries because the open tiers let you see everything at once. The proportions also translate easily to a taller version for cupcakes or a shorter one for jewelry display.
Lidded Teapot with Matching Drip Tray
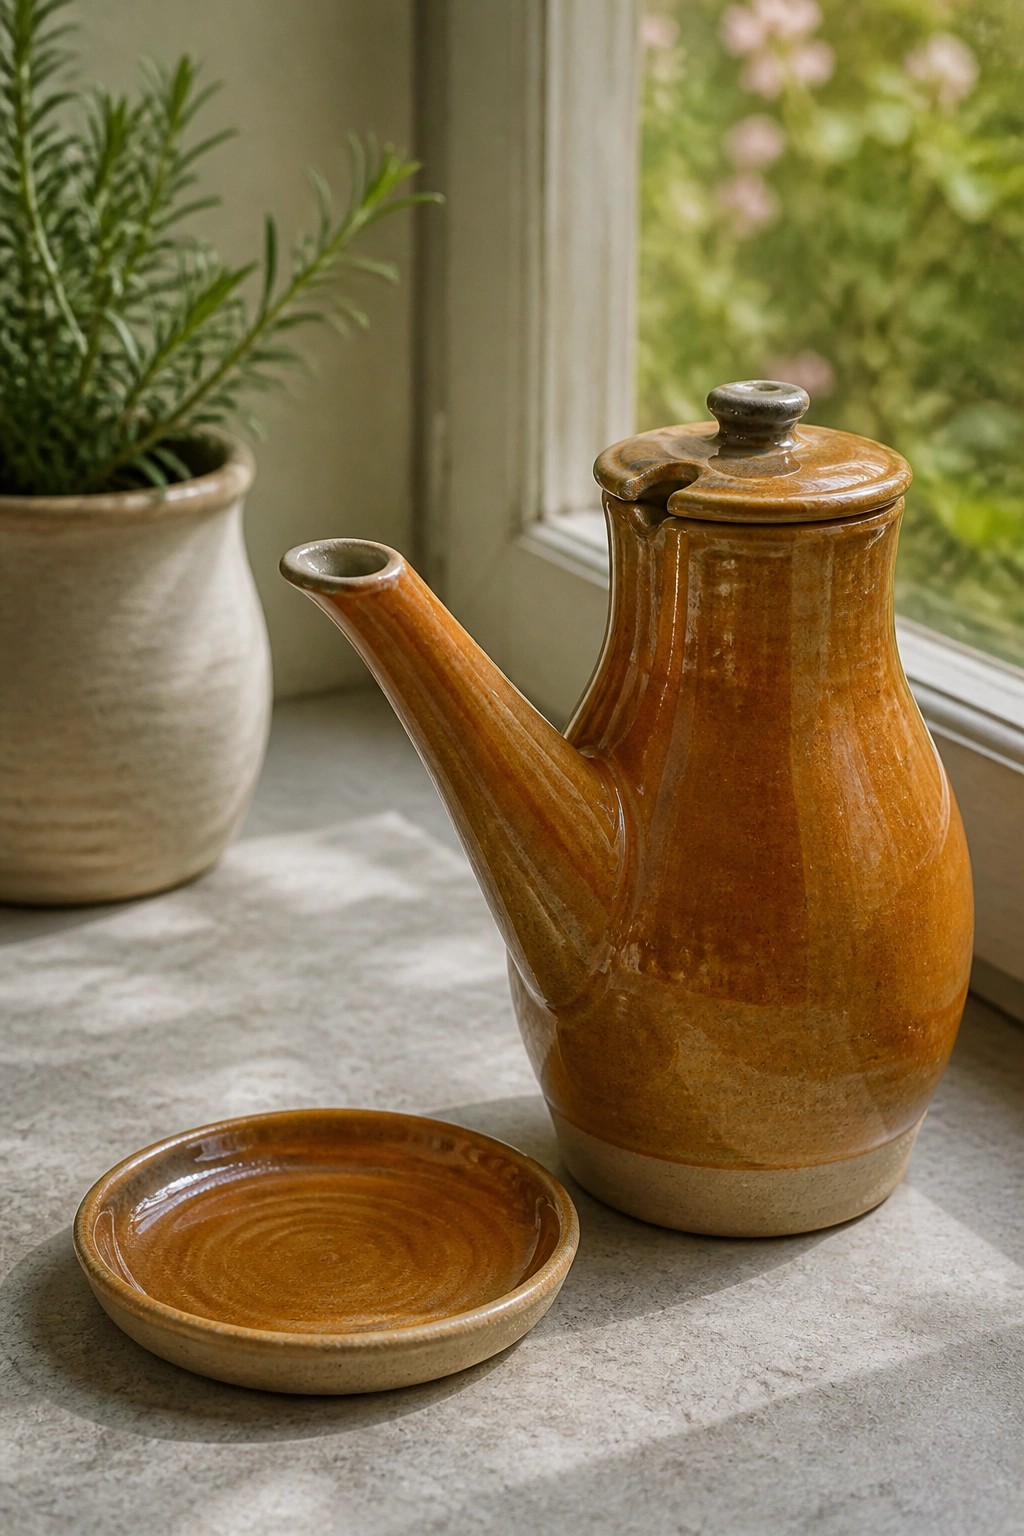
A wheel-thrown teapot combines a tapered body, attached spout, and fitted lid with a shallow round tray to create a functional serving set. The lid includes a small notch that aligns with the spout, while the tray sits underneath to catch drips. An amber glaze with visible throwing rings covers both pieces and unifies their surfaces. This project belongs in the multi-part forms category because it requires precise measurements for the spout attachment, lid fit, and matching tray diameter.
What makes this idea useful is the tray, which turns a standard teapot into a more complete kitchen piece that protects tabletops during use. You could rework the same body proportions into a smaller creamer or adapt the tray size for a butter dish. The clean lines and single glaze make it straightforward to vary the color on future versions without redesigning the forms. In a kitchen or dining space, the set stands out on open shelves because the two pieces read as a deliberate pair rather than separate objects.
Wheel-Thrown Watering Can with Overhead Handle and Spout Rose
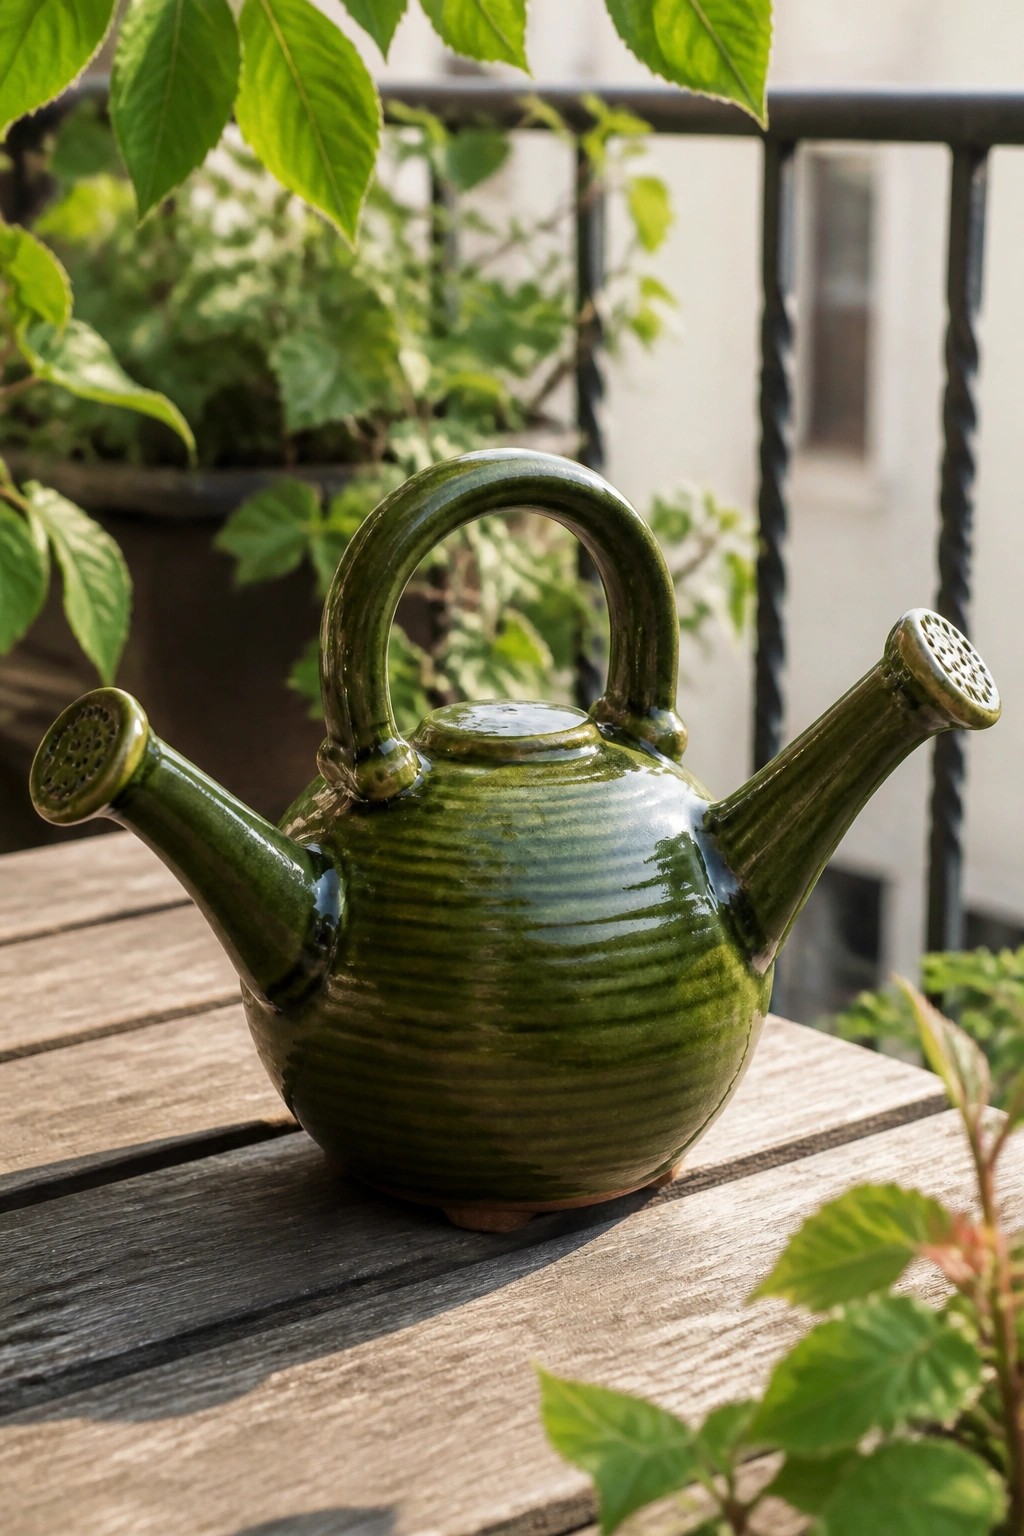
A wheel-thrown watering can uses a rounded body joined to an overhead looped handle and a tapered spout that ends in a perforated rose. The form shows clear throwing ridges under a glossy green glaze that highlights the horizontal texture without hiding it. This multi-part project requires accurate attachment of the handle at two points and careful alignment of the spout so the piece pours evenly and sits stable.
What makes this idea useful is how the same joining sequence transfers directly to teapots or pitchers. The compact scale works well on a windowsill or balcony table for watering small plants without taking much space. You can shorten the spout or change the handle curve to adjust balance, and the green glaze keeps the surface easy to clean if used outdoors. For Pinterest, the functional shape with visible throwing lines stands out against typical decorative vases.
Precision-Fit Lidded Bowl with Cutwork Dome
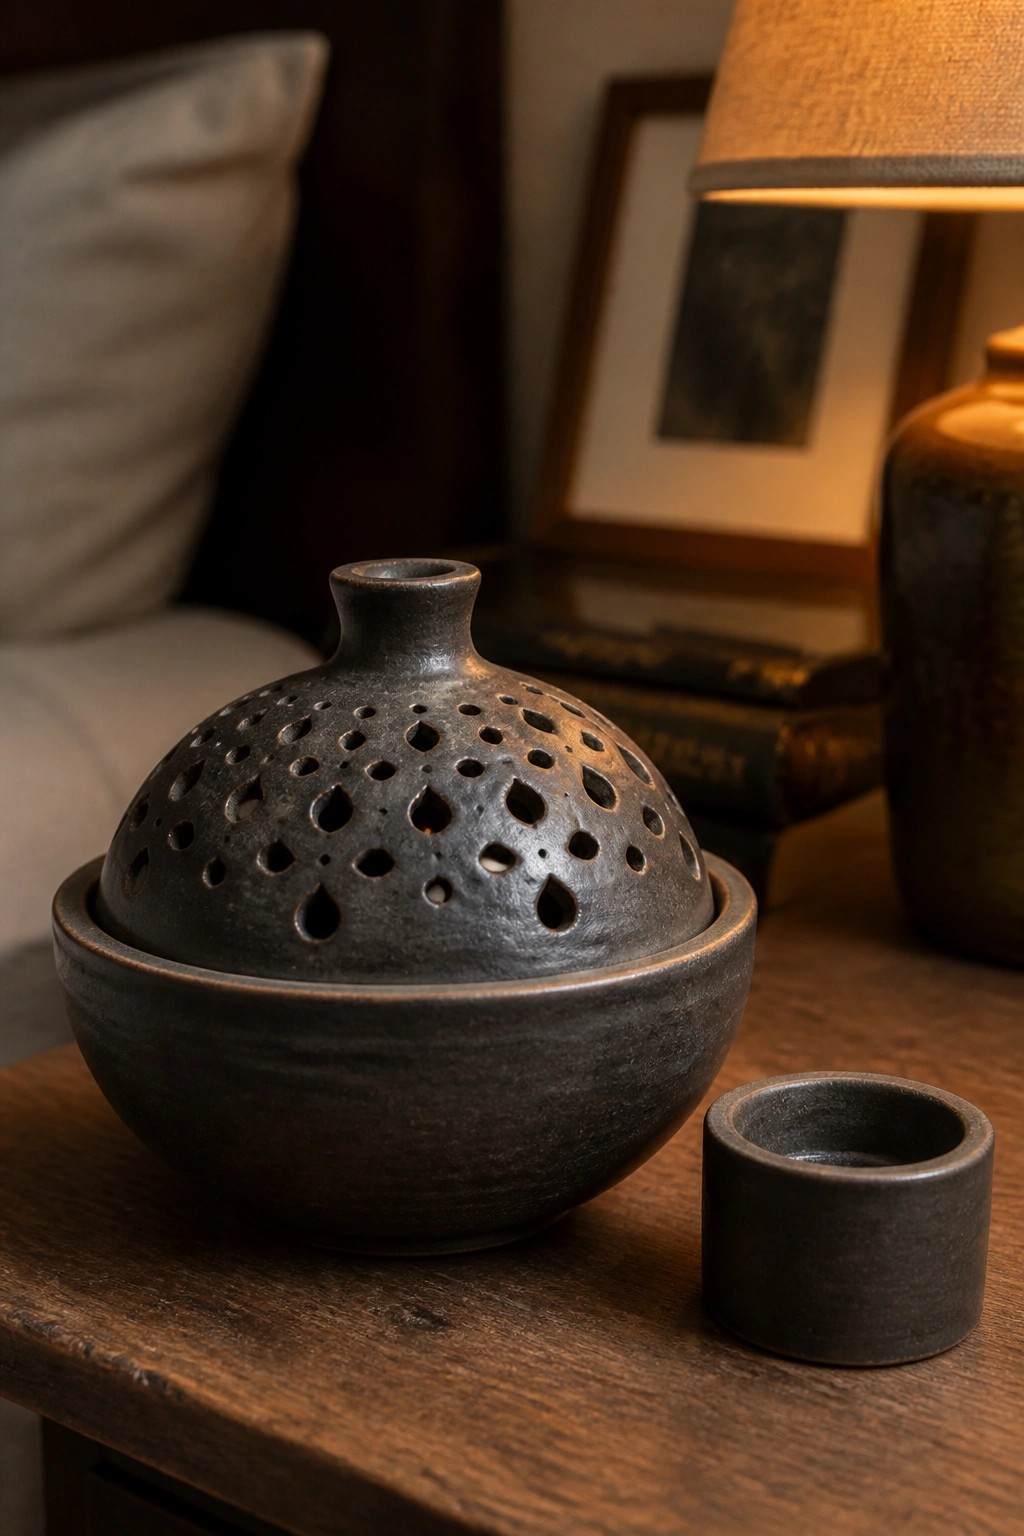
This project combines a wheel-thrown bowl with a separate domed lid that sits inside the rim. The lid is thrown as a closed form first, then trimmed and pierced with multiple irregular openings while the clay is still leather hard. The dark matte surface keeps attention on the contrast between the solid lower bowl and the openwork upper section.
What makes this idea useful is how the two-part construction forces careful measurement for a stable fit without relying on a gallery. The same dome shape can be adapted into a garlic keeper by reducing the number of cuts or turned into a small candle cover by spacing the openings farther apart. Working at this scale lets you practice lid throwing and trimming multiple times without using large amounts of clay.
Lidded Butter Crock with Nested Base
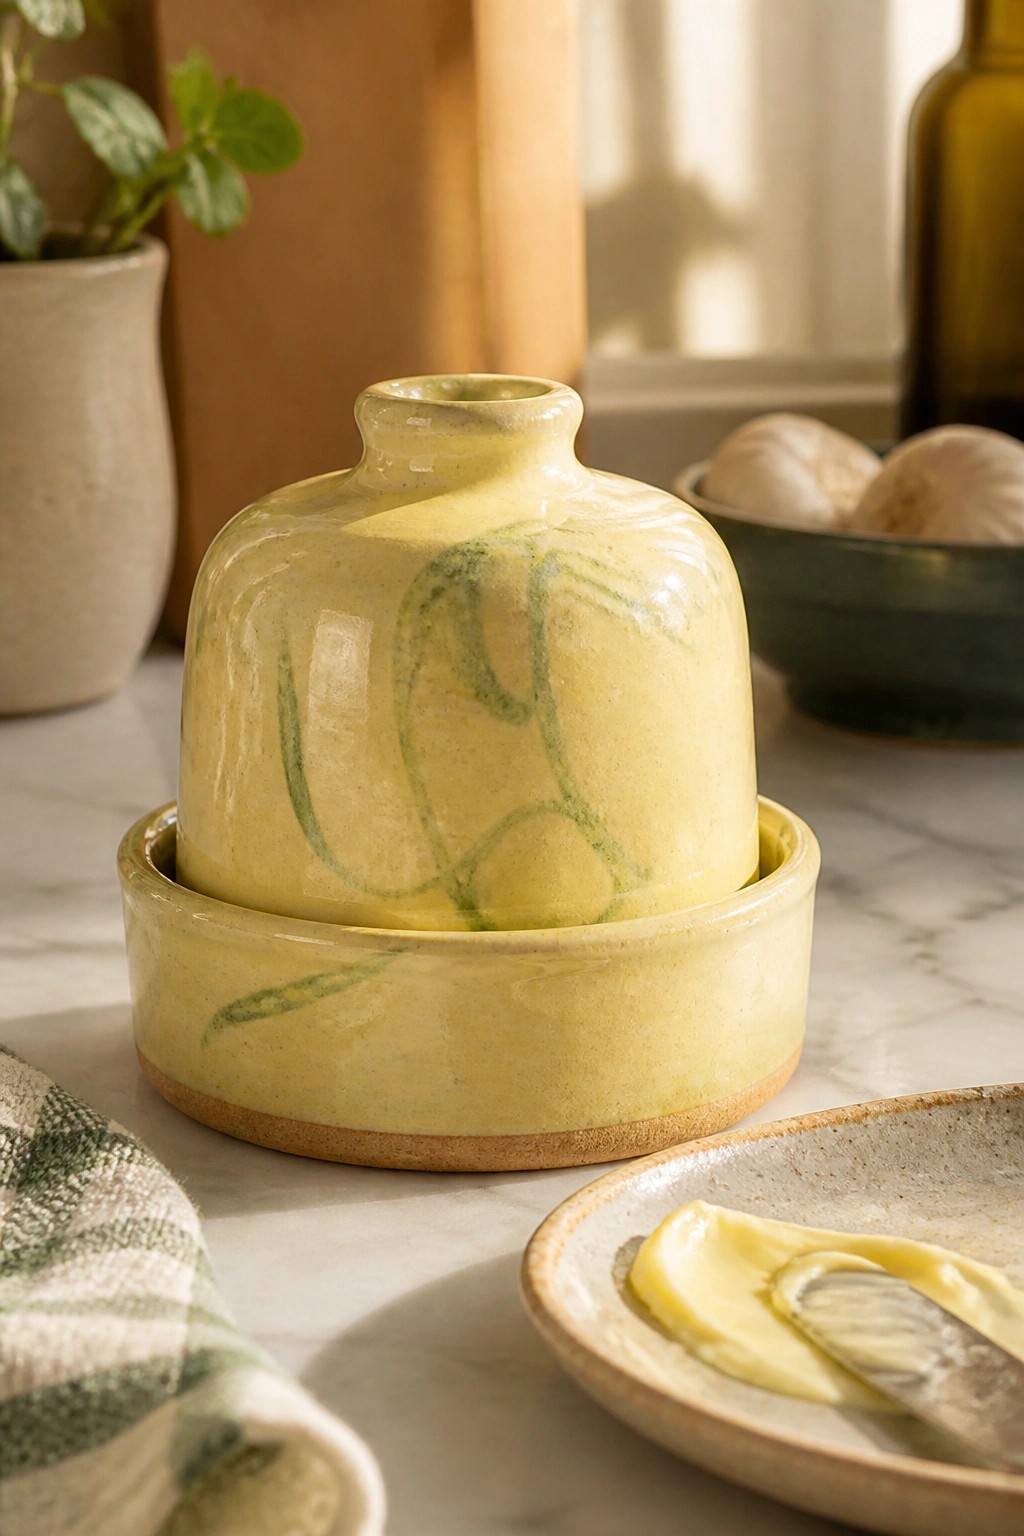
A wheel-thrown butter dish made from two parts works well here: a shallow, wide bowl as the base and a domed lid that sits down into it with a small knob on top. The form uses a bright yellow glaze overall, with loose green brush marks added across both pieces before firing. This keeps the piece compact enough for daily kitchen use while the painted lines give it a quick, hand-drawn look rather than a rigid pattern.
What makes this idea useful is how the nested lid keeps butter covered without needing a separate plate or wrap. The same shape and size translate easily to a small sugar bowl or a lidded jam pot by adjusting the knob height or skipping the green marks. In a kitchen, the yellow base color stands out against most counters and still feels neutral enough to match everyday dishes. You could rework the idea into a taller version for holding garlic or small produce by stretching the dome and leaving the base unglazed on the inside.
Three-Compartment Divided Serving Bowl
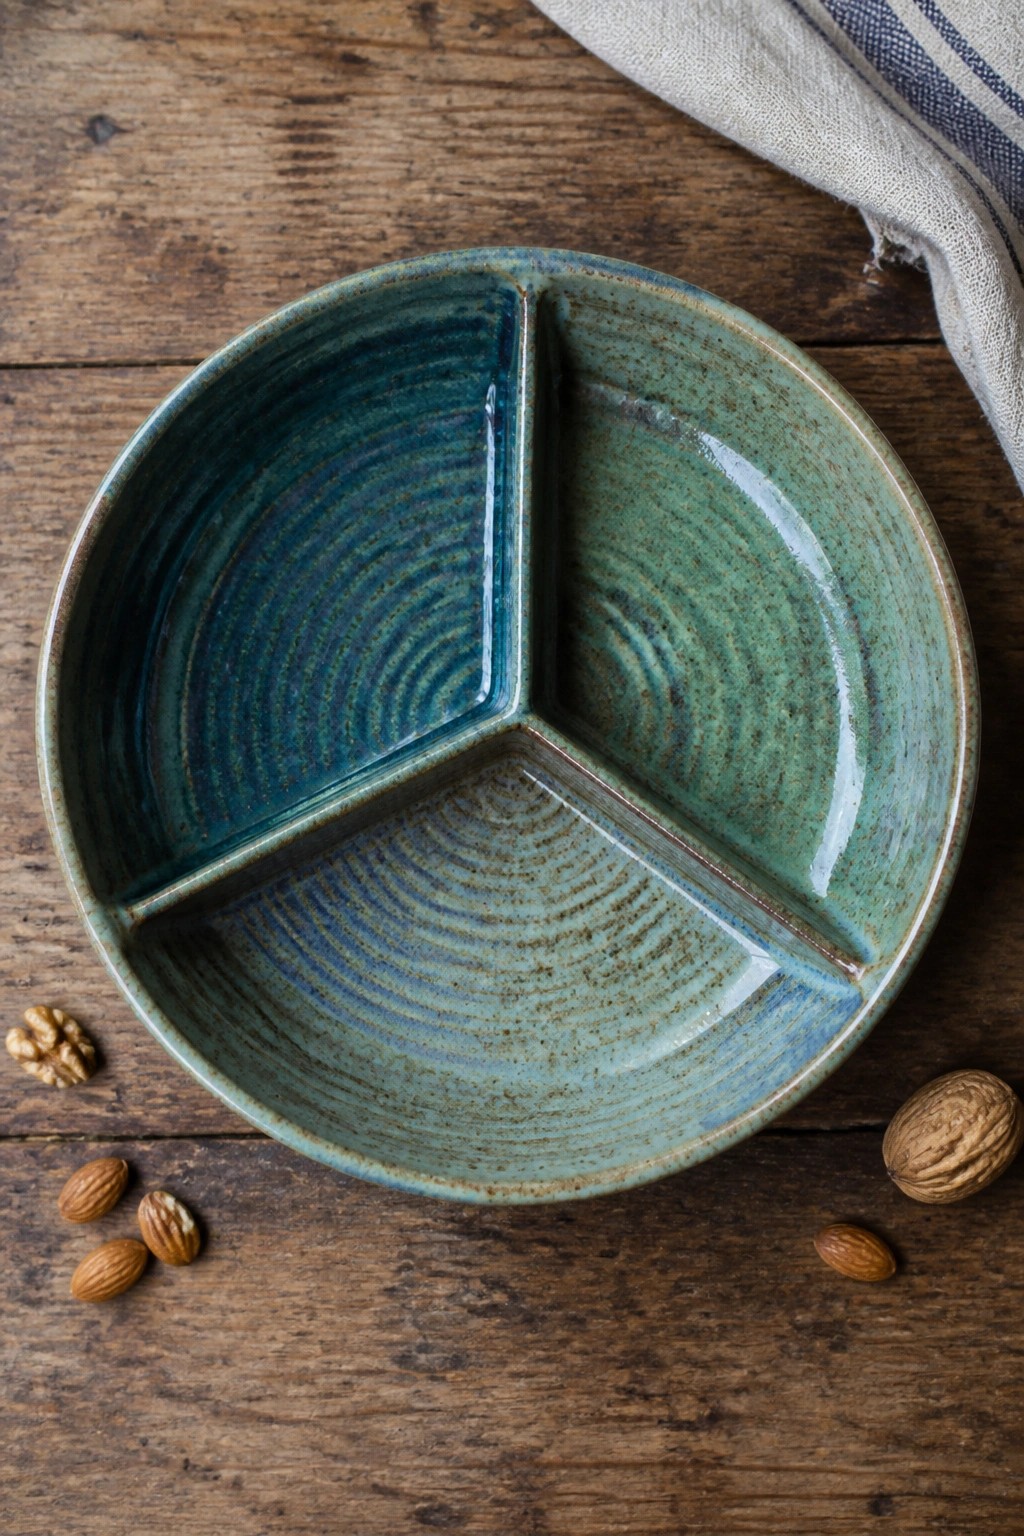
A wheel-thrown bowl with two added internal walls creates three separate sections in one piece. This setup works for serving snacks, nuts, or small appetizers while keeping items from mixing. The blue-green glaze with its mottled finish and visible throwing ridges adds texture without overpowering the simple division.
What makes this idea useful is how the walls turn a single bowl into a practical serving dish for mixed foods like trail mix or olives. You could adapt the same form by changing the number of walls or lowering them for easier access with spoons. In a kitchen this shape keeps portions organized on a table without extra plates, and the technique scales down easily for smaller individual versions.
Lidded Crock with Recessed Lid
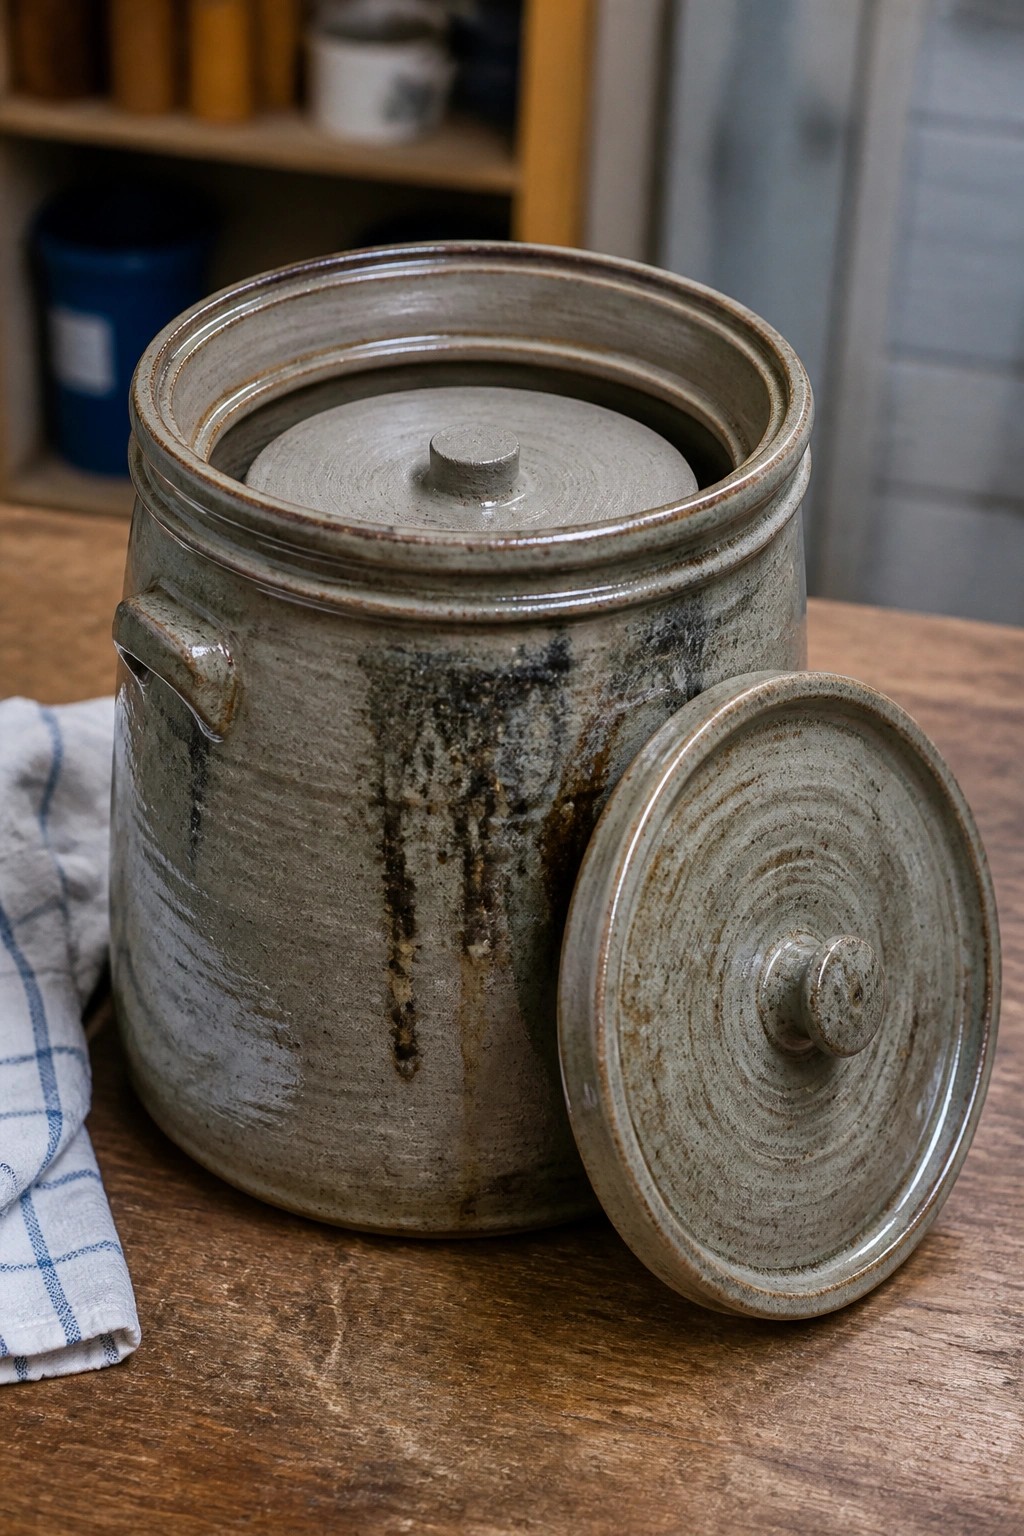
A wheel-thrown lidded crock makes a practical kitchen storage piece. The wide cylindrical body includes a recessed rim that accepts a fitted lid for a stable seal. A small knob centers the lid while a single side lug provides grip when moving the jar. The muted glaze with dark streaking keeps the focus on the clean thrown lines and the two-part construction.
What makes this idea useful is the precise lid fit that turns a basic cylinder into a functional container. You could repeat the same rim profile on smaller jars to create a matching set for dry goods. In a pantry this shape stacks easily and protects contents from dust. The core form also adapts to a batter bowl by skipping the lid and adding a pouring lip.
Lidded Jar with Tiered Finial
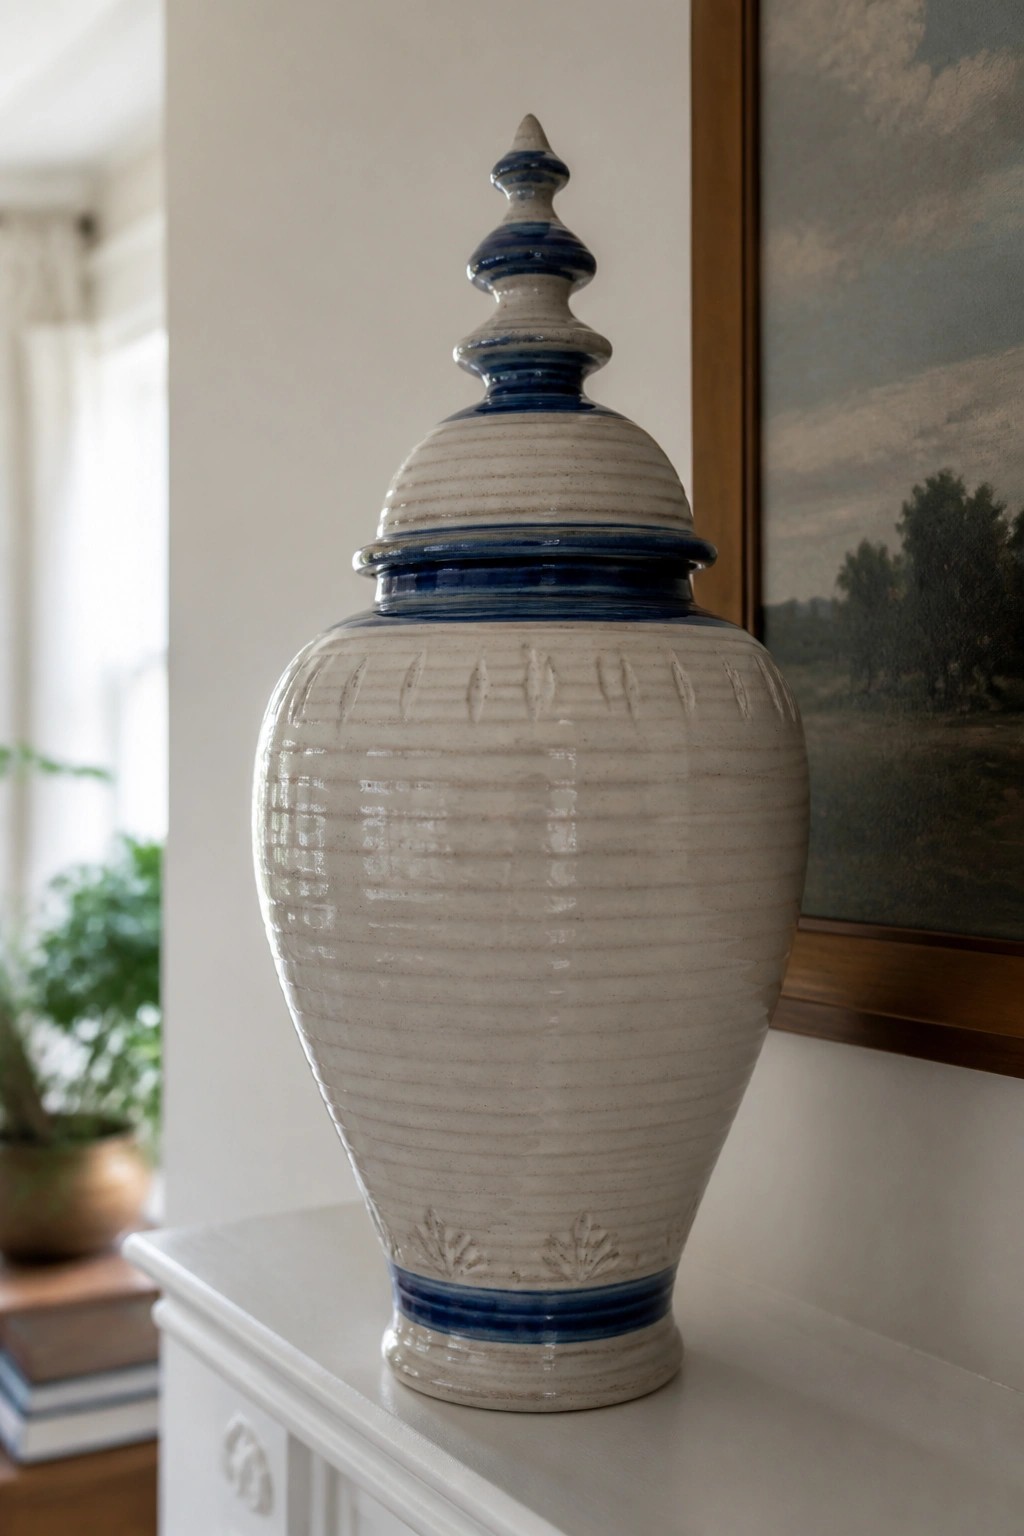
A tall lidded jar like this uses wheel throwing for the main body and a separate thrown lid with a stacked finial. Horizontal throwing lines cover the surface while blue bands define the shoulder, base, and lid edges. Small impressed leaf stamps sit just above the foot and give the lower section a bit of texture. The overall shape works as a decorative vessel for storage or display rather than daily use.
The finial adds height and turns the piece into a complete form that reads well from a distance. You could adapt the same lid structure on a shorter cylinder for a different proportion or swap the blue for a single accent color to simplify glazing. This jar works especially well on a console or shelf where the lid keeps the focus on the silhouette. Scaling the same multi-part approach down makes it easier to repeat for a set of smaller covered jars.
Lidded Yarn Bowl with Spiral Yarn Guide
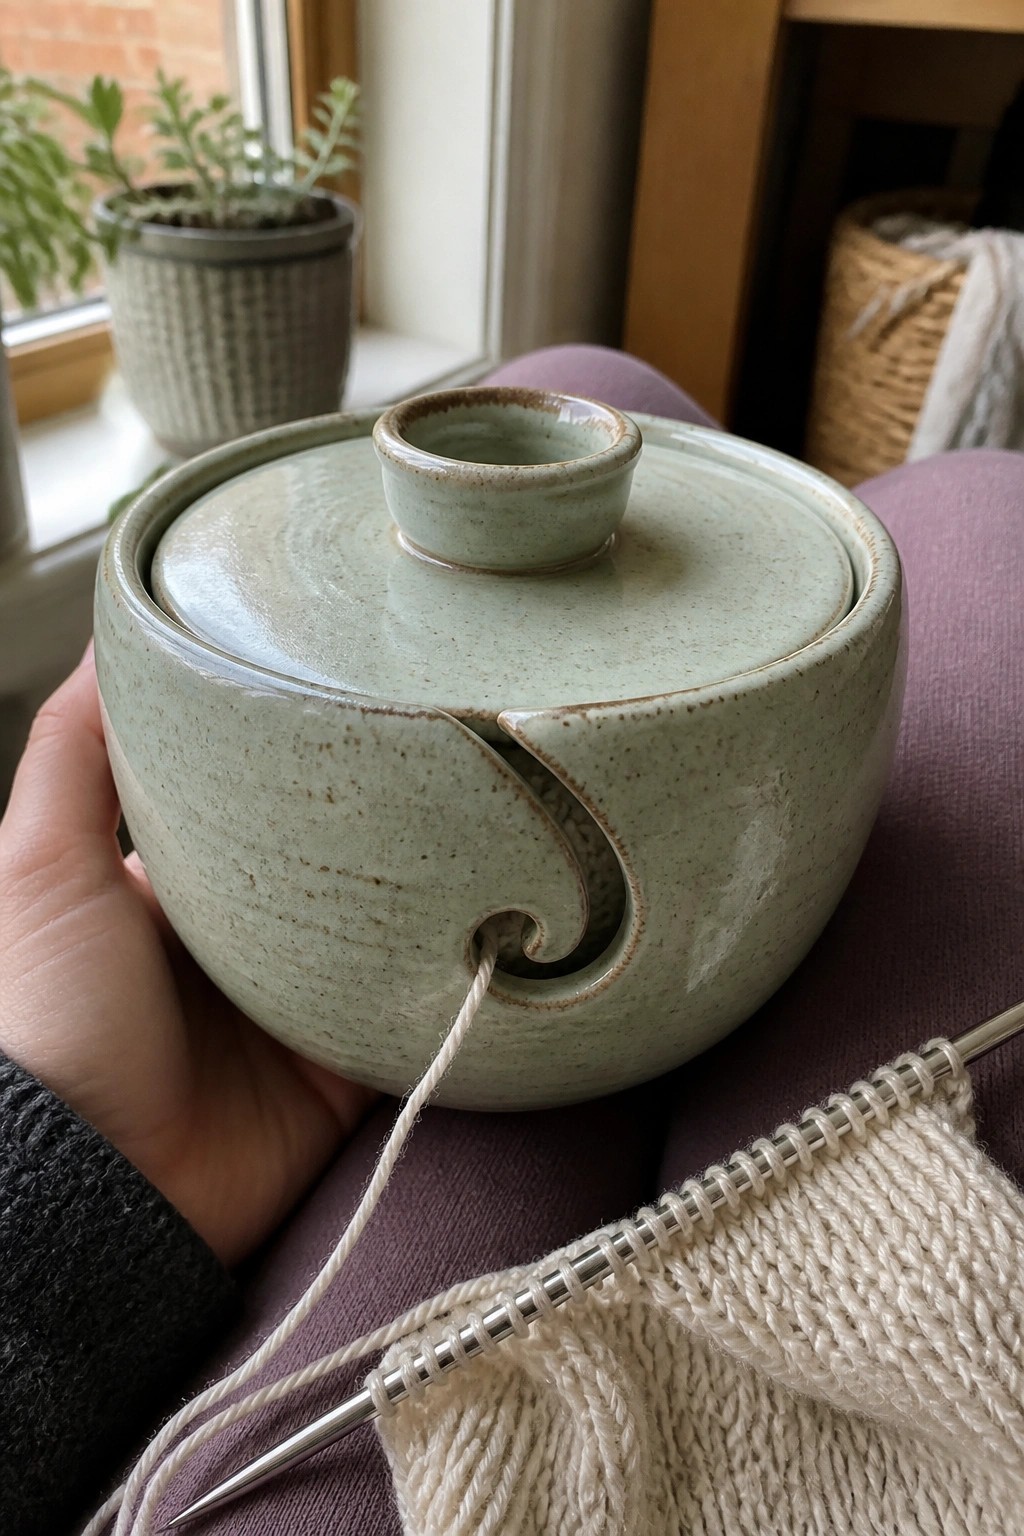
A wheel-thrown yarn bowl combines a fitted lid and a large spiral opening cut into the side wall. The lid includes a small central knob for easy removal while the spiral slot lets yarn feed out smoothly during knitting or crocheting. The matte green glaze and simple rounded form keep the focus on the functional cutout rather than surface decoration. This project sits in the multi-part throwing category because it requires precise lid fitting and clean wall cutting after the main form is thrown.
The shape does a lot of the work here because the wide opening and curved wall naturally support a ball of yarn without tipping. A piece like this works especially well in a craft room or as a gift for knitters who want something more durable than plastic containers. The spiral can be resized or flipped to the opposite side to match different yarn weights or left-hand preferences. Scaling the same form down creates a smaller version for embroidery floss or thin cord while keeping the lid and cutout details intact.
Wheel-Thrown Mug with Contrasting Interior
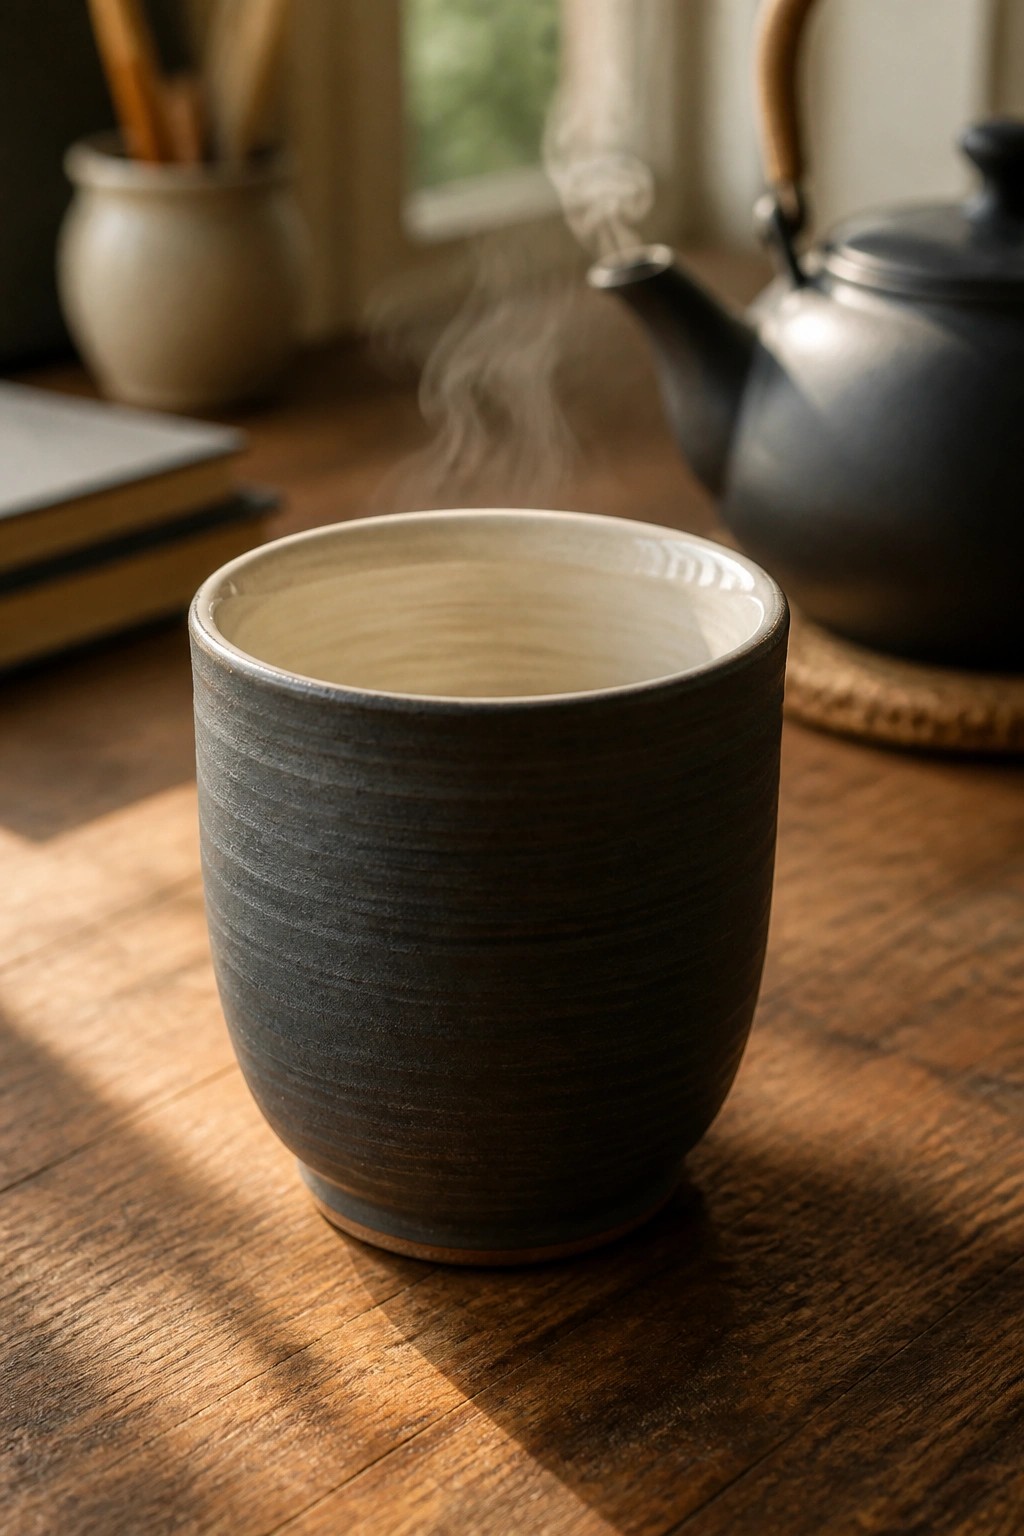
A wheel-thrown mug in this style keeps a straight cylindrical form with a subtle inward curve near the base. The dark exterior surface shows the horizontal ridges from throwing, while the interior uses a lighter tone to create a clean contrast at the rim. This combination fits the category of a functional drinking vessel and works because the simple profile lets the throwing marks and glaze split stand out without extra carving or handles.
What makes this idea useful is that the same proportions can be adjusted for different volumes, such as a shorter version for espresso or a taller one for larger pours. The two-tone glaze approach stays easy to repeat across multiple pieces for a matching set. In a kitchen or tea setup, this shape pairs well with a kettle and avoids the need for complex attachments, so you can focus on refining the wall thickness and rim finish instead.
Teapot with Removable Strainer Insert
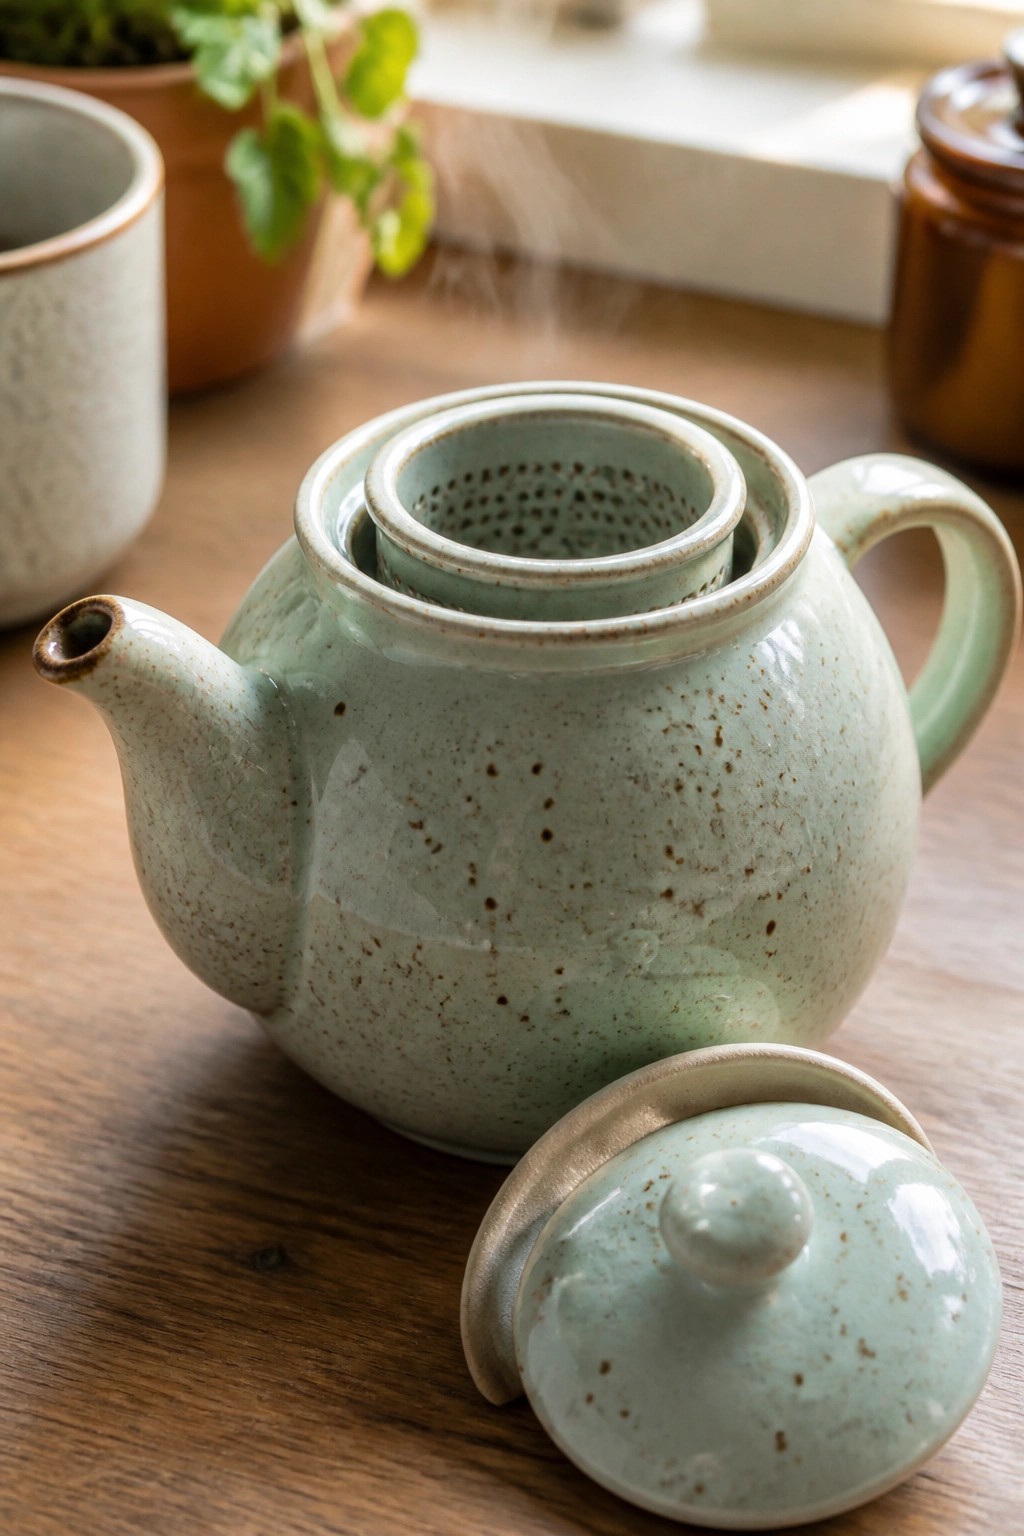
A wheel-thrown teapot with a separate perforated cylinder that drops into the neck to act as a built-in strainer. The form combines a rounded body, tapered spout, and fitted lid, all finished in a light speckled glaze that keeps the focus on the thrown shapes. This multi-part construction solves the common problem of loose tea leaves escaping during pouring while keeping the pieces easy to remove for cleaning.
What makes this idea useful is how the strainer sits flush inside the opening without needing extra hardware. You could adapt the same neck-and-insert approach for smaller coffee drippers or herb steepers by changing the perforation pattern. In a kitchen this kind of piece handles daily use while still reading as a deliberate, handmade object. The same method would translate well to a taller pitcher form if you wanted to keep the strainer function but change the scale.
Serving Bowl with Rim-Attached Cups
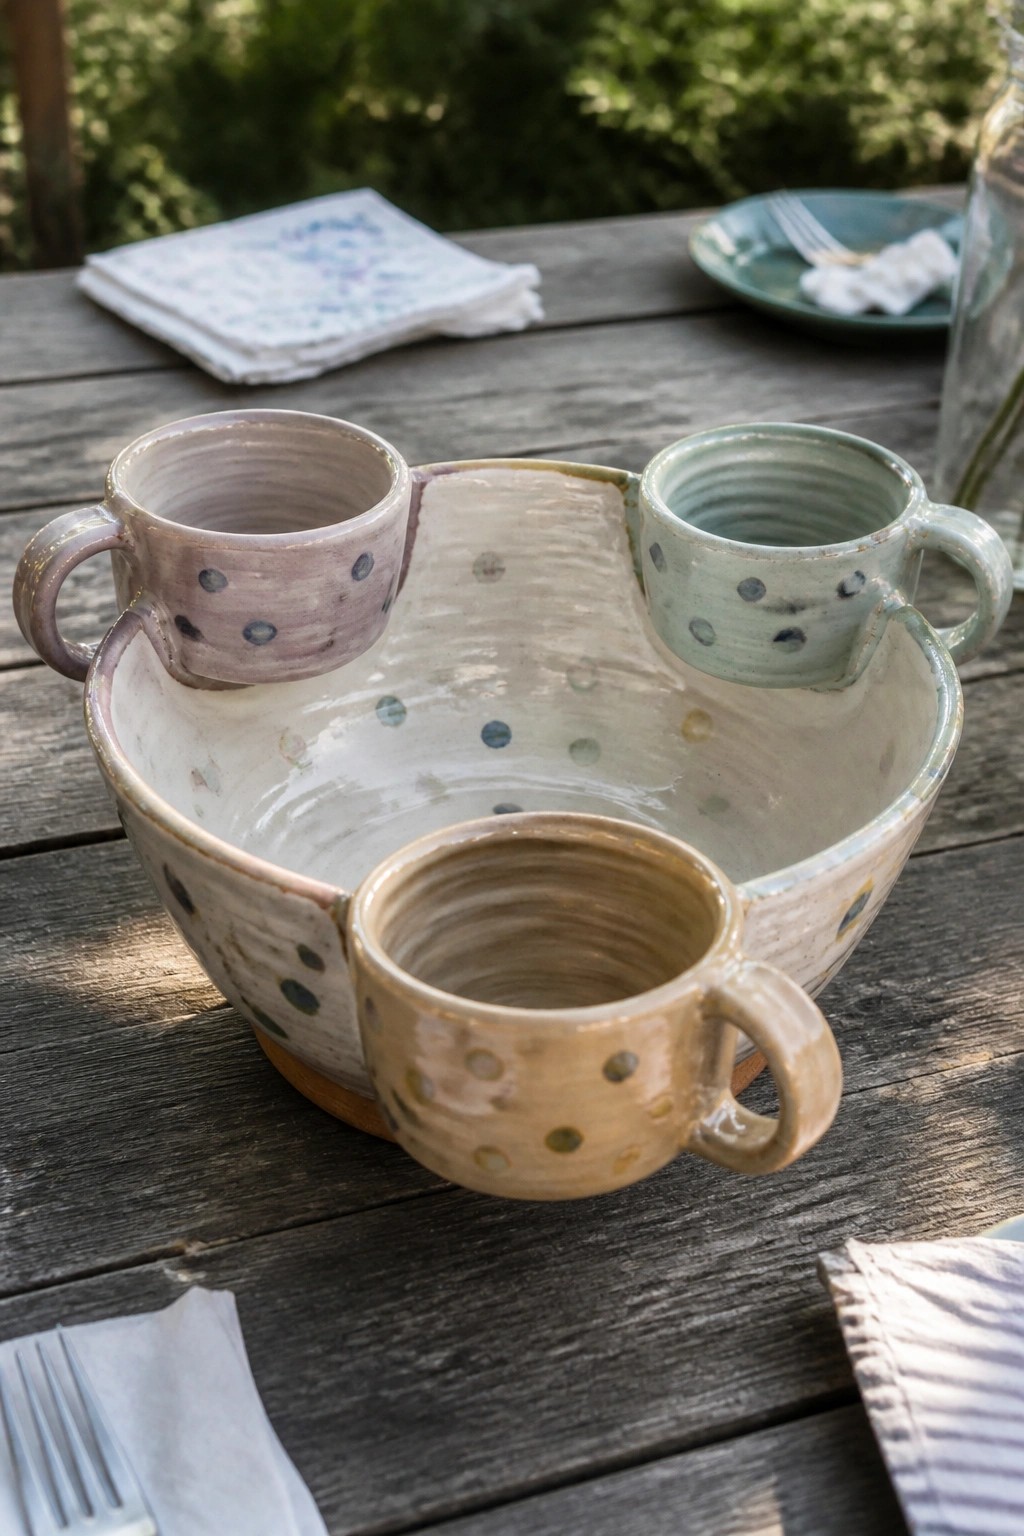
A large wheel-thrown bowl can be modified after the leather-hard stage to accept three smaller cups joined directly to the rim. The cups sit at different points around the edge so the whole object functions as one stable piece for serving shared food with individual portions. Different glazes on each cup and a lighter base on the main bowl keep the forms visually separate while the scattered dots add simple surface interest without extra carving.
What makes this idea useful is the way it solves portion and serving needs in a single object for snacks or dips. You could adapt the rim attachments to a flatter tray form or reduce the cup count to two for a smaller table setting. In a kitchen this shape works well when you want guests to take their own small cup without extra dishes. The same joining method can be applied to plates or low bowls if you want to change the scale for different uses.
Ribbed Cylinder Vase with Gradient Glaze
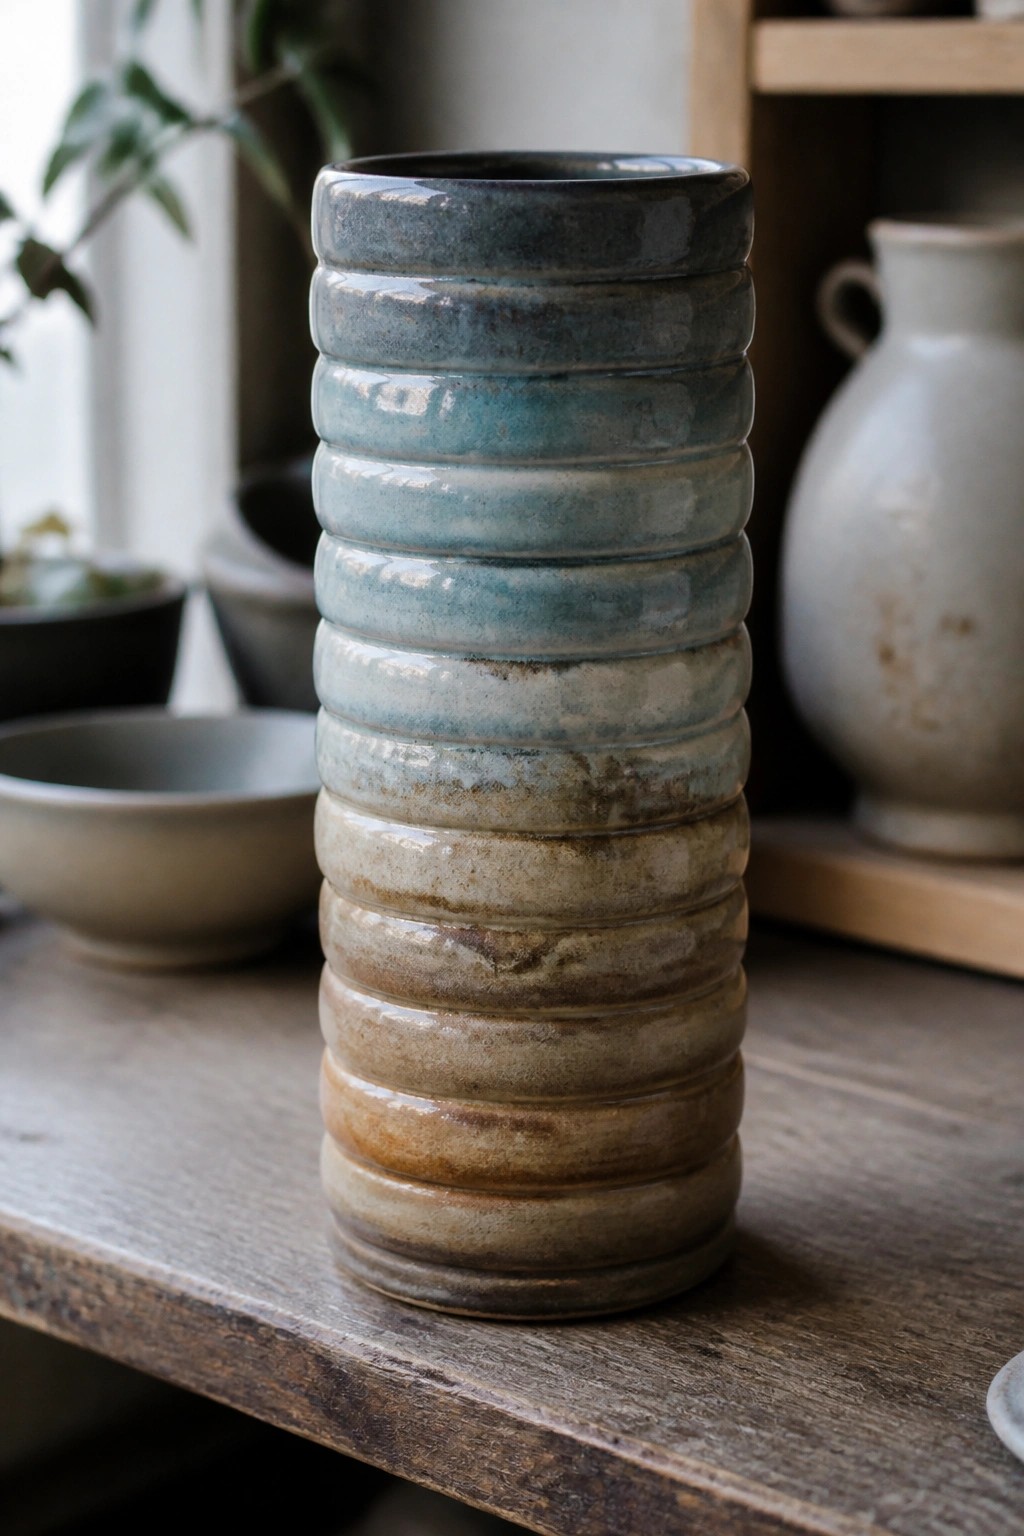
A tall cylindrical vase formed with evenly spaced horizontal ridges creates a segmented look that emphasizes the wheel-thrown construction. The glaze moves from dark blue at the top through teal and gray into warmer brown tones near the base, letting the ridges catch light and shadow. This approach keeps the surface interesting while relying on form and glaze variation rather than added carving or handles. The result is a straightforward vase shape suited for display or holding dried stems.
The shape does a lot of the work here by turning a basic cylinder into something more structured through the ridges alone. You could adapt the idea by widening the ridges for a bolder texture or narrowing them for a subtler effect, and the same form could be shortened into a tumbler or pencil holder. This vase works especially well on a shelf or windowsill where its height stands out without taking much surface space. For a gift, the ridged surface makes the piece easy to personalize with different glaze combinations.
Multi-Part Pierced Candle Lantern
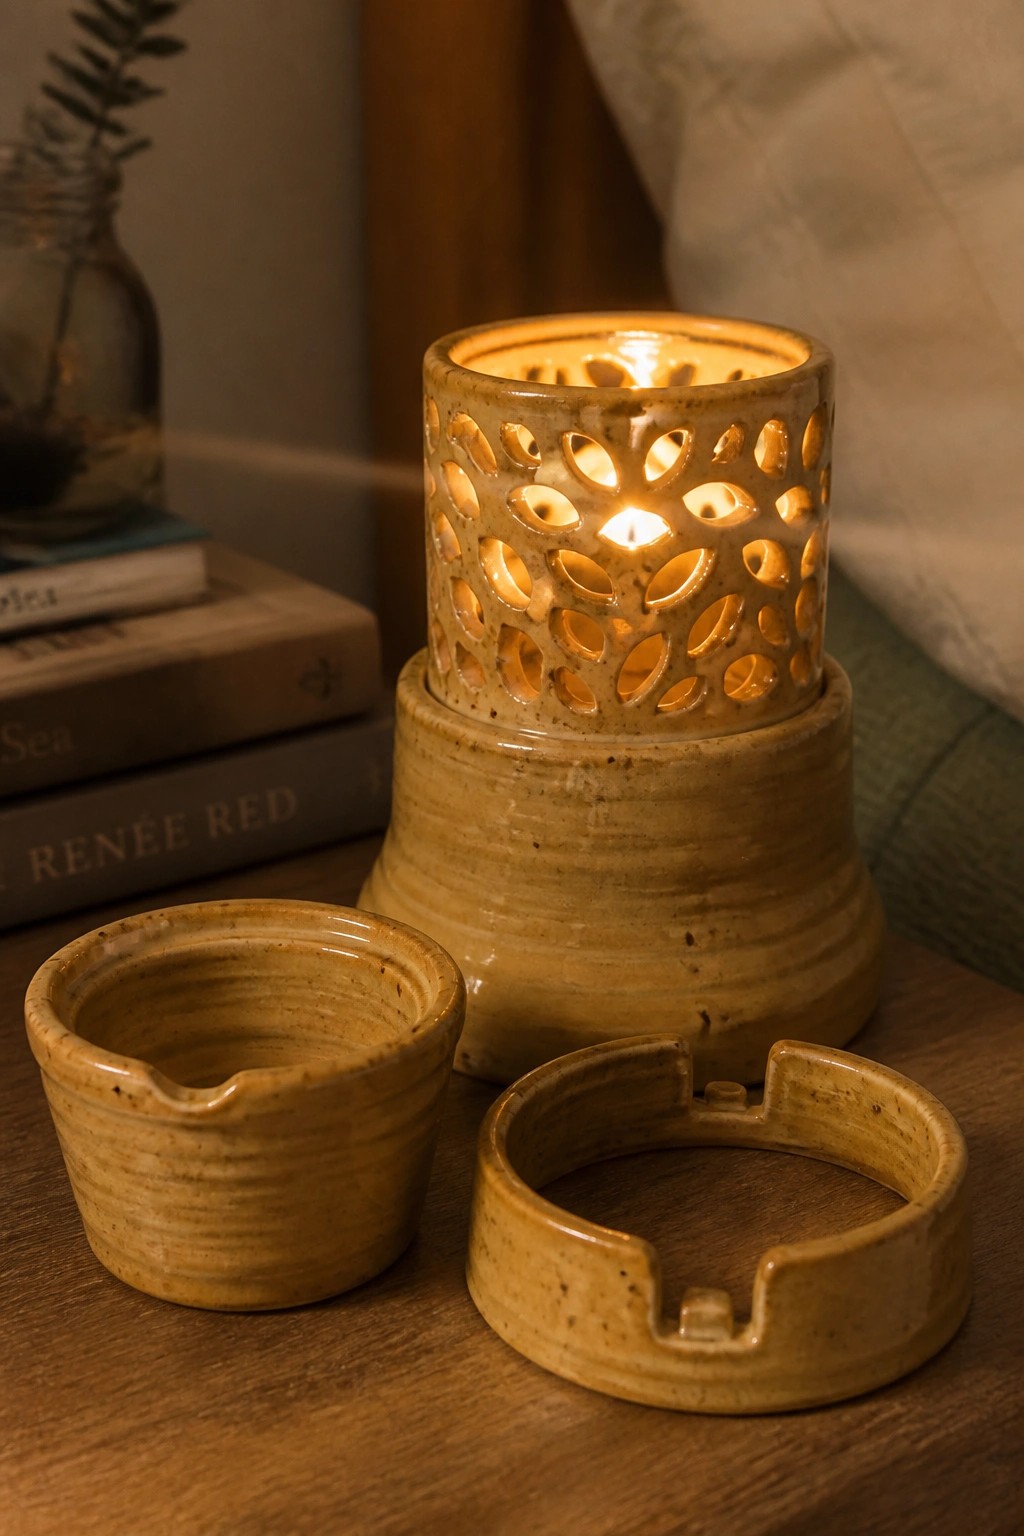
A wheel-thrown candle lantern built from three separate thrown sections creates a functional light piece with a tall cylinder that sits on a wider base. The upper section uses repeated oval and leaf-shaped cutouts to let light pass through while the lower base remains solid for stability. Two smaller thrown rings sit alongside as optional components, allowing the set to be arranged in different ways depending on the candle size or surface. The speckled glaze keeps the focus on the form and the light pattern rather than surface decoration.
The shape does a lot of the work here because the cutouts turn a simple cylinder into a working lantern without extra hardware. You could throw the same pieces in a shorter height for a desk version or swap the oval cutouts for a grid pattern to change the light effect. This kind of project stands out on Pinterest because the modular pieces give viewers multiple finished looks from one build. For a gift, the extra rings make it easy to present as a small set instead of a single object.
Frequently Asked Questions
What tools are essential for achieving the precision needed in these advanced projects?
For wheel throwing projects involving multi-part forms, start with a good set of calipers to measure diameters and heights accurately during throwing. A sharp trimming tool and a flexible metal rib help refine surfaces without distortion. Consider adding a banding wheel for even application of slips or glazes on assembled pieces, along with a spray bottle to keep clay moist during long sessions. These tools support the exacting measurements required for parts that fit together seamlessly.
How should I approach joining multiple thrown parts without visible seams or structural weaknesses?
Begin by throwing each component slightly oversized to allow for trimming after assembly. Score and slip the joining surfaces thoroughly, then use a small amount of clay as a bridge to reinforce the connection. Support the form with props or foam while it dries to prevent sagging. Once leather hard, refine the joint with a rib or sponge to blend the transition smoothly before bisque firing.
What drying and firing strategies work best for complex multi-part forms to avoid cracking?
Dry pieces slowly under plastic for several days to equalize moisture across all sections, then move to a controlled environment with gradual humidity reduction. For firing, use a kiln program with extended preheats to release any remaining water vapor from thick joints. Test small batches first if using high-fire clays, and avoid stacking pieces directly on kiln shelves without stilts or setters to maintain shape.
Which of the 22 projects would suit someone transitioning from basic throwing to these advanced techniques?
Start with simpler lidded vessels or modular stacking forms that involve only two or three parts before tackling more intricate assemblies like teapots with spouts and handles. Focus initially on projects that emphasize repetition of similar shapes to build muscle memory for precision. This gradual progression helps develop the control needed for complex compositions without overwhelming frustration.
How can I adapt these projects if I work with a specific clay body like porcelain versus stoneware?
Porcelain requires extra care with thinner walls and slower drying due to its lower plasticity, so scale down project sizes and use supports during assembly. Stoneware offers more forgiveness for larger forms and can handle bolder attachments. Adjust throwing speeds and water use accordingly, and always run test firings to match your clay’s shrinkage rate for precise part alignment.

Pottery Path is my cozy corner of the internet where I share clay ideas, pottery inspiration, and simple projects you can recreate at home. I love exploring everything from air dry clay to handbuilt pottery to cute minis that brighten your day. My goal is to make clay crafting feel easy, fun, and welcoming for anyone who wants to try it.
You will find beginner friendly tutorials, creative pottery painting ideas, and lots of warm inspiration for slow and happy crafting. If you enjoy hands on creativity, this space will feel like home.