Have you ever thought about growing your own potatoes? Imagine stepping into your garden and plucking fresh, homegrown spuds right from the earth. It sounds rewarding, doesn’t it?
Key Takeaways
- Choose Certified Seed Potatoes: Opt for certified varieties like Yukon Gold, Russet, and Red Pontiac for a healthier yield, avoiding grocery store potatoes that may carry diseases.
- Prepare the Soil Properly: Use loose, well-draining soil with a pH of 5.8 to 6.5, and amend with compost to enhance nutrient content and drainage.
- Follow Best Planting Practices: Plant seed potatoes in early spring when soil temperatures reach 45°F, spacing them 12 inches apart and burying them 4 inches deep.
- Maintain Consistent Watering: Keep the soil consistently moist, especially during tuber development; consider mulching to retain moisture and suppress weeds.
- Harvest at the Right Time: Wait for leaves to yellow and die back, usually 2-3 weeks after flowering, then gently lift potatoes using a fork to avoid damage.
- Cure and Store Properly: Cure harvested potatoes in a dark, cool area for 1-2 weeks before storing in a place with good ventilation at temperatures between 40°F and 50°F.
Understanding Potato Growing Basics
Growing potatoes in your garden involves understanding essential practices. Here’s how to ensure successful cultivation.
Choosing the Right Seed Potatoes
Select certified seed potatoes instead of grocery store varieties. Certified seeds reduce disease risk. Look for potato varieties that suit your climate. Examples include:
- Yukon Gold: Great for all climates, smooth skin, and creamy texture.
- Russet: Ideal for baking and frying, thrives in well-drained soil.
- Red Pontiac: Produces round, red-skinned potatoes, suitable for boiling and salads.
Preparing the Soil
Use loose, well-draining soil for optimal growth. Aim for a pH level of 5.8 to 6.5. Follow these steps:
- Test the Soil: Check pH and nutrient levels using a soil testing kit.
- Amend the Soil: Mix in compost or well-rotted manure to enrich the soil.
- Till the Soil: Break up compacted soil to improve aeration.
Planting Techniques
Plant seed potatoes in early spring when soil temperature reaches at least 45°F. Space them 12 inches apart in rows 2-3 feet apart. Follow these steps:
- Cut Seed Potatoes: Each piece should have at least one eye.
- Let Them Dry: Leave cut pieces to dry for a day before planting to prevent rot.
- Plant at Depth: Bury them 4 inches deep.
Watering and Care
Potato plants thrive with consistent moisture, especially during tuber development. Implement these practices:
- Water Regularly: Keep soil moist but not soggy.
- Mulch: Add straw or grass clippings to retain moisture and suppress weeds.
- Fertilize: Apply a balanced fertilizer every few weeks, following package instructions.
Harvesting Potatoes
Harvest when plants begin to yellow and die back. For new potatoes, check 2-3 weeks after flowering. Follow these steps:
- Loosen the Soil: Use a fork to gently lift potatoes from the ground.
- Avoid Bruising: Handle potatoes carefully to prevent damage.
- Cure Before Storage: Place harvested potatoes in a dark, cool area for a couple of weeks before storing.
By mastering these fundamental practices, you can successfully grow potatoes in your garden, leading to a rewarding harvest.
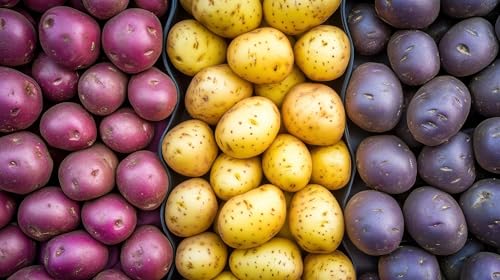
Choosing the Right Potatoes
Selecting the right type of potatoes plays a crucial role in successful potato gardening. Consider the following factors when making your choice.
Recommended Products

VARIETY TYPE: Yukon Gold is a determinate potato variety, meaning tubers form in one main layer near the seed piece and mature uniformly for a concentrated harvest window, ideal for home gardens and raised beds

Whole Certified Seed Tubers Grown And Raised In the USA Are Non GMO So Can Be Grown Organicaly
GROW FRESH VEGETABLES: Grow your own potatos. Pick the amount you want, we ship all 3 types with each order. Grow the top 3 selling seed potatos in USA with one click
Seed Potatoes vs. Grocery Store Potatoes
Opt for certified seed potatoes instead of grocery store potatoes. Seed potatoes are disease-free and specifically grown for planting. Grocery store potatoes may carry diseases or have been treated with chemicals that inhibit sprouting. Using certified seed potatoes ensures robust growth and a healthier yield.
Best Varieties for Home Gardens
Choose potato varieties that thrive in your specific growing conditions. Here are some popular options:
- Yukon Gold: These all-purpose potatoes are known for their creamy texture and buttery flavor. They grow well in various climates and mature in about 70-90 days.
- Russet: Ideal for baking and frying, russets are large, starchy potatoes that perform best in well-drained soil. Maturity occurs around 90-120 days.
- Red Pontiac: This variety produces round, red-skinned potatoes with moist, white flesh. They’re flavorful and work well in salads, with a harvest time of 90-110 days.
- Fingerling Potatoes: Unique in shape, fingerlings add visual interest and flavor. Varieties like ‘French Fingerling’ and ‘Rose Finn Apple’ mature in about 80-90 days.
When selecting varieties, consider your climate, soil conditions, and desired cooking methods.
Preparing Your Garden for Potatoes
Preparing your garden ensures a successful potato crop. Focus on soil quality, sunlight exposure, and consistent watering.
Soil Requirements
Potatoes thrive in loose, well-draining soil. Aim for a soil pH level between 5.8 and 6.5. Conduct a soil test to check pH and nutrient levels.
- Amend the Soil: If pH is too low, add lime to raise it. If it’s too high, incorporate sulfur to lower it.
- Improve Drainage: Incorporate organic matter like compost or peat moss to enhance drainage and nutrient retention.
- Tilling: Till the soil to a depth of 12 to 15 inches to break up compacted layers. This helps roots grow deeper and healthier.
Sunlight and Water Needs
Potatoes need full sun for optimal growth, requiring at least six hours of sunlight daily. Position your garden in a spot with ample exposure.
- Watering: Water potatoes consistently. Aim for about 1 to 2 inches of water each week, adjusting for rainfall.
- Mulching: Apply a layer of mulch to retain moisture and suppress weeds. Straw or shredded leaves work well.
- Monitoring: Keep an eye on moisture levels. If the leaves start to droop, it indicates they need more water.
By focusing on these crucial aspects, your garden will be well-prepared for a bountiful potato harvest.
Planting Potatoes in Your Garden
Growing potatoes in your garden can be a fruitful endeavor. It’s essential to know the best practices for planting to ensure a bountiful yield.
When to Plant Potatoes
Plant potatoes when soil temperature reaches about 45°F. In most regions, this occurs in early spring, around March to April. Check local climate guidelines for specific dates. If using your finger to check, the soil should feel cool, but not cold. For many gardeners, this timing typically aligns with the last frost date.
- Choose Seed Potatoes: Select certified seed potatoes. Varieties like Yukon Gold, Russet, and Red Pontiac contribute to healthy crops. Avoid using grocery store potatoes, as they may carry diseases.
- Prepare the Seed Potatoes: Cut larger seed potatoes into sections, making sure each piece has at least one eye. Allow them to dry for 24 hours to form a protective callus.
- Dig Trenches: Create trench rows about 3 inches deep and 2 to 3 feet apart. Ensure that the spacing allows for airflow between plants.
- Place Seed Potatoes: Space seed potato pieces 12 inches apart within each row. The eyes should face upward.
- Cover with Soil: Gently cover the seed potatoes with soil, ensuring not to compact it too firmly. Leave a few inches of space on top to allow for growth.
- Water Thoroughly: Water the area immediately after planting. Aim for about 1 to 2 inches of water per week, adjusting for rainfall.
- Mulch: Apply a layer of mulch around the plants. Mulch helps retain soil moisture and suppress weeds.
Follow these steps to ensure optimal conditions for your potato plants, helping them thrive throughout the growing season.
Caring for Your Potato Plants
Caring for your potato plants involves attention to watering, fertilization, and managing pests and diseases. Following these guidelines ensures healthy growth and a bountiful harvest.
Watering and Fertilization
Water your potato plants consistently. Aim for about 1 to 2 inches of water per week, especially during dry spells. Water deeply to encourage roots to grow deeper. When plants reach about 6 inches in height, begin hilling them with soil. This practice supports the plants and promotes higher yields.
Fertilize your potatoes with a balanced fertilizer during the growing season. Use a formula with equal parts nitrogen, phosphorus, and potassium, such as a 10-10-10 blend. Apply the fertilizer when the plants are about 6 inches tall and again two weeks later. Ensure you follow the recommended application rates on the package to prevent over-fertilization.
Pest and Disease Management
Monitor your potato plants for common pests like aphids, potato beetles, and aphids. Handpick these pests or use insecticidal soap for effective control. Regularly inspect the undersides of leaves for any signs of infestations.
Implement crop rotation to reduce the risk of disease. Avoid planting potatoes in the same location for at least three years. Conditions such as blight thrive in high moisture, so ensure proper air circulation by spacing plants correctly. If you spot any yellowing leaves, act promptly to remove them, as this can prevent the spread of disease.
Practice these care tips for optimal growth and robust production from your potato plants.
Harvesting Your Potatoes
Harvesting your potatoes is the most rewarding part of gardening. Knowing when to gather this crop ensures you enjoy the freshest taste and maximize yields.
Signs of Readiness
Watch for specific indicators that signal it’s time to harvest your potatoes.
- Leaves: When the plants yellow and begin to die back, this often means the potatoes are ready for harvest.
- Timing: Generally, this occurs about 2 to 3 weeks after flower formation.
- Size: You can gently dig around the base to check the size of the potatoes if uncertain. Harvest when they are at least a few inches in diameter for good flavor.
How to Harvest and Store
Follow these steps to properly harvest and store your potatoes.
- Prepare Tools: Use a spade or fork to gently loosen the soil around the potato plants.
- Lift Plants: Carefully lift the plants; avoid piercing the potatoes with your tools.
- Collect Tubers: Gather all the potatoes, discarding any damaged or diseased ones.
- Initial Cleaning: Brush off excess dirt, but avoid washing; moisture can lead to rot.
- Curing Process: Allow harvested potatoes to cure in a dark, cool area for about 1 to 2 weeks. This process helps toughen their skin, improving storage life.
- Storage: Store potatoes in a cool, dark place with good ventilation, such as a basement or a root cellar. Ideal storage temperatures range between 40°F and 50°F.
Following these steps ensures your potatoes remain fresh and flavorful for weeks.
Conclusion
Growing potatoes in your garden can be a fulfilling adventure. With a little planning and care you can enjoy the satisfaction of harvesting your own fresh potatoes. Remember to choose the right seed varieties and prepare your soil well to set the stage for success.
Stay attentive to your plants’ needs throughout the growing season. Proper watering hilling and pest management will go a long way in ensuring a bountiful harvest. When the time comes to gather your potatoes take pride in knowing you’ve nurtured them from seed to table.
So grab your gardening tools and get ready to dig into the rewarding world of potato gardening. Happy planting!
Frequently Asked Questions
What are the best types of seed potatoes to grow?
For home gardening, popular seed potato varieties include Yukon Gold, Russet, and Red Pontiac. These certified seed potatoes are recommended as they are less likely to carry diseases compared to grocery store varieties.
How do I prepare my soil for planting potatoes?
To prepare your soil, ensure it is loose and well-draining with a pH of 5.8 to 6.5. Conduct a soil test, amend it as needed, and till it to create optimal conditions for potato growth.
When should I plant my seed potatoes?
Plant seed potatoes in early spring when the soil temperature reaches about 45°F (7°C). Ensure they are placed at the correct depth and spacing to promote healthy growth.
How often should I water my potato plants?
Potato plants require consistent watering, approximately 1 to 2 inches of water per week. Regular moisture helps ensure a successful and productive harvest.
How do I know when to harvest my potatoes?
You can harvest your potatoes when the plants begin to yellow and die back, usually 2 to 3 weeks after the flowering period. This is an indication that the potatoes are ready for gathering.
What is the best way to store harvested potatoes?
After harvesting, clean the potatoes gently and cure them in a dark, cool place for a couple of weeks. Store them in a well-ventilated area, away from sunlight, to keep them fresh for weeks.
How do I manage pests and diseases while growing potatoes?
Monitor your potato plants regularly for common pests and diseases. Implement crop rotation, ensure good air circulation, and maintain healthy growing conditions to reduce disease risks.
Why are certified seed potatoes better than grocery store varieties?
Certified seed potatoes are specifically grown for planting and are less likely to carry diseases. Using them helps ensure a healthier crop and a more successful potato harvest.

My interest in trees started when I first saw the giant sequoias in Yosemite.I was a teenager then, and I remember thinking, “I need to learn more about this.”That moment stuck with me.A few years later, I went on to study forestry at Michigan Tech.
Since graduating, I’ve worked in a mix of hands-on tree care and community education.I’ve spent over ten years helping people understand how to plant, maintain, and protect the trees in their neighborhoods.I don’t see trees as just part of the landscape.They are living things that make a real difference in our daily lives.