Have you ever found yourself struggling with stuck hedge trimmer blades right in the middle of a yard project? It’s frustrating when you’re trying to tidy up your garden and your tools just won’t cooperate. You’re not alone—this is a common issue that can slow down your work and leave you feeling stuck.
Key Takeaways
- Types of Blades: Understand the differences between double-sided, single-sided, and laser-cut blades to choose the best option for your gardening needs.
- Common Issues: Be aware of debris buildup, rust, and misalignment as frequent causes of stuck blades, which can disrupt your gardening tasks.
- Regular Maintenance: Cleaning, lubricating, and sharpening your trimmer blades after each use is essential for maintaining optimal cutting performance.
- Proper Inspection: Always inspect your blades before use to identify any debris or rust, and make necessary adjustments to prevent sticking.
- Preventative Care: Store your hedge trimmer in a dry location and consider using a protective cover to avoid moisture and physical damage.
- Tools for Maintenance: Keep essential tools such as a soft brush, soapy water, lubricating oil, and a wrench handy to effectively unstick and maintain your hedge trimmer blades.
Understanding Hedge Trimmer Blades
Hedge trimmer blades are crucial tools for maintaining neat gardens and landscapes. Understanding them helps you troubleshoot issues like blade sticking.
Types of Hedge Trimmer Blades
- Double-Sided Blades: These blades cut on both sides, offering efficiency for large areas. They allow trimming from various angles, ensuring versatility.
- Single-Sided Blades: These blades provide precision. They’re often found in smaller models, making them ideal for detailed work.
- Laser-Cut Blades: These precision blades offer clean cuts. They reduce the risk of damaging plants and improve overall cutting quality.
Materials Used
- Stainless Steel: This material is common for its rust resistance and durability. Stainless steel blades typically require less maintenance.
- Carbon Steel: Carbon steel blades are sharp and hold an edge well but may rust if not properly cared for. Regular cleaning and lubrication help extend their lifespan.
Common Issues with Blades
- Dirt and Debris: Clippings or dirt can accumulate on blades, causing them to stick. Clearing this debris regularly prevents future issues.
- Rust: Rust can develop on blades if they’re exposed to moisture. Ensuring they dry after use can help prevent corrosion.
- Misalignment: Misaligned blades cause poor cutting performance. Regular checks can keep them aligned, improving efficiency.
- Regular Cleaning: Clean blades after each use with a brush or cloth. This step removes dirt that can hinder performance.
- Lubrication: Apply a light oil to blades after cleaning. Lubrication reduces friction and extends blade life.
- Sharpening: Sharpen blades at least once a year or as needed. Sharp blades cut cleaner, reducing strain on the motor.
Understanding hedge trimmer blades enhances your ability to maintain them effectively. You’ll find that proactive care minimizes issues and ensures smooth operation during your gardening tasks.
Common Reasons for Sticking Blades
Sticking blades on a hedge trimmer often stem from a few key issues. Understanding these reasons helps prevent and resolve problems effectively.
Recommended Products

POWERFUL CLEANING FORMULA: Advanced cleaner that breaks the molecular bond between resin, pitch, rust and dirt, lifting contaminants away from the surface without harsh scrubbing or the use of aggressive citrus-based solvents.
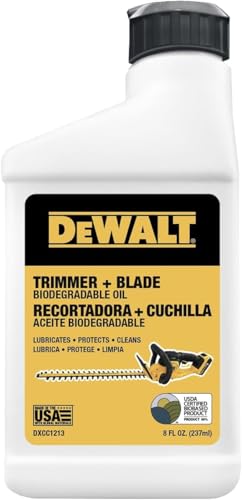
Professional-Grade for High-Speed Commercial Hedge Trimmers: Specifically engineered to meet the demands of professional landscapers, ensuring optimal lubrication and reduced blade wear in heavy-duty, high-speed trimming applications.

Cleans and Lubricates
Debris Buildup
Debris buildup is a primary cause of sticking blades. Grass clippings, leaves, and twigs can accumulate on or around the blades during use. When this material blocks movement, it hinders the cutting action and creates friction.
To reduce debris buildup, regularly clean the blades after each use. Use a soft brush or cloth to remove any leftover plant matter. For stubborn debris, a little soapy water can help loosen the particles.
Rust and Corrosion
Rust and corrosion can severely impact the functionality of your hedge trimmer blades. Exposure to moisture can lead to rust, which forms on metal surfaces over time. Corrosion can increase friction and prevent the blades from moving smoothly.
To prevent rust, keep your blades clean and dry after each use. Apply a light coating of oil, such as vegetable oil or motor oil, to protect against moisture. Storage in a dry area also reduces the risk of corrosion. If rust does form, use a rust remover or fine-grit sandpaper to carefully remove it.
How to Unstick Hedge Trimmer Blades
Stuck hedge trimmer blades can hinder your gardening efforts. Follow these instructions to free them up efficiently.
Recommended Products

Rust Prevention – Prevents rust from forming & helps extend the life of the clipper & blades; can also reduce the likelihood of blades becoming dull
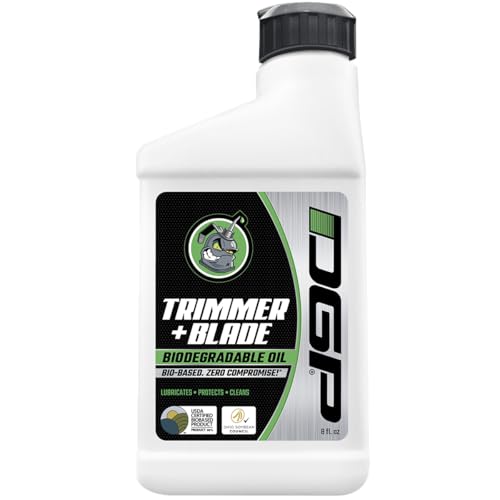
Professional-Grade for High-Speed Commercial Hedge Trimmers: Specifically engineered to meet the demands of professional landscapers, ensuring optimal lubrication and reduced blade wear in heavy-duty, high-speed trimming applications.

Extends Blade Life: Specially formulated oil helps extend the life of clipper and trimmer blades
Tools and Materials Needed
- Soft Brush – Use this for cleaning debris.
- Soapy Water – Prepare a mixture for stubborn dirt.
- Lubricating Oil – Helps prevent rust and keeps blades moving.
- Wrench or Screwdriver – Necessary for loosening parts.
- Heavy-Duty Gloves – Protects your hands during maintenance.
- Turn Off and Unplug Your Trimmer – Ensure safety before starting any maintenance.
- Inspect the Blades – Check for debris, rust, or misalignment.
- Clean the Blades – Use a soft brush to remove loose debris. For stubborn dirt, apply soapy water and scrub gently.
- Check for Rust – If rust is present, apply lubricating oil directly to the affected areas. Let it sit for a few minutes.
- Loosen Stuck Components – Use a wrench or screwdriver to gracefully adjust any misaligned parts.
- Test the Blades – With the trimmer still off, manually move the blades to ensure they aren’t stuck.
- Lubricate the Blades – Apply oil to the blades to help them glide smoothly. Regular lubrication prevents future sticking.
- Store Properly – Keep your trimmer in a dry area to avoid moisture that can cause rust.
These steps ensure that your hedge trimmer remains in top condition, ready for use whenever you need it.
Preventative Measures
Regular maintenance and proper storage can significantly reduce the chances of your hedge trimmer blades sticking. Implementing these practices ensures smooth operation and longevity.
Recommended Products

CLEANS AND PROTECTS – STA-BIL Blade Guard is a premium lubricant that can be used to clean and protect your outdoor tools. Treating your equipment with this penetrating lube helps to maintain the blade edge as well as keeping the tool at its peak performance

Since 1894 this versatile multi-purpose drip oil has been a trusted tool used by professional tradesmen and do-it-yourselfers

Clipper Cool Spray Can: Top-of-the-line product for blade maintenance to help you achieve professional results when you clip, trim, and groom your dogs, cats, horses, livestock, and more
Regular Maintenance Tips
- Clean After Use: Remove debris like dirt and sap after each use. Utilize a soft brush or soapy water, ensuring all surfaces are free from buildup.
- Lubricate Regularly: Apply lubricating oil to the blades, hinges, and moving parts after cleaning. This action prevents rust and maintains blade performance.
- Check for Damage: Inspect the blades for signs of wear or damage before each use. Sharp, well-maintained blades cut more efficiently, reducing stress on the motor.
- Sharpen Blades: Sharpen blades as needed, ideally every few uses or when you notice decreased performance. Sharp blades lead to cleaner cuts and less sticking.
- Adjust Tightness: Ensure that screws and bolts on the trimmer are tightened appropriately. Loose components can lead to misalignment and sticking.
- Store in a Dry Location: Keep your hedge trimmer in a dry environment to prevent moisture accumulation, which can lead to rust on the blades.
- Use a Blade Cover: Whenever storing your trimmer, use a blade cover for protection. This cover prevents accidental damage and reduces exposure to dust and dirt.
- Avoid Extreme Temperatures: Store your trimmer in a place with stable temperatures, avoiding extreme cold or heat. Temperature fluctuations can harm electrical components and affect lubricant viscosity.
- Hang or Mount Properly: Store the trimmer vertically or on a wall mount to avoid blade contact with other tools. This setup minimizes damage and keeps it organized.
- Check Periodically: Regularly inspect your stored hedge trimmer for signs of rust or mechanical issues. Addressing these early extends the trimmer’s lifespan.
Conclusion
Keeping your hedge trimmer blades in top shape makes a world of difference in your gardening experience. By following the tips shared in this post you can prevent sticking and ensure smooth operation every time you tackle those hedges. Regular maintenance not only saves you time but also keeps your tools working efficiently for years to come.
So next time you finish trimming those bushes take a moment to clean and care for your blades. You’ll be glad you did when it’s time to get back to work in your garden. Happy trimming!
Frequently Asked Questions
What are common reasons for hedge trimmer blades getting stuck?
Hedge trimmer blades can get stuck due to dirt, rust, or misalignment. These issues can occur over time if the blades are not properly maintained.
How can I clean my hedge trimmer blades?
To clean your hedge trimmer blades, use a brush or cloth to remove debris and dirt after each use. A mixture of soap and water can help remove any stubborn buildup.
How often should I lubricate my hedge trimmer blades?
It’s recommended to lubricate your hedge trimmer blades every few uses, or after cleaning. Regular lubrication helps prevent rust and keeps the blades operating smoothly.
When should I sharpen my hedge trimmer blades?
You should sharpen your hedge trimmer blades at least once a season or after heavy use. Sharp blades are essential for clean cuts and efficient performance.
What is the best way to store a hedge trimmer?
Store your hedge trimmer in a dry location, ideally hanging or mounted to prevent damage. Use a blade cover to protect the blades from moisture and dust.
Can extreme temperatures affect my hedge trimmer?
Yes, extreme heat or cold can affect the performance of your hedge trimmer. It’s best to store it in a climate-controlled environment to maintain its functionality.
How can I avoid misalignment of hedge trimmer blades?
To avoid misalignment, regularly inspect your blades for uneven wear or damage. Make adjustments as needed, and ensure proper tightening of all bolts and screws.
I’ve always been drawn to trees.As a kid, I spent most of my free time outside, climbing, exploring, and trying to figure out the names of the trees around me.That early curiosity eventually led me to study arboriculture and horticulture at Michigan State.Later, I completed a degree in forestry at the University of Michigan.
I’ve been working in tree care and education ever since.These days, I enjoy helping people learn more about the trees in their own backyards.How they grow, how to care for them, and why they matter.You don’t need to be an expert to appreciate trees.A little curiosity goes a long way.